manuals.online logo
Brands
  1. Home
  2. •
  3. Brands
  4. •
  5. MEGATOUCH
  6. •
  7. Game
  8. •
  9. MEGATOUCH ML-1 Guide

MEGATOUCH ML-1 Guide

www.megatouch.com
Casual Games | Emerging Media
PM0821-01
Page 1 of 3
ML-1 LCD and Touchscreen Replacement Instructions
1. Turn off and unplug the game.
2. Unlock and remove the rear door.
3. Remove the eight screws securing the monitor bezel (see Figure 1), and open the bezel.
FIGURE 1 –REAR VIEW OF ML-1 WITH REAR DOOR REMOVED
4. Place something underneath the monitor bezel to support it, and carefully remove the screw and
washer securing the strain relief cord (see Figure 2).
FIGURE 2 –INSIDE VIEW OF LCD ASSEMBLY
EIGHT SCREWS
SECURING MONITOR BEZEL
SCREW AND
WASHER SECURING
STRAIN RELIEF CORD
TIE WRAP SECURING
TOUCHSCREEN
CONTROLLER AND
CREDIT CARD
READER CABLES
CABLE CLAMP
CREDIT CARD
READER CABLE
TOUCHSCREEN
CONTROLLER
LCD POWER CABLE
CONNECTION
VGA CABLE
CONNECTION
TOUCHSCREEN
CONTROLLER CABLE
CONNECTION
TIE WRAP SECURING
TOUCHSCREEN
CONTROLLER CABLE
CREDIT CARD
READER
www.megatouch.com
Casual Games | Emerging Media
PM0821-01
Page 2 of 3
5. Carefully disconnect all cables from the rear of the LCD assembly: the LCD power cable, the VGA
cable, and the touchscreen controller cable. You do not need to disconnect the credit card reader
cable, but you must remove this cable from the cable clamp. See Figure 2 for cable and connection
locations.
6. Carefully cut the two tie wraps: one securing the touchscreen controller and credit card reader
cables, and one securing only the touchscreen controller cable (see Figure 2 for locations).
7. Note how the slack from the VGA, credit card, and LCD power cables is tucked into the rear of the
LCD assembly, as you will need to do the same thing to these cables when you reinstall
everything. Move all cables clear of the LCD. Be extra careful with the credit card cable, as its
connection to the reader is fragile.
8. Carefully grab the edge of the touchscreen controller that’s furthest from the hinge on the monitor
bezel and lift it up and off the velcro underneath. Be extra careful with the touchscreen controller,
as the connector that wraps around the underside of the LCD assembly is fragile. See Figure 2 for
touchscreen controller location.
9. Remove the 12 screws that secure the LCD assembly to the monitor bezel. See Figure 3 for screw
locations. Take extra care not to damage the harness when removing the screw located near the
credit card reader.
FIGURE 3 –INSIDE VIEW OF THE LCD ASSEMBLY
10. Carefully remove the LCD assembly from the unit. The touchscreen is located below it.
If you are replacing the touchscreen: Carefully lift the touchscreen from the system.
If you are not replacing the touchscreen: Leave the touchscreen in place and skip to step 12.
11. If you are replacing the touchscreen: Take the new touchscreen and lay it in the bezel so that it
seats properly. The black strip around the perimeter of the touchscreen should be facing toward the
monitor bezel, and the touchscreen controller should be located at the bottom of the bezel. An easy
way to tell if the touchscreen is positioned correctly is to flip the touchscreen controller over (as if it
CREDIT CARD
READER
SCREWS SECURING
LCD ASSEMBLY TO
MONITOR BEZEL
(12 PLACES)
www.megatouch.com
Casual Games | Emerging Media
PM0821-01
Page 3 of 3
was wrapped around the bottom of the LCD assembly); the connector side of the controller should
be accessible and facing toward you after positioning it in this way.
12. Ensure that the touchscreen controller is flipped up and out of the way and that all wires are clear,
and then place the LCD into the bezel. The LCD assembly should be positioned so that the cable
clamp on the rear of the LCD is located near the credit card reader (see Figure 2), and the velcro
for the touchscreen controller should be at the bottom of the bezel.
13. Replace the 12 screws that secure the LCD assembly to the bezel. Again, be extra careful when
replacing the screw by the credit card reader (see Figure 3).
14. Flip the touchscreen controller back over so that the velcro on the bottom of it attaches to the
velcro on the rear of the LCD. Again, be extra careful when handling the touchscreen controller so
as not to damage its connection to the touchscreen.
15. Reconnect the touchscreen controller cable, the LCD power cable, and the VGA cable to the
appropriate places (see Figure 2).
16. Slide the credit card reader cable back into the plastic cable clamp (see Figure 2).
17. Tie wrap the touchscreen controller cable near its connection to the touchscreen controller, and
then tie wrap that cable along with the credit card reader cable in the place shown in Figure 2.
18. Gently tuck the excess cable from the LCD power cable into the opening on the rear of the LCD,
and then loop the excess cable from the VGA and credit card reader cables and tuck it into the
same opening. Do not force the cables or pinch them while doing this.
19. Use the screw and washer you removed earlier to re-secure the strain relief cord to the rear of the
LCD assembly (see Figure 2).
20. Carefully close the monitor bezel, making sure that you do not crimp or damage any cables while
doing so.
21. Replace the eight screws securing the monitor bezel (see Figure 1).
22. Replace and lock the rear door.
23. Plug in and turn on the game.
Other MEGATOUCH Game manuals

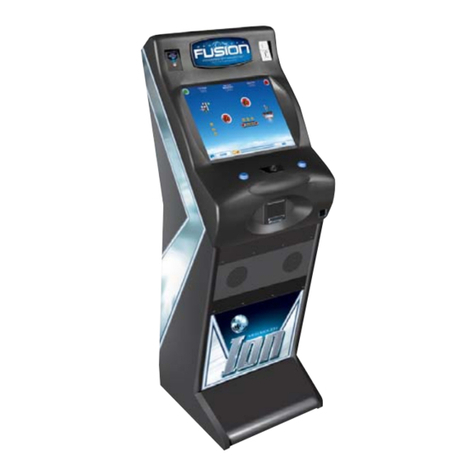
MEGATOUCH Ion Fusion Operating instructions

MEGATOUCH

MEGATOUCH Ion Fusion Operating instructions

Popular Game manuals by other brands

Hasbro Battle of Naboo Game 88-003 Instruction

Hasbro

Hasbro Battle of Naboo Game 88-003 Instruction

MOB MO6342 user manual

MOB

MOB MO6342 user manual

GLD Products Super Shot 64-3012 manual

GLD Products

GLD Products Super Shot 64-3012 manual

airquee Water Drop Additional operating instructions

airquee

airquee Water Drop Additional operating instructions

BCP SKY6991 instruction manual

BCP

BCP SKY6991 instruction manual

Parker Brothers Magazine Card Game manual

Parker Brothers

Parker Brothers Magazine Card Game manual

Radica Games Legends 74003 instruction manual

Radica Games

Radica Games Legends 74003 instruction manual

Brunswick StringPin Service manual

Brunswick

Brunswick StringPin Service manual

Hasbro Alarm Clock Game instruction manual

Hasbro

Hasbro Alarm Clock Game instruction manual

Bandito SPORT SPEEDFIGHTER 5278.01 Assembly instructions

Bandito SPORT

Bandito SPORT SPEEDFIGHTER 5278.01 Assembly instructions

Hathaway BLUE LINE NG1013T3 Assembly instructions

Hathaway

Hathaway BLUE LINE NG1013T3 Assembly instructions

LEXIBOOK JG6000TS instruction manual

LEXIBOOK

LEXIBOOK JG6000TS instruction manual

Hasbro Baby Alive Diaper Bag 18849/18657 instructions

Hasbro

Hasbro Baby Alive Diaper Bag 18849/18657 instructions

Radica Games Pocket Blackjack21 17009 instruction manual

Radica Games

Radica Games Pocket Blackjack21 17009 instruction manual

MD SPORTS BLL090 108B Assembly instructions

MD SPORTS

MD SPORTS BLL090 108B Assembly instructions

MD SPORTS ARC108 038B Assembly instructions

MD SPORTS

MD SPORTS ARC108 038B Assembly instructions

MD SPORTS CBF056_018M Assembly instructions

MD SPORTS

MD SPORTS CBF056_018M Assembly instructions

MD SPORTS TT218Y21003 Assembly instructions

MD SPORTS

MD SPORTS TT218Y21003 Assembly instructions

manuals.online logo
manuals.online logoBrands
  • About & Mission
  • Contact us
  • Privacy Policy
  • Terms and Conditions

Copyright 2025 Manuals.Online. All Rights Reserved.