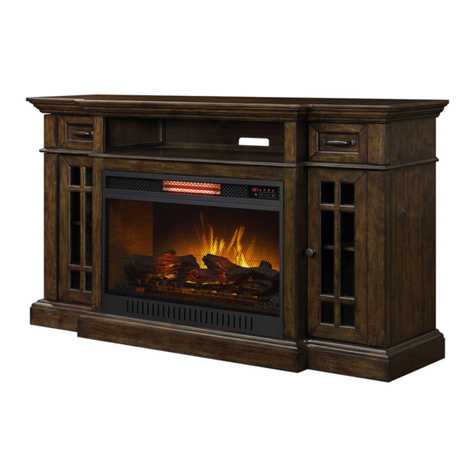
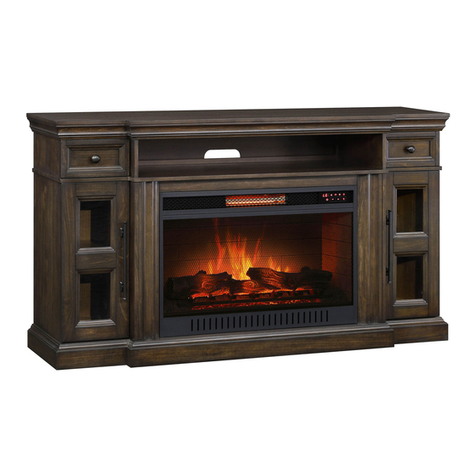
Members Mark SF127B-33AI User manual

THIS INSTRUCTION BOOKLET CONTAINS IMPORTANT SAFETY INFORMATION.
PLEASE READ AND KEEP FOR FUTURE REFERENCE.
USE AND CARE GUIDE
COMBINATION ELECTRIC FIREPLACE/HEATER
Covered by one or more of t e following US Patents: 10,451,235 / 10,371,333 / 10,520,149 / 10,731,810.
Additional US and International Patents Pending.
Model # SF127B-33AI
IMPORTANT
NOTE: An excellent feature of t e fireplace/ eater unit is t e free Bluetoot
TM
enabled remote app. Refer
to t e separated installation instructions and install t e W alen fireplace Bluetoot
TM
remote app on your
mobile device, so t at you can c ange t e settings of t e fireplace/ eater conveniently.
Please read all t e information in t is operating manual, including all safety, operating, and maintenance
information. To avoid t e potential risk of fire, electric s ock, or injury to persons, users s ould follow
t e directions and warnings in t is manual.
Your Electric Fireplace / Heater is fully assembled from t e factory. T ere are no installation steps
required to make t e fireplace / eater work.
Quantum Flame and the Quantum Flame logo are registered
trademarks of Living Style (B.V.I.) Limited.
All rights reserved.
HEATER DEFAULT SETTING:
T e default factory setting for your t ermostat is 72 degrees. If your room temperature is already 72 degrees or
above, t en your eater will s ut OFF after about 3 minutes. See t ermostat directions for ow to adjust t e
temperature settings in order to keep your eater ON until your desired room temperature is reac ed.
LO NUMBER: DA E PURCHASED: / /

2 Need Assistance? isit us at: samsclub.com/membersmarkhelp
W en using electrical appliances, basic precautions s ould always be followed to reduce t e risk of fire,
electric s ock, and injury to persons, including t e following:
1. Read all instructions before using this heater.
2. his heater is hot when in use. o avoid burns, do not let bare skin touch hot surfaces. If provided, use handles
when moving this heater. Keep combustible materials, such as furniture, pillows, bedding, papers, clothes and
curtains at least 0.9 meters (3 feet) from the front of the heater and keep them away from the sides and rear.
3. Extreme caution is necessary when any heater is used by or near children or invalids and whenever the heater is
left operating and unattended.
4. Always unplug heater when not in use.
5. Do not operate any heater with a damaged cord or plug or after the heater malfunctions, has been dropped or
damaged in any manner. Return heater to authorized service facility for examination, electrical or mechanical
adjustment, or repair.
6. Do not use outdoors.
7. his heater is not intended for use in bathrooms, laundry areas and similar indoor locations. Never locate heater
where it may fall into a bathtub or other water container.
8. Do not run power cord under carpeting. Do not cover power cord with throw rugs, runners, or the like. Do not
route cord under furniture or appliances. Arrange power cord away from traffic area and where it will not be
tripped over.
9. o disconnect heater, turn controls to off, then remove plug from outlet.
10. Connect to properly grounded outlets only.
11. Do not insert or allow foreign objects to enter any ventilation or exhaust openings as this may cause an electric
shock or fire, or damage the heater.
12. o prevent a possible fire, do not block firebox air intakes or exhaust in any manner. Do not operate firebox on
soft surfaces, like a bed, where openings may become blocked.
13. A heater has hot and arcing or sparking parts inside. Do not use in areas where gasoline, paint, or flammable
liquids are used or stored.
14. here is a thermostat limiter inside the heater. When the inner temperature over heating or occur abnormal
heating, the thermostat protective device would cut off power supply to avoid the fireplace damaged or risk of
fire.
15. Use this heater only as described in this manual. Any other use not recommended by the manufacturer may cause
fire, electrical shock, or injury to persons.
16. Avoid the use of an extension cord because the extension cord may overheat and cause a risk of fire. However,
if you have to use an extension cord, the cord shall be No.14 AWG minimum size and rated not less than 1875
watts.
W ile t e eater is in use
,
t e top center of t e fireplace can get ot to t e touc , and may
cause serious injury or burns. Always supervise small c ildren around t e fireplace/ eater.
Do not place any clot or decorations over t e eater outlet of t e fireplace, or ot erwise
obstruct t e eater outlet of t e fireplace, as t is may cause a fire and serious injury may
result.
IMPORTANT SAFETY INSTRUCTIONS
SAVE THESE INSTRUCTIONS
T ere are no user serviceable parts inside t e fireplace/ eater. If t e unit appears
to malfunction, turn t e unit off and unplug t e unit from t e wall immediately, t en contact our
Customer Service for assistance, or refer service to qualified service personnel.
CAUTION
HOT

Need Assistance? isit us at: samsclub.com/membersmarkhelp 3
T is product must be grounded. If it s ould malfunction or breakdown, grounding provides a pat of least
resistance for electric current to reduce t e risk of electric s ock. T is product is equipped wit a cord
aving an equipment-grounding conductor and a grounding plug. T e plug must be plugged into an
appropriate outlet t at is properly installed and grounded in accordance wit all local codes and ordinances.
T is eater is for use on 120 volts circuit and as a grounded plug t at looks like t e one illustrated on
Figure 1. See Figure 1 for grounding instruction. An adapter as s own at C is available from your local
electronics store or online supplier for connecting t ree-blade grounding type plugs to two-slot receptacles.
T e green grounding lug extending from t e adapter must be connected to a permanent ground suc as a
properly grounded outlet box. T e adapter s ould not be used if a t ree-slot grounded receptacle is available.
GROUNDING INSTRUCTIONS
Improper connection of the equipment-grounding conductor can result in a risk of
electric shock. Check with qualified electrician or serviceman if you are in doubt as to whether the
product is properly grounded. Do not modify the plug provided with the product – If it will not fit the
outlet; have a proper outlet installed by qualified electrician.
Figure 1
A
Grounding Pin
Adapter
Metal Screw
Cover of Grounded Outlet Box
Grounding Lug
Cover of Grounded Outlet Box
B

4 Need Assistance? isit us at: samsclub.com/membersmarkhelp
NOTE: his equipment complies with the FCC RF radiation exposure limits set forth for an uncontrolled environment.
his equipment should be installed and operated with a minimum distance of 20 centimeters between the radiator
and your body. his equipment has been tested and found to comply with the limits for a Class B digital device,
pursuant to Part 15 of the FCC Rules. hese limits are designed to provide reasonable protection against harmful
interference in a residential installation. his equipment generates, uses, and can radiate radio frequency energy and,
if not installed and used in accordance with the instructions, may cause harmful interference to radio communications.
However, there is no guarantee that interference will not occur in a particular installation. If this equipment does cause
harmful interference to radio or television reception, which can be determined by turning the equipment off and on,
the user is encouraged to try to correct the interference by one or more of the following measures:
Reorient or relocate the receiving antenna.
Increase the separation between the equipment and the receiver.
Connect the equipment into an outlet on a circuit different from that to which the receiver is connected.
Consult the dealer or an experienced radio/ V technician for help.
his device complies with Part 15 of the FCC Rules. Operation is subject to the following two conditions:
1) his device may not cause harmful interference, and
2) his device must accept any interference received, including interference that may cause undesired
operation.
Modifications not approved by the party responsible for compliance could void user’s authority to operate the
equipment.
CAN ICES-3 (B)/NMB-3(B).
his Class B digital apparatus complies with Canadian ICES-003.
FCC ID: 2AAHD-SF127B-33AI QDID: 86829
Whalen Furniture Manufacturing
1578 Air Wing Road,
San Diego, CA 92154, USA
FCC/IC STATEMENT

Need Assistance? isit us at: samsclub.com/membersmarkhelp 5
he fireplace/heater unit comes in two distinct parts:
he fireplace unit itself, (Figure 2), and the Remote Control, (Figure 3).
Figure 2 Figure 3
T e Fireplace/Heater Unit
On the top right corner of the fireplace/heater unit is the control panel. his panel contains the buttons and displays to properly
operate the fireplace/heater unit. Refer to Figure 4 for placement of the control buttons.
Display Unit.
his segment will show information about flame level, flame speed, timer, and current Fahrenheit/Centigrade temperature.
With the heater on, gently touch and hold the heater control button for five seconds to enter temperature converting
mode. Repeat the same process to convert Celsius temperature into Fahrenheit temperature.
Main Power button.
ouch the power button to turn the fireplace/heater unit on and off. ouch the power button once to turn the unit on. ouch
again to turn the unit off.
NOTE: After the heater function or power is shutoff the blower will continue to run for several minutes to cool the internal
components.
ELECTRICAL SPECIFICATIONS
Model No. SF127B-33AI
Voltage 120 V
Frequency 60 Hz
Watts 1500 W
OPERATION
Figure 4
Fireplace/Heater Front
Panel Controls
Display Unit Flame Speed
imer Function
Heater Control
Flame Color Adjustment
Main Power
Brightness Adjustment
Heater Up
Heater Down

6 Need Assistance? isit us at: samsclub.com/membersmarkhelp
Heater Control.
ouch the heater button to turn the heater on or off. ouch the heater down button to lower the heat and touch
the heater up button to turn up the heat.
When the heating function turns on, touch and hold heater button for 5 seconds to enter temperature converting mode.
he temperature setting range is between 62°F - 82°F - ON (17°C - 27°C - ON). NOTE: he heater default temperature is set to 72
degrees Fahrenheit. If your ambient room temperature is above 72 degrees, then your heater will automatically shut off after few
minutes. Adjust your heater thermostat to a higher temperature in order to keep your heater ON above 72 degrees.
Timer Function.
You activate the timer by touching the button multiple times to get the amount of time you want the fireplace/heater to run. he
timer button operates both the flames and the heater function. If the heater is operating when the timer is set, then the heater is
on the timer. If the flames are operating, then the timer will control the flames. If both the heater and flames are operating with
the timer is set, then the timer controls both the flames and the heater. ouching the button in sequence will set the timer for a
set interval. his interval period is shown in the display segment, and the red LED light turns on to show that the timer function
is engaged. he set intervals are displayed in this table:
BUTTON PRESS
TIMER INTERVAL
DISPLAY VALUE
1
st
press 30 Minute Interval 30
2
nd
press 1 hour 1h
3
rd
press 2 hour 2h
4
th
press 3 hour 3h
5
th
press 4 hour 4h
6
th
press 5 hour 5h
7
th
press 6 hour 6h
8
th
press OFF OF
he timer starts after you select your preferred interval and release the button; note that the display and red light will turn off
after a few seconds. here is no clock function for turning the heater or flames on or off at a specific time.
Brig tness Adjustment
here are six settings for the brightness. ouching the brightness button in sequence will set the brightness for different level.
It will deactivate the flame color and speed adjustment function if you set the brightness to “H0”.
Flame Color Adjustment
here are six settings for the flame color. ouching the flames button in sequence will set the flames for different color.
o turn on Bluetooth
M
link, gently touch and hold the flame button for 5 seconds until the front LED lights show "bt". he
display unit flashes 30 seconds, indicating it is in searching and pairing mode. he LED lights stop flashing and indicating once
your Whalen Fireplace Bluetooth
M
remote app paired with the fireplace.
NOTE: When the unit is turned off that LOGS completely die out for 3 seconds.
OPERATION
(CONTINUED)

Need Assistance? isit us at: samsclub.com/membersmarkhelp 7
Flame Speed Adjustment
here are six settings for the flame speed. From 1 to 5 means low speed to high speed, and 6 is auto cycle for speed.
NOTE: ouch and hold this button for five seconds until “beep” sound to enter the child lock model (Child lock model means
heating function is not work. If want to cancel it, please keep touching and holding this button for five seconds)
T e Fireplace/Heater Remote Control
A great feature of the Fireplace/Heater unit is the small remote control. his remote combines all the functions of the front
panel controls of the fireplace/heater with the convenience of not having to leave the comfort of your seat to change the
settings of the fireplace/heater.
Follow the steps below to install the batteries into the remote control.
1. ake off the back cover from the battery compartment.
2. Insert two provided AAA batteries into the battery compartment making sure that the ends of the batteries with the
negative (-) symbols are against the springs in the battery compartment.
3. Replace the battery compartment cover.
4. urn the remote over and aim it towards the fireplace/heater unit.
5. Press the upper center power button, and see if the flames on the fireplace/heater turn on or off.
6. If nothing appears to happen, check to make sure the battery is installed correctly, and try again.
Battery Replacement
NOTE: Do not mix old and new batteries.
Do not mix alkaline, standard (carbon zinc), or rechargeable (nicad, nimh, etc.) batteries.
1
2
12
USING THE REMOTE
CONTROL
Do not ingest batteries.
1. Non-rechargeable batteries are not to be recharged.
2. Batteries are to be inserted with the correct polarity.
3. Exhausted batteries are to be removed from the product.
4. Always purchase the correct size and grade of battery most
suitable for the intended use.
5. Replace all batteries of a set at the same time.
6. Clean the battery contacts and also those of the device prior to
battery installation.
7. Remove batteries from equipment when not used for an
extended period of time.
NO E:
Battery disposal
Please always dispose of batteries
at a suitable recycling point.
Figure 5

8 Need Assistance? isit us at: samsclub.com/membersmarkhelp
Remote Control Button Functions
he remote control mimics the buttons on the front panel of the fireplace/heater. he remote control has a display
function. he buttons on the remote control work as follows: (Figure 6)
hese remote control buttons work exactly the same as the buttons on the front panel of the fireplace/heater. See the
FIREPLACE/HEA ER section above to review the front panel button functions and familiarize yourself with the remote control.
Gently press and hold the B Sync button for 3 seconds to activate Bluetooth
M
function. he remote control display unit shows
"B " and the icon flashes (interval is 1 second). he display turns off after 30 seconds.
NOTE: he remote control only can carry on the simple functional operation to the product, but it has no function to lock/unlock
the flame and heating function. o convert the Fahrenheit and Centigrade temperature, press and hold the Heater Up or Heater
Down button for 3 seconds.
Figure 6
Flame Color Adjustment
imer Function
Heater Down
Main Power
Bright Adjustment
Display Unit
Bluetooth
Heater Up
Heater Control
Flame Speed
USING THE REMOTE CONTROL
(CONTINUED)

Need Assistance? isit us at: samsclub.com/membersmarkhelp 9
he blower motor and flame motor are pre-lubricated for a durable using time and need no further lubrication or maintenance.
o remove any accumulation of dust or debris, the soft brush attachment of a vacuum cleaner should occasionally be used to
clean the outlet grille of the fan heater.
Use a soft, clean cloth that will not scratch the surface when dusting.
Use a clean soft cloth dampened with warm water to clean the fireplace surface. DO NOT use household or abrasive
cleaners, as these products may damage the surface.
When cleaning the glass viewing screen use a non-abrasive damp cloth with liquid cleaner or soft soap if necessary; DO
NOT use cleaning powders or any other substance with abrasives since these substances will scratch glass.
Under no circumstances should this product be operated with a broken or chipped glass panel.
Do not strike or slam the glass.
In the event that your appliance is stained or otherwise damaged during use, we recommend that you call a professional to
repair it.
When not in use please unplug the cord from the outlet to prevent any damage or accidents.
ALWAYS DISCONNEC FROM HE POWER SUPPLY BEFORE CLEANING HE HEA ER. FIRS URN OFF HE
MAIN POWER. HEN REMOVE HE ELEC RICAL PLUG FROM HE WALL OU LE .
DO NO USE HIS FIREPLACE INSER IF ANY PAR OF I HAS BEEN UNDER WA ER. IMMEDIA ELY CALL
A QUALIFIED SERVICE ECHNICIAN O INSPEC HE FIREBOX AND REPLACE ANY PAR OF HE ELEC RICAL SYS EM WHICH HAS
BEEN UNDER WA ER.
We hope you enjoy your purchase for many years,
hank you for your purchase!
CARE AND MAINTENANCE INSTRUCTIONS

10 Need Assistance? isit us at: samsclub.com/membersmarkhelp
TROUBLE SHOOTING GUIDE
PROBLEM SOLUTION
1. he display unit on the control panel shows error code
“EE”.
1a. Your thermistor sensor is loose or cut off.
1b. DO NO return to store.
1c. Please email us or call our oll Free # for a replacement.
2. Using the fireplace with the heater ON causes a trip in
my power circuit.
2a. Unplug other appliances from the same circuit and same
outlet as the fireplace. Do not overload the circuit.
2b. Connect the fireplace to a properly grounded outlets with
thicker cord.
2c. Replace with a qualified fuse-box with a heavy load.
3. he unit does not turn on. 3a. Check that unit is fully plugged into a standard 120V outlet.
3b. Press power button on the control panel.
4. here is a visible flame effect, but heater does not
continue to blow warm air after repeatedly turning on
the heater. he heater continues to automatically
shut itself off after a few minutes.
4a. he heater has reached its high temperature setting for
automatically shutting off at 131 degrees Fahrenheit.
4b. Note that the heater thermostat default temperature setting
is 72 degrees Fahrenheit. Confirm that your heater
temperature setting exceeds your ambient room
temperature. If your room temperature is above 72 degrees,
your heater will shut itself off, unless you adjust your
thermostat to a higher temperature setting.
4c. urn on/off the heater button several times to make sure it
is in the “ON” position.
5. Heater does not work, but Power and Heater switches
are in the “ON” position and thermostat is set on
“ON”.
5a. urn off fireplace and unplug the unit from the wall outlet
for 5 minutes. After 5 minutes plug the unit back into wall
outlet and operate as normal. Make sure that no objects are
blocking the air vents on the top and on the front of your
fireplace. Note that if your ambient room temperature is
very hot, the heater will automatically shut off as a safety
protocol.
6. he display unit on the control panel shows “88” and
the function indicator is quick flashing, indicating it is
in alarm mode.
6a. Unplug the unit from the wall outlet for 5 minutes. After 5
minutes plug the unit back into wall outlet and operate as
normal. Make sure that no objects are blocking the air vents on
the top and on the front of your fireplace. Note that if your
ambient room temperature is very hot, the heater will
automatically shut off as a safety protocol.
7. Remote control is not working.
7a. Change the remote batteries.
7b. Operate remote transmitter at a slow measured pace. Press
the remote control buttons with an even motion and gentle
pressure. Repeatedly pressing buttons in rapid succession
may cause the transmitter to malfunction.
7c. Stand closer to your fireplace.
7d. Remove objects that may block your remote control’s ability
to communicate with your fireplace.
8. Pressing the heater button causes the logs to flash,
and the heater blower will not turn on and produce
heat.
8a. Fireplace is in child lock model. o deactivate child lock
mode, press and hold the Flame Speed button for 5
seconds.

ESTÉ MANUAL DE ENSAMBLE CONTIENE INFORMACIÓN DE SEGURIDAD IMPORTANTE.
POR FAVOR LEA Y MANTENGA PARA REFERENCIA FUTURA.
GUÍA DE USO Y CUIDADO
COMBINACIÓN CHIMENEA/CALENTÓN ELÉCTRICO
Cubierto por un o más de l s siguientes p tentes de E.U.A.: 10,451,235 y 10,371,333 y 10,520,149 y 10,731,810
P tentes est dounidenses e intern cion les dicion les pendientes
Modelo # SF127B-33AI
IMPORTANTE
NOTA: Un gr n c r cterístic de l unid d chimene /c lent dor es uso remoto por l plic ción
Bluetooth
TM
h bilit d . Consulte l s instrucciones de inst l ción sep r d s e inst le en l chimene
m rc Wh len l plic ción Bluetooth
TM
de uso remoto en su dispositivo móvil, p r que pued c mbi r
l configur ción de l chimene /c lent dor en form conveniente.
Por f vor le tod l inform ción de esté m nu l de oper ción, incluyendo tod l inform ción de
segurid d, de oper ción, y de m ntenimiento. P r evit r el riesgo de fuego, shoques eléctricos, ó
lesiones person s, los usu rios deben de seguir l s direcciones y visos en esté m nu l.
Su chimene eléctric / c lentón est complet mente ens mbl d desde l fábric . No h y p sos de
inst l ción neces rios p r h cer que l chimene / c lentón funcione.
Quantum Flame el logotipo de Quantum Flame son
marcas registradas de Living St le (B.V.I.) Limited.
Todos los derechos reservados.
CONFIGURACIÓN PREDETERMINADA DEL CALENTÓN:
L configur ción predetermin d de l fábric del termost to es de 72 gr dos. Si l temper tur y está 72 gr dos
o m yor, entonces su c lentón se p g r después de 3 minutos. Ve l s direcciones de termost to p r s ber cómo
just r l temper tur p r m ntener su c lentón prendido h st lleg r l temper tur dese d del cu rto.
NÚMERO de LOTE: FECHA de COMPRA: / /

2 Necesita asistencia? Visitenos en: samsclub.com/membersmarkhelp
Cu ndo use p r tos eléctricos, prec uciones básic s deben ser siempre p r reducir el riesgo o incendios,
desc rg s eléctric s y lesiones person s, entre ell s l s siguientes:
1. Lea todas las instrucciones antes de usar este aparato.
2. Este calentador se calienta cuando está encendido. Para evitar quemaduras, no deje que la piel desnuda entre
en contacto con superficies calientes. Si se proporciona, utilice las asas al mover este calentador. Mantenga los
materiales combustibles, tales como muebles, almohadas, ropa de cama, papeles, ropa cortinas por lo menos
0.9 m (3 pies) desde la parte frontal de la estufa mantenerlos lejos de los lados parte trasera.
3. El aparato no debe ser utilizado por o cerca de niños o personas con movilidad reducida de capacidad física,
sensorial o mental, donde el calentador se opere se desatienda.
4. Desenchufe siempre el aparato cuando no esté en uso.
5. No opere ningún calentador con un cable o enchufe dañado o después de que el mal funcionamiento del aparato,
o si se ha caído o dañado de alguna manera. Regrese el calentador al centro de servicio autorizado para su
revisión, ajuste eléctrico o mecánico, o reparación.
6. No utilizar al aire libre.
7. Esta calefacción no está diseñada para su uso en baños, lavaderos lugares similares en interiores. Nunca
coloque el calentador donde pueda caer en una bañera o recipiente de agua.
8. No haga funcionar el cable debajo de la alfombra. No cubra el cable con alfombras, tapetes, o similares. No ruta
el cordón debajo de los muebles o aparatos eléctricos. Coloque el cordón de zonas de tráfico donde no se pueda
tropezar.
9. Para desconectar el calentador, ponga el control en la posición de apagado, luego retire el enchufe del
tomacorriente.
10. Conecte a tomas que tengan tierra solamente.
11. No inserte o permita que objetos extraños penetren en la ventilación o la apertura de escape a que esto puede
causar un choque eléctrico o incendio, o dañar el calentador.
12. Para evitar un posible incendio, no bloquee las entradas de aire o de escape de cualquier manera. No lo utilice
en superficies suaves, como una cama, donde la apertura puede llegar a ser bloqueado.
13. Un calentador tiene partes calientes que forman arco o chispas en el interior. No lo utilice en áreas donde los
líquidos gasolina, pintura o inflamables se almacenen o utilicen.
14. Ha un termostato limitador en el interior del calentador. Cuando la temperatura interior sobre la calefacción o
calentamiento anormal ocurre, el dispositivo de protección del termostato comienza a cortar el suministro de
energía para evitar daños a la chimenea o el riesgo de incendio.
15. Utilice este calentador sólo como se describe en el manual. Cualquier otro uso no recomendado por el fabricante
puede causar incendios, descargas eléctricas o lesiones a personas.
16. Evite el uso de un cable de extensión porque el cable de extensión puede recalentarse causar un riesgo de
incendio. Sin embargo, si tiene que usar un cable de extensión, el cable debe tener un tamaño mínimo de 14 AWG
no debe ser inferior a 1875 vatios.
Mientr s que el c lent dor está en uso, el centro superior de l chimene se c lient l t cto,
y puede c us r lesiones gr ves o quem dur s. Siempre supervise los niños pequeños
lrededor de l chimene /c lent dor. No coloque ningún p ño o decor ciones en l s lid del
c lent dor de l chimene , o cu lquier otr form obst culiz l s lid del c lent dor de l
chimene , y que esto puede c us r puede producirse un incendio y lesiones gr ves.
INSTRUCCIONES IMPORTANTES DE SEGURIDAD
GUARDE ESTAS INSTRUCCIONES
No h y piez s en el interior de
l chimene /c lent dor. Si l unid d p rece
funcion r incorrect mente, p gue l unid d y desconecte l unid d de l p red inmedi t mente,
póng se en cont cto con nuestro servicio de tención l Cliente p r obtener sistenci , o bien devolver
el servicio person l de servicio c lific do.
CUIDADO
CALIENTE

Necesita asistencia? Visitenos en: samsclub.com/membersmarkhelp 3
Este producto debe conect rse tierr . Si h y un m l funcion miento, l conección tierr le d un c mino
de m s b j resistenci p r l corriente eléctric y reducir un choque eléctrico. Este equipo cuent con
un c ble que tiene un conductor y conección p r tierr . Est conección debe conect rse un
tom corriente propi do con entr d p r desc rg tierr y desc rg decu d tierr de cuerdo los
códigos loc les y orden nz s.
Ver FIGURA 1 p r seguir l s instrucciones. Este c lent dor es p r su uso en 120 voltios. El c ble tiene un
enchufe como se muestr en l FIGURA 1. Ver de puest tierr instrucción. Un d pt dor como se muestr
en C está disponible en su tiend de electrónic loc l o proveedor en líne un d ptor p r l conexión de
tres p l s con puest tierr se conect receptáculos de dos r nur s. L conexión tierr verde que se
extiende desde el d pt dor debe est r conect do un tierr perm nente, como un tom de tierr c j .
El d pt dor no debe ser utiliz do si un esp cio de tres receptáculos de tierr está disponible.
INSTRUCTIVO PARA CONECCION A TIERRA
Figura 1
Conexión a tierra
Tapa de tomacorriente a tierra
Adaptador
Ceja a tierra
Tornillo de metal
Tapa de tomacorriente a tierra
La conexión inadecuada del conductor de tierra puede resultar en un riesgo de
descarga eléctrica. Consulte con un electricista o técnico calificado si tiene alguna duda en cuanto a si
el producto está correctamente conectado a tierra. No modifique el enchufe suministrado con el producto
- Si no encaja en el tomacorriente, mande a instalar una toma adecuada por un electricista calificado.

4 Necesita asistencia? Visitenos en: samsclub.com/membersmarkhelp
NOTA: Este equipo cumple con los límites de exposición a la radiación de RF de la FCC establecidos para un entorno
no controlado. Este equipo debe instalarse operarse con una distancia mínima de 20 centímetros entre el equipo
su cuerpo. Este equipo ha sido probado cumple con los límites para un dispositivo digital de Clase B, según la Parte
15 de las Normas de la FCC. Estos límites están diseñados para proporcionar una protección razonable contra las
interferencias perjudiciales en una instalación residencial. Este equipo genera, utiliza puede irradiar energía de
radiofrecuencia , si no se instala utiliza de acuerdo con las instrucciones, puede causar interferencias en las
comunicaciones de radio. Sin embargo, no ha garantía de que no se produzcan interferencias en una instalación en
particular. Si este equipo causa interferencias perjudiciales en la recepción de radio o televisión, lo cual puede
comprobarse encendiéndolo apagándolo, se recomienda al usuario que intente corregir la interferencia mediante
una o más de las siguientes medidas:
Reorientar o reubicar la antena receptora.
Aumentar la separación entre el equipo el receptor.
Conecte el equipo a un tomacorriente en un circuito diferente de aquel al que está conectado el receptor.
Consulte al distribuidor oa un técnico de radio / televisión para obtener a uda.
Este dispositivo cumple con la Parte 15 de las Normas de la FCC. La operación está sujeta a las dos condiciones
siguientes:
1) Este dispositivo no debe causar interferencias perjudiciales,
2) Este dispositivo debe aceptar cualquier interferencia recibida, inclu endo interferencias que puedan causar
un funcionamiento no deseado.
Las modificaciones no aprobadas por la parte responsable del cumplimiento podrían anular la autoridad del usuario
para operar el equipo.
CAN ICES-3 (B)/NMB-3(B).
Este aparato digital Clase B cumple con el ICES-003 canadiense.
FCC ID: 2AAHD-SF127B-33AI QDID: 86829
Whalen Furniture Manufacturing
1578 Air Wing Road,
San Diego, CA 92154, USA
REQUERIMIENTOS FCC / IC

Necesita asistencia? Visitenos en: samsclub.com/membersmarkhelp 5
La unidad chimenea/calentón viene en 2 partes distintas:
La unidad de chimenea, (Figura 2), el control remoto, (Figura 3).
Figura 2 Figura 3
L unid d chimene /c lentón
En la esquina superior derecho del la unidad chimenea/calentón esta el panel de control. Esté panel contiene los botónes los
monitores para operar apropiadamente la unidad chimenea/calentón. Consultar la figura 4 para la ubicación de los botónes de
control.
Monitor.
Esté segment mostrará información sobre el nivel de la llama, la velocidad de la llama, el temporizador, la temperatura
Fahrenheit/Celsius actual.
Con el calentón encendido tocar gentilmente mantener presionado el botón de calentón por 5 segundos para entrar en
el modo de conversion de temperatura. Repetir el mismo proceso para convertir la temperature Celsius a Fahrenheit.
Botón de encendido.
Toca el botón de encendido para encender apagar la unidad chimenea/calentón. Toca el botón de encendido una vez para
encender la unidad. Tocar de Nuevo para apagar la unidad.
NOTA: Después de que la función calentón ó el poder sea apagado, el soplador continuará funcionando por varios minutos para
enfriar los componentes internos.
ESPECIFICACIONES
ELECTRICAS
Modelo No. SF127B-33AI
Voltaje 120 V
Frecuencia 60 Hz
Potencia 1500 W
OPERACIÓN
Figura 4
Controles del panel frontal de la chim
enea/calentón
Monitor Velocidad de llama
Función del temporizador
Control de calentón
Ajuste del color de llama
Encendido
Ajuste de brillo
Calentador +
Calentador -

6 Necesita asistencia? Visitenos en: samsclub.com/membersmarkhelp
Control de c lentón.
Toca el botón de calentón para encender ó apagar el calentón. Toca el botón de calentador - para bajar el calor.
Toca el botón de calentador + para aumentar el calor.
Cuando la función del calentón esté encendida, mantener toca el botón del calentón por 5 segundos para entrar en el modo
de ajuste de temperatura. El alcance de temperatura esta entre 62°F - 82°F - ON (17°C - 27°C - ON). NOTA: La configuración
predeterminada de la fábrica del termostato es de 72 grados Fahrenheit. Si la temperatura a está a 72 grados o ma or, entonces
su calentón se apagará después de unos minutos. Ajuste el termostato a una temperatura ma or para mantener el calentón
prendido cuando este arriba de 72 grados.
Función de temporiz dor.
Usted activara el temporizador toque el botón multiples veces para obtener el tiempo que usted quiera que la chimenea/calentón
corra. El botón temporizador opera la función de llamas de calentón. Si el calentón esta operando cuando el temporizador se
ajuste, el temporizador controlara el calentón, Si las llamas estan operando, el temporizador controlara las llamas. Si las llamas
el calentón estan operando cuando se ajuste el temporizador, el temporizador controlara las llamas el calentón. Al tocar el
botón en secuencia ajustara el temporizador por un intervalo fijo. El tiempo del intervalo se muestra en el monitor la luz LED
de color roja se prendera para mostrar que el temporizador está activado. Los intervalos establecidos se muestran en esta tabla:
PRESIONADO DEL BOTÓN
INTERVALO DEL TEMPORIZADOR
VALOR EN EL MONITOR
1
ra
vez 30 minutos 30
2
da
vez 1 hora 1h
3
ra
vez 2 hora 2h
4
ta
vez 3 hora 3h
5
ta
vez 4 hora 4h
6
ta
vez 5 hora 5h
7
ma
vez 6 hora 6h
8
va
vez APAGADO OF
El temporizador empieza después que seleccione el intervalo deseado deje de presionar el botón; note que el monitor la luz
azul se apagaran después de unos segundos. No ha función de reloj para encender o apagar el calentador o llamas en un
momento determinado.
Ajuste de brillo
Ha 6 ajustes para el brillo. Al tocar el botón de brillo en secuencia ajustara el brillo para un nivel diferente. Desactivará el
color de la llama la función de ajuste de velocidad si configura el brillo en "H0".
Ajuste del color de l ll m
Ha 6 ajustes del color de la llama. Al tocar el botón de llama en secuencia ajustara las llamas para un color diferente. Para
activar la conexión Bluetooth
TM
, tocar mantenga presionado el botón de llama durante 5 segundos hasta que las luces LED
frontales muestren "bt". La unidad de visualización parpadea durante 30 segundos, lo que indica que está en modo búsqueda
emparejamiento. Las luces LED dejan de parpadear e indican una vez que su aplicación remota Whalen Fireplace
BluetoothTM se combina con la chimenea.
NOTA: Cuando la unidad se apague, los LOGS esté completamente apagados por 3 segundos.
OPERACIÓN
(CONTINUACION)

Necesita asistencia? Visitenos en: samsclub.com/membersmarkhelp 7
Ajuste de l velocid d de l ll m
Ha 6 ajustes para la velocidad de la llama. Del 1 al 5 es de baja a alta velocidad, 6 es el ciclo automático para velocidad.
NOTA: Mantener presionado esté botón por 5 segundos hasta escuchar el “beep” para entrar en el seguro de niño (El seguro del
niño significa que el calentón no va a funcionar. Si desea cancelarlo, por favor de mantener presionado el botón por 5 segundos)
El control remoto de chimene /c lent dor
Una gran característica de la chimenea / calentador Whalen es el pequeño mando a distancia. Este control remoto combina
todas las funciones de los controles del panel frontal de la chimenea / calentador con la comodidad de no tener que dejar la
comodidad de su asiento para cambiar la configuración de la chimenea/calentador.
Siga los pasos a continuación para instalar las pilas en el mando a distancia.
1. Quite la cubierta posterior fuera del compartimento.
2. Insertar 2 pilas AAA en el compartimiento de la batería, asegurándose de que los extremos de las baterías con el polo
negativo (-) símbolos están en contra de los resortes en el compartimiento de la batería.
3. Vuelva a colocar la tapa del compartimento de la batería.
4. Gire el mando a distancia una apuntar hacia la unidad chimenea / calentador.
5. Pulse el botón de alimentación superior central, ver si las llamas se prenden en la chimenea /calentador.
6. Si no aparece nada suceda, asegúrese de que la batería esté instalado correctamente vuelva a intentarlo.
Reempl zo de l b terí
NOTA: No mezcle pilas nuevas viejas.
No mezcle pilas alcalinas, estándar (carbono-zinc) o recargables (níquel-cadmio, nimh, etc.) baterías.
1
2
12
USANDO EL CONTROL REMOTO
No ingerir las baterías.
1. Baterías no recargables no se pueden recargar.
2. Las baterías deben ser insertadas con la polaridad correcta.
3. Baterías agotadas deben ser eliminadas del producto.
4. Compre siempre el tamaño correcto de la batería el grado
más adecuado para el uso previsto.
5. Cambie todas las pilas de un juego a la vez.
6. Limpie los contactos de la batería también los del dispositivo
antes de la instalación de la batería.
7. Retire las baterías de equipos provistos no se va a utilizar
durante un período prolongado de tiempo.
NOT
A
:
Disposición de bateria
Por favor, siempre tire las pilas
en un punto de reciclaje adecuado.
Figura 5

8 Necesita asistencia? Visitenos en: samsclub.com/membersmarkhelp
Funciones del control remoto
El control remoto imita los botones en el panel frontal de la chimenea/calentador. El mando a distancia tiene una función
de visualización. Los botones del mando a distancia como se indica a continuación: (Figura 6)
Estos botones del control remoto funcionan exactamente igual que los botones en el panel frontal de la chimenea / calentador.
Vea la sección CHIMENEA / CALENTADOR arriba para revisar las funciones del panel frontal botón, familiarizarse con el mando
a distancia. Presione mantenga presionado el botón de BTS nc durante 3 segundos para activar la función del BluetoothTM.
El monitor de control remoto muestra "BT" el icono parpadea (intervalo es de 1 segundos). La pantalla se apaga después de
30 segundos.
NOTA: El control remoto sólo puede continuar la operación simple funcional al producto, pero no tiene ninguna función para
bloquear / desbloquear la función de llama calefacción. Para convertir la temperatura de Fahrenheit Centígrados, mantenga
presionado el botón de calentador + o botón de calentador - durante 3 segundos.
Figura 6
Control flamas
Función de tiempo
Calentador -
Control primario
Ajuste de brillo
Monitor
Bluetooth
Calentador +
Control calentador
Ajuste de la velocidad de la llama
USANDO EL CONTROL REMOTO
(
CONTINUACION
)

Necesita asistencia? Visitenos en: samsclub.com/membersmarkhelp 9
El motor del ventilador el motor de la llama son pre-lubricados no necesitan lubricación adicional o mantenimiento. Utilice el cepillo
suave de una aspiradora para eliminar la acumulación de polvo o escombros de la rejilla de salida del calentador de ventilador.
□
Utilice un paño limpio suave que no ra e la superficie cuando quite el polvo.
□ Utilice un paño limpio suave humedecido con agua tibia para limpiar la superficie de la chimenea. NO use limpiadores abrasivos
o del hogar, a que estos productos pueden dañar la superficie.
□ Al limpiar la pantalla de visualización de cristal utilice un paño húmedo no abrasivo con un limpiador líquido o jabón suave si es
necesario; NO use polvos de limpieza o cualquier otra sustancia con abrasivos, a que estas sustancias pueden ra ar el vidrio.
□ En ningún caso debe este producto ser operado con un panel de vidrio roto o astillado.
□ No golpee el cristal.
□ En el caso de que el aparato está manchado o dañado durante el uso, le recomendamos que llame a un profesional para repararlo.
□
Cuando no se utilice, por favor desconecte el cable de la toma de corriente para evitar cualquier daño o accidentes.
SIEMPRE DESCONECTE DE LA FUENTE DE ALIMENTACIÓN ANTES DE LIMPIAR LA ESTUFA. PRIMERO,
APAGUE EL INTERRUPTOR PRINCIPAL. LUEGO DESCONECTE EL ENCHUFE DEL TOMACORRIENTE DE PARED.
NO UTILICE ESTA CHIMENEA SI ALGUNA PARTE DE ELLA HA ESTADO BAJO EL AGUA.
INMEDIATAMENTE LLAME A UN TÉCNICO CALIFICADO PARA INSPECCIONAR LA CAJA DE FUEGO Y REEMPLAZAR CUALQUIER
PARTE DEL SISTEMA ELÉCTRICO QUE HA SIDO BAJO EL AGUA.
Esperamos que disfrute de su compra durante muchos años,
¡Gracias por su compra!
INSTRUCCIONES DE MANTENIMIENTO

0 Necesita asistencia? Visitenos en: samsclub.com/membersmarkhelp
GUÍA PARA SOLUCIONAR PROBLEMAS COMUNES
PROBLEMA SOLUCIÓN
1. La unidad de visualización en el panel de control
muestra el código de error "EE".
1a. Su sensor de termistor está suelto o cortado.
1b. NO regrese a la tienda.
1c. Envíenos un correo electrónico o llame a nuestro número
gratuito para obtener un reemplazo.
2. Usar la chimenea con el calentador encendido
provoca que se bote el circuito de alimentación.
2a. Desenchufe otros electrodomésticos del mismo circuito
mismo tomacorriente que la chimenea. No sobrecargue el
circuito.
2b. Conecte la chimenea a tomacorrientes debidamente
conectados a tierra con un cable más grueso.
2c. Reemplace con una caja de fusibles calificada con una carga
pesada.
3. La unidad no se enciende
3a. Asegurar de que la unidad esté completamente enchufada a
una terminal estándar de 120V.
3b. Presionar el botón de encendido en el panel de control.
4. Ha un efecto de llama visible, pero el calentón no
continua soplando aire caliente después de
encender repetidamente el calentón. El calentón
continúa apagándose automáticamente después
de uno minutos.
4a. El calentador ha alcanzado su configuración de temperatura
alta para apagarse automáticamente a 131 grados Fahrenheit.
4b. Note que la temperatura predeterminada del termostato del
calentón es de 72 grados Fahrenheit. Confirmar que la
configuración de temperatura de su calentón exceda la
temperatura ambiente del cuarto. Si su cuarto está arriba de
72 grados, su calentón se apagara por sí solo, a menos que
usted ajuste su termostato a una temperatura ma or.
4c. Encender/Apagar el calentón muchas veces para asegurar que
esté en la posición de encendido.
5. El calentón no funciona, pero los botones de
encendido del calentón están en la posición de
encendido.
5a. Apagar la chimenea desenchufar la unidad de la toma de
corriente por 5 minutos. Después de los 5 minutos enchufe la
unidad de vuelta a la pared operar normalmente. Asegurar
que no haiga objetos bloqueando las salidas de aire en la parte
superior en el frente de su chimenea. Note que si la
temperatura ambiente de su cuarto es mu caliente, el calentó
se apagara automáticamente como medida de seguridad.
6. El monitor en el panel de control muestra “88” el
indicador de función está parpadeando, indicando
que está en modo alarma.
6a. Desenchufar la unidad de la toma de corriente por 5 minutos.
Después de los 5 minutos enchufe la unidad de vuelta a la pared
operar normalmente. Asegurar que no haiga objetos bloqueando las
salidas de aire en la parte superior en el frente de su chimenea.
Note que si la temperatura ambiente de su cuarto es mu caliente,
el calentó se apagara automáticamente como medida de seguridad.
7. El control remoto no funciona.
7a. Cambie las baterías del control.
7b. Operar el transmisor remoto a un paso lento medido. Presionar
los botones del control remoto con un movimiento nivelado
presión gentil. Presione botones rapidamente puede causar
que falle el transmisor.
7c. Pararse más cerca de la chimenea.
7d. Retirar objetos que puedan bloquear la habilidad de su control
remoto para comunicarse con la chimenea.
8. Presionar el botón del calentón causa que los
troncos brillen, el ventilador del calentón no se
prende produce calor.
8a. La chimenea está en modo de seguro de niño. Para desactivar
el modo de seguro de niño, presionar mantener presionado el
botón de la velocidad de la llama por 5 segundos.
Table of contents
Languages:
Other Members Mark Indoor Fireplace manuals
Popular Indoor Fireplace manuals by other brands

Quadra-Fire
Quadra-Fire 31I-ACC installation manual

Mendota
Mendota DXV-45 Deep Timber III Installation & operating instructions

Napoleon
Napoleon 1600C-1 Installation and operating instrictions

Continental Fireplaces
Continental Fireplaces CWHVF31N Installation and operating instructions

Dimplex
Dimplex Optisuite2Go Assembly manual

Enviro
Enviro C72I owner's manual

Wayne
Wayne HSG200 instruction manual

Quadra-Fire
Quadra-Fire VOYAGEUR GRAND INSERT GRAND-MBK-AU owner's manual

Valor
Valor 1500IN Installation & owner's manual

EQUATION
EQUATION ND-18D2P Assembly-Use-Maintenence Manual

Lennox
Lennox ESTATE EST-36 specification

Unigas
Unigas K590X Manual of installation - use - maintenance