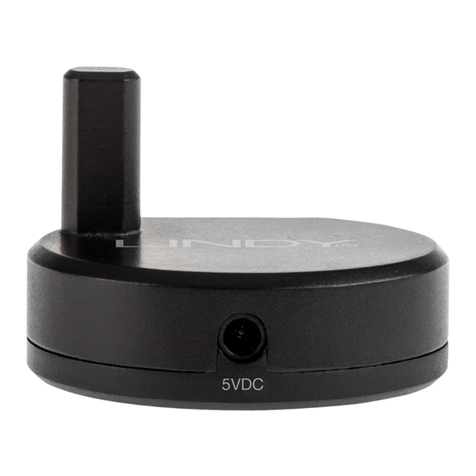
Mercator Ikuü SR03N User manual

1
WIFI RANGE EXTENDER
QUICK START GUIDE
SR03N www.ikuu.com.au

2
1
2
3
45
6
7
8
9
10
Default access
Web: http://ap.setup
IP address: 192.168.10.1
Password: admin
SSID: Wireless-N
1 Power On/O
2 WPS Button
3 Mode Selector
4 Reset Button
5 LAN Port
6 WAN/LAN Port
7 WiFi Signal Indicator Light
8 Power/WPS LED
9 WAN/LAN LED
10 LAN LED
LED Indicators
Power/WPS
ON: The device is powered on.
OFF: The device is powered o.
WAN/LAN
ON: The ethernet port is connected.
OFF: The ethernet port is not connected.
FLASHING: Transferring data to or from a PC or phone.
WPS
BLINKING SLOWLY: The device is connecting to a PC or phone.
BLINKING RAPIDLY: The device is connecting to an AP/Router.

3
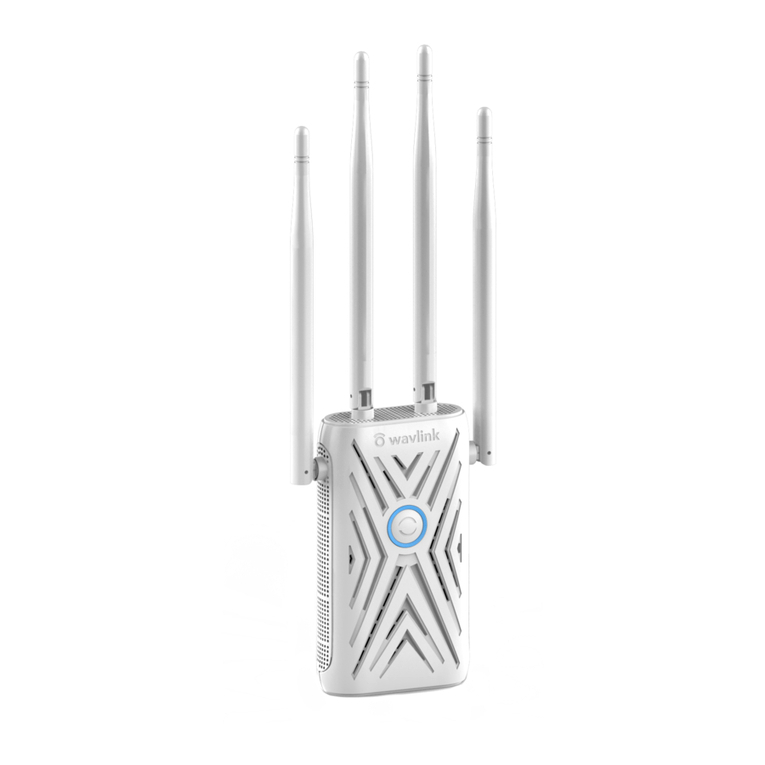
This WiFi Range Extender is designed to eliminate WiFi dead zones by
extending the wireless coverage in your home or oice. It’s easy to connect
and use, and is compatible with any WiFi router. It’s also suitable for use
with all WiFi Ikuu smart home products. There are 3 modes available,
allowing you to extend a wireless network, manage extra devices on an
existing network, or create a new wireless network.
Access Point Mode
Create a wireless network (WLAN) by connecting the extender to your
existing router using an ethernet cable. This projects a WiFi signal to a new
location.
Repeater Mode
Extend the range of your WiFi network by plugging the extender into a
power outlet within WiFi range of your existing router.
Router Mode
Manage extra devices by connecting the extender to a modem/router.
Routers can typically manage 10-20 wireless devices, and connecting the
extender as an additional router via an ethernet cable will allow you to
connect extra wireless devices.
Router/Modem
WiFi Range
Extender
Use wireless
connection
in Repeater
mode
Use wired
connection in
Access Point &
Router modes
Smartphone Ikuü WiFi
devices
Product Overview

4
WiFi Signal Status
In Repeater Mode, this indicator shows the signal strength of the host WiFi
network. In Access Point Mode and Router Mode, this indicator shows the
signal strength of its own WiFi network.
Note: To optimise signal strength while in Repeater Mode, set up the device in an area that
receives at least two bars of signal. If your signal is too weak, try setting up your device closer
to the host WiFi router. To optimise signal strength in Access Point Mode or Router Mode, refer
to Product Setup.
WiFi Signal Status LED
Mode
WiFi Signal Status LED
Description
Repeater
ON ON ON Good Signal
ON ON OFF Medium Signal
ON OFF OFF Poor Signal
Flashing OFF OFF Disconnected
192.168.10.1 192.168.10.1
Office WiFi
Wireless N
Home WiFi
Guest WiFi
Search for the network
‘Wireless-N’ on your
phone or computer.
Open your browser and
type: ‘http://ap.setup’ or
‘192.168.10.1’
Configure settings.Press the ‘Wizard’ tab.

5
Access Point Mode Setup
Before following the steps below, ensure that the extender is not
connected to a host router.
1. Plug the extender into a wall socket outlet and switch on the
wall socket.
2. Slide the mode selector switch to ‘Access Point’ and the power
switch to ‘ON’.
3. Connect to the WiFi network called ‘Wireless-N’.
4. In your web browser, type ‘http://ap.setup’ or ‘192.168.10.1’ into the
address bar. The default password is ‘admin’. If you are using your
mobile and receive any errors when accessing the Management
System in your browser, turn o your mobile data.
Note: ensure that you set up your own device SSID and password in the
management system (see p. 7).
5. Connect one end of your ethernet cable to an Ethernet or LAN port
on your router, and connect the other end of the cable to the WAN/
LAN port on the extender.
6. To connect a device to the WiFi network, open your device’s network
settings and connect to the network you have set up.
Repeater Mode Setup
Prior to setup, ensure that the host router’s WiFi network is 2.4GHz.
1. Plug the extender into a wall socket outlet and switch on the
wall socket.
2. Slide the mode selector switch to ‘Repeater’ and the power switch
to ‘ON’.
3. Connect to the WiFi network called ‘Wireless-N’.
4. In your web browser, type ‘http://ap.setup’ or ‘192.168.10.1’ into the
address bar. The default password is ‘admin’. If you are using your
mobile and receive any errors when accessing the Management
System in your browser, turn o your mobile data.

6
Router Mode Setup
1. Plug the extender into a wall socket outlet and switch on the wall
socket.
2. Slide the mode selector switch to ‘Router’ and the power switch
to ‘ON’.
3. Connect to the WiFi network called ‘Wireless-N’.
5. Select ‘Wizard’ to navigate to the setup page.
6. Select the host WiFi (existing WiFi router) from the WiFi list, then type
in the host WiFi password. Here you can also create a new network
name for extended network by changing the default SSID.
7. Press ‘Connect’ to begin the setup process. Aer loading, the device
will restart and the extended network will be ready to use.
8. To connect a device to the WiFi network, open your device’s network
settings and connect to the network you have set up.
If using the WPS Quick Connect Button:
1. Plug the extender into a wall socket outlet and switch on the wall
socket.
2. Slide the mode selector switch to ‘Repeater’ and the power switch to
‘ON’.
3. Press and hold the WPS button on the extender for 6 seconds, then
press the WPS button on the host WiFi router for 2 seconds.
Note: press the WPS button on the host WiFi router within 2 minutes of
pressing the WPS button on the extender.
The device will restart, which might take a few minutes. Aer the device
has restarted, the extended WiFi network will be ready to use.
WPS
Button

7
Accessing the Management System
To access the management system, open your web browser and visit
‘http://ap.setup’ or ‘192.168.10.1’.
Once you have finished setup in Repeater Mode or Access Point Mode, you
might find that you can no longer access the management system. This is
because your device is now connected to the internet via your router. You
can use analyser soware to identify the new IP address of your extender
in order to access the management system.
Use the blue ribbon located at the bottom of the screen to access network
information (Status), set up your device (Wizard), manage your WiFi
connection (WiFi) and adjust your settings (Setup).
Change Device SSID and WiFi Password
Select WiFi from the blue ribbon, and then select ‘WiFi Setup’ to navigate
to the setup page.
Change Password
Select Setup from the blue ribbon, and then select ‘Login Password’.
Restore Default Settings
Use a pin to press the reset button for more than 3 seconds. The extender
will reboot and restore default settings.
Using the Device Management System
4. In your web browser, type ‘http://ap.setup’ or ‘192.168.10.1’ into the
address bar. The default password is ‘admin’. If you are using your
mobile and receive any errors when accessing the Management
System in your browser, turn o your mobile data.
Note: ensure that you set up your own device SSID and password in the
management system (see p. 7).
5. Select ‘Wizard’ to navigate to the setup page, and complete the
information.
6. Connect the WAN/LAN port of the extender to the modem or host
router. The network is now ready for use.

MRIN005229/3
Warranty
Mercator guarantees this product against defects of materials and workmanship
for a period of 36 months from the date of purchase provided the product is
used for its proper purpose, in accordance with Mercator’s recommendations
and within such voltage and current limits as are specified by Mercator in
relation to the product. Mercator will at its own option and cost make good, or
replace this product with the same or similar product and return it to you, or
provide a credit for any product manufactured or supplied by it, which proves to
be defective within the limits set out above provided that no repairs, alterations
or modifications to the product have been undertaken or attempted by anyone,
other than Mercator or its authorized agents. Should you wish to make a claim
under this guarantee, the product and proof of purchase must be returned pre-
paid by you to the place of purchase.
This guarantee is in addition to and does not take away from any other rights
and remedies you may have under any relevant law.
Our goods come with guarantees that cannot be excluded under the Australian
Consumer Law. You are entitled to a replacement or refund for a major failure
and for compensation for any other reasonably foreseeable loss or damage.
You are also entitled to have the goods repaired or replaced if the goods fail to
be of acceptable quality and the failure does not amount to a major failure.
Please retain your proof of purchase for all warranty claims.
For All Sales & Warranty Enquiries
Mercator (ACN 005 946 958)
Building 3, 31-41 Joseph Street,
Blackburn North, Victoria, 3130
P.O. Box 1065, Blackburn North LPO
Blackburn North, 3130
For sales and product information telephone
Customer Service: 1300 552 255
Table of contents

