Merope K22 DPV User manual

Merope-dive-tools Compass K22 DPV
1
Manual Compass K22 DPV

Merope-dive-tools Compass K22 DPV
2
Table of contents
General remarks………………………………………………………………………………………………………… 3
1. General…………………………………………………………………………………………………….…………..4
1.1 Technical data…………………………………………………………………................................ 4
1.2 Warranty…………………………………………………………………………….………………..………..5
2. Using the compass……………………………………………………………………………………..…………5
2.1 Turn on the compass…………………………………………………………………………..………….5
2.2 Main screen…………………………………………………………………………………………..……….5
2.3 Menu structure.…………………………………………………………………....……………………….6
2.3.1 Exit menu………………………………………………………….………………………………… 6
2.3.2 Reset dive timer…………………………………………………………………………………..7
2.3.3 GPS menu………………………………………………………….…………………………………7
2.3.4 Screen settings……………………………………………………………………………………. 8
2.3.5 Turn off the compass………………………………………………………………………….. 9
2.3.6 Standby for dive………………………………………………………….……………………….10
2.3.7 Calibrate sensors………………………………………..………….…..……………………….10
2.3.8 Imperial or metric………………………………….…………………………………………….12
2.3.9 Reset and update…………………………………………….…………………………………..12
2.3.10 Compass orientation………………………………….………………………………………..12
2.3.11 Water type…………………………………………………………………………………………..13
3. Installing on the scooter………………………………………………………………………………………. 13
3.1 Magnetism……………………………………………………………………………………………………..14
4. Determine Direction ………..……………………………………………………….………………………….14
5. Charging the compass………………………………………………………….……………………………….15
6. Maintenance…………………………….…………………………………………………………………………. 16
7. Installing the K22 DPV software on computer (Windows) ………………………………. 16
8. Update software …………………………………………………………………………………………………. 22

Merope-dive-tools Compass K22 DPV
3
General remarks
Please read the instruction manual carefully before using the compass.
This compass is intended for recreational purposes only and it is not a toy.
Careful inspect/check the operation of your entire dive equipment before diving.
You are responsible for your own safety. Dive only if you are in good health.
Merope Engineering is in no way liable for any damage resulting from use of this
compass. By using this compass you agree with the general terms and conditions of
Merope Engineering.
These can be found on our website: www.merope-engineering.com.
Conformity declaration
Hereby Merope Engineering declares that the compass complies with the directive 2014/53 / EU.
The Declaration of Conformity can be downloaded from the website: merope-engineering.com.
Manufactured by:
Merope-Engineering, Nederland

Merope-dive-tools Compass K22 DPV
4
on / menu - select confirm
1. General
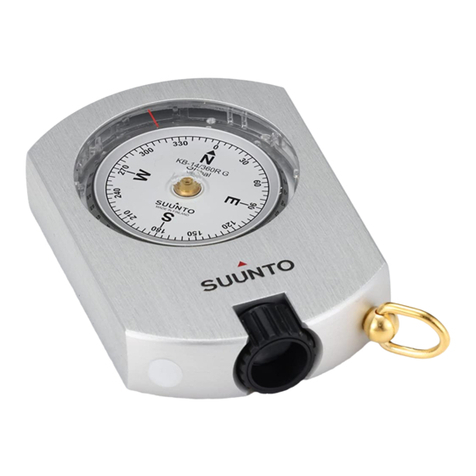
The compass is intended to be mounted on a DPV, also known as an underwater scooter. The
compass is an electronic instrument that indicates magnetic north on a display. It also contains a
depth gauge, a dive timer and a GPS receiver. This instrument is not a dive computer.
Always take a spare compass with you, because it is an electronic instrument and all
electronic instruments can malfunction.
1.1 Technical data
Operating Temperature Range
2 up to 50 ºC
Storage temperature
-5 up to 40 ºC
Compass accuracy
+/- 3 degrees; resolution 1 degree
Maximum depth
100 meter // denotation: 99.9mtr //
resolution: 10 cm
Battery
Rechargeable LiPo; operating life ca. 6 hr, fully
charged at 15ºC
Temperature range thermometer
-20 up to 50 ºC
GPS receiver
GPS/GNSS Quectel
Transmit-receiver
Bluetooth, 2.4GHz ISM band;
output power<4mW, class2
Do not exceed the maximum depth!
Disposal of the compass at end of life: All waste must be handled and disposed of in
accordance with local laws and regulations. Return the compass at the end of its
lifetime to the dive shop or a designated collection point.

Merope-dive-tools Compass K22 DPV
5
1.2 Warranty
The warranty period is 2 years after purchase of the product. The purchase invoice must be
submitted in case of a warranty claim.
What is not covered by the warranty:
-Normal wear and tear such as scratches, damage, possible discoloration;
-Damage caused by, e.g. dropping the compass or careless handling;
-Repair (or attempted repair) by an unauthorised dealer;
-Attempted self-opening of the compass;
-Use of an incorrect charger. The charger must be a CE marked USB adaptor; 5 Volt / 1
Ampere.
2. Using the compass
2.1 Turn on the compass
Briefly press the left button. A start screen appears with the question: Power on: Yes/No.
If the button corresponding to “Yes” is pressed, the compass will start up and the main screen will
appear. If no button is pressed, the compass will automatically turn off after about 5 seconds. The
name of the compass owner is also displayed during the main screen. This name can be entered
via the K22 DPV PC software.
2.2 Main screen
After start-up, the main screen appears. In this screen, several functions are active.
Top left corner: the battery status. This is divided into 5 segments. From 100% full to 10% (=almost
empty). After being 100% charged, the battery lasts approximately 6 hours. This depends on the
ambient temperature and the aging of the battery.
3 of the 5 segments are green (100-20%). Yellow means that the battery still has about 10% charge
left and is therefore almost empty. Red means the battery is empty. When the yellow indicator
has become active, there is approximately 30 minutes of battery life left. The display will
automatically dim to save energy.

Merope-dive-tools Compass K22 DPV
6
When the red indicator is activated, only a few minutes of display time remain.
Always fully charge the compass before each dive.
Right next to the battery status is the satellite indicator “S”. This indicates how many satellites are
in use by the compass. When the compass starts up, it will be set to S00. After about a minute, it
will indicate the number of satellites being received. This number can vary depending on the
strength of the satellite signal.
In the top center is the compass direction in decimal degrees. This is a decimal representation of
the round compass rose in the center.
In the top right corner is the temperature indication. It measures the temperature of the housing.
Underwater, the water temperature is indicated. The display can be changed from Celsius to
Fahrenheit in the menu.
The middle left shows a table with 4 lines. The first line is marked “A”, then 1, 2 and 3 are shown.
A = Active, the selected heading in use. 1, 2 and 3 show the previously selected headings.
This table stores multiple heading(s) selected with the right button.
In the center of the compass is the compass rose. This is an analogue representation of the north
and south directions. North is a red sphere, South is a white sphere.
In the center of this compass rose there is a tip-tilt indicator (oval sphere).
At the bottom left of the screen the dive timer (bottom timer) is located. It starts automatically
from a depth of 1.5 meters. The compass must be turned on first.
On the bottom right of the screen is the depth gauge with, on the left, an indicator that shows
whether the depth remains the same or whether you are ascending or descending.
2.3 Menu structure
Pressing the left button brings up the setup menu. There are 2 pages.
“ > ” (menu indicator) shows which menu will be selected. Select the sub menu “ > ” by using the
left push button. The right push button confirms the selection. Then you enter the submenu.
2.3.1 Exit menu: Exit this menu and go back to a previous menu, or to the main screen.

Merope-dive-tools Compass K22 DPV
7
2.3.2 Reset dive timer:
If required, the dive timer can be reset. After the reset this timer will be set to 000.00 minutes.
The dive timer will count the number of minutes and will show, for example, 075:12. This means
that you have dived for 75 minutes and 12 seconds.
2.3.3 GPS menu:
Load GPS position:
This function shows the GPS positions that have been uploaded to the compass. Uploading is done
via the Windows program: K22 DPV. Here you can put known GPS locations (eg. wreck locations)
in the table and upload them to the compass.
Waypoints:
- Above water: use the active GPS location as the starting point. Then choose the destination
from the list of GPS points.
- Underwater: choose a previously entered GPS point from the list. This point must of course
correspond to the current location. Then select the destination.
The route can be started. Once arrived at the destination, a new location can be selected (under
water). You will be asked whether the current location should be used as the starting point. Answer
with “yes”. The new route is shown. Make sure that this starting point is the actual GPS point.
If you answer “no”, the compass returns to the main menu. If necessary, you can ascend to surface
for an active GPS location and plan a new route.

Merope-dive-tools Compass K22 DPV
8
Save GPS position:
Here the current GPS position can be saved in the compass. The coordinate will be saved at the
selected position.
A new coordinate can be saved at any position, overwriting the old position.
GPS status:
The built-in GPS receiver displays the number of satellites received and the number of satellites
used for positioning.
2.3.4 Screen settings
Rotate screen:
The display is rotated 180 degrees.

Merope-dive-tools Compass K22 DPV
9
Brightness:
5 settings: 100%, 80% ,60%, 40% and 20%. “*” indicates the active setting.
Set colour:
Choose one of the colours from the list. The active colour is used for all indications, except for the
the compass rose colours.
Switch buttons
Selecting the menus and confirming them can be reversed using the switch buttons function. The
on-off button always remains active under the left button (buttons on top of the compass).
2.3.5 Turn off compass:
This turns off the compass.

Merope-dive-tools Compass K22 DPV
10
2.3.6 Standby for dive:
The screen turns off to save power. The compass remains active in the background. At a depth of
about 30 cm, the display turns on again automatically. Or when a button is pressed.
2.3.7 Calibrate sensors
Calibrate compass
This function is intended to calibrate the compass sensor. This is done on a calibrated horizontal
plate and normally does not need to be repeated.
Calibration by the end user may only be done when a perfectly horizontal plate (in x-
and y- direction) is available.
Please note that there is no magnetic influence by e.g. metals, magnets, electrical
appliances, mobile phones, etc.
Calibrate only on a perfectly horizontal surface; use a spirit level for this!!! Otherwise
there will be a deviation in the purity of the compass.
Follow the instructions for calibrating the compass and save the values.
→→→

Merope-dive-tools Compass K22 DPV
11
→→
Calibrate depth
The depth indication also responds to air pressure/atmospheric pressure. Therefore, it is possible
that the depth display does not show 00.0 when switched on. But for instance on 00.2. This can be
reset to 00.0 in this menu.
Raw sensor values and IMU sensor values
This is digital output from the MEMS sensor. This is only intended for service point maintenance
applications.
Set declination
Magnetic north and true north (geographic poles) are not the same. The value varies per location
and can be positive or negative. Also, this value varies slowly over time.
For example in 2021:
- the Netherlands + 1.88//Germany +3.1//United Kingdom +0.3//Belgium +1.92//France +2.3
This value needs to be adjusted according to the location of the dive. There are several
websites where these values can be found. (“declination magnetic field calculators”)
If the declination value is not entered or not entered correctly, the north will differ from
the actual north.

Merope-dive-tools Compass K22 DPV
12
2.3.8 Imperial or metric
Select the applicable unit system here.
2.3.9 Reset and update
In this menu Activate Bluetooth and Reset factory values.
Activate Bluetooth
After activation, the Bluetooth module “Listening to Bluetooth” is turned on and the compass
becomes visible on the PC. The K22 DPV software can now be connected to the compass.
Reset factory values
This function resets the following values to the factory settings:
Metric/screen orientation/screen colour/compass&barometer calibration/brightness 100%/
declination = 0
Update firmware
Activate Bluetooth and pair the compass with the K22 DPV PC software. For further steps: see
chapter 8 "Update firmware".
2.3.10 Compass orientation
Choose here whether the compass is to be used horizontally or vertically. This is important as the
tip tilt compensation is calculated accordingly.
The tip tilt has a compensation range of + and -90 degrees. If the compass is outside this range,
the compass rose turns red. This indicates that the compass can no longer compensate for tip and
tilt.

Merope-dive-tools Compass K22 DPV
13
The Auto detect function automatically checks the position of the compass during start-up.
2.3.11 Water type
Select here whether it is fresh or salt water.
3. Installing the compass on the scooter
Mount the compass at a place on the scooter where it is easy to read and operate. A good spot is
at the trigger handle.
An aluminium bracket with adapter block to mount the compass on the trigger handle of the
scooter is available separately.

Merope-dive-tools Compass K22 DPV
14
3.1 Magnetism
As the compass reacts to magnetism, it will also react to other magnetic fields, caused e.g. by the
current through the motor cables or the magnets in the motor. The location of the compass should
be chosen so that its influence is minimal. Testing can be done by giving more or less “throttle”
You can see the influence of the magnetism of the motor or cables.
When mounting the compass, make sure that no magnetic metals are used. Some
stainless steel variants are magnetic. Ordinary steel is unsuitable.
After mounting, the scooter balance must be checked in the water.
4. Determine direction
Make sure the double line of the compass rose is parallel to the length of the scooter.
The red dot indicates north; the white dot opposite, the south.
Manual heading function:
By using the manual heading function, the direction can easily be fixed in the compass rose.
Do this as follows:
Point the scooter in the direction of the object you want to navigate to. Press the right button
once. A yellow dot will appear in the compass rose. At the same time, the heading is digitally added
in the table under ”A”.
The yellow dot must remain at the top of the double line. This is the direction of the selected
course/heading.
GPS heading function:
This function only works if GPS signals can be received. To do this, the compass must have an
unobstructed view of the sky. Preferably a range as large as possible. For example, 360 degrees
unobstructed view.
This means that the GPS signal cannot be received under water or in a cave, for
example.
If enough GPS satellites are received, “Sxx” will appear in the top left corner of the main screen. If
there are more than 4 satellites in this field, positioning is possible. More satellites makes
positioning more accurate.

Merope-dive-tools Compass K22 DPV
15
Bad GPS signal Good GPS signal
When a location is selected from the saved GPS locations, the
heading will be set automatically (yellow dot). The distance to the
object is also displayed under the temperature indication: D xxxxm.
For example: D 0179m. This means that the distance to the selected
GPS location is 179 meters.
The GPS heading can be chosen both above and under water. For the
correct distance to the target, GPS reception must be available.
After selecting the GPS heading above water, you can dive. The compass heading remains active
under water.
The distance will only change if a GPS signal is active. If there is no GPS signal, the
distance will remain unchanged.
The heading dot, the heading under “A” and the distance are shown in yellow.
When D 9999m is displayed, this means that the distance to the object is greater than 9999metres.
A new heading can be entered by pressing the right button twice. The active heading is moved
down one position and to make room for the new heading.
If the GPS heading is active and the right button is pressed, the
compass will ask if the heading should be stopped and a new one
chosen. “Stop tracking? 1,2,3,4,5 ”
If you choose “stop”, the yellow heading disappears from the
screen.
5. Charging the compass
1 2 3

Merope-dive-tools Compass K22 DPV
16
Press the charging clip onto the compass. The two gold-coloured pins must make contact with the
buttons. See the pictures above for attaching 1->2->3. The procedure for detaching the clip is
reversed: 3->2->1. Do not move the clip while it is attached. This may damage the spring-loaded
pins.
Then connect the mini USB cable to an USB charger. When the battery is being charged, a charging
screen appears on the screen. The charging percentage is indicated. This screen turns off after
about 2 minutes. Charging continues until the battery is full. After that, charging automatically
switches off. Charging a completely empty battery takes approx. 6-8 hours.
Tapping the housing during charging, will bring up the charging screen for a short time.
Charging the battery only works when the ambient temperature is below 30 ºC.
If the battery is/will be full and the charging clip is used, the charging screen will not appear.
Only use a CE marked charger that delivers a minimum current of 1 Ampere at a voltage
of 5 Volt.
A higher voltage than 5 Volts will damage the compass.
6. Maintenance
After the dive: Rinse the compass under tap water or in a container of clean tap water.
7. Installing the K22 DPV DPV software on computer (Windows)
This software is required to transfer the GPS coordinates to the K22 DPV compass.
This manual assumes a computer with Windows 10 with a correctly working Bluetooth
module.
Turn on the compass and go to Menu -> Reset and update -> Activate Bluetooth. The screen now
will now read: Listening to Bluetooth.

Merope-dive-tools Compass K22 DPV
17
Ensure that the Bluetooth module of the computer or laptop is turned on. Go to the Bluetooth
menu on the computer/laptop and select ‘Devices’.
Then choose ‘Bluetooth & other devices’and click ‘Add Bluetooth or other device’.

Merope-dive-tools Compass K22 DPV
18
Click on ‘Bluetooth’:
The computer detects ‘Mantis’. Click ‘Mantis’to add the device.
Enter the password. The password is 0000 and cannot be changed by the user. Click ‘Connect’to
establish the connection.

Merope-dive-tools Compass K22 DPV
19
After activating the connection, Mantis (K22 DPV) is paired. The Bluetooth connection is now ready
for use.
Then select ‘More Bluetooth options’.
Then select the ‘COM ports’tab to find out the ports connected to the K22 DPV. The outgoing
communication port is the port with which the K22 DPV communicates. This COM port number
varies in Windows.

Merope-dive-tools Compass K22 DPV
20
Now start the K22 DPV.exe program and follow the next steps:
1. Click on the drop down menu to choose a communication port and select the K22 DPV
‘outgoing’communication port. In this example COM3.
2. Click on ‘Connect’to activate the Bluetooth connection.
Upon successful connection, the ‘Connect’button will change to ‘Disconnect’.
Table of contents

