manuals.online logo
Brands
  1. Home
  2. •
  3. Brands
  4. •
  5. Meyer
  6. •
  7. Outdoor Light
  8. •
  9. Meyer Superlight LED 3 User manual

Meyer Superlight LED 3 User manual

Schutzart - Protection IP 67
Schutzklasse - Safety Class I
.
Stemmessiepener Weg 5 D-58675 Hemer
Maximale Belastung von Leitungsschutzautomaten / Maximum loading of automatic circuit breakers
Sicherungsautomat / automatic circuit breaker type:
Kabelquerschnitt [mm²] / cable cross section [mm²]: 1,5 1,5
Anzahl Leuchten / number of luminaires:
C16 B16
22 11
8 887 0.. .40 8 887 0.. .50
8 887 0.. .10
LED outdoor luminaire.
MOUNTING INSTRUCTIONS
Connection of light fitting in compliance with the
prevailing regulations in your country.
Luminaire for non-protected outdoor installation.
Luminaire is suitable for mounting on
normal inflammable surfaces.
Disconnect from power supply before opening
light fitting.
Remove front frame from housing by loosening
the 4 rear screws.
Remove the sheathing from the last 10 cm
of cable and pass cable through cable gland.
Take care to use the correct gasket to suit the
diameter of cable being used. Set of gaskets
supplied with luminaire. After making electrical
connection, place front frame with glass onto
housing and tighten the screws crosswise and with
3,6 Nm torque. Aim luminaire and tighten the
screws in the mounting bracket with 3,6 Nm.
Additional grub screws ( ) should be tightened
with 3,6 Nm torque to ensure that aimed position
is maintained. The glass is tempered safety glass.
Luminaire may be operated only if all protective
covers are in place.
Part number Weight Projected area
Ensure that the minimum distance between
luminaire and illuminated surface is observed.
A
8 887 0.. ... 5,4 kg 0,08 m²
The light source contained in this
luminaire shall only be replaced by
the manufacturer or his service agent or a similar
qualified person.
LED-Leuchte.
MONTAGEHINWEISE
Anschluß der Leuchte nach VDE 0100.
Scheinwerfer für ungeschützte Anlagen.
Leuchte ist geeignet für die Montage auf
normal entflammbaren Baustoffen.
Vor dem Öffnen der Leuchte Netzspannung
trennen !
Rahmen durch Lösen der vier hinteren Schrauben
vom Gehäuse nehmen.
Netzanschlußleitung 10 cm abmanteln
und durch die Kabelverschraubung führen,
dabei passenden Dichtungssatz (Lieferumfang)
wählen.
Nach dem elektrischen Anschluss Rahmen
mit Glas aufsetzen und Schrauben gleichmäßig
über Kreuz anziehen:
Drehmoment: 3,6 Nm.
Leuchte ausrichten und Schrauben am Bügel
ebenfalls mit 3,6 Nm anziehen.
Zusätzliche Gewindestifte ( ) zur Sicherung der
eingestellten Ausrichtung mit 3,6 Nm anziehen.
Das Glas ist ein Einscheiben-Sicherheits-Hartglas.
Die Leuchte darf nur mit ihren vollständigen
Schutzabdeckungen betrieben werden.
Leuchte Gewicht Windangriffsfläche
8 887 0.. ... 5,4 kg 0,08 m²
Die in dieser Leuchte eingebaute
Lichtquelle darf nur durch den
Hersteller oder seinen Kundendienst oder eine
ähnlich qualifizierte Person ersetzt werden.
A
In Strahlrichtung den Mindestabstand zu
angestrahlten Flächen einhalten !
min 0,5 m min 0,5 m
Superlight LED 3
8 887 0.. 010
8 887 0.. 040
8 887 0.. 050
8 887 0.. 110
8 887 0.. 140
8 887 0.. 150
8 887 0.. 180
8 887 0.. 190
8 887 0.. 1.. ( DALI )
DALI dimmbare Leuchten:
DALI dimmable luminaire:
Steueradern für die Dimmung gemäß
Klemmenbeschriftung anschließen.
Die DALI-Steuerleitung ist gegenüber der
Netzleitung basisisoliert.
Connect the wires for the dimming system
according to the marking on the terminal block.
The DALI control wire is equipped with basic
insulation against the power supply cables.
280
108
40
74
50-70
8,5 17
Schutzart - Protection IP 65
Schutzklasse - Safety Class I
.
Stemmessiepener Weg 5 D-58675 Hemer
LED outdoor luminaire.
MOUNTING INSTRUCTIONS
Connection of light fitting in compliance with the
prevailing regulations in your country.
Luminaire for non-protected outdoor installation.
Luminaire is suitable for mounting on
normal inflammable surfaces.
Disconnect from power supply before opening
light fitting.
Aim luminaire and tighten the screws in the
mounting bracket with 3,6 Nm.
Additional grub screws ( ) should be tightened
with 3,6 Nm torque to ensure that aimed position
is maintained. The glass is tempered safety glass.
Luminaire may be operated only if all protective
covers are in place.
Part number Weight Projected area
Ensure that the minimum distance between
luminaire and illuminated surface is observed.
A
Loosen the set screws on the wall box and
remove the box.
Install the wall box in the required position.
The information sign "bottom" inside the wall box
refers to the standard installation of the light fitting
as per illustration. Make the electrical connection.
After making the electrical connection,
ensure that the gasket is correctly in place.
Connection of the grounded wire must be done at
the head contact binder.
Put luminaire on wall box and arrange electrical
connection by plug. Fix set screws with 4,5 Nm.
8 887 1.. ... 6,4 kg 0,10 m²
The light source contained in this
luminaire shall only be replaced by
the manufacturer or his service agent or a similar
qualified person.
LED-Leuchte.
MONTAGEHINWEISE
Anschluß der Leuchte nach VDE 0100.
Scheinwerfer für ungeschützte Anlagen.
Leuchte ist geeignet für die Montage auf
normal entflammbaren Baustoffen.
Vor dem Öffnen der Leuchte Netzspannung
trennen !
Gewindestifte an der Wanddose lösen und
Montagedose entnehmen.
Montagedose am Montageort anbringen.
Hinweisschild "UNTEN" in der Montagedose gilt für
normale Gebrauchslage der Leuchte (wie Abb.).
Elektrischen Anschluss vornehmen.
Auf richtigen Sitz der elektrischen Zuleitung
in den Dichtungen achten !
Der Erdleiteranschluß muss an der freien
Kopfkontaktklemme erfolgen.
Beim Aufsetzen der Leuchte auf die Montagedose
elektrische Verbindung durch Stecker herstellen.
Gewindestifte mit 4,5 Nm anziehen.
Leuchte ausrichten und Schrauben am Bügel mit
3,6 Nm anziehen.
Zusätzliche Gewindestifte ( ) zur Sicherung der
eingestellten Ausrichtung mit 3,6 Nm anziehen.
Das Glas ist ein Einscheiben-Sicherheits-Hartglas.
Die Leuchte darf nur mit ihren vollständigen
Schutzabdeckungen betrieben werden.
Leuchte Gewicht Windangriffsfläche
8 887 1.. ... 6,4 kg 0,10 m²
Die in dieser Leuchte eingebaute
Lichtquelle darf nur durch den
Hersteller oder seinen Kundendienst oder eine
ähnlich qualifizierte Person ersetzt werden.
A
In Strahlrichtung den Mindestabstand zu
angestrahlten Flächen einhalten !
Maximale Belastung von Leitungsschutzautomaten / Maximum loading of automatic circuit breakers
Sicherungsautomat / automatic circuit breaker type:
Kabelquerschnitt [mm²] / cable cross section [mm²]: 1,5 1,5
Anzahl Leuchten / number of luminaires:
C16 B16
22 11
min 0,5 m min 0,5 m
Superlight LED 3
mit Ausleger
8 887 1.. 1.. ( DALI )
DALI dimmbare Leuchten:
DALI dimmable luminaire:
Steueradern für die Dimmung gemäß
Klemmenbeschriftung anschließen.
Die DALI-Steuerleitung ist gegenüber der
Netzleitung basisisoliert.
Connect the wires for the dimming system
according to the marking on the terminal block.
The DALI control wire is equipped with basic
insulation against the power supply cables.
Zur Vermeidung von Gefährdungen darf eine
beschädigte äußere flexible Leitung dieser Leuchte
ausschließlich vom Hersteller, seinem
Servicevertreter oder einer vergleichbaren
Fachkraft ausgetauscht werden.
To avoid danger of electrical shock, any damaged
exterior flexible cable should be changed only by
the manufacturer, his technical representative or
other specialised technical personnel.
8 887 1.. 010
8 887 1.. 040
8 887 1.. 050
8 887 1.. 110
8 887 1.. 140
8 887 1.. 150
8 887 1.. 180
8 887 1.. 190

Other Meyer Outdoor Light manuals

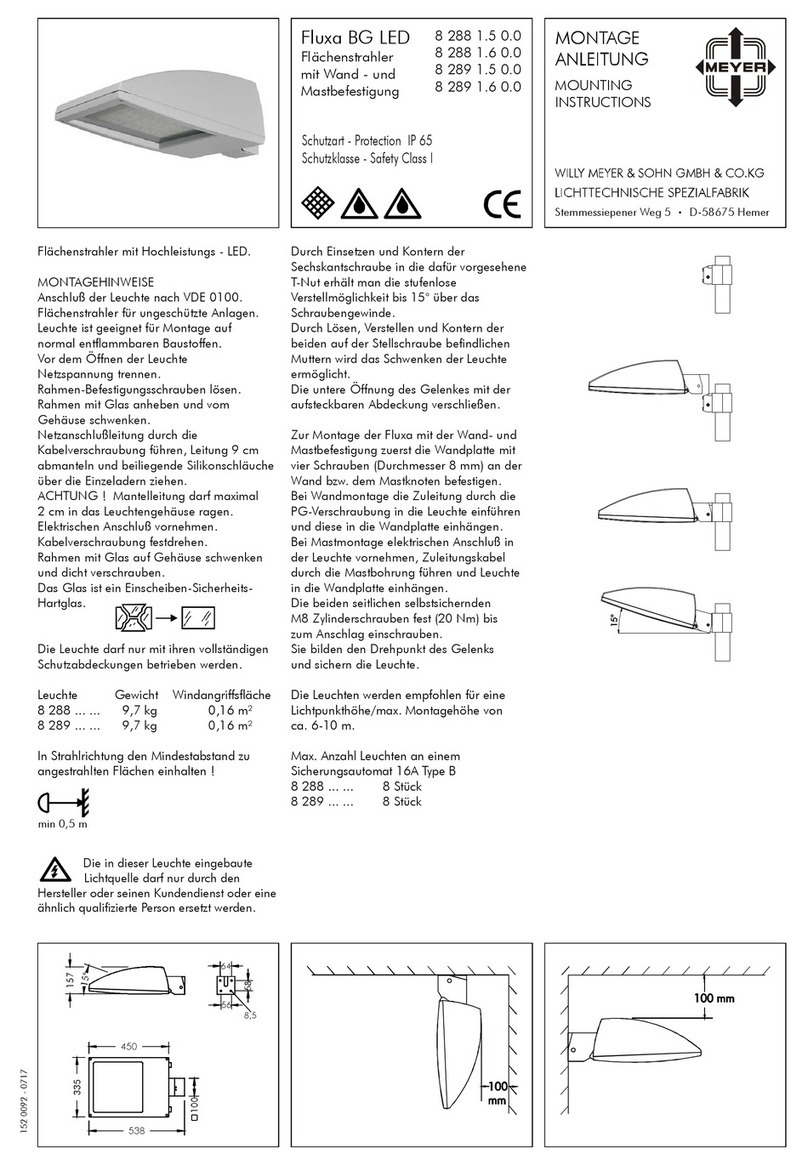
Meyer Fluxa BG LED User manual

Meyer

Meyer Fluxa BG LED User manual

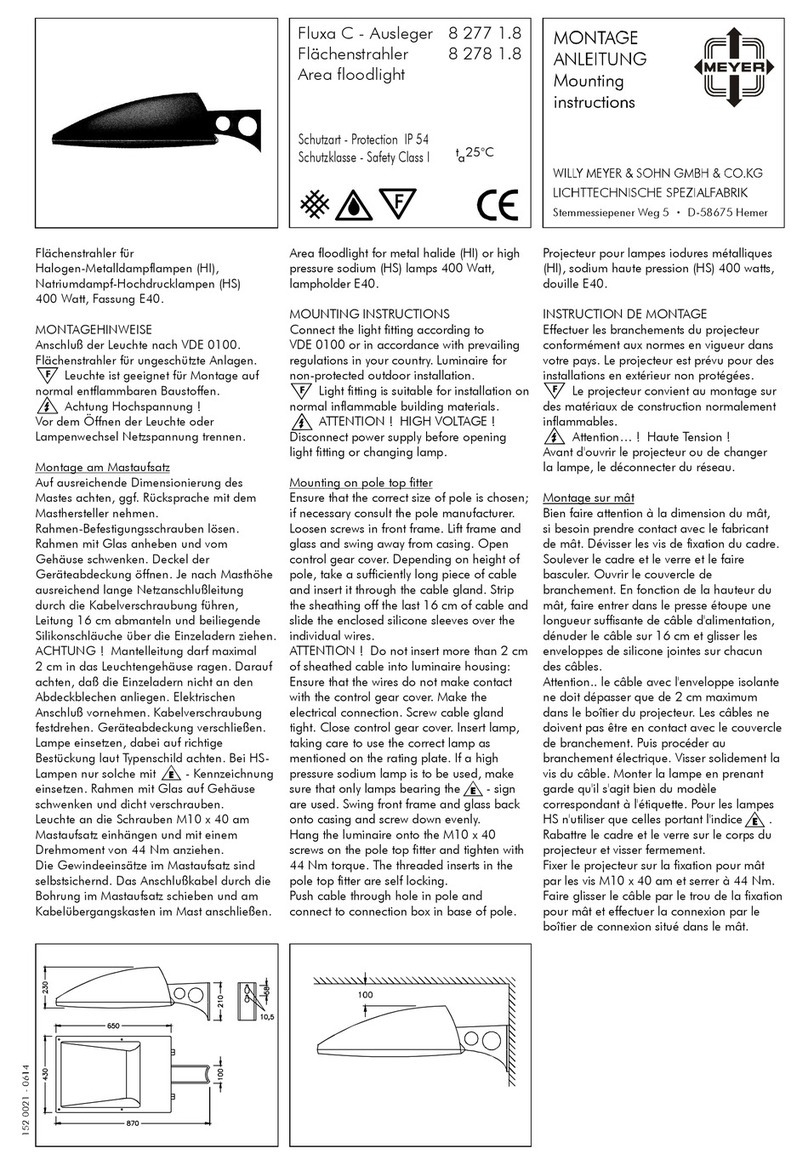
Meyer Fluxa C 8 277 1.8 User manual

Meyer

Meyer Fluxa C 8 277 1.8 User manual

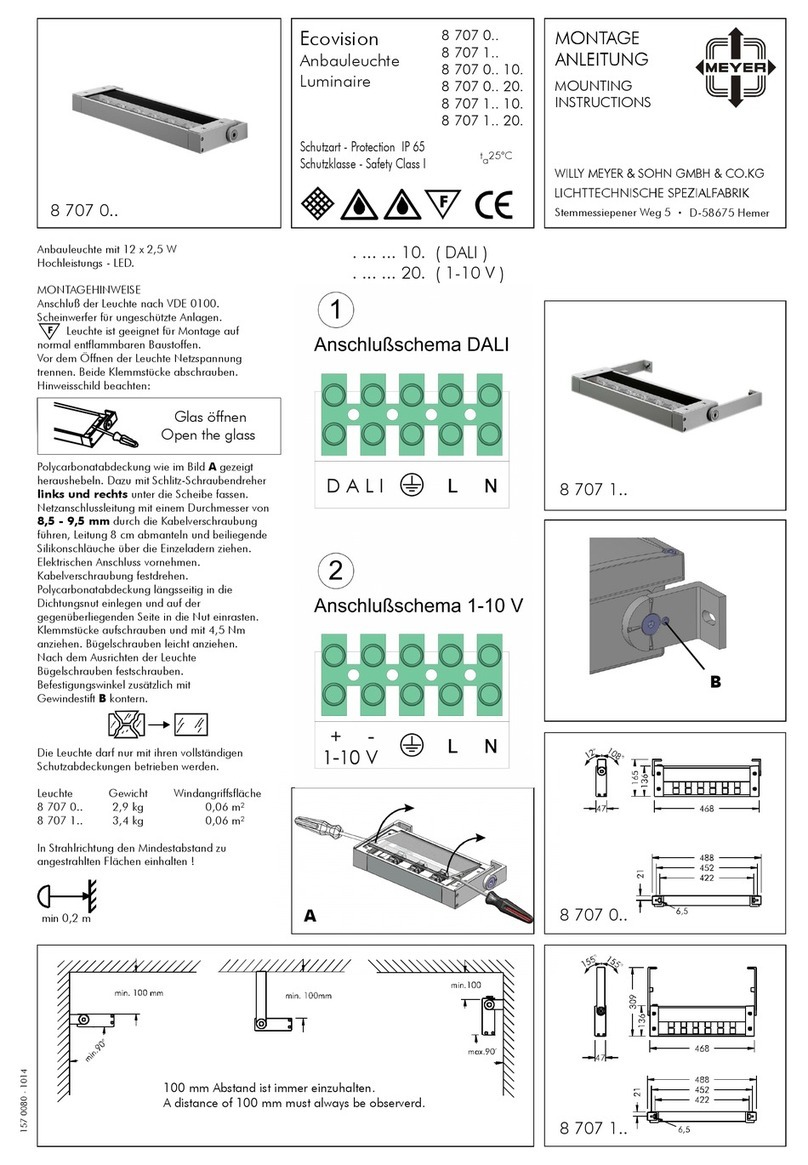
Meyer 8 707 0 Series User manual

Meyer

Meyer 8 707 0 Series User manual

Meyer 8 730 1 Series User manual

Meyer

Meyer 8 730 1 Series User manual

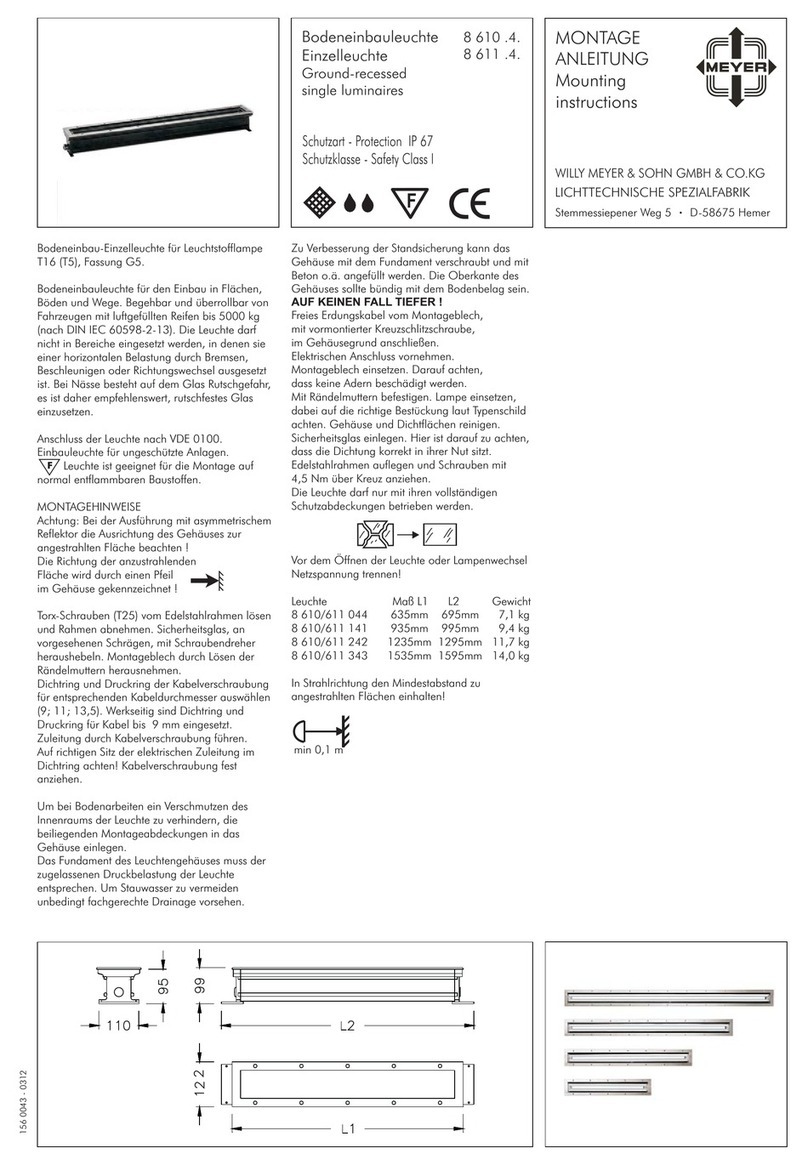
Meyer 8 610 4 Series User manual

Meyer

Meyer 8 610 4 Series User manual

Popular Outdoor Light manuals by other brands

Safavieh Lighting BAILEY LIT4511 quick start guide

Safavieh Lighting

Safavieh Lighting BAILEY LIT4511 quick start guide

Qazqa Empoli FL Brass CCT 2 instruction manual

Qazqa

Qazqa Empoli FL Brass CCT 2 instruction manual

IKEA Strala manual

IKEA

IKEA Strala manual

EINHELL TC-CL 18/1800 Li Original operating instructions

EINHELL

EINHELL TC-CL 18/1800 Li Original operating instructions

Patriot Lighting DH8090 quick start guide

Patriot Lighting

Patriot Lighting DH8090 quick start guide

LEHNER 5789503 Using instruction

LEHNER

LEHNER 5789503 Using instruction

Philips 169289316 user manual

Philips

Philips 169289316 user manual

IBEX Nox S user manual

IBEX

IBEX Nox S user manual

Sistemalux MINI LOOK Installation sheet

Sistemalux

Sistemalux MINI LOOK Installation sheet

LUCCI NEVADA installation instructions

LUCCI

LUCCI NEVADA installation instructions

Dewenwils HNLA19A instruction manual

Dewenwils

Dewenwils HNLA19A instruction manual

HEPER HANDRA Forward LH5006.595-US Installation & maintenance instructions

HEPER

HEPER HANDRA Forward LH5006.595-US Installation & maintenance instructions

Haute Decor DCYD0013 quick start guide

Haute Decor

Haute Decor DCYD0013 quick start guide

Maximus Smart Security Light instruction manual

Maximus

Maximus Smart Security Light instruction manual

RH PYRAMID LINEN SHADE TELESCOPING FLOOR LAMP manual

RH

RH PYRAMID LINEN SHADE TELESCOPING FLOOR LAMP manual

alverlamp LEX06001 quick start guide

alverlamp

alverlamp LEX06001 quick start guide

JONATHAN Y JYL6203A quick start guide

JONATHAN Y

JONATHAN Y JYL6203A quick start guide

Ingo Maurer The MaMo Nouchies Wo-Tum-Bu 1 Mounting instructions

Ingo Maurer

Ingo Maurer The MaMo Nouchies Wo-Tum-Bu 1 Mounting instructions

manuals.online logo
manuals.online logoBrands
  • About & Mission
  • Contact us
  • Privacy Policy
  • Terms and Conditions

Copyright 2025 Manuals.Online. All Rights Reserved.