Mic-Fi MicFiBOX User manual

USB/WiFi Streamer
Instruction Manual
Contents
•Features……………………………………...1
•Package Contents………………................….2
•Product overview and function….………….3
•Led indicators………………… ………...….4
•How to connect the USB/WiFi Streamer..…..5
•Download and installation App……….……6
•How to use “MicFi” app………………….....10

· INTRODUCTION
Wi-Fi Digital box streamer is a very innovative device that allows to stream from USB to Wi-
Fi all kind of images taken from a digital USB device. It can be used with digital USB
microscopes (i.e. Dino-Lite) but even with other devices like USB endoscopes or USB eyes. It
breaks the conception of traditional USB digital microscope to realize the following
functions: measurement, conservation, copy and transfer of images and video which are
difficult for a traditional microscope.
You can use Wi-Fi Digital box even as power bank to charge your smartphone
· Features
Operation system
Windows, OS X, iOS, Android
Protocol IEEE 802.11 b/g/n standard compliants
Ditanza di Trasmissione Wireless Up to 5 m
Transmit power 11n HT40 MCS7: +13 dBm, 11b CCK: +18 dBM, 11g
OFDM: +15 dBm
Data rate 802.11n: up to 150Mbps , 802.11b: 1, 2, 5,5,
11Mbps , 802.11g: 6, 9, 12, 18, 24, 36, 48, 54Mbps
Frequency range
2.400 ~ 2.4835GHz
Power consumption Max 2.5W
Li-ion battery Continuous Working Time—Appx.3 Hours, Full
—
Appx.3 Hours
Power source DC5.0V/1A
1

·DINO-LITE COMPATIBILITY
Series Resolution Led
Premier 1.3 Mpixels
NO
Premier R4
1.3 Mpixels
YES
Premier
5 Mpixels
YES
Edge
1.3 Mpixels SXGA
YES
Dino-Lite is a registered trade mark from third parties and is mentioned for descriptive use only
· PACKAGE CONTENTS
USB/WiFi Streamer Power source (5V, DC 1A) USB cable
2

· PRODUCT OVERVIEW & FUNCTION
1. Mini USB port – This allows to be connected a mini USB cable carrying power from
power source.
2. Power Switch – This power switch turns On and OFF the USB/WiFi Streamer.
3. WiFi Indicator – Read the information in the “LED indicators” section of this manual.
4. Charge Indicator – Read the information in the “LED indicators” section of this manual.
5. Battery Indicator – Read the information in the “LED indicators” section of this manual.
6. USB Interface – This allows to connect USB microscopes, endoscopes and others USB
devices
3

· LED INDICATOR
LED COLOR STATUS DESCRIPTION
Charege Indicator
NO light
OFF
The device is powered off
or otherwise is not getting
power
Charege Indicator
GREEN
SOLID
The battery is charging
WiFi Indicator
NO light
OFF
The device is powered off
WiFi Indicator
BLUE
BLINKING
The device is trasmitting or
receiving data
WiFi Indicator
BLUE
SOLID
The device is powered on
but is not transmitting or
receiving data
Battery Indicator
NO light
OFF
The device is powered off
or otherwise is not getting
power
Battery Indicator
ORANGE
BLINKING
The battery needs urgent
charge
Battery Indicator
ORANGE
SOLID
The device is powered on or
it is charging
4

· HOW TO CONNECT USB/WIFI STREAMER
1. Connect the mini USB cable to USB/WiFi Streamer and to power source.
PLEASE MAKE A CHARGE OF AT LEAST 3HOURS.
DO NOT USE USB/WIFI STRAMER during the charge of the battery
2. Disconnect USB cable for the charge the battery and connect your USB device to
USB interface ( position n.6) and power ON the USB/WiFi Streamer by Power
switch (position n.2)
5
· Download the app and install it
1. Install:
a) For iPad and iPhone:Search “Mic-Fi” in App Store to download and install it.
b) For Smart-Phone and Tablet Android: Search “Mic-Fi” in Google Play to
download and install it.
c) For Windows and Mac PC: Download the Mic-Fi Software by
www.mic-fi.com
2. After powered ON the USB/WIFI Streamer, wait for ~20 seconds until the led of Wi-Fi
indicator are solid.
3. Check the wireless connection on your Phone/Tablet or PC and a list of available
networks will appear. Select the SSID “Wi-Fi2SCOPE_xxxxxx” network from the list to
connect; the network “Wi-Fi2SCOPE_xxxxxx” requires a password: enter the password
“12345678” and click Ok.
4. Once connected, please wait for about 5 seconds to open the “Mic-Fi” application to
see your images. If there is no video display, please close and restart “Mic-Fi” app again.
The Wi-Fi indicator LED flashes and video stream signal should be displayed in the
app. Video streaming can be broadcasted to many devices, but the frame rate of live
video will decrease as the number of receiving devices increase.
Setting for Internet and Microscope’s Wi-Fi Connection at the same time
You can use the Wi-Fi network of the microscope and that of the PC / SmartPhone / Tablet at the same time
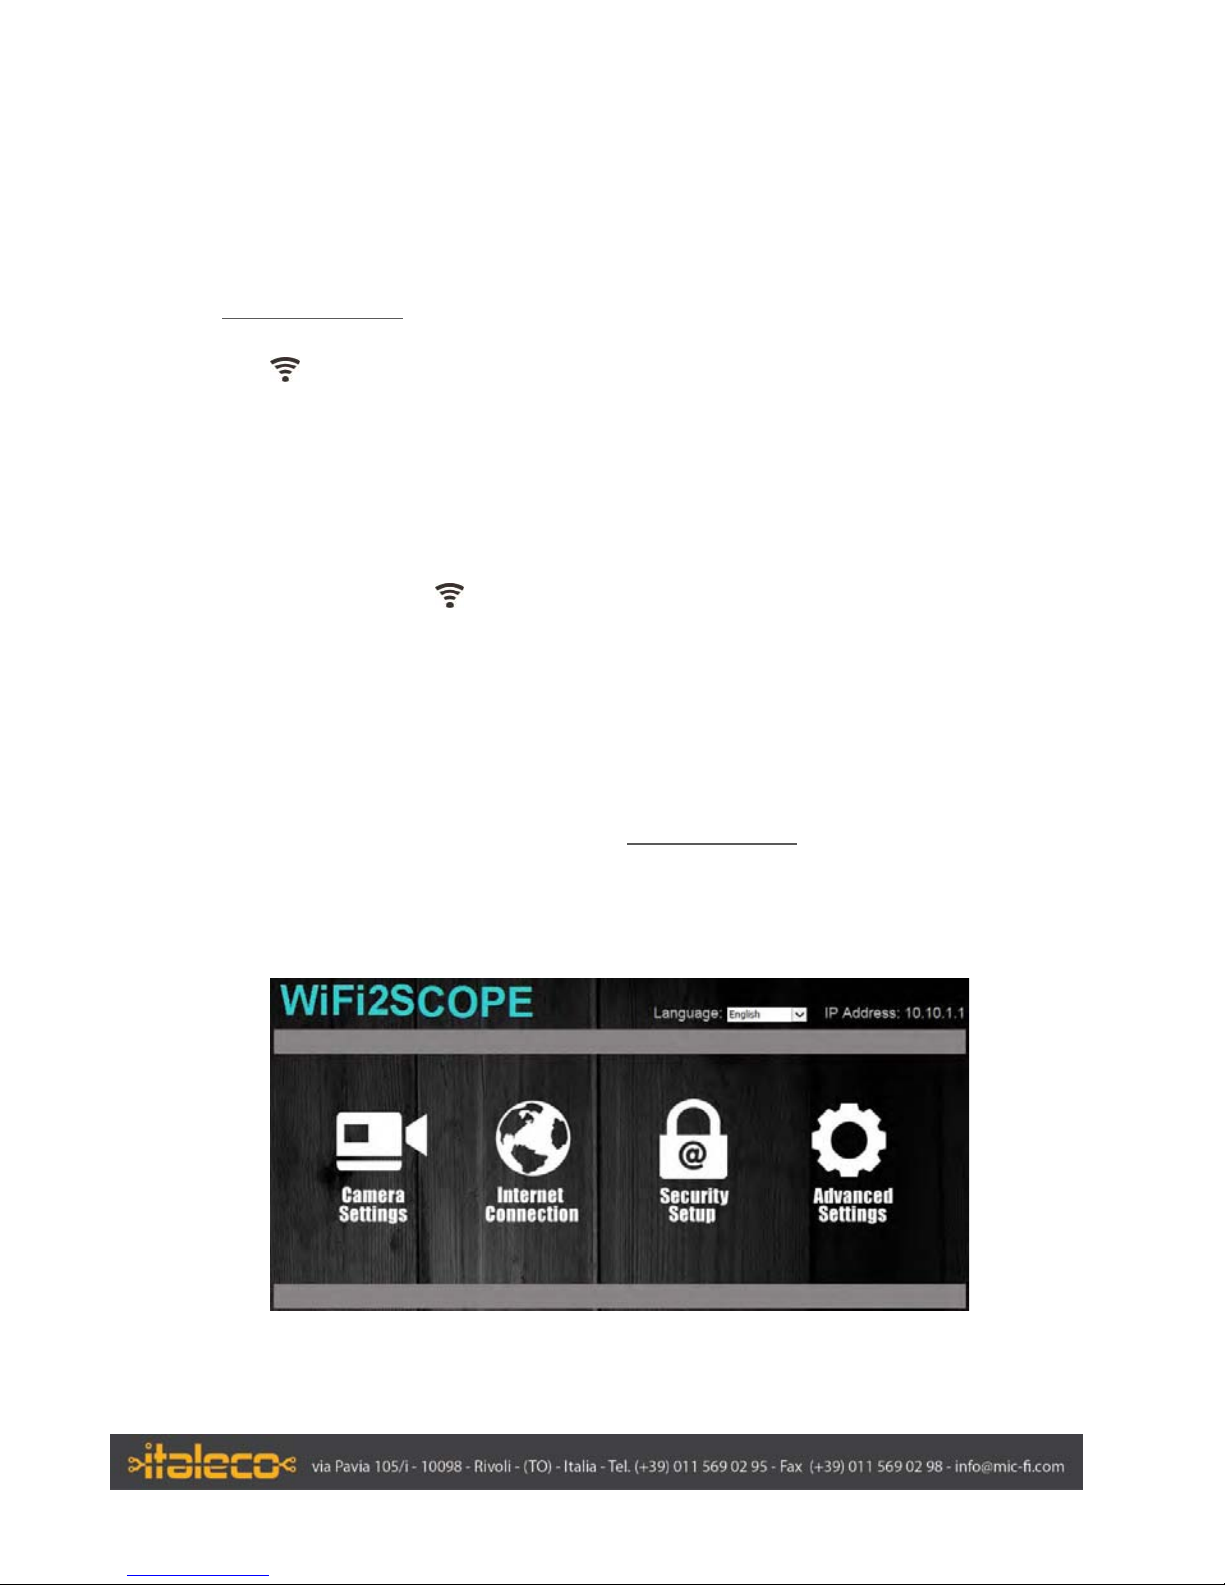
1. To access the internet by Wi-Fi connection at the same time the Wi-Fi microscope is
working, open an internet browser, input http://10.10.1.1 and click “enter”. A pop-up
window will require you to enter a username and password, please enter: admin and
admin, and then this window should appear:
6
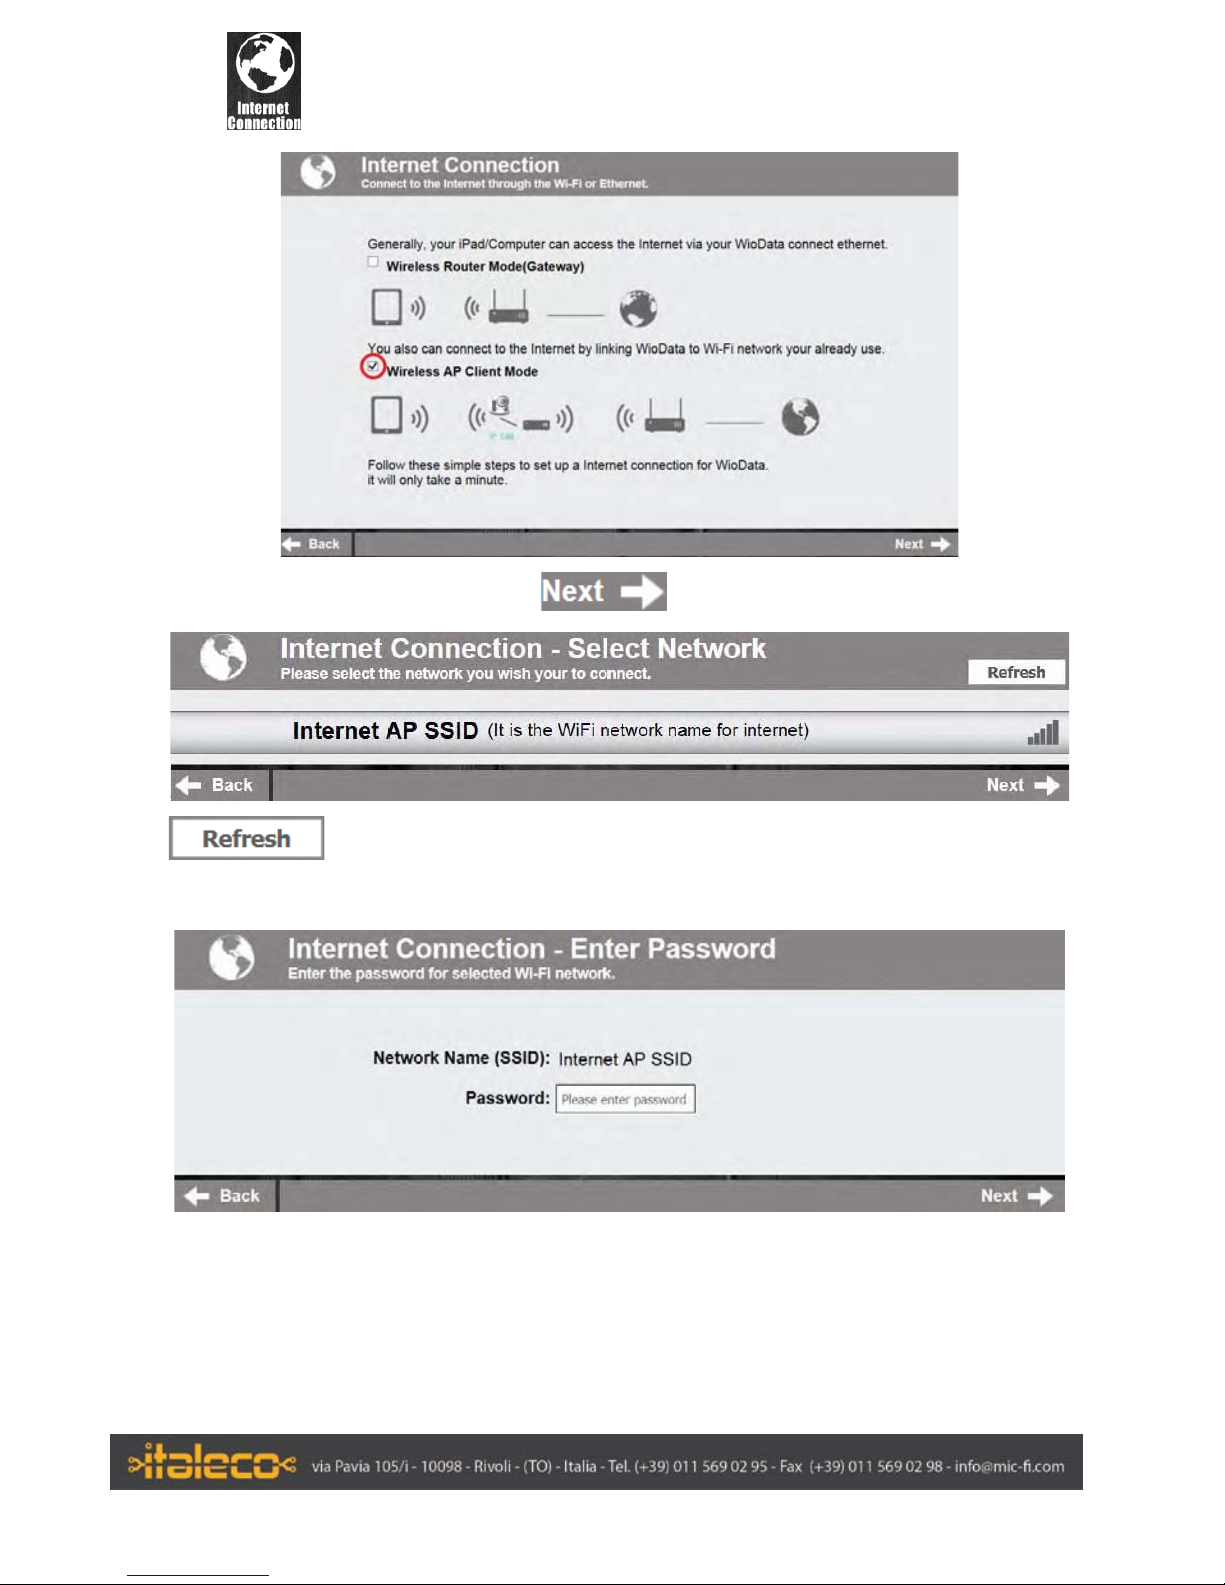
2. Click in the window to pop-up the screen:
Select “Wireless AP Client Mode”, click to pop-up the screen:
Click till your destre network SSID appears, and click it to pop-up the
screen:
Insert the password and click “Next”. Now you can use USB/WIFI streamer and Internet at
the same time
7

WiFi: Security setup
Open an internet browser, input http://10.10.1.1
and click “enter”. A pop-up window will
require you to enter a username and password, please enter: admin and admin, and then
this window should appear:
Click on
8

Click “Network Security Settings” to pop-up the screen on the right.
Enter your desired Network Name (SSID) and password in “WPA-PSK Key” and “Re-Enter”,
and click “Next”. The setting is done, now you can re-connect the new SSID Wi-Fi by
entering the new password.
9

“MicFi” UTILIZZO DELL’APPLICAZIONE
Note: First to open the Mic-Fi app, connect the Wi-Fi microscope
“MicFi” on iPad/iPhone
Search “MicFi” in App Store to download and install it
Click the icon to display video
Warm-up Tips: If the live video is black or slow, please restart “Mic-Fi” app again.
Capture photo or record video (The pixel resolution has to be set at 640x480 when
recording video).
Videos and photos folder
, , , Navigation icon - moving a dot left/up/down/right for calibration or
measurement operation.
Measurement and calibration icon Calibration; Line; Angle;
Circle (three dots)
Switch between photo taking and video recording
10
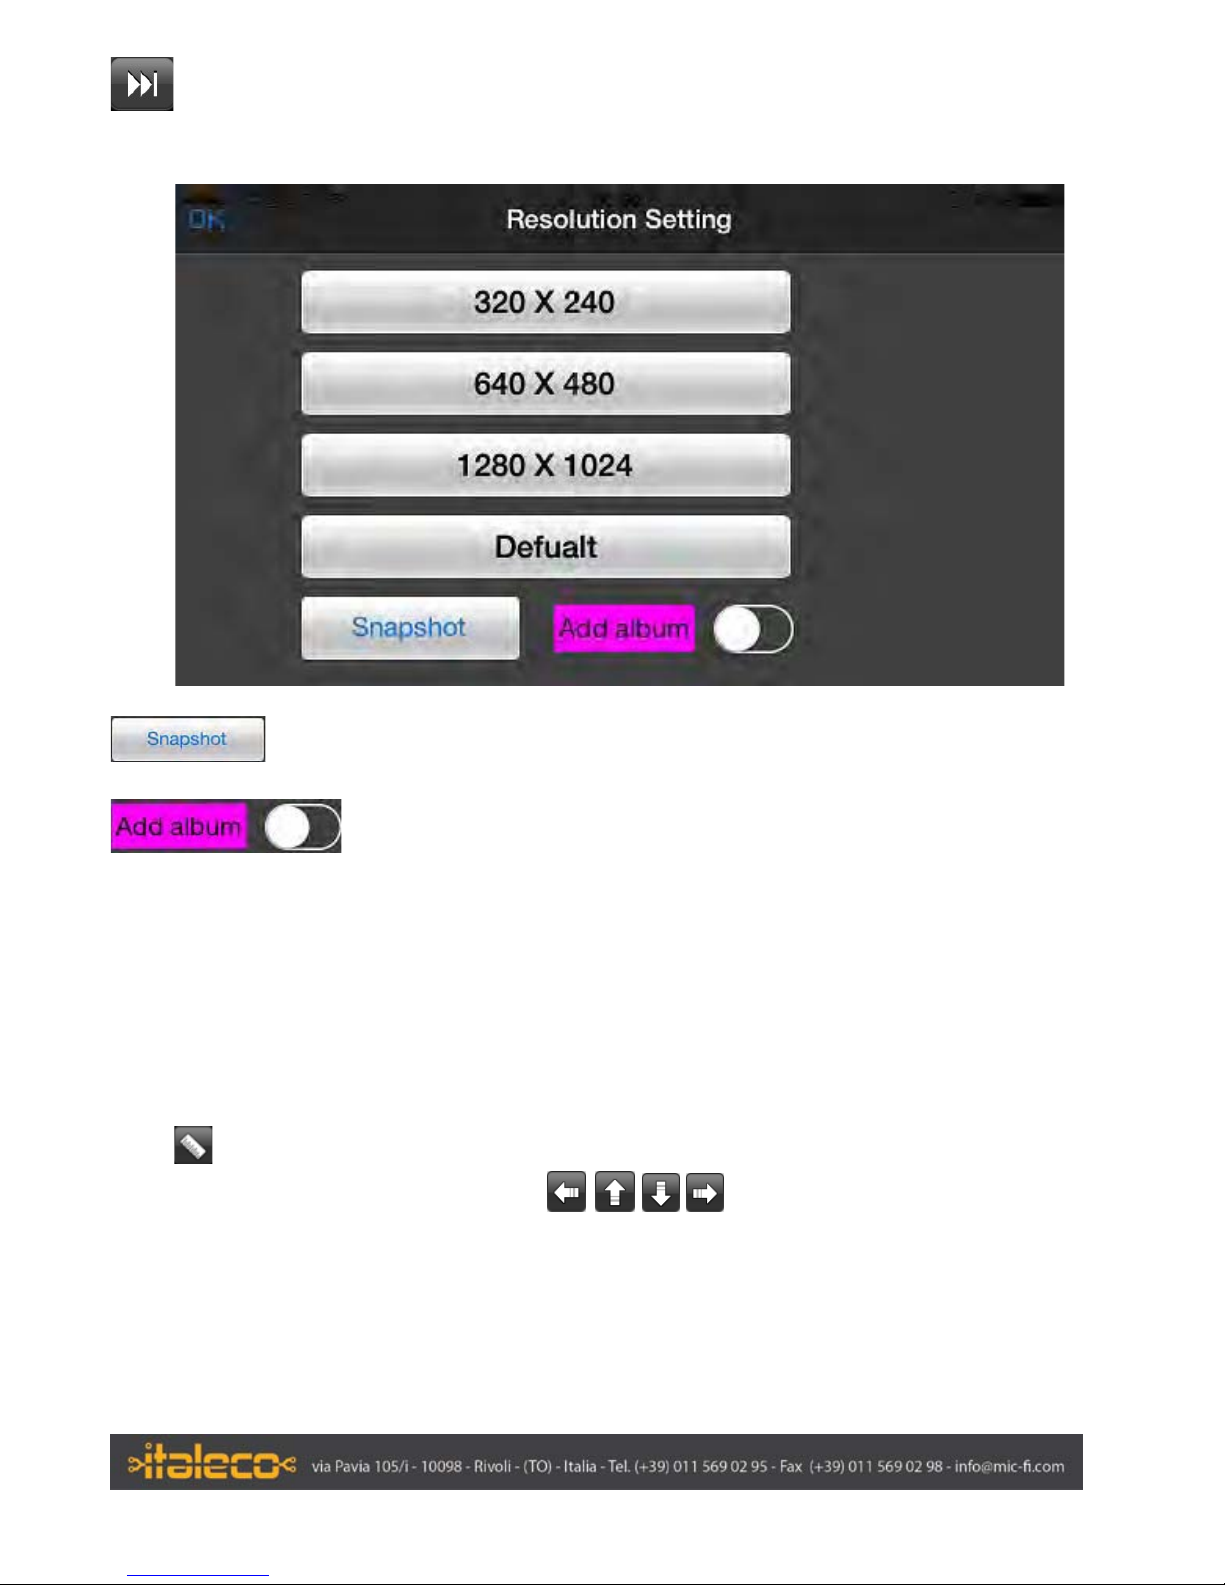
Resolution Setting. (When changing the resolution, please wait until the illumination
LED is off and lights up again – it takes about 5 seconds).
Click for power on Snapshot
Add new folder
Measurement & Calibration
To obtain the accurate measurement data for each magnification, please calibrate
before any measurement function.
Use the enclosed calibration ruler as to-be-observed object. Bring the image into focus by
turning the “Focus & Magnification adjustment wheel”;
Click
to pop-up the screen on the left. Click “Calibration” to back the live video, click
two dots (moving the dot by clicking )which draw a your desired line,
then click on the live video to show the following screen:
11

Enter the value of lenght and click “ok”:
Now the calibration is completed. Click on screen again, you can make measurement
features accurately on the live video at this same focus. (Don’t adjust again the “Focus &
Magnification wheel”). If the new photo object is not in focus, please only adjust the
distance between the microscope and the object until the photo is clear. The measurement
data can be saved inside the taken photo.
12

“MicFi” on Android Tablet/Phone
Note: First to open the Mic-Fi app, connect the Wi-Fi microscope
Search “MicFi” in Google paly to download and install it
Click the icon to display video
Warm-up Tips: If the live video is black or slow, please restart “Mic-Fi” app again.
.
Capture photo or record video (The pixel resolution has to be set at 640x480 when
recording video).
Videos and photos folder
,,, Navigation icon - moving a dot left/up/down/right for calibration or
measurement operation.
Measurement and calibration icon Calibration; Line; Angle;
Circle (three dots)
Resolution Setting. (When changing the resolution, please wait until the illumination
LED is off and lights up again – it takes about 5 seconds).
13
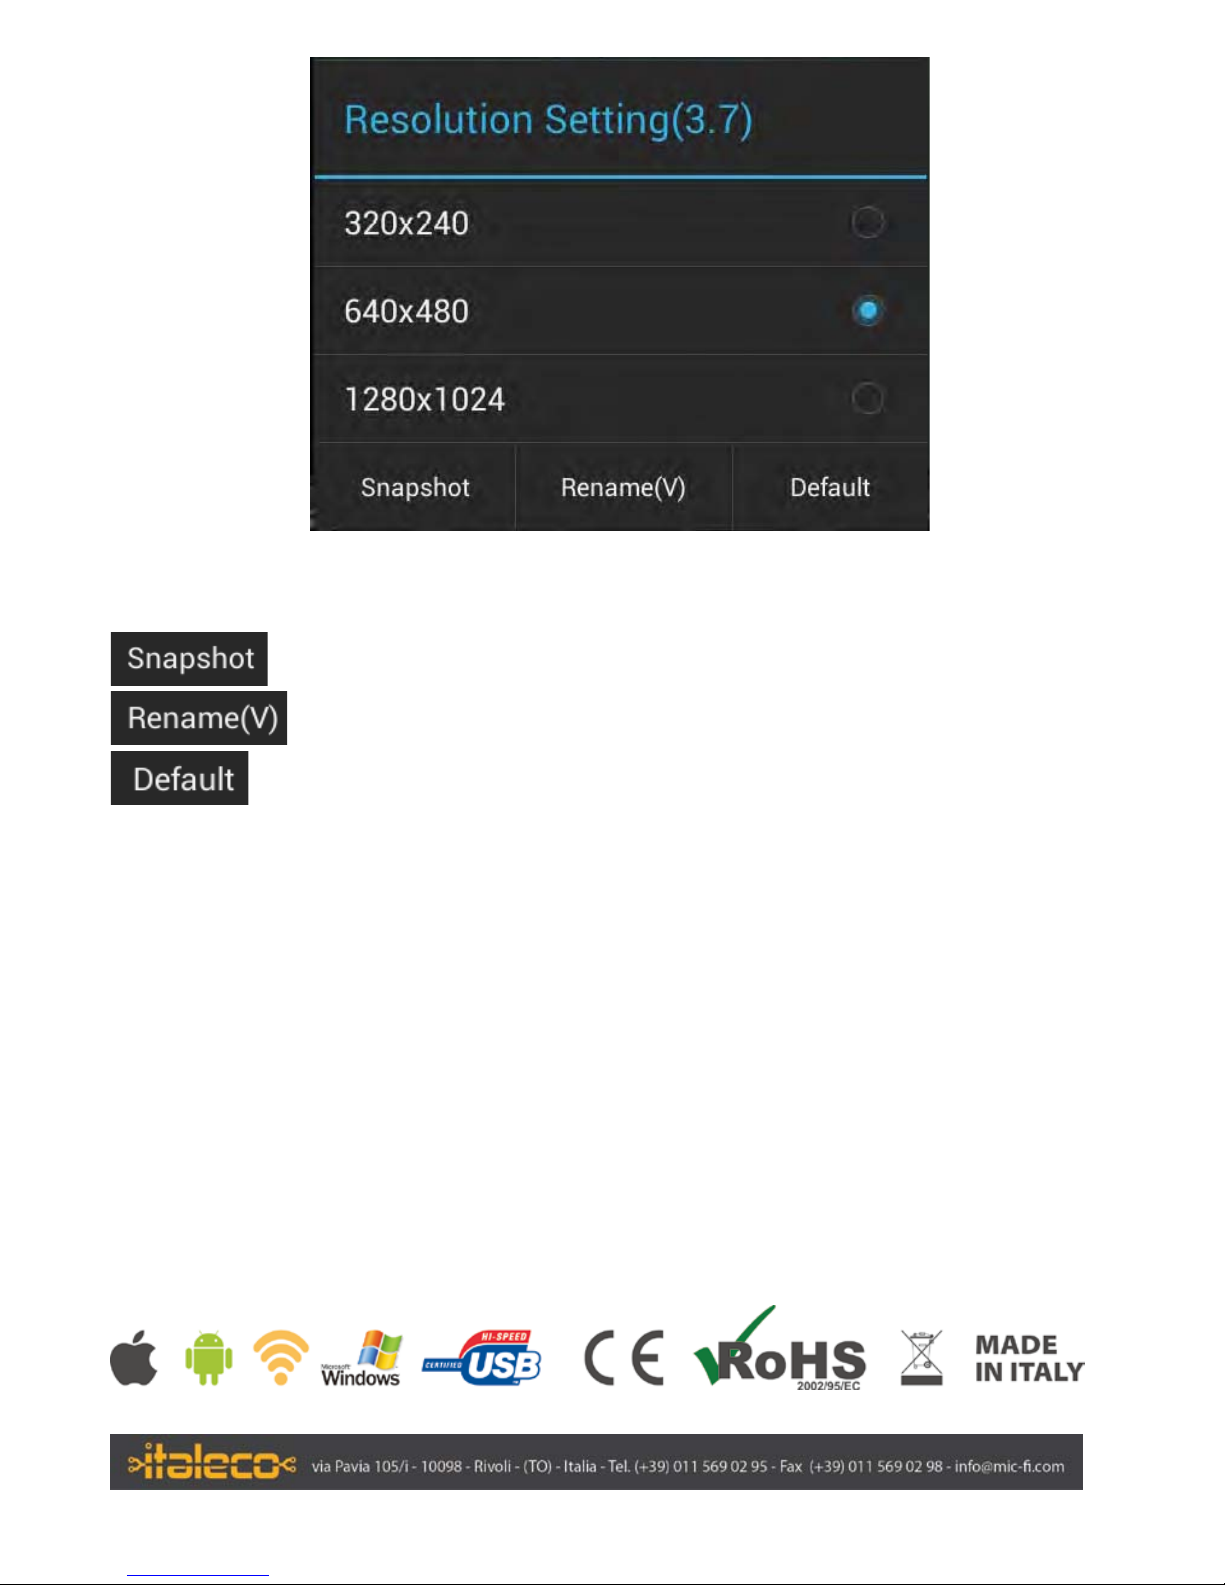
Power on snapshot.
Rename the photo first to save it.
Default setting
Measurement & Calibration
See iPhone/iPad measurement and calibration information
14

Table of contents


