manuals.online logo
Brands
  1. Home
  2. •
  3. Brands
  4. •
  5. MICROclimate International
  6. •
  7. Thermostat
  8. •
  9. MICROclimate International B2 User manual

MICROclimate International B2 User manual

IMPORTANT))*)TO)ENSURE)CORRECT)OPERATION)OF)YOUR)B2)THE RM OS TAT )
PLEASE)READ)THE)GUIDE)BEFORE)COMMENCING)INSTALLATION
B2)Thermostat)
User)Guide
Correct'temperature'reading
The'temperature'sensor'encased'in'the'black'sheath'is'very'accurate.'
Having'set'the'desired'temperature'on'the'thermostat'and'positioned'
the'sensor'in'its'required'location'the'temperature'of'the'air'will'be'
controlled'accurately'at'the'position'of'the'temperature'sensor.
The'temperature'nearer'the'heater''(from'the'sensor'position)'will'be'
hotter'and'further'away'from'the'heater'it'will'be'cooler.''
Please'note'that'when'using'a'thermometer'to'check'the'temperature'
that'unless'it'is'in'exactly'the'same'position'as'the'thermostat'sensor'
there'will'be'a'discrepancy'due'to'the'positioning'of'the'thermometer.
Warranty
Used'in'accordance'with'these'instructions'this'thermostat'will'give'
many'years'of'trouble'free'service.
The'thermostat'is'guaranteed'for'five'years'from'the'date'of'purchase'
against'faulty'parts'and'workmanship.''In'the'unlikely'event'of'a'
failure,'return'it'to'Microclimate'International'Ltd'and'together'with'a'
receipt'or'proof'of'purchase'and'a'brief'description'of'the'fault.''If'
returned'within'one'year'there'will'be'no'charge,'after'this'time'a'
charge'of'£5'will'be'made'for'administration'and'postage.''Please'
enclose'a'cheque'or'postal'order'made'payable'to'Microclimate'
International.''Cash'is'also'accepted.
No'liability'is'accepted'other'than'for'the'repair'or'replacement'of'a'
faulty'product.
This'does'not'affect'your'statutory'rights.
Microclimate'International
Unit'3'Heath'Mill'Enterprise'Park
Heath'Mill'Road
Wombourne
England
United'Kingdom
WV5'8AP
Tel':'01902'895351
Fax':'01902'897613
[email protected]
www.microclimate.co.uk
B2'Thermostat
The'B2'Thermostat'is'designed'to'give'precise'microprocessor'
controlled'temperature'of'non'light'emitting'heat'sources'up'to'600'
watts.''This'may'include'heatmats'and'ceramics.'The'heater'must'be'a'
minimum'of'5'watts.''
The'B2'is'a'pulse'proportional'thermostat'which'pulses'the'power'to'
the'heat'source.''For'this'reason'pulse'proportional'thermostats'are'not'
suitable'for'light'emitting'heaters'i.e'bulbs.
WARNING DO NOT OVERLOAD YOUR THERMOSTAT BY CONNECTING
HEAT SOURCES WITH OUTPUTS GREATER THAN 600 WATTS.
DAMAGE CAUSED BY MISUSE IS NOT COVERED BY THE WARRANTY.
PF0077A
Operating'your'B2'Thermostat
The'thermostat'temperature'is'factory'set'to'19'degrees'Celsius,'this'is'
fully'anti^clockwise'on'the'temperature'dial.
To'adjust'the'temperature'use'a'small'flat'bladed'
screwdriver'and'rotate'the'temperature'adjuster'
clockwise'until'the'slot'is'aligned'with'the'required'
temperature'on'the'scale.
A'thermometer'should'ALWAYS'be'used'to'check'the'
temperature'within'the'vivarium'and'the'thermostat'then'
adjusted'to'give'the'required'temperature'for'your'pets'environment.
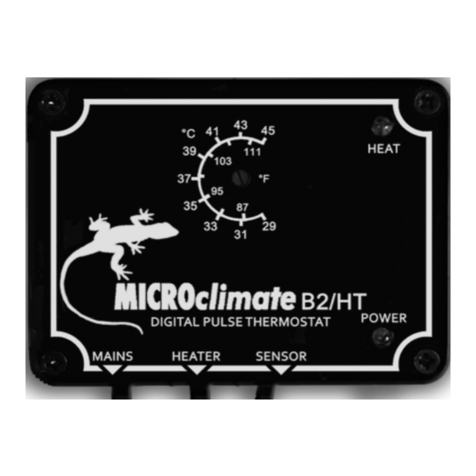
The'green'LED'is'a'power'on'indicator'and'will'be'lit'when'the'
thermostat'is'connected'to'the'mains'supply.
The'yellow'LED'on'the'thermostat'indicates'power'being'sent'to'the'
heater.''If'the'temperature'that'has'been'set'requires'full'power'from'
the'heater'then'the'LED'will'be'on'all'the'time.'If'the'power'required'is'
only'half'power'then'the'LED'will'be'on'for'the'same'time'that'it'is'off.''
If'no'power'is'required'the'yellow'LED'will'be'off.''The'thermostat'can'
vary'the'power'pulses'from'zero'to'continuous'resulting'in'extremely'
accurate'and'stable'temperature'control.
If'the'yellow'LED'remains'on'full'brightness'for'prolonged'periods'this'
would'indicate'that'a'higher'wattage'heater'may'be'required'to'achieve'
the'temperature'that'has'been'set.
A'vivarium'should'be'set'up'to'allow'a'temperature'gradient.''The'
heater'should'be'at'one'end'with'the'sensor'in'the'centre'of'the'
vivarium.'This'will'allow'a'Hot'area,'Controlled'area'and'a'Cooler'area.
Mains'Supply
Heat'Source
Sensor'mounted'in'Vivarium
Installing'your'B2'Thermostat
Find'a'suitable'location'for'the'thermostat'to'be'located'on'the'outside'
of'the'vivarium'ensuring'sufficient'cable'is'available'for'the'sensor.
The'sensor'should'be'installed'inside'the'vivarium'at'least'225mm'(9'
inches)'away'from'the'heat'source.''This'is'to'ensure'that'the'sensor'is'
measuring'the'air'temperature.''The'sensor'should'be'in'free'air'and'not'
fixed'to'the'wall'of'the'vivarium'as'this'will'not'give'a'correct'reading'to'
the'thermostat.'Ensure'the'sensor'is'at'least'10cm'from'the'side'walls'of'
the'vivarium.''
However'if'you'are'controlling'a'heatmat'installed'underneath'a'layer'of'
substrate'inside'the'vivarium'then'we'recommend'that'the'sensor'be'
placed'under'the'substrate'directly'on'top'of'the'heatmat.'This'allows'
direct'control'of'the'heatmat.
Connect'the'mains'cable'from'your'heat'source'to'the'heater'socket'on'
the'thermostat'using'a'suitable'mains'plug'fitted'with'a'3'amp'fuse.
Connect'the'mains'cable'from'the'thermostat'to'your'mains'supply.''
Please'note'the'mains'plug'is'fitted'with'a'3'amp'fuse.
The'mains'cable'fitted'to'the'thermostat'is'colour'coded'as'follows
BROWN'^'LIVE''''''''''''BLUE'^'NEUTRAL'''''''''''''GREEN/YELLOW'^'EARTH
Heater
Sensor
Hotter
Controlled
Cooler

Other MICROclimate International Thermostat manuals

MICROclimate International B1ME User manual

MICROclimate International

MICROclimate International B1ME User manual

MICROclimate International Ministat User manual

MICROclimate International

MICROclimate International Ministat User manual

MICROclimate International HH 6 User manual

MICROclimate International

MICROclimate International HH 6 User manual

MICROclimate International DL2 User manual

MICROclimate International

MICROclimate International DL2 User manual

MICROclimate International B1 User manual

MICROclimate International

MICROclimate International B1 User manual

MICROclimate International B2/HT User manual

MICROclimate International

MICROclimate International B2/HT User manual

MICROclimate International B2 Magic Eye User manual

MICROclimate International

MICROclimate International B2 Magic Eye User manual

Popular Thermostat manuals by other brands

Siemens RDS120 Mounting instructions

Siemens

Siemens RDS120 Mounting instructions

Watts WFHT 041 user guide

Watts

Watts WFHT 041 user guide

ESI ESRTP4RF User instructions

ESI

ESI ESRTP4RF User instructions

HaiLin Controls HL8001 Operator's manual

HaiLin Controls

HaiLin Controls HL8001 Operator's manual

Saswell SAS908XWHB-7-APP user manual

Saswell

Saswell SAS908XWHB-7-APP user manual

Emos P56211 user manual

Emos

Emos P56211 user manual

Chromalox GNIT-5 installation instructions

Chromalox

Chromalox GNIT-5 installation instructions

Tranberg TEF 1058 installation manual

Tranberg

Tranberg TEF 1058 installation manual

Watts Tekmar 563 user manual

Watts

Watts Tekmar 563 user manual

wattio THERMIC manual

wattio

wattio THERMIC manual

hager EK052 User instruction

hager

hager EK052 User instruction

Jackson Systems Wireless Comfort WCT-32 user manual

Jackson Systems

Jackson Systems Wireless Comfort WCT-32 user manual

Schego TRD operating instructions

Schego

Schego TRD operating instructions

DEVI VUGDB202 user guide

DEVI

DEVI VUGDB202 user guide

Shenzhen Myuet Energy Saving Equipment ME83 manual

Shenzhen Myuet Energy Saving Equipment

Shenzhen Myuet Energy Saving Equipment ME83 manual

Stelpro Maestro ASMT402 user guide

Stelpro

Stelpro Maestro ASMT402 user guide

Universal Remote Control total control THZ-100 owner's manual

Universal Remote Control

Universal Remote Control total control THZ-100 owner's manual

Heatit Controls HEATIT Z-TRM3 Installer manual

Heatit Controls

Heatit Controls HEATIT Z-TRM3 Installer manual

manuals.online logo
manuals.online logoBrands
  • About & Mission
  • Contact us
  • Privacy Policy
  • Terms and Conditions

Copyright 2025 Manuals.Online. All Rights Reserved.