Infrared Intelligent High Speed Dome Camera Operating Manual
5
2、infrared high-speed dome camera setting and operation
2.1.technology parameter table
Power Supply
Video Output
Communication
Dome Address
Communication Protocol
Baud Rate
Horizontal Rotation Speed
Horizontal Rotation Range
Vertical Rotation Speed
Vertical Rotation Range
Manual Control Speed
One Machine Set
Infrared light(Spec x pcs)
IR Distance
Preset Points
A-B Scan Speed
Cruise scanning
Pattern scanning
Idle Running
Timing of operation
Privacy protection
Password protection
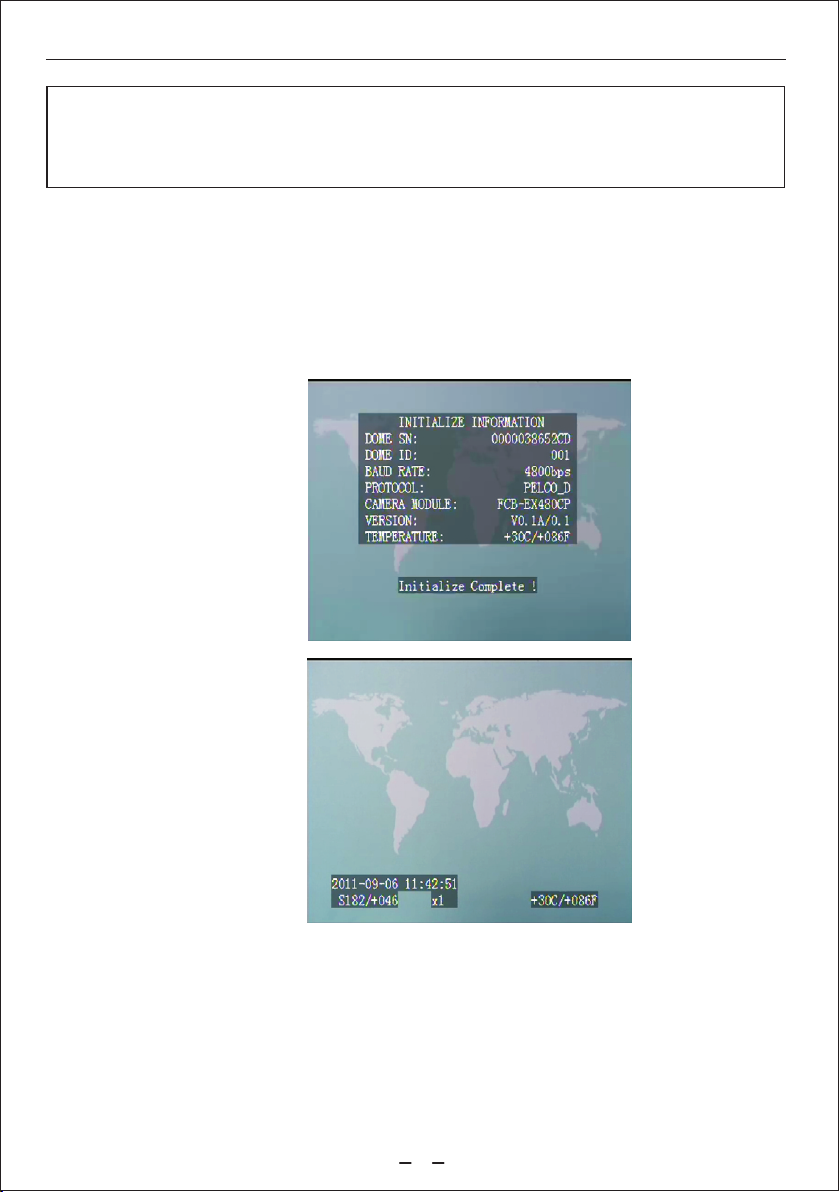
Information Display
Alarm Linkage
Working Temperature/ Humidity
Automatic thermostat indicator
Waterproof
Dimension
Net Weight
AC220V/50Hz or AC110V/60Hz
1.0V p-p 75Ω
RS485
1-255(Support software rewriting address)
Pelco-D/Pelco-P / SANTACHI 650 / FACTORY
2400/4800/9600/19200 bps
220º/s (1-64 Grade speed change)
360º unlimited
90º/s
0-90º
180º/S
Compatible with SONY,HITACHI,SAMSUNG,LG,SANYO.CNB etc
LED Array lights x10pcs / Ø5x90pcs
100-120m
220 points
4 groups(1-64 grade speed available)
4 groups(at most 32 preset points each group)
4 groups(at most 100 continuous action each group)
After setting idle 5-255S,it scans automatically
4 groups(can operate at any setted time the whole day)
Can be set to 8 protected areas
Can be set to 6 numbers password
Date,time positon,temperature,etc
Support 4ways output,2ways input, colse/open optional
-40℃—+60℃, ≤95% (no condensation)
<-5℃ Heating, >48℃ Cooling
IP65
400×380×210mm
7.9kg
2.2.Common Functions Glossary
Preset setup:Save some locations that need to be usually monitored,so that can find these locations easily.
Call preset:To run the machine quickly and accurately to a pre-stored location, or execute a specify function.
Left-right scan setup:Set the machine scan back and forth between two points in a certain area. Also
known as A-B Scan.
Cruise setup:Set the machine scan between some preset points, and each preset dwell time between the
points can be set freely.
Pattern Setup:record the scanned line and store it into the machine, easy to play back or run the line at
any time.
Time action:Set the machine to run a certain function at a specific time.
Wait action:After a period of time without any operation, the ball automatically run to the specified preset
point guard, or run a preset function.
Alarm Linkage:When an alarm signal is input, the machine immediately execute pre-configured functions,
and can be linked to other output devices.
Power-off memory:When the machine restart after power failure, it will automatically revert to the last
stop position or the last working state.
High zoom low speed: with manual zoom lens value increases,the manual control speed in proportion
to slow down.