Midwest grow kits Ultimate Kit User manual
1
Free Shipping !!
Orders over $99
www.midwestgrowkits.com (800) 921-4717
**Please watch the Mushroom Growing Videos or read the Mushroom Grow Guide prior to seng this
kit up. The Mushroom Grow Guide along with all of our guides can be found by vising these links.
Guides Library Page: hp://www.midwestgrowkits.com/guides.html
Video Grow Guides: hp://www.midwestgrowkits.com/videogrowguide.html
Before seng this kit up, you should have already injected your spores into the jars using one of the
methods in the growing guide. Now you are ready for the incubaon period!
Please Note:
The Ulmate kit uses a “Forced Air” system with ltraon. It diers from other kits which recommend a “shotgun” style
fruing chamber, which is simply a container with many holes drilled. This system is superior because it allows growing in
any environment, even the direst ac, closet or basement, while providing opmal air exchange!
This kit can be used for both incubaon period and for fruing. Follow these simple setup instrucons!
Items not included: Extension cord and water
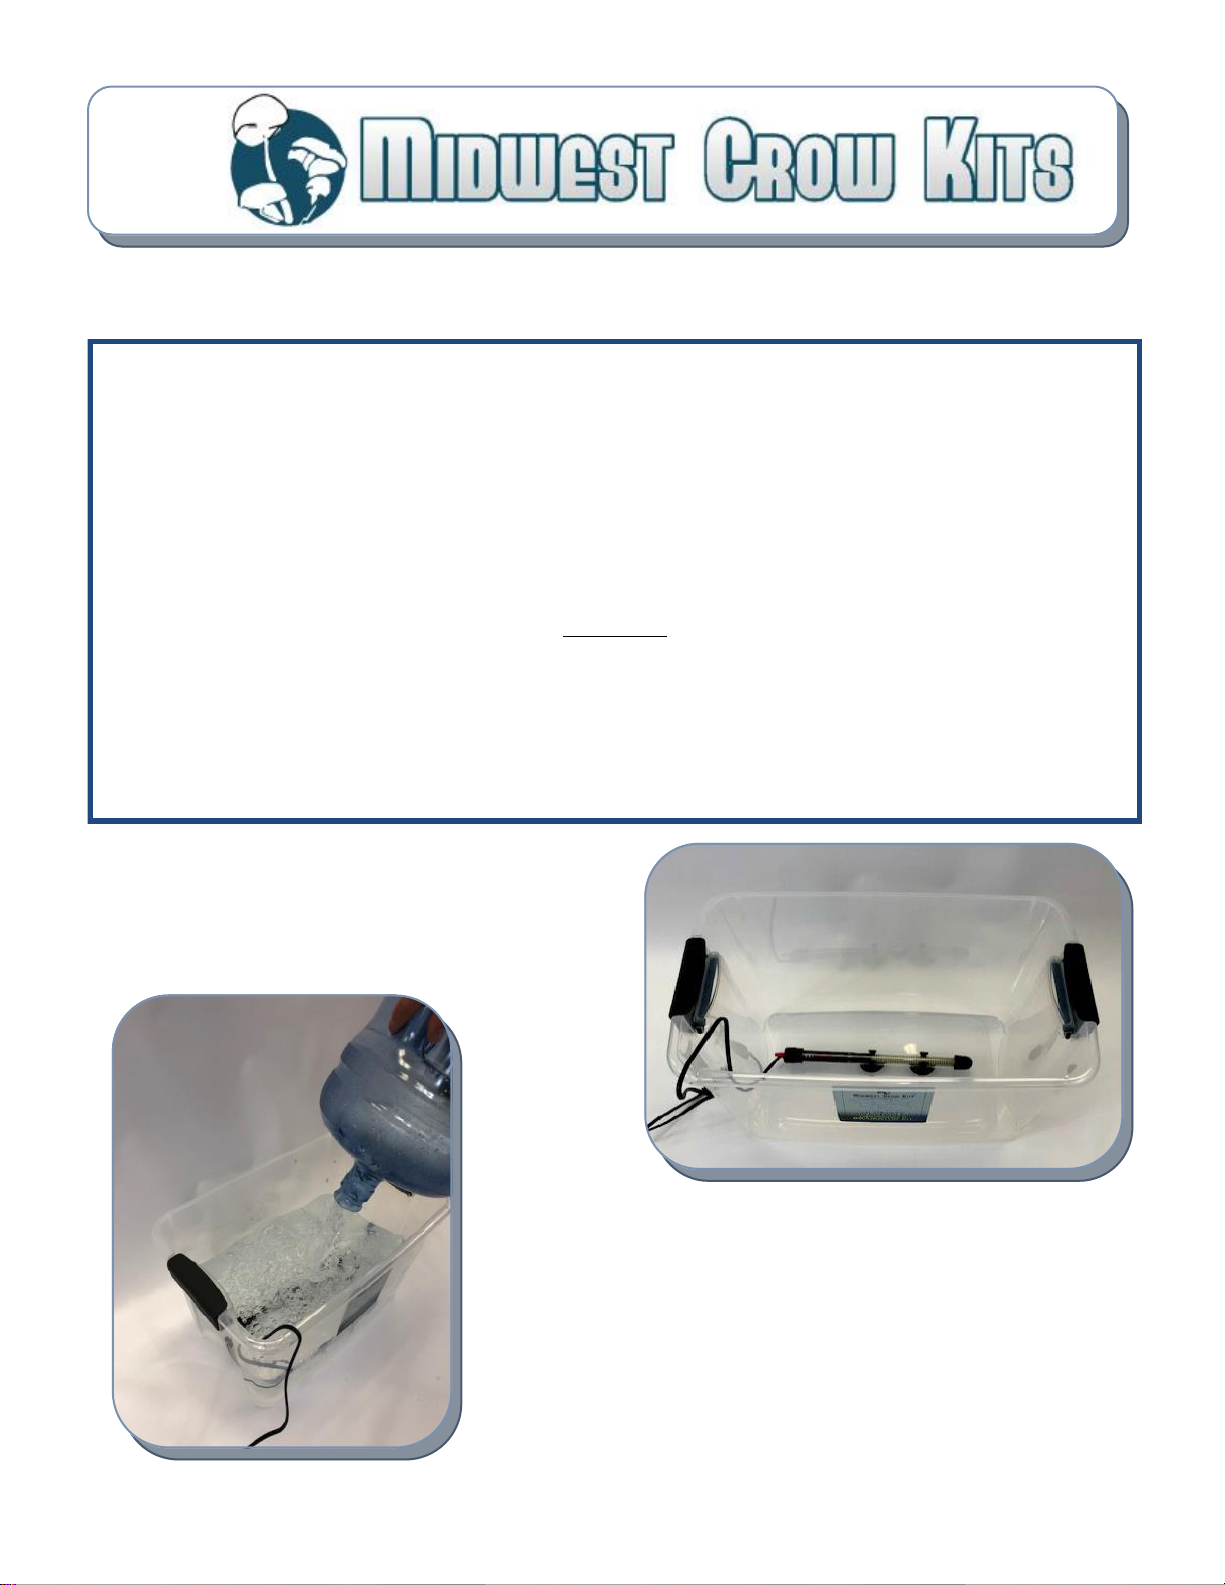
Start by placing your fully submersible aquarium heater on the
boom and use the sucon cups to secure it. (**The aquari-
um heater must always be fully submerged in water when
plugged in to work properly!)
Next add water to one of the containers with around 6-7 gallons. (Regular tap
water is ne). The water level should be about 60% full. Double check that the
heater is secure and the sucon cups are rmly in place on the boom.
The New Ulmate Kit design is made with two idencal modular containers
that t together so extra containers can be added to expand your grow later if
desired. Save the extra lid for future use.
Midwest Grow Kits Revision 9.0; 2018-2019
Ultimate Kit Set Up guide
(Text included with videos)
2
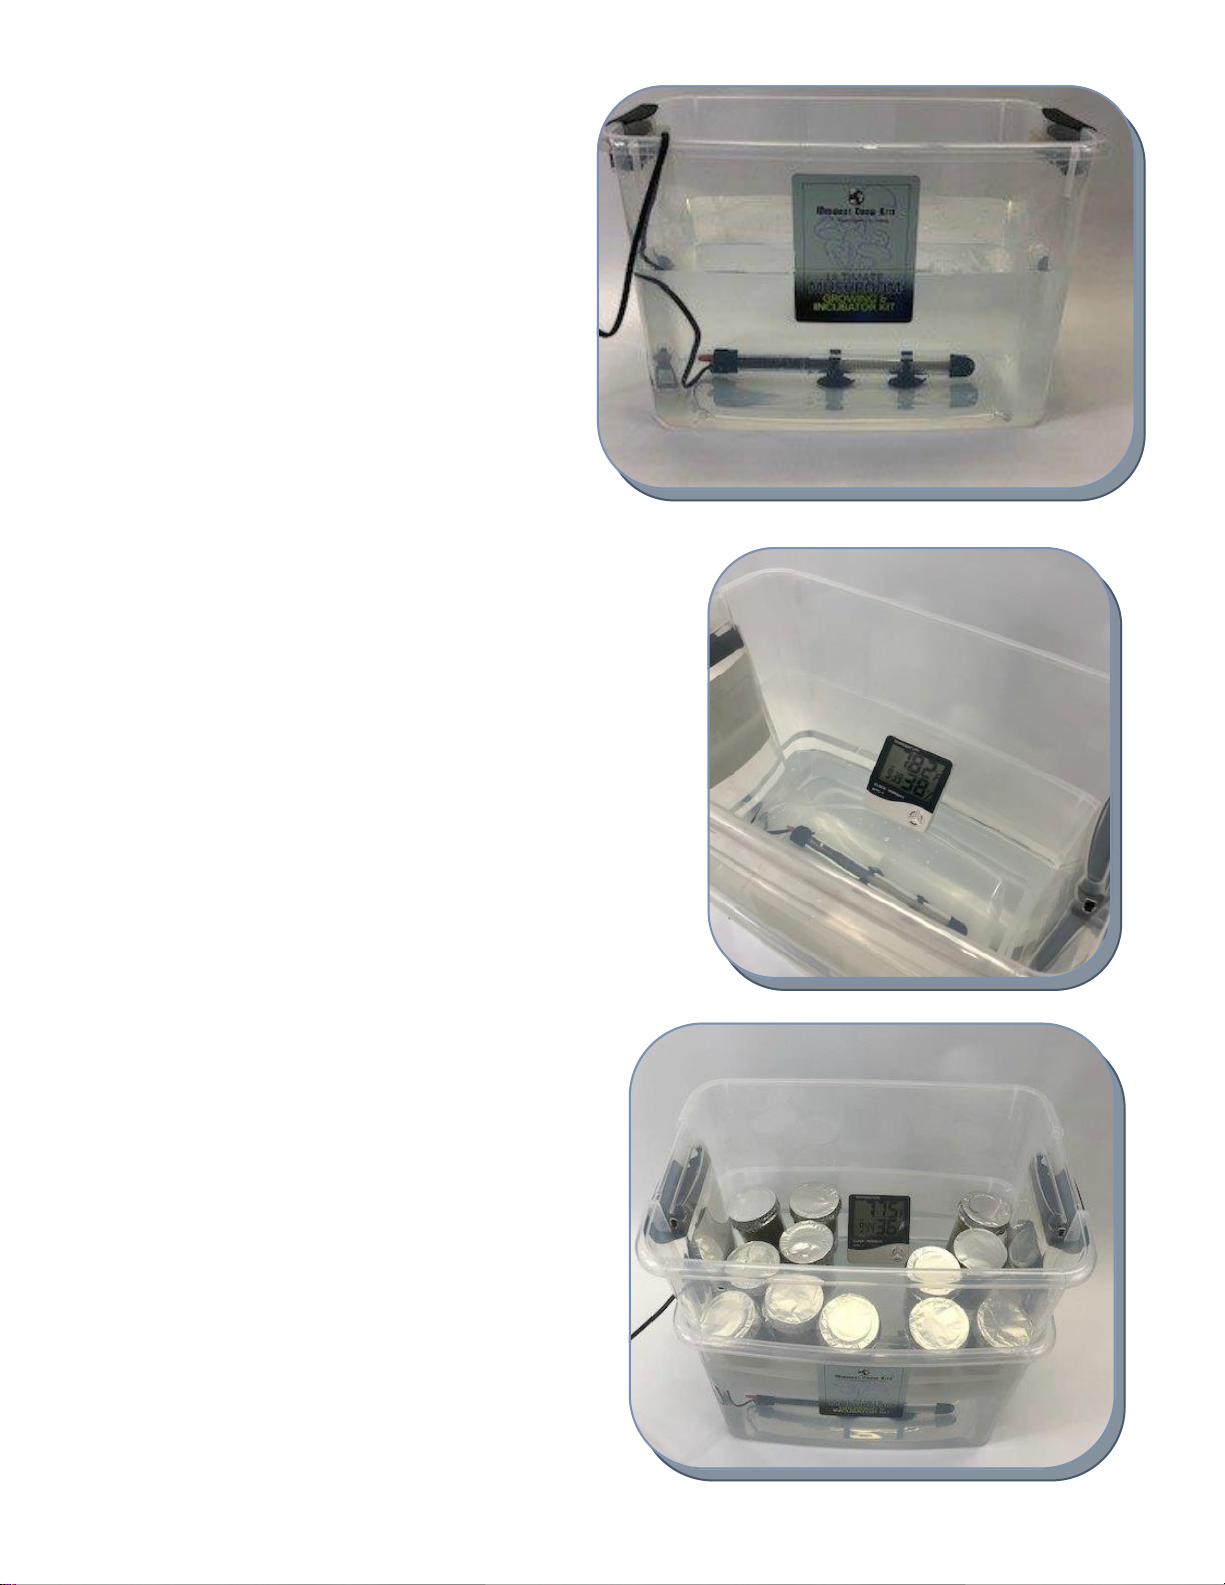
The picture on the right is an example of the proper wa-
ter level and placement of the aquarium heater.
Next, plug in the aquarium heater and adjust the red dial
on the heater to around 86-92 degrees to start. Float the
other container in the water, place the digital thermome-
ter inside the clear bin and close the lid. Every room or
growing environment is dierent, so start with a warmer
seng and adjust down from there. You want to reach a
steady 76-80 degrees. This may take anywhere from 4-6
hours or longer depending on the outside temperature
and the water temp in which you started with.
The heater light will turn on and o as it warms the water, this is nor-
mal. During this inial process, sr the water every few hours to help
disperse the heat. You may get it too hot at rst, just simply turn back
the knob to lower the temperature. Once you have achieved your de-
sired incubaon temperature, the heater will maintain that and you are
ready to add your inoculated jars to the tub.
www.midwestgrowkits.com (800) 921-4717
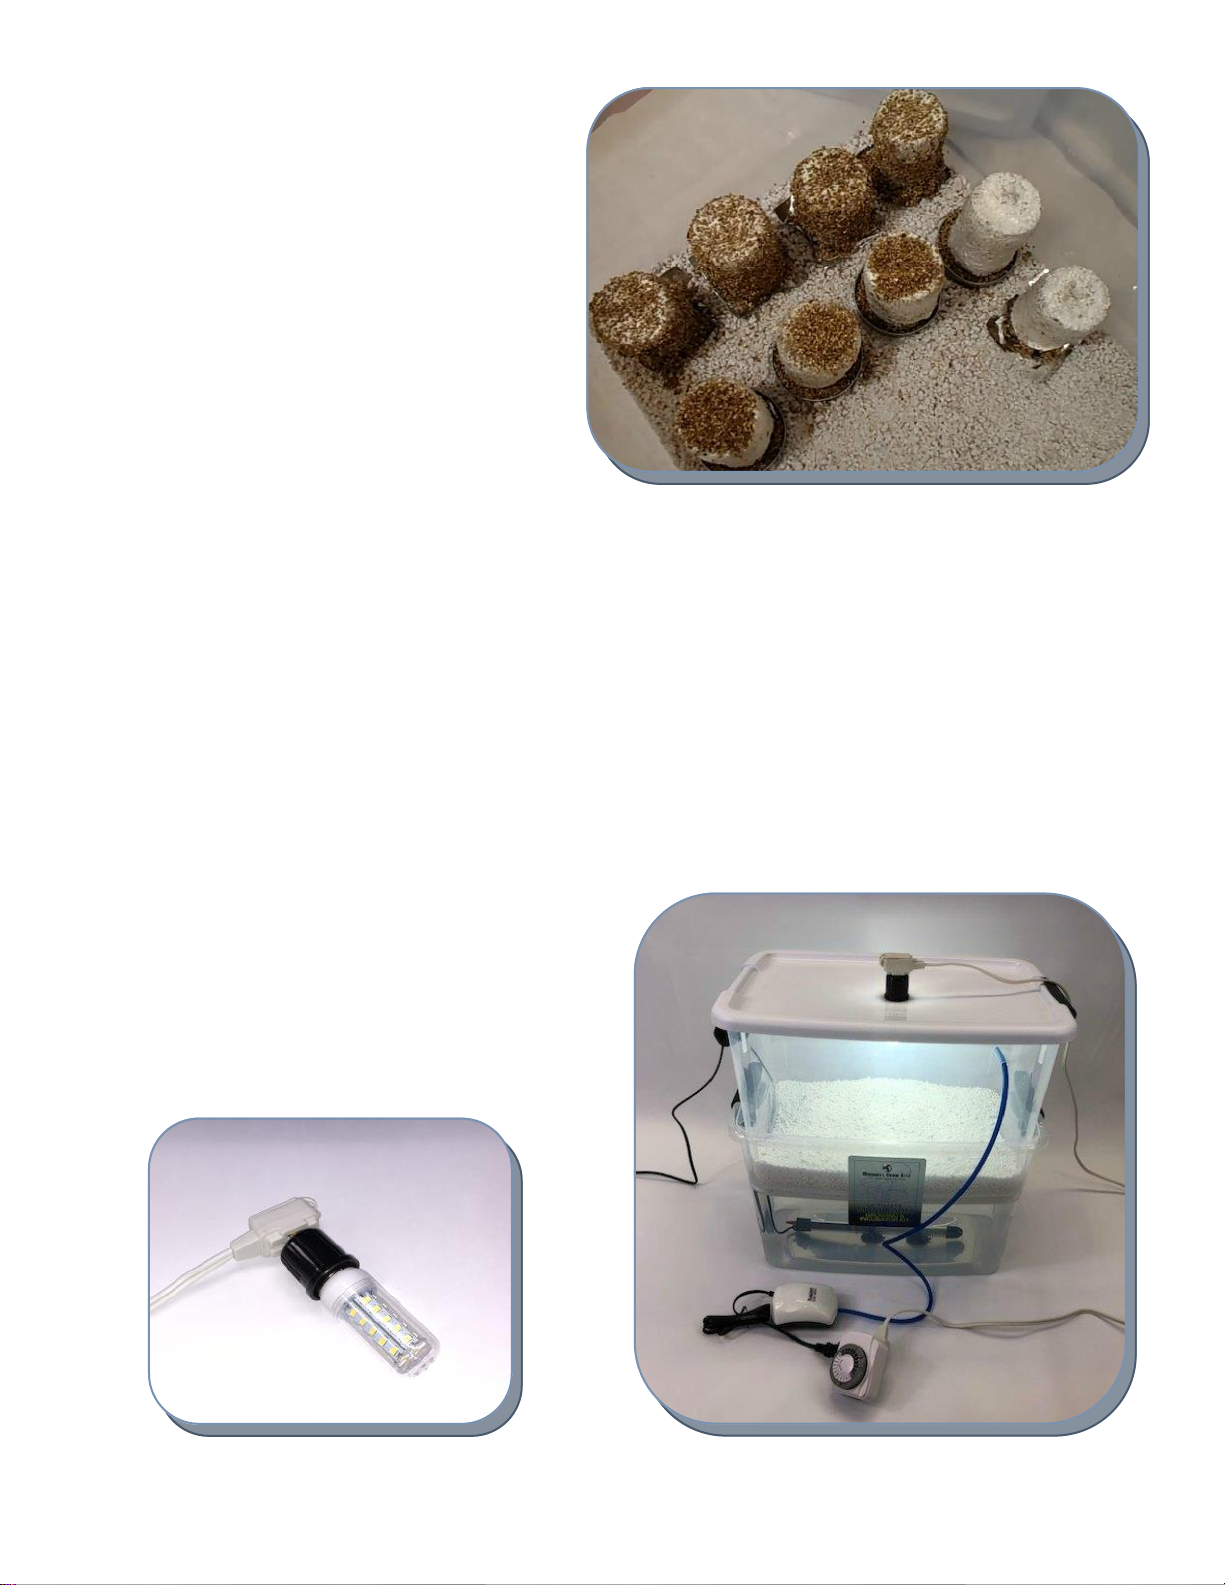
Once you get the temp set correctly and steady, add your
inoculated jars and close the lid. That’s all that is needed for
the rst 3-4 weeks, or unl fully colonized. Water will evapo-
rate, so every week add some water to maintain proper wa-
ter levels.
The jars only need small amount of gas exchange while incu-
bang. So we recommend leaving the foil on loosely and
opening up the lid every few days to allow some fresh air to
enter.
The jars should incubate in the dark or unl they are around
75% colonized. When they are 75% colonized, we recom-
mend adding light to help trigger the fruing process when
they are 100% colonized. (Adding light too soon can trigger
them to pin too early and start growing mushrooms before
they have nished colonizing.)

3
YOU’RE FINISHED WITH THE INITIAL SETUP!
Now sit back and wait for them to colonize. (23-35 days average. Some strains are faster than others)
Look for the signs of germinaon around day 6-10. Then you will see white rhyzomorphic growth (spider web growth) for
the next few weeks.
***(Tip)***
Not all jars will colonize at the same speed. This is very common and no need to worry. We usually recommend waing unl
all jars are fully colonized before seng up the fruing chamber, but you can fruit and colonize at the same me if needed.
Somemes you have a slow jar, so just set up the kit in the next steps for fruing and place that slow jar on the other side.
The humidity from the perlite will not hurt the jar. A fully colonized cake can remain in the jar for up to 30-45 days aer its
100% colonized without aecng the life or producon of mushrooms.
***(Tip)***
Usually the boom is the last 5-10% of the jar to colonize. To speed this up, you can ip the jar upside down and gently tap
the boom of the jar to dislodge the cake from the glass. Leave the jar upside down unl it nishes colonizing.
These next steps should be done aer the jars are 100% colonized and are ready to start the fruing process.
Connect the hose to the air pump. Make sure the side with the white HEPA lter
parcle (inside the hose) is closest to the air pump. Then insert the other end in
the hole in the side of the clear container. The blue hose should point down
inside the clear container about 1 inch.
Set up the mer to go on for 60 minutes twice per day. Once
in the morning and once in the evening. This is a good starng
point and may be adjusted to suit your own growing condions.
The more cakes there are growing the more oen you need to run
the air pump system.
The goal is to achieve humidity levels between 90-99% while
adding fresh air/oxygen to the cakes during fruing. Carbon diox-
ide will escape through the holes near the handles. There is no
need to drill addional holes. This setup has been tried and tested
for more than 11 years!

4
You are now ready to add your perlite! The perlite goes on the boom of the inner chamber aer you birth the jars. Per-
lite evaporates water and this is what creates the high humidity levels needed.
Mix with ltered water to get a moist mix.
Don’t over saturate either. This provides
the humidity needed. You want it wet
enough so it’s moist when you push down
on it, but you don’t want to see any
standing or pooling water. You can simp-
ly add water like shown here or use the
weng instrucons in the grow guide,
either method works ne.
**TIP** You can add hydrogen peroxide to
the perlite to help keep it clean. You may add
a cup of regular over the counter peroxide to
the perlite every week if desired. Peroxide
breaks down into water & oxygen aer 48
hours, so it is very safe to use. This can also
be added to the outer tub as well to keep the
water from becoming stagnate. Do not use
any other chemicals, as they may corrode the
heater.
**Tip** During this stage do not leave your Thermometer/Humidity Gauge in the fruing chamber for extended periods of
me. The high humidity can cause failure over me. We advise placing it in the fruing chamber when you are making ad-
justments and let it dry out rst to improve the accuracy and extend the life of the unit. You can safely remove the lid any-
me to check on your growing mushrooms during this me. As long as you see water droplets on the side or lid when you
open it, you are over 90% humidity!
It’s me to remove your cakes from the jars!
We recommend waing an extra 2-3 days aer they appear
fully colonized to make sure the center is 100% colonized.
5
Adding Light!
The Ulmate Kit includes our new 36-diode custom dual spectrum HP LED Grow light that is the closest thing to actual sun-
light we have found. We also include one baery LED light, operang at 6,000k. The baery light is oponal and mainly used
by closet growers without electricity available.
Mushrooms are very dierent than plants. They use light only as a trigger mechanism to know when to produce mushrooms
and what direcon to grow. The lights provided in our kit provide the essenal spectrum of daylight needed for growth.
During the fruing stage, we recommend they get around 8-12 hours of light per day.
Time to add your cakes!
Remove cakes from the jars. You may need to tap the
boom of the jars to dislodge any stubborn cakes.
Here is an example of jars on top of the perlite. The top
row have been dunked and rolled. (See Mushroom
Grow Guide) The boom row have been double end
cased, which is adding moist vermiculite to just the top
and boom. The two jars on the right side have been
dunked but no extra vermiculite added. In our experi-
ence there isn't one parcular method that is beer
than the next, but adding vermiculite does help the
cake last longer between dunks without drying out.
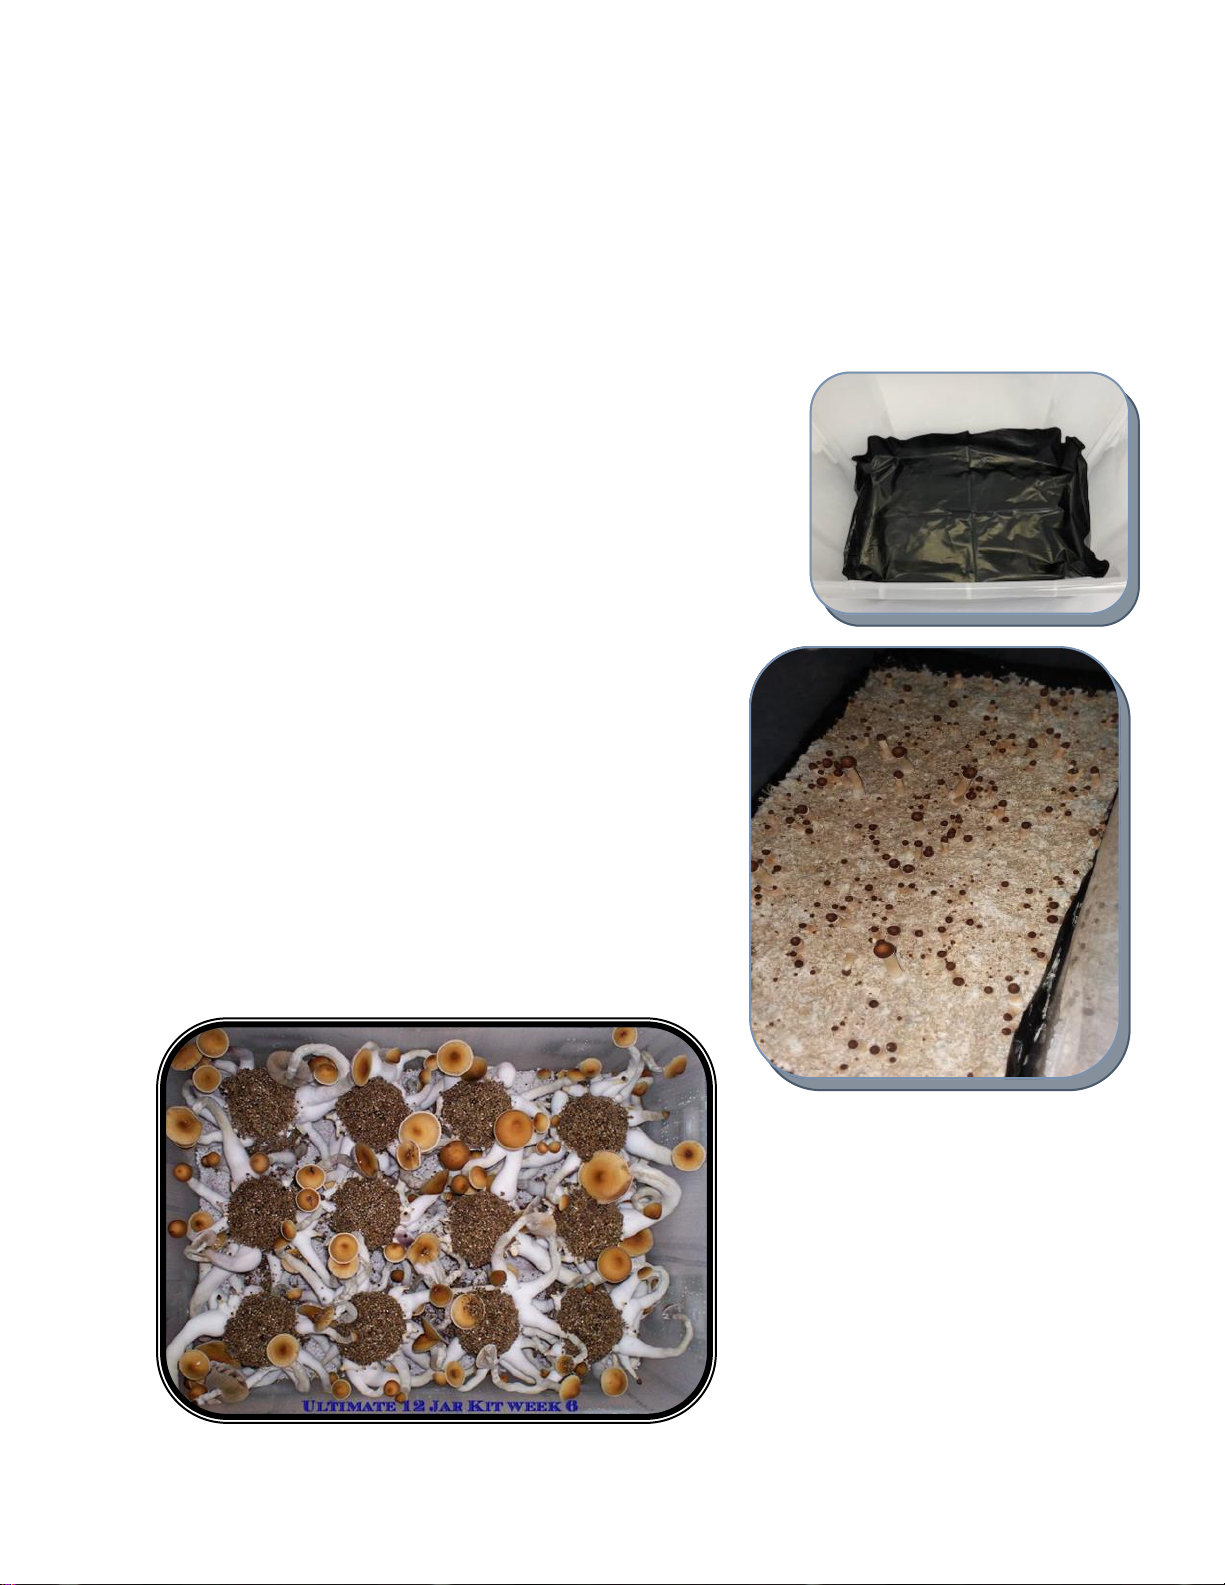
Using the Plug in 110v LED 36-Diode Grow Light
Use an extension cord and connect the outlet adapter to the cord.
Screw in the bulb and connect the power.
Remove the scker covering the hole in the lid and insert the
light bulb into the hole. It should look like the picture to the
right.
Light should be on 8-12 hours a day. Some people prefer to
add an addional mer for added convenience.
6
How to convert your kit to Bulk Growing!
Bulk growing, or somemes called mono-tub is another style of growing. It involves colonizing a whole grain substrate like our
spawn bags or 5-grain Jars and breaking up the substrate and mixing it with a casing mix to create one giant bed of mycelium.
This method has become more popular in recent years. All of our growing kits can be easily converted to this style of growing.
Please start by reading the Bulk Growing Guide & Spawn Bag Guide in our Guides Library. See the link on Page 1 of this guide.
You will need either 2 Spawn bags or 3 Quick Colonizing 5grain Jars and 1 bag of the 5lb Bulk Casing Mix. Start by injecng
your spawn bags or Jars and incubang at 75-77 degrees (few degrees less than 1/2 pint Jars). Follow the Spawn Bag Guide
and allow them to become fully colonized.
Next, cut a black trash bag and line the boom of the fruing chamber to block
any light from entering on the boom. See picture on the right.
Follow the Bulk Casing Guide on adding your colonized grain and Casing Mix.
Run the Air Pump system for 1 hour on 4 mes per day during this stage.
Place a blanket or towel over the enre kit to keep everything in the dark for the
rst 7-10 days while the mix re-colonizes.
Aer the mix re-colonizes and you see lots of white poking through, turn on the
lighng system and run the light for 12 hours per day.
Once you see mushroom pins, increase the air pump system to 30 mins on
and 30 mins o. Enjoy your harvests!
Need growing help? Email us at support@midwestgrowkits.com or call us (800) 921-4717 Mon-Fri 11am-5PM Central Time.
Ulmate Kit Bulk Grow Pinning!
Ulmate Kit with Jars Week 6!
Table of contents
Popular Lawn And Garden Equipment manuals by other brands

Schiller Grounds Care
Schiller Grounds Care Classen TRS-20HE Operator's manual

RioOutdoors
RioOutdoors 4P-SC installation instructions

AL-KO
AL-KO Solo 7505 VR Instructions for use

Stihl
Stihl RL 540 instruction manual

Land Pride
Land Pride Rear Blades RBT40108 Specification sheet

Shindaiwa
Shindaiwa M242 Owner's/operator's manual


