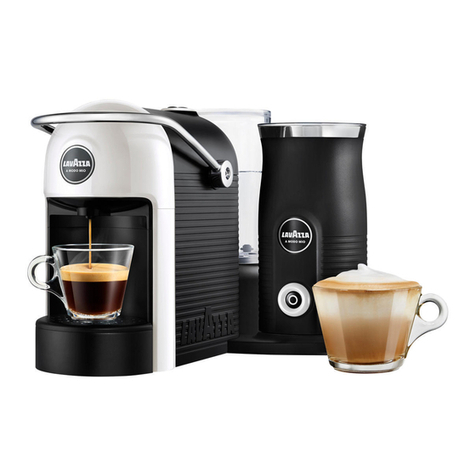
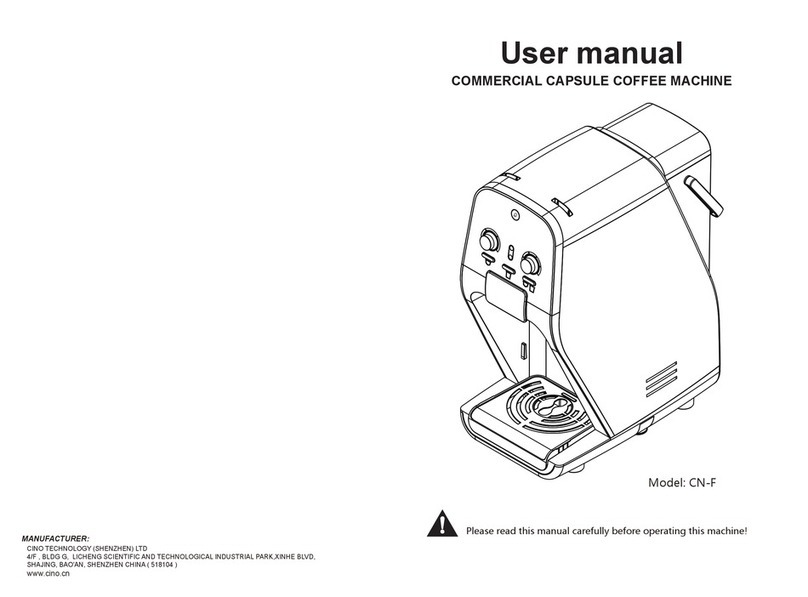
MIGEL GCM 105 User manual


220-240
GCM 105

Minimum


I
MAX
Nespresso , Donlim

I
Large
Small cup cup
Small cup
Large cup
Cappuccino

I
MAX
" "
%<
Cappuccino
" "
Nespresso , Barsetto
I

Small cup
Large cup
Cappuccino

MAX
" "
%<
Latte
" "
Nespresso , Barsetto
I
Small cup
Large cup

Latte
I
" "
%<
Latte

" "
Latte
MAX

I
Large cupSmall cup
Large cupSmall cup
Large cupSmall cup

1
Technical data
Important Safeguards
Input Power:........................................................................................................ 1050W
Voltage:.............................................................................................................220-240V
Frequency: .........................................................................................................50/60Hz
English
When using electrical appliances, basic precautions should always be fol-
lowed, including the following:
1. Read all instructions.
2. Make sure that your outlet voltage corresponds to the voltage stated on
the rating label of the coee maker.
3. To protect against re, electric shock and injury to persons do not im-
merse cord, plug or unit in water or other liquid.
4. Close supervision is necessary when any appliance is used by or near
children.
5. Unplug from outlet when not in use and before cleaning. Allow to cool-
ing before putting on or taking o parts, and before cleaning the appliance.
6. Do not operate any appliance with a damaged cord or plug or after the
appliance malfunctions, or has been damaged in any manner. Return appli-
ance to an authorized service facility for examination, repair or adjustment.
7. The use of accessory not recommended by the appliance manufacturer
may result in re, electric shock or injury to persons.
8. Do not let cord hang over edge of table or counter, or touch hot surface.
9. Do not place on or near a hot gas or electric burner, or in a heated oven.
10. Use on a hard, at level surface only, to avoid interruption of airow
underneath the appliance.
11. Always be sure to place the water reservoir tightly back in the unit with
its lid closed and ll with water on or above the minimum before turning
appliance on.
12. Capsule collection tray and drip tray shall be put in place during nor-
mal use, otherwise water spillover will occur.
13. Only ll the water reservoir with clean and cold water. Never ll it with
mineral water, milk or other liquids.
14. Do not let the coee maker operate without water.
15. Never insert nger into the capsule holder to avoid nipping nger.
16. There is extremely hot water in the capsule holder during the brew pro-
GCM 105
Dear customer!
Thanks for your worthful choice and condence to Migel brand.
We really hope that you enjoy operating this product.

2
cess.To avoid risk of injury, do not lift the brew handle during brewing process.
17. To disconnect, remove plug from wall outlet. Always hold the plug. But
never pull the cord.
18. Some parts of appliance are hot when operated, so do not touch with
hand. Use handles or knobs only.
19. Do not leave the appliance on unattended.
20. The environment temperature of operating or storing shall be more
than 0C.
21. Do not leave the appliance exposed to atmospheric agents (sun, rain
and so on).
22. Do not remove the water reservoir until unit is turned o.
23. This appliance is not intended to be operated by means of an external
timer or separate remote-control system.
24. This appliance can be used by children aged from 8 years and above
and persons with reduced physical, sensory or mental capabilities or lack
of experience and knowledge if they have been given supervision or in-
struction concerning use of the appliance in a safe way and understand
the hazards involved. Children shall not play with the appliance. Cleaning
and user maintenance shall not be made by children without supervision.
25. Children should be supervised to ensure that they do not play with the
appliance.
26. This appliance has been incorporated with a grounded plug. Please
ensure the wall outlet in your house is well earthed.
27. Do not use appliance for other than intended use.
28. Do not use outdoors or for commercial purpose.
29. Do not use outdoors.
30. This appliance is intended to be used in household and similar applica-
tions such as:
–Sta kitchen areas in shops, oces and other working environments;
–Farm houses;
–By clients in hotels, motels and other residential type environments;
–Bed and breakfast type environments.
31. Save these instructions.

3
Check that all accessories are complete and the unit is not damaged. Add
water into water reservior, make sure the handle is closed in place. Place a
container on the cup holder grid, insert the plug, press the power switch to
“I”position and the all the indicators start to ash, wait until the indicators
light steadily, then press the corresponding coee button, after a while,
the water starts to ow out from the coee outlet. Once the desired quan-
tity has been reached, the water will stop owing out. Then discard the
water. Clean all detachable parts thoroughly with warm water.
PREPARING ESPRESSO
1. Fill the detachable water reservior with drinking water. The water level
should not exceed MAX level marked on the reservior.
2. Put capsule collection container, drip tray and cup holder grid in place
3. Open the handle by lifting it and insert a coee capsule. Close the han-
dle by pushing it down directly.
Note: Only use Nespresso and Donlim capsules for the appliance.
4. Plug the power cord into the outlet. Press the power switch to“I”position
and then all the indicators start to ash.
CAUTION: During brewing, never open the handle. Otherwise the coee
capsule will be expelled into the capsule collection container.
5. Position a container on the cup holder grid. Make sure the drip tray is
assembled in place.
6. Once all the indicators light steadily, press the large cup or small cup cof-
fee button according to your demand, and then its corresponding indica-
tor starts to ash, after a while, coee will ow out from the coee outlet.
For the rst use
Using your coee maker
Device description

4
Once the desired quantity has been reached, the coee will stop owing
out automatically and the all the indicators will light steadily.
NOTE: The appliance will enter into the standby mode and all the indica-
tors will be extinguished if no any operation within 4 minutes after all the
indicators light steadily.
NOTE: Coee quantity of small cup is ranged between 25ml and 45ml
while the coee quantity of large cup is ranged between 55ml and 85ml.
NOTE: During brewing process, you can cancel the coee brewing process
by pressing your selected coee button once. To restart the brewing pro-
cess, just need to press the button again.
7. During brewing process, all the indicators will ash quickly if there is
lack of water in the water reservior. At that time, you shall rell the water
reservior. After it, press any button to make the indicators stop ashing
and then press the corresponding button to restart the brewing process.
8. Once you have nished brewing coee, always expel the capsule. Cap-
sules are automatically expelled into the capsule collection container by
opening the handle.
CAUTION: Never open the handle during brewing cycles.
NOTE: The appliance will enter into the standby mode and all the indica-
tors will be extinguished if no any operation within 4 minutes after the
appliance nishes brewing coee. If you want to brew coee again, rstly,
make sure that the plug is connected well with the power source and the
power switch is at“I”position, and then press any button, after it, the appli-
ance will continue to brew coee.
9. If you want to another cup, insert a new capsule for operating.
10. Empty the capsule collection container and rinse the unit and reservoir
frequently.
11. Always turn the coee maker o and disconnect the power supply
when not use.
PREPARING CAPPUCCINO
1. Fill the detachable water reservior with drinking water. The water level
should not exceed MAX level marked on the reservior.
2. Put capsule collection container, drip tray and cup holder grid in place
3. Move the milk reservior by following the arrow “ ” marked on the milk
reservior lid and ll the milk reservior with milk (grease content >3%, tem-
perature: 4-8°C) to the“ ”mark on the milk reservior. After it, replace
the milk reservior well on the milk reservior holder by following the arrow
“ ”marked.
4. Open the handle by lifting it and insert a coee capsule. Close the han-
dle by pushing it down directly.
Note: Only use Nespresso and Barsetto capsules for the appliance.
5. Plug the power cord into the outlet. Press the power switch to “I” posi-

5
tion and then all the indicators start to ash.
CAUTION: During brewing, never open the handle. Otherwise the coee
capsule will be expelled into the capsule collection container.
6. Position a container on the cup holder grid. Make sure the drip tray is
assembled in place.
7. Once all the indicators light steadily, press the “ ” button and its in-
dicator starts to ash for some time, and then the machine starts to froth
milk. After nish frothing, all the indicators light steadily.
8. Pour appropriate amount of frothed milk into the container. After it,
press the small cup or large cup based on your requirement and then its
corresponding indicator starts to ash, after a while, coee will ow into
the container from the coee outlet. Once the desired quantity has been
reached, the coee will stop owing out automatically and the all the indi-
cators will light steadily.
NOTE: The appliance will enter into the standby mode and all the indica-
tors will be extinguished if no any operation within 4 minutes after all the
indicators light steadily.
NOTE: During brewing process, you can cancel the coee brewing process
by pressing your selected coee button once. To restart the brewing pro-
cess, just need to press the button again.
9. During brewing process, all the indicators will ash quickly if there is
lack of water in the water reservior. At that time, you shall rell the water
reservior. After it, press any button to make the indicators stop ashing
and then press the corresponding button to restart the brewing process.
10. Once you have nished brewing coee, always expel the capsule. Cap-
sules are automatically expelled into the capsule collection container by
opening the handle.
CAUTION: Never open the handle during brewing cycles.
NOTE: The appliance will enter into the standby mode and all the indica-
tors will be extinguished if no any operation within 4 minutes after the
appliance nishes brewing coee. If you want to brew coee again, rstly,
make sure that the plug is connected well with the power source and the
power switch is at“I”position, and then press any button, after it, the appli-
ance will continue to brew coee.
11. If you want to another cup, insert a new capsule for operating.
12. Empty the capsule collection container and rinse the unit and reservior
frequently.
13. Always turn the coee maker o and disconnect the power supply
when not use.
PREPARING LATTE
1. Fill the detachable water reservior with drinking water. The water level
should not exceed MAX level marked on the reservior.

6
2. Put capsule collection container, drip tray and cup holder grid in place
3. Move the milk reservior by following the arrow “ ” marked on the
milk reservior lid and ll the milk reservior with milk (grease content >3%,
temperature: 4-8°C) to the “ ” mark on the milk reservior. After it, re-
place the milk reservior well on the milk reservior holder by following the
arrow“ ”marked.
4. Open the handle by lifting it and insert a coee capsule. Close the han-
dle by pushing it down directly.
Note: Only use Nespresso and Donlim capsules for the appliance.
5. Plug the power cord into the outlet. Press the power switch to “I” posi-
tion and then all the indicators start to ash.
CAUTION: During brewing, never open the handle. Otherwise the coee
capsule will be expelled into the capsule collection container.
6. Position a container on the cup holder grid. Make sure the drip tray is
assembled in place.
7. Once all the indicators light steadily, press the“ ”button and its indica-
tor starts to ash for some time, and then the machine starts to froth milk.
After nish frothing, all the indicators light steadily.
8. Pour appropriate amount of frothed milk into the container. After it,
press the small cup or large cup based on your requirement and then its
corresponding indicator starts to ash, after a while, coee will ow into
the container from the coee outlet. Once the desired quantity has been
reached, the coee will stop owing out automatically and the all the indi-
cators will light steadily.
NOTE: The appliance will enter into the standby mode and all the indica-
tors will be extinguished if no any operation within 4 minutes after all the
indicators light steadily.
NOTE: During brewing process, you can cancel the coee brewing process
by pressing your selected coee button once. To restart the brewing pro-
cess, just need to press the button again.
9. During brewing process, all the indicators will ash quickly if there is
lack of water in the water reservior. At that time, you shall rell the water
reservior. After it, press any button to make the indicators stop ashing
and then press the corresponding button to restart the brewing process.
10. Once you have nished brewing coee, always expel the capsule. Cap-
sules are automatically expelled into the capsule collection container by
opening the handle.
CAUTION: Never open the handle during brewing cycles.
NOTE: The appliance will enter into the standby mode and all the indica-
tors will be extinguished if no any operation within 4 minutes after the
appliance nishes brewing coee. If you want to brew coee again, rstly,
make sure that the plug is connected well with the power source and the

7
power switch is at“I”position, and then press any button, after it, the appli-
ance will continue to brew coee.
11. If you want to another cup, insert a new capsule for operating.
12. Empty the capsule collection container and rinse the unit and reservior
frequently.
13. Always turn the coee maker o and disconnect the power supply
when not use.
FROTHING MILK ONLY
1. Move the milk reservior by following the arrow “ ” marked on the
milk reservior lid and ll the milk reservior with milk (grease content >3%,
temperature: 4-8°C) to the “ ” mark on the milk reservior. After it, re-
place the milk reservior well on the milk reservior holder by following the
arrow“ ”marked.
2. And you can add some ingredients such as chocolate powder into the
milk reservior if you like.
3. Press “ ”button and then the appliance starts to froth the milk only.
4. The appliance will stop working after nish frothing.
When environment temperature is lower than -5 Centigrade degrees,LED
of Latte button will blink in red and blue, and LED of other buttons will ex-
tinguish. Once environment temperature rises and reaches above -5 Centi-
grade degrees, appliance will resume to normal operation.
Be sure to unplug this appliance and cool down before cleaning. To protect
against electrical shock, do not immerse cord, plug or unit in water or liq-
uid. After each use, always make sure plug is rst removed from wall outlet.
We recommend that the following is performed on a periodical basis:
1. Use a dry cloth to wash the removable water reservior.
2. Empty the capsule collection container and clean it.
3. Clean the capsule holder with a dry cloth.
4. Use a damp cloth to gently wipe the cup holder grid.
5. Clean the machine using a damp cloth, never submerge the machine.
6. Replace all parts and keep for next use.
To keep your coee maker operating eciently, you should clean away the
mineral deposits left by the water regularly according to the water quality
in your area and the frequency use the appliance, the detail is as follows:
1. Fill the water reservior with water and descaler to the MAX level in the
gauge of coee maker (the scale of water and descaler is 4:1, the detail re-
fers to the instruction of descaler. Please use“household descaler”, you can
use the citric acid instead of the descaler (the one hundred parts of water
Low temp protection
Cleaning and maintenance
Removing mineral deposits

8
and three parts of citric acid).
2. Press the power switch to“I”position and all the indicators start to ash,
wait until the indicators light steadily.
3. Make sure the handle is closed in place.
4. Position a container on the cup holder grid.
5. Press the large cup or small cup coee button and allow the liquid to
ow. Once the desired quantity has been reached, the water will stop ow-
ing out.
6. Wait for 20 minutes with the machine turned on.
7. Press the large cup or small cup coee button until all of the water is
used up.
8. Rinse the reservior well and ll with clean water. Press the large cup or
small cup coee button until all of water is used up.
You can help protect the environment!
Please remember to respect the local regulations: hand in the
non-working electrical equipments to an appropriate waste
disposal centert.
Directions for making good coee
ENVIRONMENT FRIENDLY DISPOSAL
Table of contents
Languages:

