Milford iGuide Assembly instructions

user reference manual

We understand - new technology can be intimidating. That’s why we’ve put together this easy to use
reference manual for i-Guide. i-Guide unlocks a world of great choice, convenience and control so you
can fully enjoy your digital cable entertainment experience.
With Family Cable, you have more programming choices than ever before. And with i-Guide, you can
eortlessly nd your favorite shows and stars on TV – you’re in control.
With 90-minutes of program listings at a glance, you’ll nd i-Guide easy to use and navigate.
The Quick Menu allows you to move easily to the programming and information you want.
You’ll be able to easily set Recordings, Reminders, Favorites and Parental Controls.
Use Mini Guide to browse future listings while you continue to enjoy watching TV.
This manual provides you with the detailed information about important features in i-Guide
so you can get started enjoying your digital cable experience.
i-Guide is used with the following gadgets for your home:
Motorola DCX700-HD Standard Box
Motorola DCX3510-HD DVR Box
1
906 Okoboji Ave
Milford, IA 51351
855-722-3450
www.milfordcomm.net

2
table
of
contents
welcome to i-Guide 1
table of contents 2–3
basic navigation tips 4
your access to digital cable 5–8
Listings By Time 5
Listings By Channel 5
Navigate Program Listings 5
Quick Menu 6
Quick Menu Icons 6
Main Menu 6
Program Information 7
Action Icons 7
Reminders 8
Setting Reminders 8
Reminder Settings 8
search 9
Search 9
Title Search 9
Saving Searches 9
smart channel surng 10–11
Flip Bar 10
Mini Guide (Browse) 10
Digital Music 11
Access Digital Music 11
Local Weather 11
Messages 11
parental controls 12–14
Parental Controls Setup 12
Parental Controls for On Demand 14
View Locked Programs 14
Bypass or Clear Locks 14
Restore Locks 14
favorites 15–16
Favorites Lists Setup 15
Access Favorites Lists 16
Add or Delete Channels to Favorites Lists 16
setup 17–19
Guide Setup 17
Cable Box Setup 17
Audio Setup 18
Text Language Setup 18
Screen Saver 19
Parental Controls and Purchase PINs Setup 19
Guide Colors 19
Screen Position Setup 19
DVR Setup 19
table of contents

table
of
contents
hdtv 26
digital video recorder (dvr) 27–38
Control Live TV 27
Playback Controls 27
Remote Control Arrow Buttons 27
Status Bar 27
Pause 28
Rewind 28
Fast Forward 28
Slow Motion 28
Instant Replay 29
Return to Live TV 29
SWAP Between Two Programs 29
Recording Programs 29
One-touch Recording 29
From Program Information 30
Manual Recording 30
Record Two Programs at Once 30
Two Recordings Are in Progress Overlay 31
Manage Schedule Conicts 31
Search and Record 31
Actor/Director Search 31
Keyword Search 32
Saving Searches 32
Recording Series 32
Modify Series 33
Modify the Series Priority List 33
Manage Series Priorities 34
Manage Series Priority List 34
View Recorded Programs 34
Recorded Program Information Screens 34
Future Recordings 35
View List of Scheduled Recordings 35
Manage Your Recordings 35
DVR Setup 35
DVR Folders 36
Live Program Notice – Default“On” 36
DVR Clipping 36
Manage Series Priorities 36
DVR Cleanup 37
DVR History 37
Modify Recording Options 37
From Listings 38
Recording Notices 39
Recording Starting Notice 39
Changing Channels While Recording 39
Recording Low and Full Notices 39
multiroom DVR 40–41
Access Recordings From Your Primary DVR 41
Access Recordings From Networked Set-Top Boxes 41
frequently asked questions 42–51
3

basic
navigation
tips
In i-Guide, yellow is the highlight color. To navigate the guide, use the arrows on your
remote control. The highlight appears on-screen to indicate your current selection.
Press buttons on your remote to move the highlight.
Press OK/Select to conrm your selection.
Press EXIT on your remote to return to watching TV.
basic navigation tips
4
Currently Unavailable

Your remote control holds the key to navigating through the features of i-Guide. Words
appearing in ALL CAPS refer to a specic button on the remote. Note that all remotes may
not have all of the buttons.
Listings By Time
To nd out what’s on TV right now, press GUIDE on your remote to access Listings By Time.
The listings grid provides a 90-minute view of programming for up to 5 channels per screen.
The current program is highlighted in yellow. Use the andbuttons to navigate the
listings grid. Instant program info appears in the upper left of the screen. Press OK/Select to
tune to a program from the grid. Press INFO for additional information.
Listings By Channel
Press GUIDE two times to view Listings By Channel and use thebuttons to see listings
for the next channel in the line-up. Use buttons to navigate.
Navigate Program Listings
You can use the
and buttons on your
remote to quickly navigate the listings screens –
up to 14 days in advance. Press OK/Select to
tune to that channel or INFO for more information.
Listings are color-coded to identify types of programs.
Blue – Regular programs
Purple – Movies
Green – Sports
Light Blue – Kids’ programs
For faster searching
• Use the PAGE
buttons to view listings a page at a time
• Press and hold
or to rapidly move ahead in time or through the channel lineup
• Press the DAY +-buttons to advance ahead a day at a time
your
access
to digital
cable
your access to digital cable
5

* Menu selections vary depending on services oered by your cable provider.
** May not be supported by all set-top boxes.
your
access
to digital
cable
Guide Symbols to Know – Quick Menu Icons
These icons may appear on your Quick Menu. Use the buttons on your remote to
highlight and select an icon for immediate access.
Main Menu – go to the Main Menu
DVR – schedule, view and manage recordings
On Demand – view On Demand menu
and programs
HDTV – view list of HDTV programs,
by channel or time
Favorites – view your Favorites lists
Search – search programming by category
or by Title, Actor/Director or Keyword
Movies – lists movies by category
Sports – lists sports events by category
Kids – lists kids programming by category
Parental Controls – lock shows or channels
based on preferences
The Picture in Guide feature allows you
to watch a show while using the guide.**
Quick Menu
The Quick Menu* provides shortcuts directly to the
key features of i-Guide and digital cable service.
Press the MENU button one time and the Quick
Menu will appear over any video or guide screen.
Press the buttons on the remote to continuously
move through the icons.
Main Menu
The Main Menu* provides access to all of the features
of i-Guide and digital cable. Press the MENU button
twice to view the available options, including:
• TV Listings By Time
• Search
• Favorites
• Parental Controls and more
6

*Menu selections vary depending on services oered by your cable provider.
your
access
to digital
cable
To access information while viewing listings or watching TV, press the INFO button.
Press INFO a second time to see a longer description and additional details such as
actor, rating, release
year, category and run time.
Action Icons
From the program information screen use the Action Icons to set a Reminder or Recording,
or designate a Favorite among other options. Usebuttons to highlight each icon
and see the on-screen description.
Go back to the previous screen
Record/Change Recording Options*
(DVR)
Set or cancel a Reminder for
this program
See all the times the program will
be airing
Watch this channel or program
Save the channel in your Favorites list
Place a lock on the program to
restrict viewing
Order PPV, On Demand and other
pay services
Guide Symbols to Know – Action Icons
Program Information
Instant Information is available when you highlight a program in the program listings, which
includes program title, start and end time, a brief program description, and indicators to
identify settings such as Reminders and Recordings.
7

your
access
to digital
cable
Reminders
You can set Reminders so you don’t miss
shows you want to watch.
Reminder Settings
Customize the frequency and timings for
Reminders.
• Use the buttons to set repeating
Reminders
• Determine Start and End time for the
Reminder to appear on-screen – up to
15 minutes prior to the program starting and
up to two hours after the program is over
When you set a Reminder, you have the option
of bypassing Locks* if they are placed on the
program, so you can tune directly to the program
without having to enter your Locks PIN
(see Parental Controls section for more information).
Setting Reminders
From the Program Info screen, highlight the
icon and press OK/Select. Follow the on screen
prompts to confirm the Reminder or Reminder
Settings.
8

Saving Searches
Save your search by selecting Save Search. Saving
searches can be helpful when you want to quickly
nd a program. Simply select Saved Searches from
the Search Menu to access your list of saved searches
to restart or delete the search. You can save up to 16
searches at one time.
search
Search
i-Guide provides you many ways to nd your favorite
shows. Select from the Quick Menu or Search
from the Main Menu to begin. Quickly search
programs by Title, or search by category like
Movies, Sports or Kids programs or view HD
and PPV channels.
If you have a DVR, you can quickly search by
Keyword or Actor/Director. See Search and
Record in the DVR section for more information.
9
Title Search
Title Search allows you to nd a specic program by
entering the rst few letters of the program name.
Select Title from the Search menu and use the
buttons to navigate the keyboard and
spell out the program title. Continue entering letters
until the show you
are looking for appears on the right.
If the program is not airing in the next 14 days, it won’t
appear on the list.
search

The Flip Bar may also show other options:
Watch in HD* – When tuning to a standard
denition channel, this button may appear on
the left side of the Flip Bar to indicate the
channel is also available in High-Definition.
Press OK/Select to tune directly to the
associated HD channel.
Mini Guide (Browse)
The Mini Guide allows you to watch television and view program listings without leaving the
program you are watching or going to the full-screen guide.
To access Mini Guide, press OK/Select. Mini Guide appears on the lower 1/3 of the screen
and displays two or three channels and 90 minutes of listings at a time. Use thearrows
to see listings on other channels and the arrows to see listings at other times. At any
time, press INFO or OK/Select to access program info.
The default setting for
Mini Guide is a 2-channel
display. To change the
display, go to Main Menu,
select Setup, then Guide
Setup and change
“Mini Guide Cell Height.”
Flip Bar
When you change channels, the Flip Bar appears
and provides a brief two line description about the
program and other information including title, start
and end time, channel, current time, program rating
and settings such as Favorites or Locks.
When you nd the program you are interested in,
press INFO for more program details, or press
OK/Select to make the Flip Bar disappear.
* Requires HD service from your cable provider. On Demand not available in all areas.
smart channel surng
smart
channel
surng
10

Digital Music
Digital Music is continuous, commercial-free music in
a variety of formats.
Access Digital Music*
• Select Digital Music from the Main Menu
or Search Menu
• Press the MUSIC button on the remote
(if available)
You can press INFO for more information on each
category. Select a music format and enjoy the music.
Local Weather
Get accurate, up-to-date local weather conditions
and a 3-day forecast.
From the Main Menu, highlight Local Weather and
press OK/Select. Use the down arrow button to
see a detailed local weather forecast.
Note: Weather service not available for all locations.
Messages
Messages may be sent occasionally by your cable company to announce new services,
special promotions or other information. If you have a Message, an envelope indicator
will appear in the upper left corner on guide screens and a red light will appear on your
set-top box. From the Main Menu, select Messages, highlight the desired Message
and press OK/Select to read.
*Digital Music may not be available on all menu congurations.
smart
channel
surng
11

parental controls
Parental Controls Setup
Locks can be set quickly in a variety of ways anytime while watching TV or using the guide:
• Press the Lock button on your remote*
• Select the from the Quick Menu
• Select the from any program info screen to lock a specic program
• Access Parental Controls from the Main Menu or Setup Menu to set up all Locks
i-Guide provides a Parental Controls feature, which allows you to restrict viewing and purchases
of TV programs and services based on your viewing preferences. To activate Parental Controls
set a personalized 4-digit PIN to place Locks by movie ratings, TV and content ratings, channels
or titles. You can also hide adult titles from being displayed on-screen.
With any of these actions, if you have not set up a PIN, you will be prompted to enter
a 4-digit PIN to activate the Locks feature. If you have already set up a PIN, enter
your number. (See Setup Section for more information on how to set up PINs).
Quick Menu Program Info Main Menu
Lock OptionsPIN Setup
*Not supported on all remotes.
parental
controls
12

The Parental Controls feature also provides you the
opportunity to lock programs and movies by ratings
and content.
From the Parental Controls Button on the Main
Menu lter your locks by Movie Rating, TV Rating,
TV Content, Channel, Title, or Service.
Under TV Content, you can lock the level of explicit
content based on your viewing preferences for
Violence, Language, Sexual Situations, and
Suggestive Dialogue.
Select Movie Ratings or TV Ratings to block content
by rating. The guide will automatically lock that rating
and the more restrictive ratings. For example, when
you lock PG-13, movies with R, NC-17 and Adult
ratings will also be locked.
MOVIE TV
RATINGS RATINGS
G TV-Y
PG TV-Y7
PG-13 G
R TV-PG
NC-17 TV-14
Adult TV-MA
TV CONTENT RATINGS
Violence Language Sexual Situations Suggestive Dialogue
(FV, V) (L) (S) (D)
Fantasy Violence
Moderate Violence Infrequent Coarse Some Sexual Some Suggestive
Situations Dialogue
Intense Violence Strong Coarse Intense Sexual Intensely Suggestive
Situations Dialogue
Graphic Violence Crude Indecent Explicit Sexual
Activity
parental
controls
13

View Locked Programs
To view programs and channels you have locked,
enter your PIN when prompted. Locks will automatically
be
restored when you tune away from the channel or turn
your set-top box o.
Bypass or Clear Locks
Temporarily open or clear all Locks for easier viewing.
Under Setup from the Main Menu, select Parental
Controls Setup, then Master Locks, and change the
options from No to Yes.
Restore Locks
Locks may be restored in any of the following ways:
• While watching TV, press the LOCK button anytime and enter your PIN
• Select Parental Controls Setup from the Setup Menu, then under Master Locks change
the options from Yes to No to turn Locks back on
• Turn the set-top box o and back on
parental
controls
14

The Favorites feature allows you to quickly access channels you and your family have
designated as Favorites.
Favorites Lists Setup
Create and manage up to ve (5) Favorites Lists. From the Main Menu, select Setup,
then Favorites Lists Setup. Use your on screen keyboard to name your lists.
favorites
favorites
15

Access Favorites Lists
• While watching TV, press the FAV button to skip
to your next Favorite channel on the current list
• From TV Listings or Mini Guide, press the FAV
button to bring up a ltered guide of the channels
in your last accessed list. Press FAV button
again to scroll through all of your Favorites Lists –
the guide will have a tab with each list’s name
• From the Quick Menu select the to bring up
your Favorites Lists. If you have
not yet set up
any Favorites, simply follow the on-screen
prompts to begin a new list
Add or Delete Channels to Favorites Lists
• From the Quick Menu – select the Icon
• Select the Favorites List you want to edit
• Select the Icon to add or remove favorite channels
• You can also rename, delete, or Lock your Favorites list
• Highlight a channel in the listings and press OK/Select or FAV to add to your favorites –
a Icon will appear; Or, to remove the channel, press OK/Select or FAV and they will
be removed
• Press the Icon to conrm your Favorites channel settings
favorites
16

From the Setup Menu, you can activate and customize certain i-Guide features such as
the Flip Bar, Parental Control options, Cable Box settings, Audio settings, Languages
and more.
Guide Setup
• Flip Bar Position – Flip Bar can appear on top
or bottom of screen – default is bottom
• Flip Bar Timeout – Flip Bar will stay on your
screen, from 2 to 15 seconds – default is 3 seconds
• Channel Entry:
— Yes – automatically tunes to a channel after
2 seconds when entering channel number
from your remote – default is Yes
— No –
you must enter 3 digits or press OK/Select
when entering channel number from your remote
• Reminder Time – Adjust the amount of time
the Reminder Notice will appear before the start
of a program, from 1–15 minutes – default is
one minute
• Grid Cell Height – Adjust the listings grid for
single- or double-height grid display
• Mini Guide Cell Height – Adjust the listings
display for single (3 channels) or double
(2 channels)
• Message Indicator – Select On to make the
message envelope appear when a new message
is received
Cable Box Setup
Front LED Display
• Current Channel – displays the currently tuned
channel on the front of the cable box
• Current Time – displays the current time on the
front of the cable box
AC Outlet
• Switched – Determines that power is available
only when the cable box is on
•
Unswitched – Allows the power to remain constant
to the outlet on the back of the cable box
Conguration – Highlight and press OK/Select
to show the conguration screen, which includes
information your cable company may need in the
event of a problem with your service.
setup
setup
17

Audio Setup
Default Audio Track
Secondary digital audio can be changed on certain
networks and programs. Note that the default audio
track will be set to “Channel Default,” or primary
audio, which in most cases is English. You can
change the default language to English, Spanish,
French, or Portuguese.
Descriptive Video Services (DVS)*
Descriptive Video Service (DVS) is an alternative
audio channel which makes television more
accessible to the visually impaired by providing
narrated descriptions of key visual elements within a
program, such as actions, subtitles, scene changes,
graphics, and body language. Default setting is O.
Audio Output – Choose if the audio output goes to
your TV or to your stereo.
• TV Speaker – default setting
• Select Advanced to change the settings for
Compression and Stereo Output
Optimal Stereo
• No – Volume is unchanged from the current setting
• Yes – Volume is automatically adjusted to the optimal level
Text Language Setup
Access the Text Language Setup from the Setup
Menu to independently select language setting for the
menu text. The default setting is English in most cases.
Change the default language to English, Spanish,
Canadian English or Canadian French.
From the Setup Menu, select Text Language Setup.
Choose the preferred language for the on-screen menus
within i-Guide. Select Yes to conrm.
Note: Changing the language can take several minutes.
During this time, listings are not accessible.
*For Canadian cable providers only.
setup
18

Parental Controls and Purchase PINs Setup
Your Parental Controls PIN allows you to restrict
viewing of programs. Your Purchase PIN is used to
restrict pay programming purchases. Once you have
setup your PINs, you can return to Parental Controls
Setup to set up your program Locks as reviewed in the
Parental Controls section.
Use the buttons to make your selections,
and then press OK/Select to conrm each setting.
Guide Colors (if available)
Select to change the color scheme of i-Guide.
Screen Position Setup
To alter your screen position:
• From the Setup Menu, select Screen Position Setup to adjust the screen position
• Use the
buttons on your remote until the display arrows are centered on the screen
Screen Saver
A Screen Saver can be activated on your TV screen. Once the Screen Saver is set to On it will
automatically engage if a guide screen is displayed for longer than the set activation time. The
default is set to On.
•
From the Setup Menu select Screen Saver to change the settings
•
The activation time is between 1-15 minutes
DVR Setup
Select DVR Setup to manage:
• DVR Folders
• Live Program Extension
• DVR Clippings
The default setting is
On
for these options. See the
DVR section for complete information about these
settings.
setup
19
Table of contents
Popular Remote Control manuals by other brands
Wonde Proud
Wonde Proud WT100CR Operation manual

Sony
Sony PCM-D50 - Portable Linear Pcm Recorder operating instructions

KRAMBLE INDUSTRIES
KRAMBLE INDUSTRIES IV Series Installation and operating manual
PairGain
PairGain HIGAIN HRU-412 manual
SOMFY
SOMFY Telis 16 RTS installation guide

MECHANIS
MECHANIS V220-S Assembly, installation and operation instructions

CaryMart
CaryMart 0020740 manual

ProLights
ProLights LUMIPARIRCH user manual
Cisco
Cisco Z22 user guide
Solid Apollo
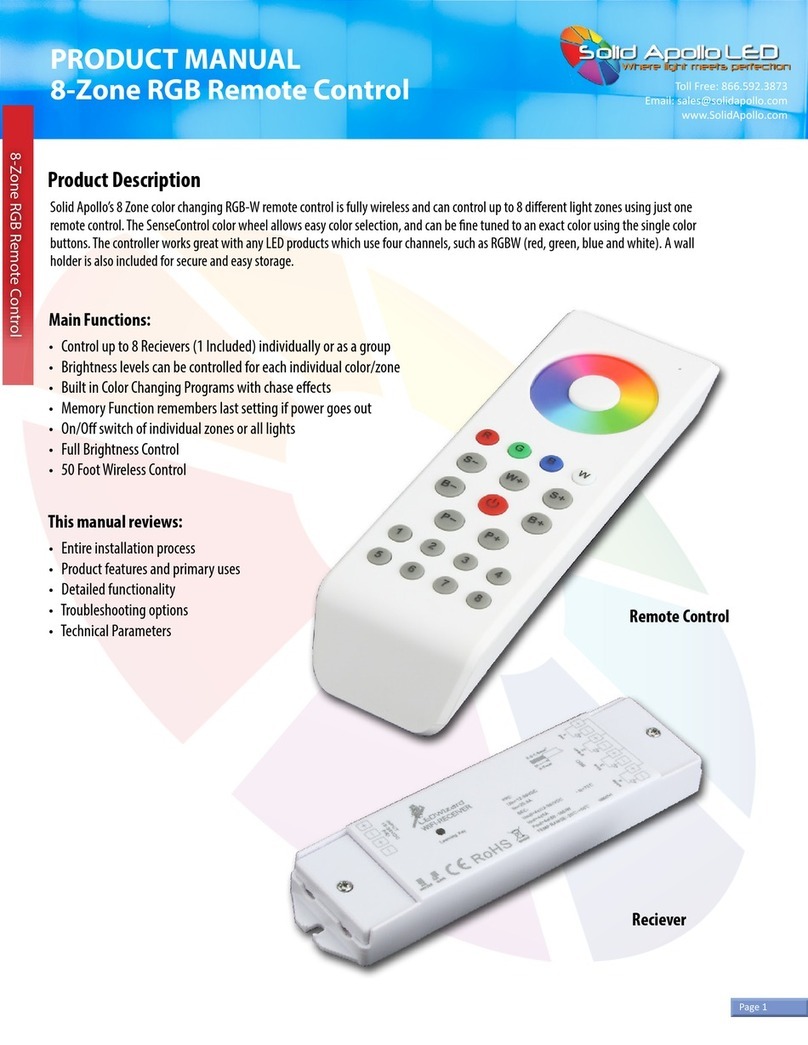
Solid Apollo 8-Zone RGB Remote Control product manual

Electrix RC
Electrix RC Circuit 1/10 Electric Stadium Truck instruction manual

Empire Comfort Systems
Empire Comfort Systems R11006 operating instructions


