manuals.online logo
Brands
  1. Home
  2. •
  3. Brands
  4. •
  5. MILUX
  6. •
  7. Fan
  8. •
  9. MILUX MCF- E135 User manual

MILUX MCF- E135 User manual

Operating And Installation Instructions
Indoor Fan Specification
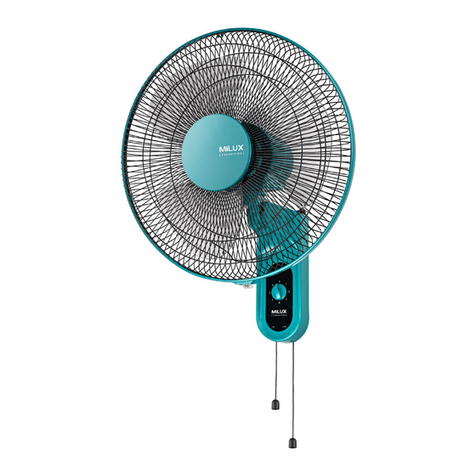
(Fan picture is for installing reference only)
Model: MCF- E135
MILUX SALES & SERVICE SDN. BHD.
Head Office: No. 31, Lorong Jala 14/KS10 Off Jalan Telok Gong 42000 Port Klang Selangor Malaysia.
Tel:1800-88-64589 Fax:603-3371 8822 http://www.milux.com.my
1
1.Installation must be carried out by a qualified wiring installer
2. Before Installing the fan turn off the power supply
3.Use power supply 220-240V/50Hz
4.When mounting the fan,ensure that the safety cable is loop across the ceiling
mounting hook.
5.The ceiling mounting hook must be able to withhold a min of 35 pounds.
7.Do not place any objects in the path of the blades.
8.When all electrical connection are done,store all wire neatly.
9.Make sure that all screws and connection are tightly screwed and secured.
10.An all‐pole disconnection must be incorporated in the fixed wiring in accordance with the wiring
rules, a all‐pole disconnection incorporated in the fixed wiring is to be provided.
11.This appliance can be used by children aged from 8 years and above and persons with reduced
physical, sensory or mental capabilities or lack of experience and knowledge if they have been given
supervision or instruction concerning use of the appliance in a safe way and understand the hazards
involved. Children shall not play with the appliance. Cleaning and user maintenance shall not be
made by children without supervision.
table of contents
Safety Precaution
1. Safety Precaution
2. Supplied Parts
3. Downrod Installation
4. Install Safety Cable
5. Electrical Wiring Connection
6.
Blades and Light Kit Installation Instruction
8. Maintenance
9. Troubleshooting
10. Customer Service Center
2
1
2
4
4
5
6
6
7
2
Supplied Parts
1 Canopy × 1
2 Yoke cover × 1
3 Downrod × 1
4 Motor × 1
5 LED Light Kit × 1
6 Blade holder × 5
7 Panel × 5
8
Receiver
× 1
9 Transmitter × 1
Fig.3
Fig.2
Fig.1
1)Remove the parts from the both side of downrod.(Fig.2)
2)Insert downrod through canopy&yoke cover, Insert the down rod into the motor shaft,
Thread wires and safety cable through downrod,Aligning the down rod holes to the holes of shaft.
Tighten the down rod to motor with the previous bolt、washer、nut and contter pin (Fig.3)
2.Downrod Installation
Bolt
Nut
Cotter pin
Spring Washer
Flat Washer
1
2
4
10
35
67
89
10 Blades × 5
11 Blade holder screws × 11
12 Blade screws × 16
13 Wire × 3
14 Wire connector × 3
15 Balancing kits × 1set
L
N
16
11 12 13
14
LIGHT
6Hr
1Hr
3Hr
LIGHT
OFF
MED
HI
LOW
Bolt
3
Fig.4
Fig.5
Install Safety Cable
Fig.6
Fig.7
Safety Cable
“J” Hook
Screw
Ceiling
Safety Cable
Bolt
Nut
Cotter pin
Spring Washer
Ceiling
Hook
Pulley
a
3)“U” Hook mounted,Remove the bolt, stop pin,
nut, washer and rubber pulley from the downrod.
(Fig.4)
4)
Place the pulley onto the Hook.(Fig.a)
5)Lift the motor until the bracket hole of the
downrod aligning the pulley hole.Tighten the
downrod to the pulley with the previous bolt、
washer、nut and contter pin.
WARNING
!
1) Remove the safety Cable Screw from the downrod bracket.
2) Arrange and tie the Safety Cable as step 2.
3) Firmly screw the Safety Cable onto the downrod.
Safety Cable must be fixed correctly.
May cause injury if ceiling fan drops.
Screw Screw
Safety
Cable
1 2 3
Pulley
Bolt
Downrod
Nut
Cotter pin
Spring Washer
6)“U” Hook mounted, Lift the fan onto the
mounted hook,until the hanging wheel seat on
the mounted J hook
.(Fig.6)
4
Fig.8
Ceiling
Electrical Connection
1. Before Installing the fan turn off the power supply.
2. All electrical connections must be in accordance with local and national electrical code standards.
If you are unfamiliar with proper electrical wiring connections, obtain the services from a qualified
electrician.
3. Take out the three pieces of lead wires from the screws bag and connect the wire to the receiver and fan.
4. Connect the fan wire to the house’s supply wire. Diagram shows a complete assembly of the ceiling fan.(
Fig.8
)
5. Finally,Place the receiver in the canopy. Raise the Canopy and tighten it with the Set Screw.
(Supply leads accommodated in the canopy)
RED (AC IN L)----------------------- LIVE WIRE
BLACK (AC IN N)------------------- NEUTRAL WIRE
RED (TO MOTOR L)---------------- LIVE WIRE
BLACK (TO MOTOR N)------------ NEUTRAL WIRE
ORANGE (FOR LIGHT L)---------- LIGHT WIRE
Grounding wire
Red( AC IN L)
Black(AC IN N)
Black
Red
Orange
240VAC/50Hz
Power supply
receiver
FOR LIGHT L
TO MOTOR L
TO MOTOR N
5
Fig.9
Fig.10
Blades and Light Kit Installation Instruction
1. Secure the blade to blade holder and Panel using screws provided, Attach the blade assembled
to motor and secure it through tightening the motor screws. Repeat above process to finish 5 blades
installation.(Fig.9)
Blade holder screws
Blade
Blade screws
Panel
Blade holder
2. Connect two wires from the bottom of the fan to two wires from the LED light kit.(Fig.10)
3. Twist clockwise the LED light kit into fan housing. Make sure light kit is secure
but not overly tight.(Fig.10)
LED Light Kit
6
Maintenance
Due to fan’s natural movement, connections may get loose after a period of usage.
To ensure a proper and safety usage,We highly recommend to inspect and tighten
all connections every 6 months.
CLEANING
Clean your fan periodically to prolong its new appearance. Basic cleaning procedures are as follows:
1.Use only lukewarm water. Do not use detergent, corrosive or acidic solution.
2.Damp the cloth lightly. Use only soft or lint-free cloth to clean the fan. Rough fabric will
scratch the surface.
3.Apply a thin coat of furniture polish to the wooden blades to protect and enhance the appearance.
4.To cover small scratches, apply a light coat of shoe polish over it.
5.There is no need to lubricate the fan.
Troubleshooting
Check on the following before lodging a service report
SYMPTOM PROBLEM SOLUTION
Fan not moving 1.Main cables not connected 1.Check main and branch circuit
Breakers or fuse
2.Wire connection loose 2.Check the line wires connections
to the fan and switch housing
Fan noisy 1.Housing screws are loose 1.Tighten all screws
2.Wire and nut connections 2.Neatly separate and store the wire
rattles against each other connections from the nut
3.Canopy touches the ceiling 3.Check to ensure the canopy is not
touching or too close to the
Ceiling
Remote control 1.Remote and receiver code 1.Check that the codes are exactly
Not working different the same
2.Battery not installed 2.Install the remote control battery
3.Weak battery 3.Change a new battery
7
Customer Service Center
If you need any technical assistance or to report a fault, please contact
our customer service center at:
MILUX SALES & SERVICE SDN. BHD.(302263-X)
No. 31, Lorong Jala 14/KS10 Off
Jalan Telok Gong 42000 Port Klang Selangor Malaysia.
Toll Free : 1800-88-64589
Tel : 603-31341254
Fax: 603-31341193
Website: www.milux.com.my

Other MILUX Fan manuals

MILUX MIWF-2820 User manual

MILUX

MILUX MIWF-2820 User manual

MILUX MSF-1601 User manual

MILUX

MILUX MSF-1601 User manual

MILUX MCF- E120 User manual

MILUX

MILUX MCF- E120 User manual

MILUX MISF-1120 User manual

MILUX

MILUX MISF-1120 User manual

MILUX MIAF-4020 User manual

MILUX

MILUX MIAF-4020 User manual

MILUX MWF-1601 User manual

MILUX

MILUX MWF-1601 User manual

Popular Fan manuals by other brands

Franklin Electric SubDrive50 Connect N3R install guide

Franklin Electric

Franklin Electric SubDrive50 Connect N3R install guide

Westinghouse ETL-ES-Petite-WH16 owner's manual

Westinghouse

Westinghouse ETL-ES-Petite-WH16 owner's manual

Ellington Regatto REG54BNK3 installation guide

Ellington

Ellington Regatto REG54BNK3 installation guide

Helios AIR1-CO DX Installation and operating instructions

Helios

Helios AIR1-CO DX Installation and operating instructions

Klarstein 10027939 manual

Klarstein

Klarstein 10027939 manual

Hunter DDI installation manual

Hunter

Hunter DDI installation manual

Vostermans VF9427B Assembly manual

Vostermans

Vostermans VF9427B Assembly manual

Parrotuncle Lighting F6273 Installation & operating instructions

Parrotuncle Lighting

Parrotuncle Lighting F6273 Installation & operating instructions

Vents-us VKM 100 E user manual

Vents-us

Vents-us VKM 100 E user manual

Salda AMBERAIR Installation, operation and maintenance manual

Salda

Salda AMBERAIR Installation, operation and maintenance manual

Hunter 21564 Parts guide

Hunter

Hunter 21564 Parts guide

Accurex XRUD manual

Accurex

Accurex XRUD manual

Hunter 41535-01 installation instructions

Hunter

Hunter 41535-01 installation instructions

cecotec FORCESILENCE 890 SKYLINE instruction manual

cecotec

cecotec FORCESILENCE 890 SKYLINE instruction manual

Westinghouse Oasis manual

Westinghouse

Westinghouse Oasis manual

VALBERG BITH 60 X 756C Instructions for use

VALBERG

VALBERG BITH 60 X 756C Instructions for use

Casablanca Metropolitan owner's manual

Casablanca

Casablanca Metropolitan owner's manual

HOFFEN FS40-14M instruction manual

HOFFEN

HOFFEN FS40-14M instruction manual

manuals.online logo
manuals.online logoBrands
  • About & Mission
  • Contact us
  • Privacy Policy
  • Terms and Conditions

Copyright 2025 Manuals.Online. All Rights Reserved.