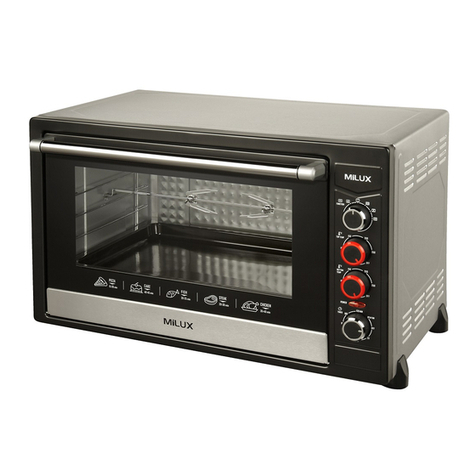
MILUX MOT-DS100 User manual

ELECTRIC OVEN
MODEL: MOT-DS100
USER MANUAL
Please read this manual carefully before operating this product.
Keep this manual handy for further reference.

1
General Safety Precautions
1. Always switch off and unplug the appliance from the main electrical
supply BEFORE cleaning and also when the appliance is not in use.
2. Never immerse the appliance in water or other liquids to avoid damage
and other hazards.
3. Never leave the appliance unattended while it is connected to the
mains.
4. Close adult supervision is necessary when operating appliance,
especially where children are present.
5. Ensure the electrical cord does not hang over the work surface.
6. Do not operate the appliance with a damaged cord set, or plug. Any
repairs should always be carried out by the Customer Service Centre
or by an authorized service centre.
7. Do not place the appliance on or near a hot gas or electric burner, in a
heated oven, or near easily flammable materials.
8. Always place appliance on a flat sturdy surface. When moving
appliance, always take precaution not to touch hot surfaces. Extreme
caution must be used when moving an appliance containing hot liquids.
9. Use of accessories or equipment not supplied by the manufacturer
may cause damage or result in the malfunctioning of your appliance or
bodily injuries.
10. When hot, do not apply water to the glass window. It may cause the
glass to break.
11. Be careful, do not touch the metal parts and glass window of the door,
it becomes extremely hot during use; use the handle to open and close
the door.
12. When cooking oil-splashing dishes such as roast chicken, it is
recommended to put 2 sheets of aluminum foils on a tray in order to
diminish oil splashing. Put one on a tray. Then oil will drip to a gap
between foils.
13. Do not attempt to dislodge food particles when the appliance is still
plugged into an electrical outlet.
14. This appliance is intended for household use only.

2
15. This appliance cannot be used by physical weak, slow response or
mentally disabled people (including children) unless guidance is
provided during operation.
Note: If the oven is positioned to close to the wall, the wall will be
burned or stained. Be sure the curtain etc, are not in contact with the
body. Do not put anything beneath the bottom of the body and the top
of set; an object so placed could be burn.
Specifications
Model
MOT-DS100
Rated Voltage
220-240V~
Rated Wattage
2800W
Capacity
100L
Frequency
50/60Hz
Parts Identification

3
Accessories
Control Panel
A.
Function Selector
This dial controls the different
convection oven settings. This
will be explained in more details
in functions operating.
B.
Top Temperature control
This dial sets the top
temperature from 600C -2500C.
c.
Bottom Temperature control
This dial sets the bottom
temperature from 600C -2500C.
D.
Timer Control
This dial sets the cooking time.
When the timer reaches zero,
the oven is automatically turned
off.
Should you want to set your
preferred time, turn the timer to
“STAY ON” and manually turn
the timer to “OFF” to stop the
operation.

4
Functions Operating
This symbol is for fermentation. Set your required time for
fermentation.
**Recommended for dough or bread making.
This symbol is to select the top and bottom element only.
**Recommended for baking cake.
This symbol is to select top and bottom heating with
rotisseries function only.
This symbol is to select top and bottom heating with
convection.
**Recommended for baking biscuits, grilling, roasting
This symbol is to select top and bottom heating with
convection and rotisseries function.
Operation Instruction
Feature
Die cast 3D diamond surface inner rear wall. Forms continuous heat
reflection in the oven for perfect baking result.
Before using for the first time
1. Remove all labels, stickers or and any accessories from inside the
oven.
2. Wash the accessories with warm soapy lukewarm water. Clean the
interior and exterior surface with a soft damp cloth.
3. Thoroughly dry all accessories and replace them in the correct position
in the oven.

5
4. Ensure the voltage indicated on the type plate corresponds to the
mains supply.
5. Before use for first time, heat the empty oven for about 10 minutes.
Some parts of the appliance have been slightly greased. This may
cause the appliance to emit some smoke, burning smell and resulting
in yellowish surface when you switch it on for the first time and the
smoke and smell will cease shortly. This is normal.
How to use Fermentation function:
1. Turn the function to fermentation .
2. Place the food in an appropriate dish on the wire rack or baking tray.
3. Set your required time to start fermentation. If you require more than 120
minutes fermentation you may set your preferred time by turning the
timer to “STAY ON” and manually turn the timer to “OFF” to stop the
operation.
How to Baking, Grilling and Roasting
Note: Recommended to preheat the oven 5-10 minutes
before cooking start.
1. Place the wire rack or baking tray into the desired position.
2. Turn the function to for top and bottom heating or to
baking and roasting with convection.
3. To baking and roasting with the convection at the same time, it helps
your food to cook evenly and quickly.
4. Turn the temperature control knob to the desired temperature.
5. Place the food in an appropriate dish on the wire rack or baking tray.

6
6. Set the desired cooking time to start cooking. The power indicator light
will be illuminated..
7. When the timer completed its operation, a bell sounds to signal that
the timer and cooking have finished.
How to use Rotisserie Function
1. Turn the function knob to the rotisserie function . If you need
convection function at the same time, please set the function control to
rotisserie and convection .
2. For rotisserie function, use the top temperature only.
Note: Preheat the oven 5-10 minutes before cooking starts.
3. Place the baking tray on the lower levels. This is avoiding the oil of the
food drip onto the heating tube.
4. Rub cooking oil on the rotisserie skewer and butterfly joints.
5. Insert the skewer through the food to be cooked. Insert the butterfly
joints on either end of the skewer and push into the food to secure it in
place. Tighten the thumbscrew on the butterfly joints.
6. Lift the assembled rotisserie and food using the rotisserie handle tool
and insert the rotisserie skewer onto the rotisserie mount on the right
hand side and lower the left end of rotisserie skewer into the rotisserie
mount on the left hand side.

7
7. Turn your desired cooking time to start. The power indicator light will
be illuminated.
8. For large portions of food which require more than 120 minutes
cooking, you may set your preferred time, turn the timer to “STAY
ON” and manually turn the timer to “OFF” to stop the operation.
Check that the rotisseries starts turning when the timer is set.
9. After cooking complete, remove the rotisserie food by using the
rotisserie handle tool or oven mitts.
Care and Cleaning
1. Ensure that the mains power is off and unit is unplugged from the
mains socket and allow the appliance to cool down completely before
performing any cleaning task.
2. Use a damp cloth or sponge to clean the interior and exterior surfaces.
Do not soak the inside of the oven or wash it in running water as this
will seriously damage the appliance.
3. Never use abrasive material, detergent or hard tools to try to dislodge
food particles left on the walls of the oven. Wiping with a damp cloth a
few times more will remove them.
4. The accessories can be washed as normal kitchenware in warm
soapy water.
5. Allow the oven and all accessories dry thoroughly before storage and
replace them in the correct position in the oven.
This marking indicates that this product should not be disposed with other
household wastes throughout the nation. To prevent possible harm to the
environment or human health from uncontrolled waste disposal, recycle
it responsibly to promote the sustainable reuse of material resources. To
return your used device, please use the return and collection systems or
contact the retailer where the product was purchased. They can take this
product for environmental safe recycling.

Table of contents
Other MILUX Oven manuals