manuals.online logo
Brands
  1. Home
  2. •
  3. Brands
  4. •
  5. Minerva Boskovice
  6. •
  7. Sewing Machine
  8. •
  9. Minerva Boskovice 4180i-1 User manual

Minerva Boskovice 4180i-1 User manual

Instruction manual
4180i - 1
Minerva Boskovice, a.s., Sokolská 60, CZ - 680 17 Boskovice
Tel.: +420-516-453434, 453433, 494111 Fax: +420-516-452165 http://www.minerva-boskovice.com
Edition/Vydáno/Herausgegeben/Edition/Editado: 09/2004 Printed/Tisk/Druck/Imprimé/Impress
ã
o: Czech Republic S735 000656
www.promelectroavtomat.ru
Contents - part A - Instruction manual:
1. Proper use of the machine ................................................................................................................................................ 1
2. Description of the machine ............................................................................................................................................... 1
3. Machine sub-classes and sewing categories .................................................................................................................. 2
3.1 Sub-class ................................................................................................................................................................ 2
3.2 Sewing categories ................................................................................................................................................... 2
4. Survey of equipment ......................................................................................................................................................................... 2
4.1 Equipment ................................................................................................................................................................................ 2
4.1.1 Needles ....................................................................................................................................................................... 2
4.1.2 Wheel feeders .............................................................................................................................................................. 2
4.1.3 Top roller holders ........................................................................................................................................................ 3
4.1.4 Top rollers ................................................................................................................................................................... 3
4.1.5 Throat plate ................................................................................................................................................................. 3
4.1.6 Throat plate inserts ..................................................................................................................................................... 3
4.1.7 Connecting cables of the head to the drive ............................................................................................................. 3
4.2 Optional eqiupment ................................................................................................................................................ 3
5. Technical data ................................................................................................................................................................................... 4
6. Operation of the machine ................................................................................................................................................. 5
6.1 Threading a thread ............................................................................................................................................... 5
6.2 Bobbin thread winding ......................................................................................................................................... 5
6.3 Inserting the bobbin and threading the lower thread ............................................................................................ 5
6.4 Regulating the thread tension .............................................................................................................................. 6
6.5 Needle replacement .............................................................................................................................................. 7
6.6 Regulation of pressing the top roller ..................................................................................................................... 7
6.7 Lifting the top roller up .......................................................................................................................................... 7
6.8 Reverse stitching .................................................................................................................................................. 8
6.9 Stitch length adjustment ....................................................................................................................................... 8
6.10 Safety clutch ............................................................................................................................................................................ 8
7. Electronic control of the machine ................................................................................................................................... 9
7.1 Control of sewing by means of control elements .................................................................................................. 9
7.1.1 Via treadle ................................................................................................................................................... 9
7.1.2 Via control pushbutton panel ...................................................................................................................... 9
7.1.3 Via control panel V810/V 820 ...................................................................................................................... 9
7.2 Adjustment of automatic functions via control panel for stop motor ................................................................... 10
7.2.1 By using stop motor Efka with panel V 810 ............................................................................................... 10
7.2.1.1 Adjustment by means of buttons with fixed setting function ........................................................ 10
7.2.1.2 Setting by means of parameters ................................................................................................... 11
7.2.2 By using stop motor Efka with panel V 820 ........................................................................................................... 12
7.2.2.1 Adjustment by means of buttons with fixed setting function ............................................................. 13
7.2.2.2 Setting by means of parameters .............................................................................................................. 13
8. Maintenance ....................................................................................................................................................................................... 14
Operating instructions for eventual trouble shooting ................................................................................................................ 15
www.promelectroavtomat.ru
Foreword
This instruction manual is intended to help the user to become familiar with the machine and take advantage of its application
possibilities in accordance with the recommendations.
The instruction manual contains important information on how to operate the machine securely, properly and economically.
Observation of the instructions eliminates danger, reduces costs for repair and down-times, and increases the reliability and life
of the machine.
The instruction manual is intended to complement existing national accident prevention and environment protection regulations.
The instruction manual must always be available at the machine/sewing unit.
The instruction manual must be read and applied by any person that is authorized to work on the machine/sewing unit. This
means:
- Operation, including equipping, troubleshooting during the work cycle, removing of fabric waste
- Service (maintenance, inspection, repair and/or)
- Transport.
The user also has to assure that only authorized personnel work on the machine.
The user is obliged to check the machine at least once per shift for apparent damages and to immediatly report any changes
(including the performance in service), which impair the safety.
The user company must ensure that the machine is only operated in perfect working order.
Never remove or disable any safety devices.
If safety devices need to be removed for equipping, repairing or maintaining, the safety devices must be remounted directly after
completion of the maintenance and repair work.
Unauthorized modification of the machine rules out liability of the manufacturer for damage resulting from this.
Observe all safety and danger recommendations on the machine/unit! The yellow-and-black striped surfaces designate permanend
danger areas, eg danger of squashing, cutting, shearing or collision.
Besides the recommendations in this instruction manual also observe the general safety and accident prevention regulations!
www.promelectroavtomat.ru
General safety instructions
The non-observance of the following safety instructions can cause bodily injuries or damages to the machine.
1. The machine must only be commissioned of the instruction book and operated by persons with appropriate training.
2. Before putting into service also read the safety rules and instructions of the motor supplier.
3. The machine must be used only for the purpose intended. Use of the machine without the safety devices is not permitted. Observe
all the relevant safety regulations.
4. When gauge parts are exchanged (e.g. needle, presser foot, needle plate, feed dog and bobbin) when tread-ing, when the workplace
is left, and during service work, the machine must be disconnected from the mains by switching off the master switch or disconnecting
the mains plug.
5. Daily servicing work must be carried out only by appropriately trained persons.
6. Repairs, conversion and special maintenance work must only be carried out by technicians or persons with appropriate training.
7. For service or repair work on pneumatic systems the machine must be disconnected from the compressed air supply system.
Exceptions to this are only adjustments and functions checks made by appropriately trained technicians.
8. Work on the electrical equipment must be carried out only by electricians or appropriately trained persons.
9. Work on parts and systems under electric current is not permitted, except as specified in regulations DIN VDE 0105.
10. Conversion or changes to the machine must be authorized by us and made only in adherence to all safety regulations.
11. For repairs, only replacement parts approved by us must be used.
12. Commissioning of the sewing head is prohibited until such time as the entire sewing unit is found to comply with EC directives.
It is absolutely necessary to respect the safety instructions marked by these signs.
Danger of bodily injuries !
Please note also the general safety instructions.
IMPORTANT WARNING!
To the feeding network cord, it is necessary to connect the respective network plug which has been approved in the country
of utilizing the machine. This operation should be performed by a worker acquainted with the electric safety rules being in
force in the given country. The supplier is not responsible for any damages caused by defective plug or owing to incorrect
assembly of the plug.
In spite of all safety measures made on the machines, inappropriate actions of the operator may lead to dangerous situations. In
industrial sewing machines, attention should be paid to the following still remaining possible sources of injury:
1. Moving sewing needle
- risk of injury when sewing with raised pressure foot or top roller, because the finger guard is then positioned too high.
2. Moving thread take-up lever
- risk of injury when inadvertently or intentionally inserting the finger(s) between the thread take-up lever and its guard.
3. Moving pressure member
- risk of injury when holding sewn work in immediate vicinity of the pressure member and beginning to insert under the pressure
member a considerably thicker sewn work portion,
- risk of injury when sinking the pressure member.
4. When switched off, the clutch motor slows down by inertia but would be reactivated by an accidental tread-ing down of the motor
treadle. To avoid such risk, it is advised to hold the handwheel by hand and slightly to depress the motor treadle.
www.promelectroavtomat.ru
1
Part A - Instruction manual
1. Proper use of the machine
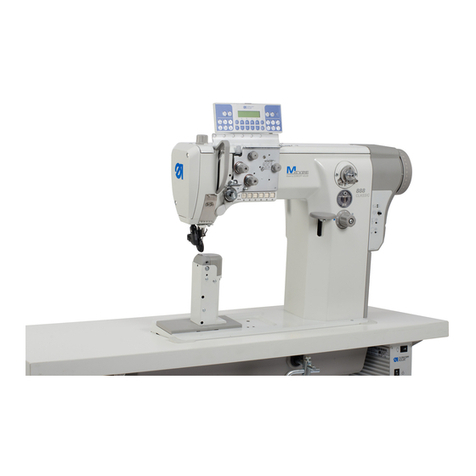
The machine can be used in the shoemaking industry for sewing of light medium and heavy shoe uppers. It is suitable for sewing
natural and man made leathers, shoemaking textiles and even plastic parts of sports shoes.
The machine is also used in the fancy goods industry for sewing bags, handbags, rucksacks and cases from the usual fancy
goods materials.
The machine sews with a double needle stitch. It is standardly equipped with needles of the 134 LR system which are suitable for
sewing leather. When sewing textile materials it is necessary to install the needle of the 134 system. The machine enables the
sewing of both technical and decorative seams which have almost the constant length of the stitch at a different sewing speed.
Only a dry material, which cannot be thicker than 6 mm when depressed by top roller, can be sewn by these machines, generally.
The material cannot contain any hard subjects, to the contrary case it is possible to work only with applied eye-protective shield.
Such a shield is not available to delivery at this time. Generally threads up to size 500 dtex x 1 x 3 (Labelled number 20) have been
used namely synthetic, cotton or core threads. Whoever should like to use other special threads, that one should consider the
resulting risks and make appropriate safety measures.
The total thickness is determined by sewing with a thicker needle of very strong material. In cases like this it is also necessary
substantially reduce the speed of sewing below the value shown in paragraph 5.
These special machines may be installed a operated only in dry and kept up expanses. We, as industrial sewing machines
manufacturers, agree with the fact that our products are operated, at the least, so far learned operators who can carry out all usual
operating functions and suppose their possible risks as perceptible.
Machine noisiness
Machine noisiness has been measured in accordance with the standards ISO 3746, ISO 11204 at maximum speed.
Laeq = equivalent machine noise of the self-standing machine on the working place, converted to % machine employment (dB)
- stated in the table
2. Description of the machine
It is single needle machine. It sews with a double threaded lock-stitch. It has a lower circular feed, needle feed and a top roller
which is driven. There are two possibilities for feeding. At the first step it feeds a lower circular feed, needle and top roller.
Secondly it feeds only the circular feed and the top roller (the needle is above the throat plate). Feeding can be in both directions.
The stitch length can be adjusted with an adjusting dial.
Caution!
Maximum allowed speed must not be exceeded for the given system of sewing. Otherwise it can cause damage to the
feeding mechanism.
The machine is fitted with a small-size (standard) vertical hook protected by an safety clutch.
The machine uses a wick lubrication system with central oil supply.
The simplest sub-class is standardly equipped with a knee operated lever. Specially for the Czech republic and if required with
treadle. Reverse stitching is with a manually operated lever.
Higher sub-classes have always mechanical control like the simplest sub-class, and furthermore there is a possibility of levelling
the needle, thread trimmer, electromagnetic top roller lift and electromagnetic reverse stitching (according to your order).
Each sub-class can be delivered in three sewing categories. Sewing category is determined by the number of the thread label and
the corresponding number of the needle. The machine is adjusted in the factory so that it corresponds to the ordered sewing
category. Changes of adjustment can be carried out only by a skilled and trained mechanic. A stand with wedge is in the simplest
sub-class equipped with a lever clutch motor and if required with a stop motor which enables the levelling of the needle.
In higher sub-classes, the stop motor is either situated on the machine table top or as a minimotor integrated on the machine
head. The type of mechanical top roller lift depending on the stand has one or two treadles.
Type of the Noisiness % machine
machine dB employment
4180i-1XX-100 82 20
4180i-1XX-200 79 20
4180i-1XX-300 73 20
www.promelectroavtomat.ru
2
3. Machine sub-classes and sewing categories
3.1 Sub-class
Table 1
*for only Czech republic
3.2 Sewing categories
This code indication includes the equipment assembled on the machine head, both necessary equipment and optional equip-
ment. The standard configuration of the equipment has been preset, according to the under mentioned table, in the factory which
includes only necessary equipment. If the buyer demands a different configuration then the factory allocates a new code
indication.
Table 2
Standard configuration - the numbers in brackets stand for ordering Nos. when ordering separately the Equipment in question
(needles - delivered in 10 pcs pack).
Type Needle size Top roller Wheel feeder Throat plate Throat plate
insert
Class-sub-class Diameter Pitch of teeth Width of hole
-sewing category 0.01mm mm mm mm -
4180i-1XX-100 80 35 0.4 1.2
(S548 134013) (M 173) (M 060) (M 126)
4180i-1XX-200 100 35 0.4 1.5 (M 091)
(S548 134001) (M 173) (M 060) (M 127)
4180i-1XX-300 130 35 0.6 2.0
(S548 000311) (M 173) (M 059) (M 151)
4. Survey of equipment
This survey does not include the equipment assembled on the stand.
4.1 Equipment (at least one of each from the following group of equipment is assembled)
4.1.1 Needles
M 020 - needle 134 LR size 80
M 023 - needle 134 LR size 100
M 021 - needle 134 LR size 130
4.1.2 Wheel feeders
M 060 - wheel feeder with pitch of teeth 0.4 mm
M 059 - wheel feeder with pitch of teeth 0.6 mm
M 058 - wheel feeder with pitch of teeth 1.2 mm
4.1.3 Top roller holders
M 156 - holder for the top roller ø 25 mm
M 157 - holder for the top roller ø 35 mm
M 295 - holder for the top roller ø 45 mm
Type of Top roller lift Reverse stitching Thread
the machine trimmer
Class-subclass Via knee Treadle Via electro- Via electro- Via hand Via electro-
-sewing lever mag. + mag. + lever mag. +
category knee lever treadle hand lever
4180i-111-XXX
4180i-121-XXX*
4180i-147-XXX
4180i-157-XXX*
••••
•
••
••
•
www.promelectroavtomat.ru
3
4.1.4 Top rollers
M 172 - top roller ø 25 mm
M 173 - top roller ø 35 mm
M 174 - rubberized top roller ø 25 mm
M 175 - rubberized top roller ø35 mm
M 310 - smooth top roller ø 25 mm
M 311 - smooth top roller ø 35 mm
M 296 - top roller ø 45 mm - width 3.8 mm
M 297 - top roller ø 45 mm - width 2.0 mm
4.1.5 Throat plate
M 091 - throat plate
4.1.6 Throat plate inserts
M 126 - insert for throat plate (for needle 60-80)
M 127 - insert for throat plate (for needle 80-110)
M 151 - insert for throat plate (for needle 110-140)
4.1.7 Connecting cables of the head to the drive
M 163 - connecting cable to the drive EFKA DC 1600/DA82GA; EFKA VD 552/6F82FA and EFKA VD 554/6F82FA
M 055 - connecting cable without any specified drive (with free cable end)
Note: For the machine provided with a minimotor, the cable is component part of the drive thereof.
4.2 Optional equipment
M 010 - built-in lighting (including transformer 230/12V)
M 018 - sewn work guide
M 149 - sewn work guide
M 242 - setting gauge
4180 111001V - high mortality spare parts kit in plastic box for sub-class without thread trimmer
4180 147001V - high mortality spare parts kit in plastic box for sub-class with thread trimmer
S794 222012 - halogen lighting (12 V, 20 W - contains transformer)
www.promelectroavtomat.ru
4
5. Technical data
Table 3
Stitch type Double thread lock-stitch
Top roller stroke 6 mm - via hand lever
12.5 mm via knee lever, treadle, electromagnet
Hook R 816 - vertical small
Needle System 134 LR
System 134 KKLR
System 134
Driving unit Lever clutch 4 poles change motor min. 0.4 kW, lewer clutch
2 poles change motor min. 0.4 kW
Stopmotor min. 0.4 kW
Weight of the head max. 52 kg (58 kg head with minimotor)
Weitght of the stand max. 61 kg (38 kg for head with minimotor)
Height of post bed 173 mm
Opening space of machine head 270 x 298 mm
Dimension of bed plate 178 x 518 mm
Length of trimmed thread ends 10....19 mm
Input machine with clutch motor Max. 700 W
Input machine with stop motor Max. 800 W (600 W with minimotor)
Equivalent accoustic presser level of the sole machine
at work place by 20% use of the machine during
a shift under standard sewing conditions 82 dB/A
Layout dimensions of the machine (including the stand) 1060 x 550 mm
Height of the machine (including the stand) 1680 mm
Sewing Material Stitch Labelled Number Sewing Hook
category sewn length number of of needle speed
polyester
thread
Standard
mm - mm mm - - 0,01mm 0,01mm SPM SPM
-100 0,8 2 1,7 3 70 80,70, 80 60-80 2500 3500 R 816
-light 60
-200 1 2 2,5 5 40 50,40, 100 80-110 2500 3000 R 816
-medium 30
-300 me- 1,5 1-2 3,5 5 20 25,20 130 110-140 1600 2000 R 816
dium heavy
Thickness of one
layer
Number of layers
Standard
Maximum
Standard
Range
Standard
Range
Standard
Maximum
www.promelectroavtomat.ru
5
6. Operation of the machine
6.1 Threading a thread
Caution! Risk of injury!
Before threading a thread, turn the main switch
off and wait until the machine stops!
Thread the threads as it is shown in picture.
Caution!
Not following the correct method of threading a
thread may cause serious damage to the function
of the machine.
6.2 Bobbin thread winding
- Insert the bobbin (1).
- Spool counter-clockwise manually onto the bobbin, mini-
mum six threads of the lower thread (3).
- Insert the thread ends into the equipment (4) and cut off the
ends.
- Press the lever (2) until it reaches its limit.
- Switch on the machine.
- The winder will automatically switch off after winding.
- Take off the hook bobbin and cut off the end in the equip-
ment (4).
- The nut (5) is instrumental to thread tension control for
winding. Turning clockwise sense the thread tension is in-
creased and the single threads are more firmly fixed on the
bobbin.
- The tension cannot be so extensive as far as slipping of the
winder friction drive has occured.
6.3 Inserting the bobbin and threading the lower
thread
Caution! Risk of injury!
Turn the main switch off and wait until the motor
stops!
- Tilt the shutter (1) up.
- Insert the bobbin (2) with thread end (3) in the direction as
shown in the picture.
- Thread the thread through the notch (4) and the space (5)
and place under the spring (6).
- Cut off the thread end as shown.
1
2
4
3
5
3
2
6
~ 10
5
4
1
www.promelectroavtomat.ru
6
6.4 Regulating the thread tension
The thread tension must conform to the thickness of the sewn
threads, thickness and hardness of sewn material (thin and
soft material will fold with high tension) and the kind of seam.
An ordinary fitting seam should be formed with stitches knit-
ted in the middle of the sewn material.
A decorative seam is mostly used with rough threads (20) on
thin material and it has tied up threads on the reverse side of
the material for achieving a decorative appearance.
Thread tension adjustment is by standard sewing (par. 5, ta-
ble 3) conditions in accordance with table No. 4.
If achieving of a decorative seam with stitch knitting on the
underside is wished, it is necessary to decrease the upper
thread tension, it is carried out by turning of nuts (1), in the
counter-clockwise sense.
Thread tension
Table 4
Sewing Kind of seam Identified Maximum
category value upper tension of
thread tension lower thread
NN
1- 31
2 - 4.5 1.5
3Fitting 8 2
Decorative 5
If the maximum lower thread tension exceeds the
values given in table No. 4, it may cause problems
in the beginning of sewing after the previous
thread trim.
Measurement of tension is done by dynamometer.
Warning:
The upper thread tensioner has been loosened automatically
after every trimming and top roller lifting. In these cases the
thread tension cannot be measured.
Regulating the thread tension
Caution! Risk of injury!
Before regulating the lower thread tension, turn
the main switch off and wait until the motor stops.
The upper thread tension is adjusted with nuts (1). Its clock-
wise turning increases the tension.
The tension of the auxiliary tensioner (3) should be as low as
possible but it should be on a level so that the upper thread
would not pull out of the tensioner when the work is being
removed.
The lower thread tension is adjusted with a screw (2). Its clock-
wise turning increases the tension.
Tension correlation rate defines the depth of the seam tied
through. The result of raising the upper tension will be the
decreasing depth of tie through. The opposite will apply with
the lower thread.
Fitting seam
Decorative seam
Stitch knitting
Stitch knitting
1
3
2
www.promelectroavtomat.ru
7
6.5 Needle replacement
Caution! Risk of injury!
Before remowing and inserting the needle turn
the main switch off and wait until the motor
stops!
- Turn with the hand wheel as far as the top needle (1) position
has been reached.
- Loosen the screw (2) and take the needle out.
- When inserting a new needle, care is to be taken that groove
(3) above the needles eye was in the same direction as the
hook.
- Tighten the screw (2).
The inserted needle must respond to the sewing
category according to paragraph No. 5, table 3.
Otherwise it will cause damage to sewing, or even-
tually the machine could be broken.
6.6 Regulation of pressing the top roller
The pressing of the top roller should be as low as possible but
on a level so that the top roller would not fly over when needle
comes off the material and that the feeding power got over
the thread pull by stitch tightening.
By turning of the screw (1) clockwise pressing of the top roller
has been increased, by counter-clockwise turning pressing of
the top roller has been decreased.
6.7 Lifting the top roller up
Mechanical lifting of the top roller is enabled by means of the
hand lever (1), which contemporarily, after it has been lifted in
the arrow direction, is locking the top roller in its top position
and turning (adjustment) of the machine is possible. The top
roller can be lifted via knee lever or left treadle - depending on
the machine sub-class. Automatical lifting by means of elec-
tromagnet is described in the paragraph No. 7.
When lifting top roller via knee lever or the treadle
or electromagnet, the needle must be in the upper
position and the machine has to come to a full
stop.
1
3
2
1
1
www.promelectroavtomat.ru
8
6.8 Reverse stitching
The change of direction of sewn work can be mechanically
controlled via a reverse stitching lever (1) by its depression in
the arrow direction (down). The sub-class defines whether
the machine has electromagnetic reverse stitching  see para-
graph No. 7.
6.9 Stitch length adjustment
Stitch length adjustment is by dial (2) by its turning. Turning
clockwise stitch length is decreased, turning counter-clock-
wise stitch is length increased.
6.10 Safety clutch
The machine is provided with a safety clutch which disen-
gages the driving unit, when the hook is blocked. Reconnec-
tion must be done in the following way:
Caution! Risk of injury!
Before assembly turn the main switch off and wait
until the motor stops!
- Turn the manually operated wheel as far as you can reach the
suitable point for inserting a screwdriver into the space(1).
- Continue turning the manually operated wheel in direction
of the arrow located on it, until you feel the drop in of the
safety clutch.
1
2
1
www.promelectroavtomat.ru
9
7. Electronic control of the machine
(it is valid for sub-classes equipped with stop motor)
7.1 Control of sewing by means of control elements
7.1.1 Via treadle (treadle positions and function
possibilities)
The position of the treadle is read by the reader, which can
recognise 16 levels. Its meaning is shown on the table.
Treadle Treadle Meaning
position
-2 Foot full backwards Command for thread
trimming (seam finishing)
-1 Foot slightly Commandlifting
the top roller up
0 Neutral position Note
1Slightly forwards Command releasing
top roller
2Continually Sewing at minimum
forwards speed (1. gear)
3Continually Sewing at second
forwards speed level
: : :
13 Fully forwards Sewing at maximum
speed (12. gear)
Note: It is possible to pre-adjust the needle position (up/down)
and foot position (up/down) by stopping in seam (introduc-
ing the treadle in neutral position). Foot position (up/down)
after seam finishing (pressing the treadle by foot fully back-
wards).
7.1.2 Via pushbutton panel
There are four built-in pushbuttons in the panel with fixed
adjustable functions:
T1 - bar operation (by pressing this pushbutton during
sewing the sewn work is feed back)
T2 - needle up/down (each press of the pushbutton changes
the needle position)
T3 - temporary cancelling (recalling) bar (in case) the bar is
pre programmed at the start and end of the seam, by
pressing the pushbutton down will uniformly switch off;
if it is not chosen it will switch on by pressing the push-
button
T4 - revolutions limitation (valid for motor Efka DA82GA)
- reduction of pressure of the presser foot for Mini-stop
EFKA DA320 (see The instructions for assembling with
Mini-stop, par. 5.2.4)
7.1.3 Via control panel Efka V 810/V 820
These functions are standardly assigned to the pushbuttons
A, B:
A - cancelling (recalling) the bar (the same function as T3 of
the pushbutton panel)
B - needle up/down(the same function as T2 of the push-
button panel)
Note: function of the A,B pushbuttons can be changed by
different adjustment of parameters 293,294 (see the parame-
ters list of driving unit Efka DA82GA).
T 1 T 2 T 3 T 4
1 ÷ 13
0
-1
-2
www.promelectroavtomat.ru
10
7.2 Adjustment of automatic functions via control
panel for stop motor
7.2.1 By using stop motor Efka with panel V 810
Functioning pushbuttons engagement:
Pushbutton P Recalling and program mode termination
Pushbutton E Confirmation of program mode changes
Pushbutton + Increase of value displayed in program
mode
Pushbutton - Decreasing value displayed in program
mode
Pushbutton 1 Start bar SINGLE/DOUBLE/OFF
Pushbutton 2 End bar SINGLE/DOUBLE/OFF
Pushbutton 3 Automatic top roller lifting after stopping
at the seam ON/OFF
Automatic top roller lifting after thread
trimming (end of seam) ON/OFF
Automatic presser foot lifting after
thread trimming (end of seam) ON/OFF
Automatic reduction of pressure of the
presser foot ON/OFF (only for DC 1550/
DA320; see The instructions for assem-
bling with Mini-stop, par. 5.2.4)
Pushbutton 4 Basic position of needle UP/DOWN
Pushbutton A For cancelling respectively recalling
the bar
Pushbutton B For switch over the needle position
UP/DOWN respective shift pushbutton
in program mode
Symbol C Connection of automatic revolutions
Symbol D Connection of lighting barrier
Symbol E The machine is running
Symbol F The revolutions limitation switch on
Symbol G Connection of lower thread controller,
flashing light indicator symbol when
the threads supply on the bobbin is
running out
The arrows on the display indicate switching the functions
which are displayed by symbols above the pushbuttons on.
7.2.1.1 Adjustment by means of buttons with fixed setting
function
Note: It is important to finish the seam in order to reach
effective button pressing (press the treadle fully backwards
down).
Setting start bar:
Drive enables sewing start bar automatically. It is necessary to
choose the type (single, double, off) and number of stitches
which will be sewn forwards and backwards.
The arrow above its symbol shows the type of bar (chosen by
gradually pressing pushbutton 1). It will be displayed
following after pressing pushbutton 1.
Arv (SAv) XXX - number of stitches of start (fancy) bar for-
wards or
Arr (SAr) XXX - number of stitches of start (fancy) bar back-
wards) for about 3 sec.
At this time you can change the number of stitches by gra-
dually pressing the pushbutton + or -.
Setting end bar:
The same applies to the start bar (setting by the means of
pushbutton 2).
Erv (SEv) XXX - end (fancy) bar number of stitches forwards
Err (SEr) XXX - end (fancy) bar number of stitches backwards
www.promelectroavtomat.ru
11
Note: The last section of end bar must have at least 3 stitches.
Foot position adjustment by stopping at the seam (by neutral
position of treadle) and after finishing seam (by neutral posi-
tion of treadle):
Setting is by means of pushbutton 3, arrow indication above
the corresponding symbol.
Needle position adjustment by stopping at the seam:
Setting is by means of pushbutton 4.
7.2.1.2 Setting by means of parameters
Drive memory contains the parameters which enables sewing
system tuning. These parameters have exact meaning and
they are divided into 3 levels. Further parameters which are
available only for operation will be quoted. Each parameter
has its (sequence) number and value.
General procedure by changing parameters of operation level:
- switch the main switch on or finish the seam by pressing the
treadle fully backwards down
- press pushbutton P on the panel V 810
- it will be displayed on the display F 000 (000 it is the number
of parameter)
- by several times pressing + (or -) set the requested number
of parameter
- push pushbutton E down and it will be shown the value of
parameter on the display
- you can change the value by means of pushbutton + or 
- by pushing pushbutton E down you will change the sequence
to the following number of parameter
- by pushing pushbutton P down you will leave the mode of
changing parameters
Note: 1. For permanent memory storing of changed pa-
rameter, it is necessary to press treadle forwards
down after changing of parameters.
2. Mode of changing parameters is possible only af-
ter finishing of the seam.
Number of stitches in bars:
Number of stitches is stored in parameters number.
No. of parameter Value range Description
of parameter of parameters
000(080) 0-254 Number of stitches of
start (fancy) bar forwards
001(081) 0-254 Number of stitches of
start (fancy)bar backwards
002(082) 0-254 Number of stitches of
end (fancy) bar backwards
003(083) 0-254 Number of stitches of
end (fancy)bar forwards
Sewing according to sewing program:
Drive with panel V810 automatically enables sewing of 1 seam
with setting number of stitches. It is necessary to set in corre-
sponding number of stitches, and initialisation of sewing pro-
gram.
No. of parameter Value range Description
of parameter of parameters
007 0-254 Number of stitches
015 ON/OFF ON/OFF sewing under
sewing program
www.promelectroavtomat.ru
12
ON/OFF thread trimmer:
No. of parameter Value range Description
of parameter of parameters
013 ON/OFF Thread trimmer
ON/OFF
7.2.2 By using stopmotor Efka with panel V 820
Functioning pushbuttons engagement:
Pushbutton P Call and termination of programming mode
Pushbutton E Confirmation when changing programming
mode
Pushbutton + Increasing the value displayed in program-
mingmode
Pushbutton - Reducing the value displayed in program-
ming mode
Pushbutton 1 Start bar SINGLE/DOUBLE/OFF
Pushbutton 2 Stitch counting FORWARD/BACK/OFF
Pushbutton 3 Light barrier function
LIGHT-DARK/DARK-LIGHT/OFF
Pushbutton 4 End bar
SINGLE/DOUBLE/OFF
Pushbutton 5 Function
TRIMMING/TRIMMING+EJECTOR/OFF
Pushbutton 6 Automatic top roller lifting after having
stopped inside the seam ON/OFF
Automatic top roller lifting after trimming
ON/OFF
Automatic presser foot lifting after thread
trimming (end of seam) ON/OFF
Automatic reduction of pressure of the
presser foot ON/OFF (only for DC 1550/
DA320; see The instructions for assembling
with Mini-stop, par. 5.2.4)
Pushbutton 7 Basic needle position UP/DOWN
Pushbutton 8 Lower thread waste controlling ON/OFF
Pushbutton 9 Operation pushbutton - programmable
Pushbutton 0 Programming/processing of 40 possible
sewing sections (seams)
Pushbutton A For cancelling or calling the bar
Pushbutton B For switching needle position UP/DOWN,
resp. shifting pushbutton in the program-
ming mode
Symbol C Designating symbol C for code number
Symbol D Designating symbol F for parameter
number
Symbol E Programme number in TEACH IN mode
Symbol F Seam number in TEACH IN mode
Symbol G Run blocking ON
Symbol H Blocked insertion by pushbutton
Symbol I Fault reporting
Symbol J Insertion of stitch number in TEACH IN
mode
Symbol K Connected lower thread controller, flashing
symbol when running out thread reserve
on bobbin
Symbol L Limitation of revolutions ON
Symbol M Right needle disconnected
symbol N Evening stitches for light barriee in the
TEACH IN mode
Symbol O Machine is running
AB
CD E F GH I JKLMNOPQ
www.promelectroavtomat.ru
13
Symbol P Automatic revolutions ON
Symbol Q Left needle disconnected
The arrows on the display indicate switching the functions
which are displayed by symbols above the pushbuttons on.
7.2.2.1 Adjustment by means of buttons with fixed setting
function
Note: It is important to finish the seam in order to reach
effective button pressing (press the treadle fully backwards
down).
Setting start bar:
Drive enables sewing start bar automatically. It is necessary to
choose the type (single, double, off) and number of stitches
which will be sewn forwards and backwards.
The arrow above its symbol shows the type of bar (chosen by
gradually pressing pushbutton 1). It will be displayed
following after pressing pushbutton 1.
Arv (SAv) XXX - number of stitches of start (fancy) bar for-
wards or
Arr (SAr) XXX - number of stitches of start (fancy) bar back-
wards for about 3 sec.
At this time you can change the number of stitches by gra-
dually pressing the pushbutton + or -.
Setting end bar:
The same applies to the start bar (setting by the means of
pushbutton 4).
Erv (SEv) XXX - end (fancy) bar number of stitches forwards
Err (SEr) XXX - end (fancy) bar number of stitches backwards
Note: The last section of end bar must have at least 3 stitches.
Foot position adjustment by stopping at the seam (by neutral
position of treadle) and after finishing seam (by neutral posi-
tion of treadle):
Setting is by means of pushbutton 6, arrow indication above
the corresponding symbol.
Needle position adjustment by stopping at the seam:
Setting is by means of pushbutton 7.
Trimming switched ON/OFF:
To be set using pushbutton 5.
Sewing programme ON:
To be switched on using pushbutton 0.
Switching ON/OFF the function of the pushbutton F:
The pushbutton F on panel can have assigned one of the
following functions: Sst - softstart
SrS - fancy bar
Frd - reverse angle after trimming
7.2.2.2 Setting by means of parameters
Drive memory contains the parameters which enables sewing
system tuning. These parameters have exact meaning and
they are divided into 3 levels. Further parameters which are
available only for operation will be quoted. Each parameter
has its (sequence) number and value.
General procedure by changing parameters of operation level:
- switch the main switch on or finish the seam by pressing the
treadle fully backwards down
- press pushbutton P on the panel V 820
- on the display there is no data shown
- by depressing the pushbutton E several times, set the
required parameter (without having displayed the parameter
number)
- you can change the value using pushbuttons + or -
- by depressing the pushbutton E you will pass in the given
sequence to the following parameter
- by depressing the pushbutton P down you will leave the
mode of changing parameters
AB
CD E F GHI JKLMNOPQ
www.promelectroavtomat.ru
14
Note: 1. For permanent memory storing of changed pa-
rameter, it is necessary to press treadle forwards
down after changing of parameters.
2. Mode of changing parameters is possible only af-
ter finishing of the seam.
Number of stitches in bars:
Number of stitches is stored in parameters number.
No. of parameter Value range Description
of parameter of parameters
000(080) 0-254 Number of stitches of
start (fancy) bar forwards
001(081) 0-254 Number of stitches of
start (fancy) bar backwards
002(082) 0-254 Number of stitches of
end (fancy) bar backwards
003(083) 0-254 Number of stitches of
end (fancy) bar forwards
The drive with the panel V 820 enables sewing automatically
up to 40 seams distributed up into eight programmes with the
given stitch numbers and sewing direction (forwards/rear-
wards). For more detailed information see the original driving
instructions.
8. Maintenance
Caution! Risk of injury!
Maintenance work can only be carried out when
the machine is off and the motor stops.
Maintenance work which must be carried out and the intervals
between them and set out in the following table.
Maintenance work Interval
Removing throat plate and its cleaning.
Cleaning of circular feed dog, hook and space
around feeding wheel of material and thread
residues. To clean it, use brush. It is prohibited
to use compressed air for cleaning without 1 day
protective guards preventing injury of persons
with flying impurities.
Hook lubrication - (one drop of oil).
Checking the oil level in the hook
lubrication oil tank. 1 week
Checking the oil level in the oil tanks
of the central distribution. 1 month
For the lubrication of this machine Esso SP-NK 10, DA 10 or
an equivalent quality lubricating oil is recommended (viscossity
at 40° C: 10 mm2/s; flash point: 150°C).
The oil tanks (1, 2, 3) of the central distribution is to be filled
the hole (4) up to the mark max.
AB
CD E F GHI JKLMNOPQ
B
4
1
2
3
www.promelectroavtomat.ru
15
Operating instructions for eventual trouble shooting
Meaning of abbreviations:NP - Instruction manual
SK - Instructions for service
Note: When the machine is driven by a stop motor, it is indispensable to check up, before starting its repair, the setting of its
parameters according to NP, part B, par. 5.
Trouble
1. Upper thread breaking.
2. Lower thread breaking.
3. Skipped stitches at the seam begin-
ning after previous thread trimming.
Cause
1.1 Incorrect threading of the upper
thread.
1.2 Excessive thread tension.
1.3 Needle incorrectly inserted or da-
maged.
1.4 Needle thickness does not suit to
that of thread or sewn material.
1.5 Hook point sticks the thread.
1.6 Needle thread excessively elastic.
1.7 Low quality thread.
1.8 Needle thickness unsuitable for the
hole in the throat plate insert.
1.9 Damaged throat plate insert.
1.10 Incorrect setting of opening bob-
bin case lifter (little opening).
2.1 Incorrect threading.
2.2 Damaged bobbin.
3.1 Short thread end in needle after
trimming (thread too tensioned in
the moment of trimming).
3.2 Excessive thread tension.
3.3 Upper thread not squeezed, at the
first needle piercing, between
sewn material and rear edge of
piercing hole.
3.4 Upper thread incorrectly caught by
movable trimming knife. Lumps of
thread remaining in hook space.
Method of troubleshooting
Thread the upper thread according to NP,
par. 6.1.
Set the tension according to NP, par. 6.4.
Replace needle according to NP, par. 6.5.
Use a thicker needle.
Set distance between hook and needle
according to SK, par. 3.1.3 and 3.1.5.
Increase the hook timing and set the
needle bar height according to SK, par.
3.2.3.
Replace thread.
Replace insert.
Replace insert.
Set according to SK, par. 3.1.6.
Thread according to NP, par. 6.3.
Replace bobbin.
Thread upper thread according to NP,
par. 6.1. Reduce tension of pretension
unit according to NP, par. 6.4. Accelerate
slightly OFF position of main tensioner
according to SK, par. 4.9; NP, part B, par.
5.2.2, 5.3.2; Mini-stop, par. 5.2.5 - pa-
rameter 192.
Set thread tension according to NP, par.
6.4.
Set needle feeding in such a way, so that,
with the maximum stitch length, the nee-
dle almost touches the rear edge of throat
plate insert accordin to SK, par. 3.2.5.
Reduce height of wheel feeder accord-
ing to SK, par. 3.5.3.2.1.
Put nearer top roller to needle and shift
it rearwards according to SK, par. 3.6.6.2.
Set correctly hook opening according to
SK, par. 3.1.6 and adjust setting of trim-
ming cam according to SK, par. 4.3.
www.promelectroavtomat.ru
16
Use thinner needle.
Insert needle according to NP, par. 6.5.
Set according to SK, par. 3.1.3 and 3.1.5.
Set according to SK, par. 3.1.4 and 3.2.3.
Increase timing as needed and set the
needle bar height according to SK, par.
3.2.3.
Replace hook.
Set according to NP, par. 6.4.
Thread according to NP, par. 6.1 set
according to NP, par. 6.4.
Thread correctly according to NP par. 6.1.
Set according to SK, par. 3.1.6.
Set wheel feeder height according to SK,
par. 3.5.3.2.1.
Shift thread limiter to the top according
to SK, par. 3.4.5 or by more than the value
quoted there.
Set tension according to NP, par. 6.4.
Shift thread limiter to the top according
to SK, par. 3.4.5 or more than the value
quoted there.
Use a thicker needle.
Reduce tension of both threads.
Engage correctly clutch according to NP,
par. 6.10.
Raise feeder more from throat plate
according to SK, par. 3.5.3.2.1.
Use feeder with 0.6 mm teeth pitch.
Replace according to SK, par. 3.5.3.2.2.
Set chain tension according to SK, par.
3.5.3.2.1.
Thread lower thread according to NP, par.
6.3.
3.5 Needle too thick with regard to
thickness of thread and sewn ma-
terial.
4.1 Needle incorrectly inserted.
4.2 Too big distance between needle
and hook point.
4.3 Incorrectly set needle hook timing
or needle height.
4.4 Excessively elastic material or ex-
cessively elastic thread.
4.5 Damaged hook point.
5.1 Lower thread tension.
5.2 Incorrect threading and tension
setting of upper thread.
6.1 Upper thread out of tensioning
dishes.
6.2 Opening bobbin case lifter incor-
rectly set (it opens too little).
6.3 Wheel feeder too low - difficult
passage of thread between sewn
material and throat plate.
6.4 Upper thread insufficiently tensio-
ned when passing through hook.
7.1 Low tension of upper and lower
threads.
7.2 Upper thread insufficiently tensio-
ned when passing through hook.
7.3 Thin needle with regard to thread
thickness.
8.1 Thread tension to high for sewn
material.
9.1 Overrun safety clutch against hook
overload.
10.1 Wheel feeder too low (especially
when sewing soft and thick ma-
terials).
10.2 Feeder teeth unsuitable (too fine)
for sewn material.
10.3 Wheel feeder driving chain too
tensioned - blocked feeding.
11.1 Incorrect lower thread threading
when replacing hook bobbin -
lower thread caught by hook point.
4. Stitch skipping.
5. Incorrect stitch locking. Threads are
locked on top side of sewn material.
6. Incorrect stitch locking. Threads are
locked on bottom side of sewn
material and increasing of tension
is of upper thread no help.
7. Stitches insufficiently tightened and
with irregular positioning. Thread
unravelled.
8. Sewn material wavy in seam.
9. Machine does not feed or is feeding
slowly or in reverse sense.
10. Difficult and iregular machine feed.
11. Hook blocked.
www.promelectroavtomat.ru

Other Minerva Boskovice Sewing Machine manuals

Minerva Boskovice 4181i-3 Troubleshooting guide

Minerva Boskovice

Minerva Boskovice 4181i-3 Troubleshooting guide

Minerva Boskovice 4181i-1 Troubleshooting guide

Minerva Boskovice

Minerva Boskovice 4181i-1 Troubleshooting guide

Minerva Boskovice 525 User manual

Minerva Boskovice

Minerva Boskovice 525 User manual

Minerva Boskovice 4280i-6 Troubleshooting guide

Minerva Boskovice

Minerva Boskovice 4280i-6 Troubleshooting guide

Minerva Boskovice 1130i-5 Series User manual

Minerva Boskovice

Minerva Boskovice 1130i-5 Series User manual

Minerva Boskovice 4181i 3 Series User manual

Minerva Boskovice

Minerva Boskovice 4181i 3 Series User manual

Minerva Boskovice 1280-6 Troubleshooting guide

Minerva Boskovice

Minerva Boskovice 1280-6 Troubleshooting guide

Minerva Boskovice 4182i-1 Troubleshooting guide

Minerva Boskovice

Minerva Boskovice 4182i-1 Troubleshooting guide

Minerva Boskovice 4280-6 Troubleshooting guide

Minerva Boskovice

Minerva Boskovice 4280-6 Troubleshooting guide

Minerva Boskovice 4120i-5 Series User manual

Minerva Boskovice

Minerva Boskovice 4120i-5 Series User manual

Minerva Boskovice 1130i-5 Series User manual

Minerva Boskovice

Minerva Boskovice 1130i-5 Series User manual

Minerva Boskovice 1280i User manual

Minerva Boskovice

Minerva Boskovice 1280i User manual

Minerva Boskovice 4280-2 Troubleshooting guide

Minerva Boskovice

Minerva Boskovice 4280-2 Troubleshooting guide

Minerva Boskovice 4182i-1 User manual

Minerva Boskovice

Minerva Boskovice 4182i-1 User manual

Minerva Boskovice 1183i-7 User manual

Minerva Boskovice

Minerva Boskovice 1183i-7 User manual

Minerva Boskovice 4182i-1 Troubleshooting guide

Minerva Boskovice

Minerva Boskovice 4182i-1 Troubleshooting guide

Minerva Boskovice 4181i-1 Troubleshooting guide

Minerva Boskovice

Minerva Boskovice 4181i-1 Troubleshooting guide

Minerva Boskovice 4220i-6 Series User manual

Minerva Boskovice

Minerva Boskovice 4220i-6 Series User manual

Popular Sewing Machine manuals by other brands

Bernina 900 Guide

Bernina

Bernina 900 Guide

Singer 410W10 instructions

Singer

Singer 410W10 instructions

JUKI AMS-210E/IP-410 instruction manual

JUKI

JUKI AMS-210E/IP-410 instruction manual

AEG NM 1714 Instruction book

AEG

AEG NM 1714 Instruction book

Singer 9858 Instruction book

Singer

Singer 9858 Instruction book

Pfaff 125 manual

Pfaff

Pfaff 125 manual

ELNA 740 EXCELLENCE - brochure

ELNA

ELNA 740 EXCELLENCE - brochure

Singer MEDIUM Directions for using

Singer

Singer MEDIUM Directions for using

Global WF3955DD Series manual

Global

Global WF3955DD Series manual

Kenmore 17881 owner's manual

Kenmore

Kenmore 17881 owner's manual

Brother NX-250 Quick reference guide

Brother

Brother NX-250 Quick reference guide

Glaeser home mia 350 user manual

Glaeser home

Glaeser home mia 350 user manual

ELNA Creative Series Instruction book

ELNA

ELNA Creative Series Instruction book

Brother LS2-B837 parts manual

Brother

Brother LS2-B837 parts manual

JUKI LU-1510 Supplementary instructions manual

JUKI

JUKI LU-1510 Supplementary instructions manual

Janome TB-12 Instruction book

Janome

Janome TB-12 Instruction book

Singer 14SH644 Operator's guide

Singer

Singer 14SH644 Operator's guide

Bernina Artista 180 Important safety instructions

Bernina

Bernina Artista 180 Important safety instructions

manuals.online logo
manuals.online logoBrands
  • About & Mission
  • Contact us
  • Privacy Policy
  • Terms and Conditions

Copyright 2025 Manuals.Online. All Rights Reserved.