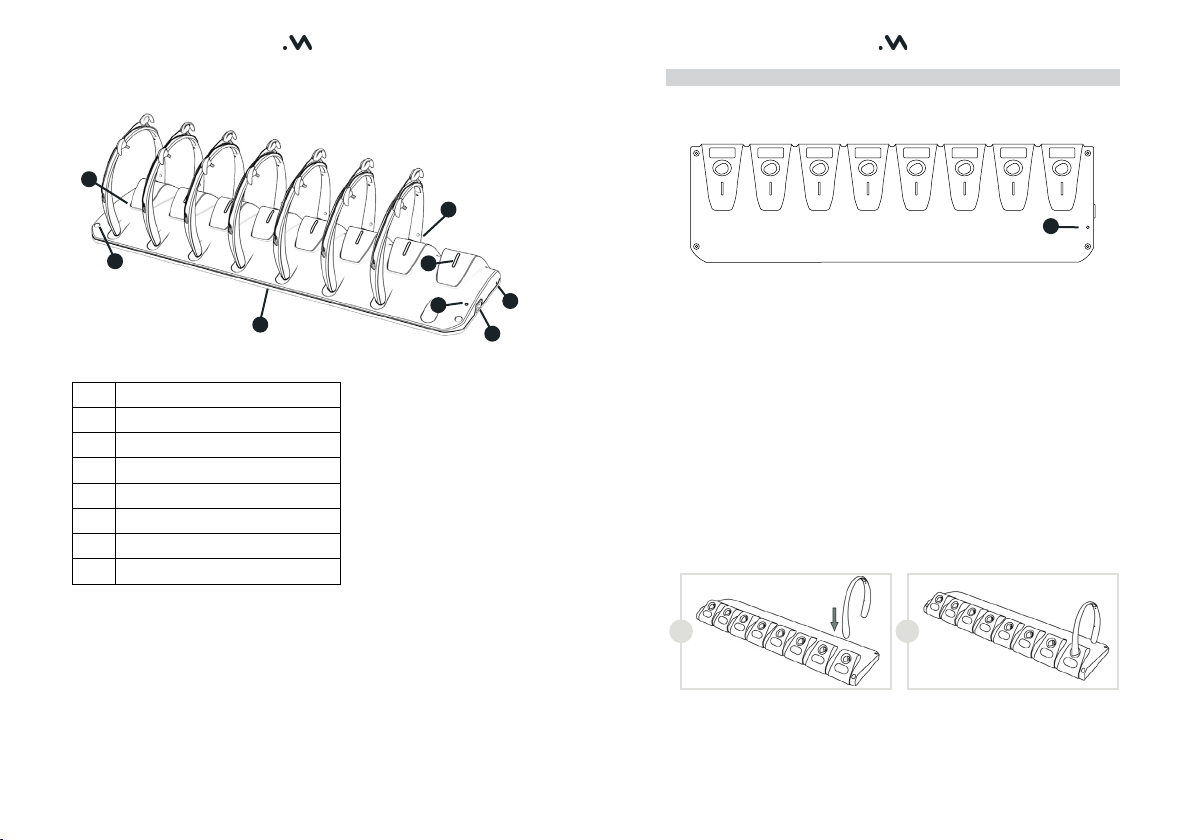
12 13
Dock Operation
Before you use the Dock, you must read and understand the Safety
Information in this manual.
Turning On
Connect the mains power lead to the Dock and then to a mains power socket.
Turn the mains socket ON
The mode and Status of the Dock shall be indicated by the Dock LED Status
(Ref Fig 1-E). Reference Table 1.0
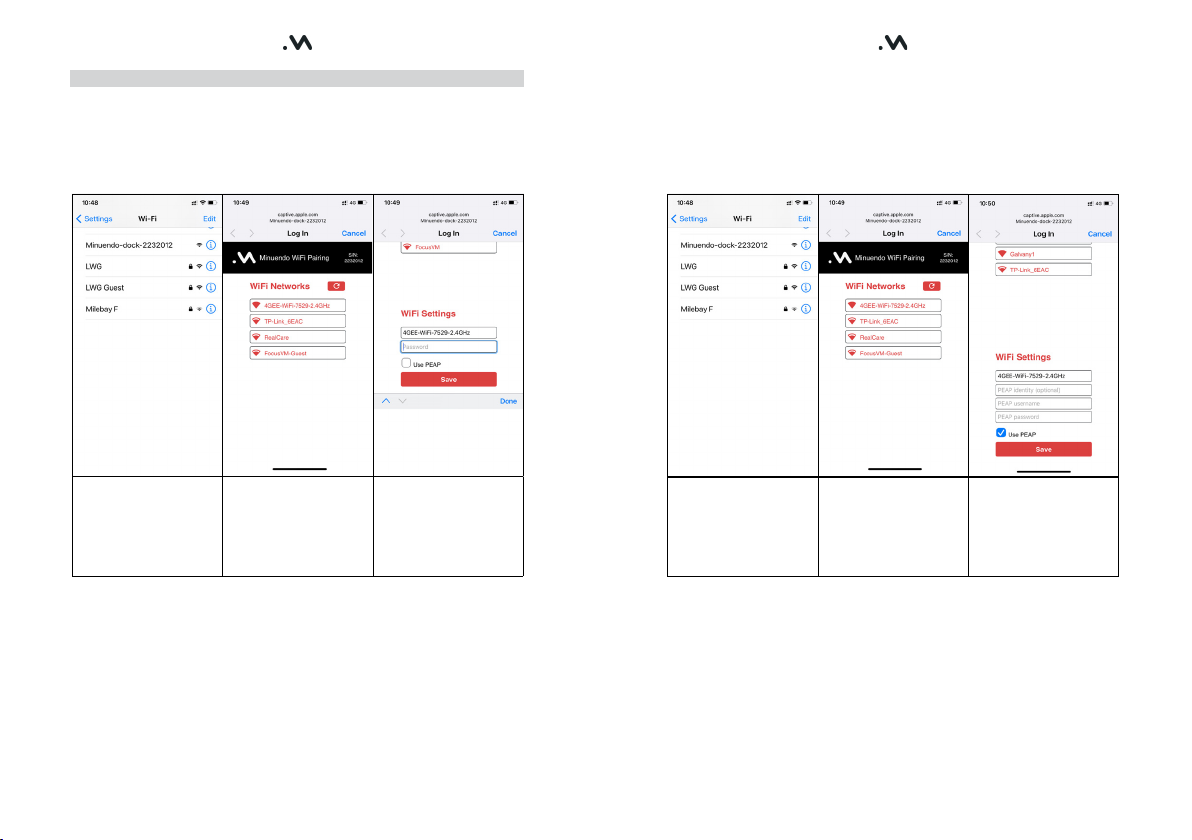
Dock LED Mode
Blinking BLUE WiFi Pairing Mode
Blinking BLUE &
RED Pairing Mode. Dock has been paired with WiFi
Router. Searching for that Router
Solid GREEN Dock connected to WiFi Router and Cloud Server
Blinking ORANGE Dock connected to WiFi Router but connection with
Cloud Server has not been established or has been
lost.
Blinking RED &
ORANGE Data transfer between Dock and Server in progress
Table 1.0 – Dock LED Status
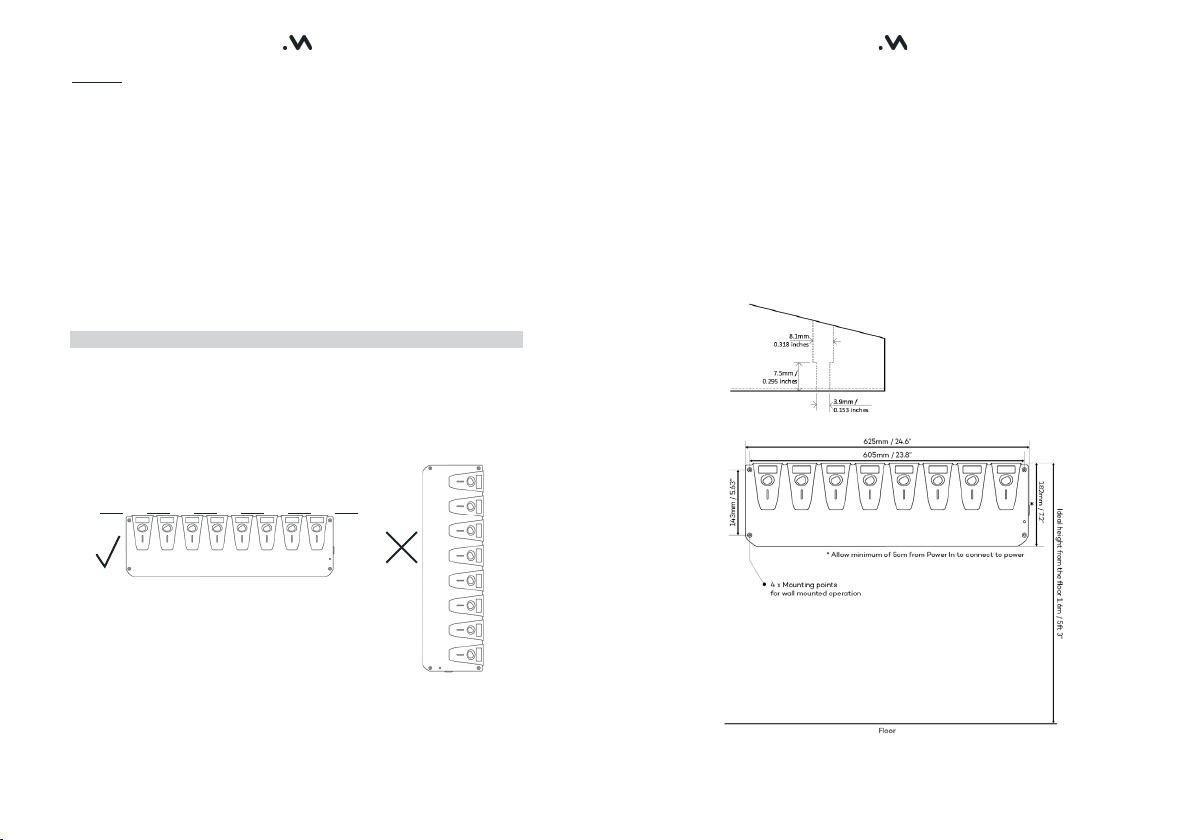
Advisory
• Use the mains power lead for your geographic location.
• The Dock will provide Earplug charging if no WiFi connection or server
connection is established.
• Data transfer (blinking RED and ORANGE LED) between the Dock and
Server will happen in regular intervals while ON. Do not switch of the Dock
or remove power during this time.
• Dock firmware will be automatically updated by the Server. During this time
the Dock LED will indicate that Data Transfer is in progress. Do not switch
of the Dock or remove power during this time.
• If the connection between the Server and the Dock is interrupted the
Dock LED will blink ORANGE, leave the Dock and WiFi powered on, if the
Connection is not restored after 15 minutes, turn the Dock power off, wait
3 seconds and then reapply. Restart the WiFi Router. The Dock remembers
the WiFI router details and will automatically reconnect.
Turning Off
Turn the mains socket off (if the socket is switched). Remove the mains lead
from the mains socket.
Advisory
• Switch off the Mains socket and disconnect the plug before disconnecting
the mains lead.
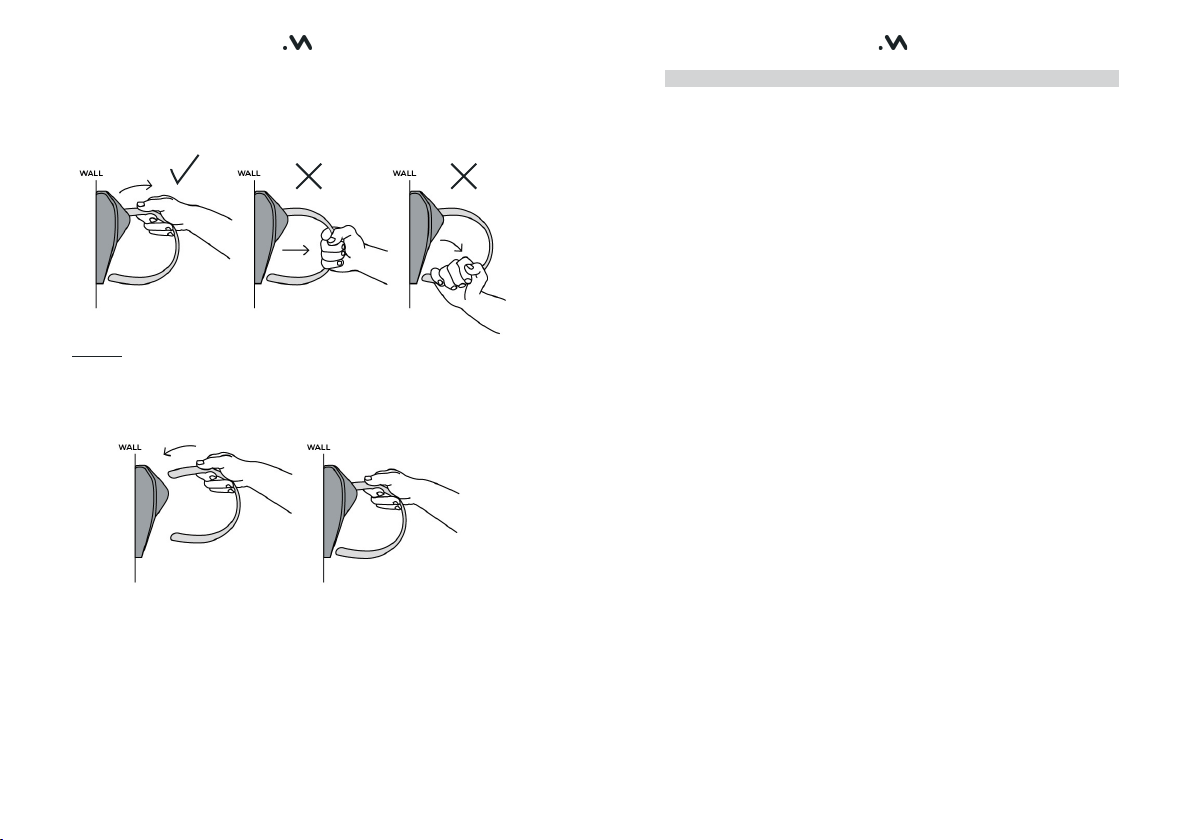
Connecting Earplugs
Using any available Earplug station on the Dock, insert the right hand side of
the collar unit into the Dock. Push the Earplug firmly into the Dock, the Earplug
will provide a confirmation beep that a connection has been made.
Advisory
• The right hand side of the Earplug Collar Unit has the LED and is marked
with R.
• When connecting an Earplug when the Earplug LED is blinking PURPLE the
confirmation Beep will not be heard.
• It is not necessary to turn the Earplug off using the button on the Collar
Unit when using the Dock.
The Earplug LED (Ref Fig 1-B) will illuminate according to the status of the
Earplug. Refer to Table 2.0
Earplug LED (Dock) Mode
Blinking ORANGE Earplug battery charging
Solid GREEN Earplug battery fully charged
Blinking RED &
ORANGE Data transfer in progress between Earplug and cloud
servers
Solid ORANGE Earplug is waiting to transfer data.
Table 2.0 – Earplug LED Status
Advisory
• Do not disconnect the Earplug while a Data Transfer is in progress.
• The time to transfer data may vary depending on (a) the volume of data
being transferred (b) the actually speed of the WiFi router, its connection
with the Internet (c) If an Earplug firmware is being downloaded and
installed on the Earplug
• Earplug firmware updates occur automatically.