Drop size cannot be zero for the first drop as a single drop is a minimum
requirement for the water drop photography.
9.2. 2nd Drop:
This screen is used to set the second drop if needed. It has two parameters.
Drop Size: This parameter is used to set the size of the drop. The unit is in
milliseconds. For example, if you set the drop size to 50, the valve will be open for
50 milliseconds.
Delay: This parameter is used to define the delay between the second drop and the
first drop. The unit is in milliseconds. For example, if you set the delay to 120, the
second drop will be released 120 milliseconds later than the first drop.
You can set the drop size to zero if you don't want to drip the second drop.
9.3. 3rd Drop:
This screen is used to set the third drop if needed. It has two parameters.
Drop Size: This parameter is used to set the size of the drop. The unit is in
milliseconds. For example, if you set the drop size to 50, the valve will be open for
50 milliseconds.
Delay: This parameter is used to define the delay between the third drop and the
second drop. The unit is in milliseconds. For example, if you set the delay to 120,
the third drop will be released 120 milliseconds later than the second drop.
You can set the drop size to zero if you don't want to drip the third drop.
9.4. 4th Drop:
This screen is used to set the third drop if needed. It has two parameters.
Drop Size: This parameter is used to set the size of the drop. The unit is in
milliseconds. For example, if you set the drop size to 50, the valve will be open for
50 milliseconds.
Delay: This parameter is used to define the delay between the fourth drop and the
third drop. The unit is in milliseconds. For example, if you set the delay to 120, the
fourth drop will be released 120 milliseconds later than the third drop.
You can set the drop size to zero if you don't want to drip the fourth drop.
9.5. Trigger:
This screen is used to set the output behavior of your device. It has 2 parameters:
Delay: This parameter is used to define the delay between the last drop and
triggering of the flash or the camera. The unit is in milliseconds. For example, if
you set the delay to 100, the flash or camera will be triggered 100 milliseconds
later than the last drop.
Trigger Mode: This parameter is used to define which output will be triggered
after the last drop. You can select one of the two possible modes. The modes are
the “Flash” and the “Camera”. In the “Camera” mode, it will trigger the camera
after dripping the drop(s). In the "Flash" mode, it will trigger the camera to start
the long exposure before releasing the drop(s) and trigger the flash after releasing
the drop(s).
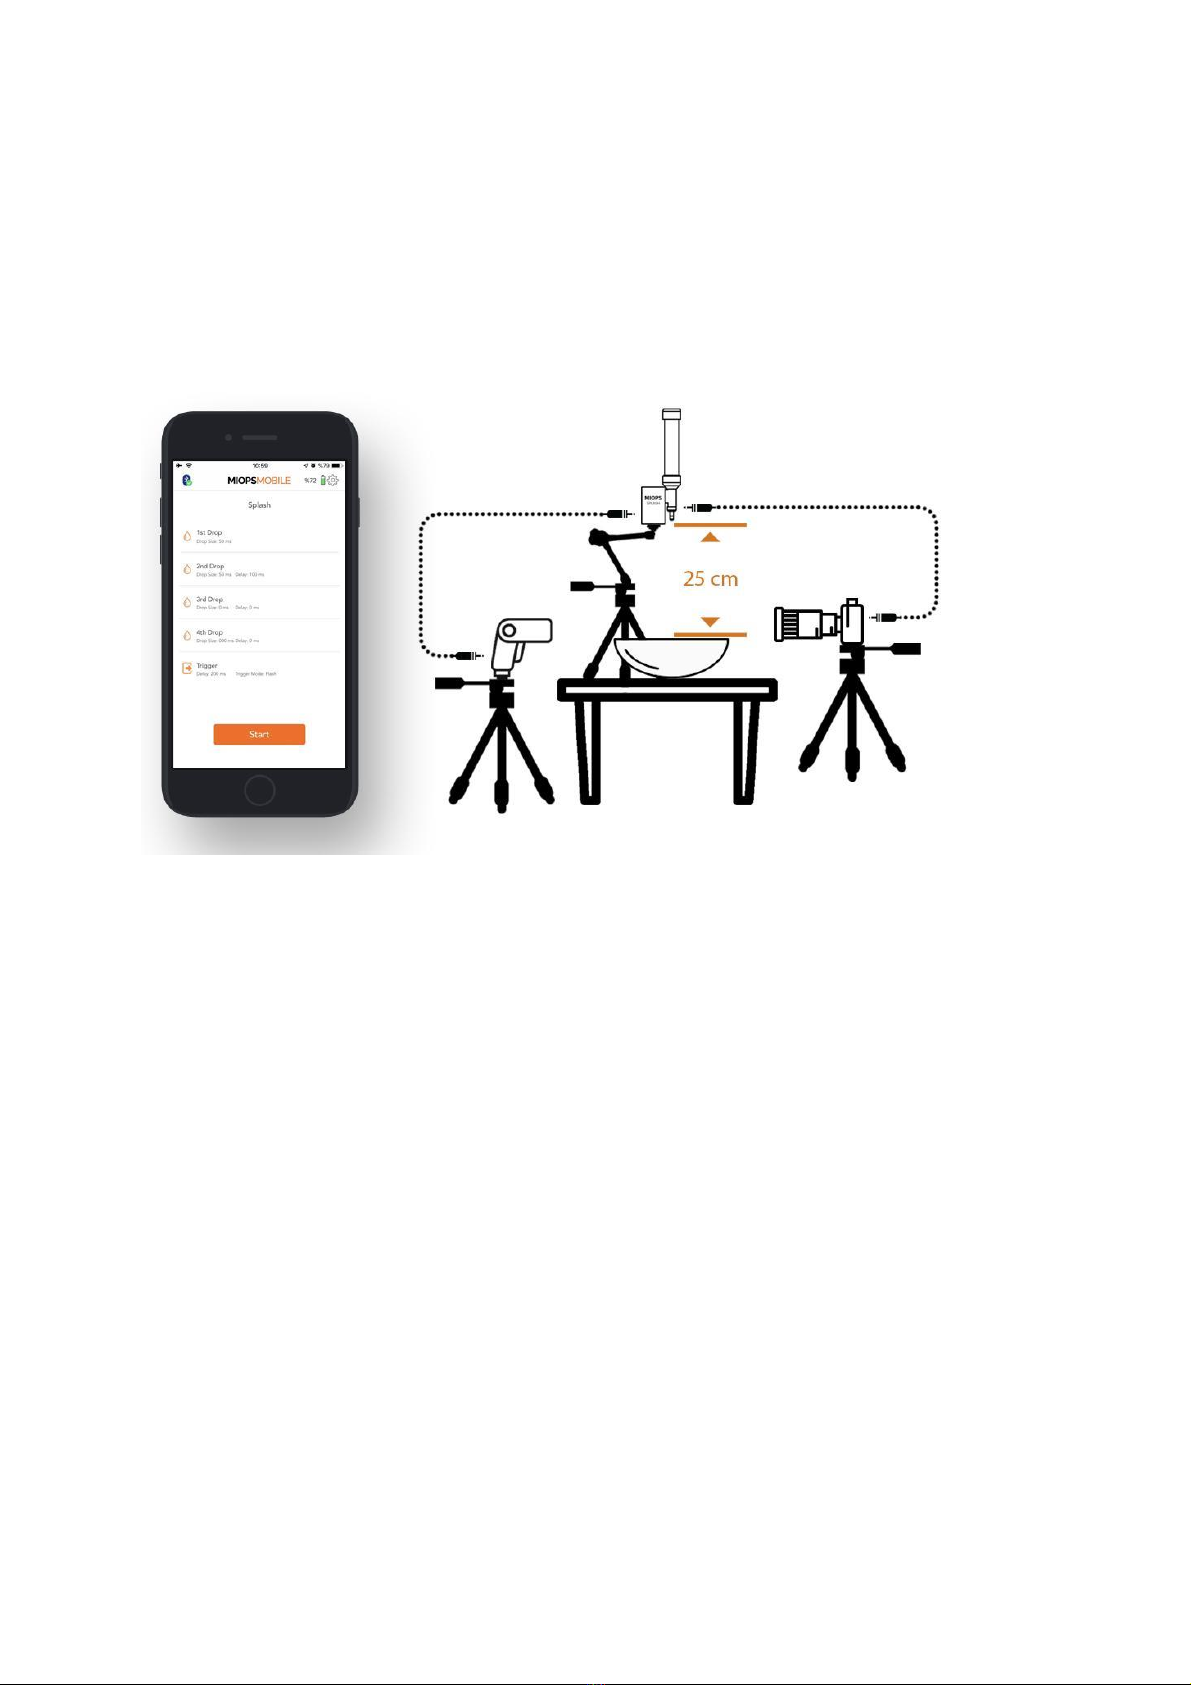
10. Example Setup: