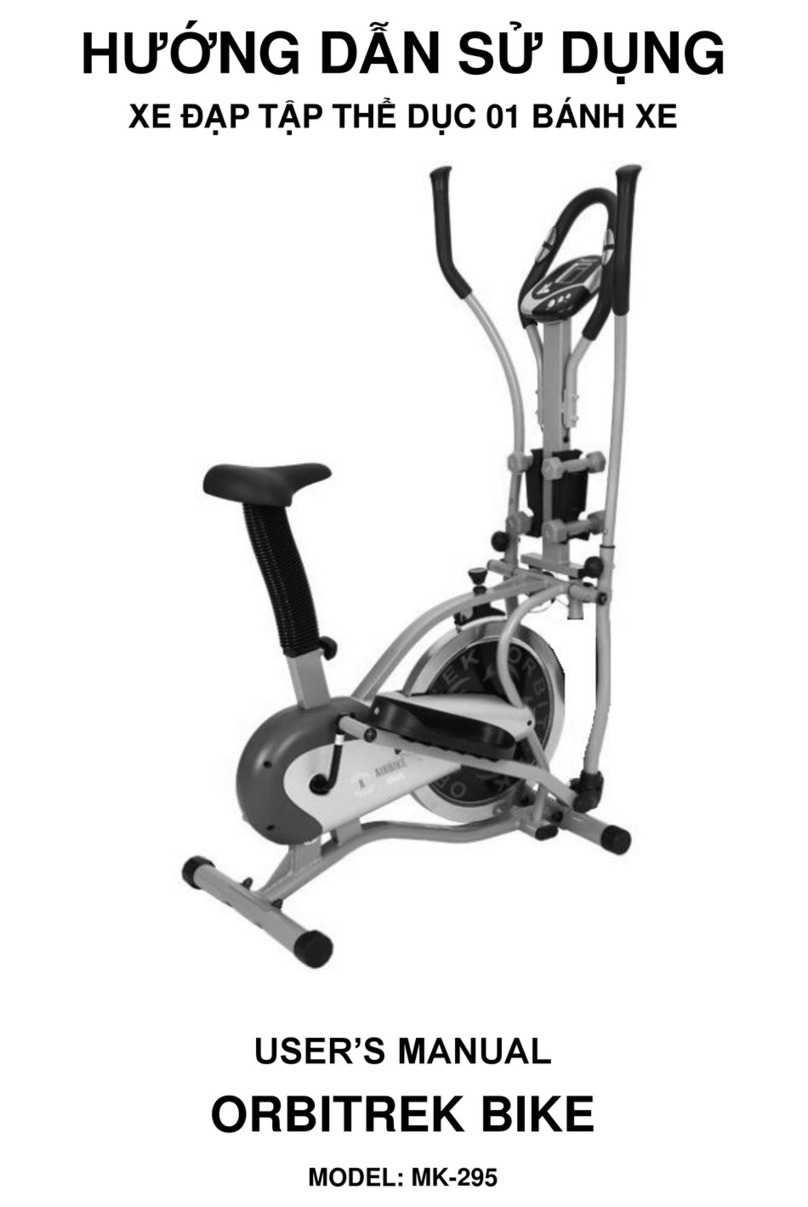
Mishio MK-288 User manual

XE ĐP TP THỂDỤC
HƯNG DN SDỤNG
INSTRUCTION MANUAL
MAGNETIC SPINNING BIKE
Model: MK-288

- 1 -
EN
BEFORE USING THE PRODUCT
Thank you for choosing our products! To ensure your safety and usefulness, please read the
instructions carefully before using and keep it for your reference when necessary.
Actual product specification is subject to change slightly from the illustrations and it is subject to
change without notice.
The image is only illustrative of the product, please see the actual product directly for more
details.
IMPORTANT SAFETY INSTRUCTION
MAKE SURE YOU HAVE READ THE INSTRUCTIONS CAREFULLY BEFORE INSTALLING
AND OPERATING THIS SPINING BIKE. PLEASE SPECIAL PAY ATTENTION TO THE
FOLLOWING SAFETY MEASURES:
1. When the exercise bike is not in use, please turn the resistance adjustment knob clockwise
so that the flywheel will not rotate.
2. Incorrect use or excessive use of the exercise bike may cause injury. It is recommended that
the user pay attention to the use time and resistance when using it for the first time. You can
adjust the resistance appropriately firstly, and then slowly increase the resistance after a
period of training.
3. This exercise bike is household fitness equipment, with a maximum load-bearing weight of
120 kg / 265 lbs.
4. The locking device of this equipment is the resistance adjustment knob (see the parts
diagram). Rotate clockwise until the 8th gear indicates that the flywheel is locked. During
use, turn clockwise to increase resistance, and counterclockwise to decrease resistance.
5. Please check the machine carefully before using it for the first time, and check the machine
strictly according to the installation principle every 1-2 months after use. Please try to keep
the machine in normal use and use the original accessories.
6. If it cannot be used normally, please contact the dealer.
7. Appropriate clothes and shoes should be worn for practice.
8. Please use it after correct installation and inspection.
9. Your health may be affected by excessive or improper exercise. Consult with your doctor
before starting an exercise program. Your doctor can determine the maximum amount of
exercise you can train yourself and can get accurate information during your workout.
10. Children and people with disabilities are exercised only under the control of those who can
provide support and advice.
11. Please do not use this product to make dangerous actions.
12. If the bike is damaged, please use original parts for repair or replacement. Do not use
accessories from unspecified suppliers.
13. Warning: Before starting any exercise, please consult your doctor. This is extremely
important for people aged 35 and over and people with health problems.

- 2 -
14. The resistance of this product is adjustable. Please choose the appropriate resistance.
15. Please carefully check all knobs and screws before use to ensure your safety.
16. The exercise bike is only suitable for one person at a time, and other people should keep a
safe distance of more than 50cm when using it.
17. When using, please adjust the height of the handlebars and the height of the saddle
reasonably. The height of the saddle is based on the reference height of the user sitting on
the saddle and the foot just touches the tread surface completely. Saddle height.
18. When using, check whether the pedals of the bicycle are intact and the fixing sleeves are
intact, put the feet in, fasten and fix them, and cannot slide. At the same time, shoelaces
must also be fastened to avoid entanglement on the bicycle. If your feet are not fixed
properly, coupled with the inertia of the flywheel, your feet can easily step on the air, causing
danger.
19. Dangers that may be caused by flywheels. For example, when riding at a high speed, it may
bring some driving or impact to the legs.
After reaching a certain speed, stop the movement, do not try to use the strength of your
legs to stop the high-speed rotating flywheel;
Resistance should be used reasonably to control the brakes (the greater the clockwise
rotation, the greater the resistance) to avoid accidents. Wait for the flywheel to stop before
getting off the car.
When the flywheel is rotating, it is forbidden to touch other parts of the body, such as with
your hands, or other objects to avoid danger.
20. The exercise bike should be placed in a fixed and flat place and cannot be placed in an
inclined place to prevent it from falling over.
TRAINING GUIDES
Proper use of the exercise bike can make the hips and legs more fit, increase the oxygen in the
blood volume, and make the spirit more relaxed. So how do we use a suitable exercise bike
safely?
First: warm up before the exercise bike.
Full warm-up exercises before exercise cannot be less, such as jogging, squatting, high legs,
leg pressing, pronunciation, twisting, moving arms. Wait for activities to make the body sweat
slightly, usually within 5-10 minutes.
Second: Adjust the height and front and rear position of the exercise bike seat and
handle height.
To get the most out of your exercise and ride as efficiently as possible, make sure your seat is
adjusted correctly. This will also make you more comfortable.
1. Seat height adjustment: Sit on the seat and place your feet on the pedals so that the toe ball
is above the pedal shaft. When the pedal is at the lowest point, you should see your knees
bend slightly at an angle of 25-30 degrees. The pedal power in this position is the greatest
and most comfortable. If the hips swing back and forth on the seat, the seat may be too
high. In this case, please lower your seat.

- 3 -
2. Seat front and rear adjustment: When sitting on the seat, when the two pedals are at the
same distance from the ground, the front knee should not exceed the toe, but you can't sit
too behind. The angle between the calf of the front leg and the instep should not be greater
than 90 degrees.
3. Handle height adjustment: After adjusting the seat, adjust the handle to a height slightly
higher than the seat; keep your back as straight as possible, especially for obese people
and those with weaker cores. If used improperly, it is possible to damage the lumbar spine.
4. The shoelaces must be fastened, then put in the fixed cover of the pedal, and fasten the
straps. These straps can let you put more on the pedals during exercise. The muscles in
exercise are more effective in pedaling exercises.
Third: the correct posture of the exercise bike.
The wrong riding posture will affect the exercise effect and cause harm to the body. Like bowing
to the waist, skimming the legs, pedaling movements are not standard, so it is an incorrect
posture during riding.
The correct posture for sitting: Lean forward, straighten your arms, tighten your abdomen, use
abdominal breathing, with your legs parallel to the beam of the car, coordinate your knees and
hip joints, and pay attention to the rhythm of riding.
Correct pedaling posture: Correct pedaling should include: pedaling, pulling, lifting, and pushing
4 consecutive movements. The foot first moves to the next step, then the calf is retracted back,
then lifted up, and finally pushed forward, so that you have just completed a lap. A good
pedaling rhythm not only saves energy, but also improves speed.
Fourth: the correct riding speed can ride on its own.
Frequency and intensity are the basic principles of exercise. At the beginning, it is suggested
that you can find the right frequency, and then increase the amount of exercise. The average
person pedals and rotates 60 to 80 times per minute. Warm up at low speed for each ride, and
then ride for more than 20 minutes at medium and high frequencies, and your body may sweat
slightly.
Fifth: The purpose of different riding methods is different, but you should do according
to your ability. If you feel unwell, please stop training.
1. To train to lose weight.
For those who want to lose weight by riding a bicycle, you can use aerobic exercise riding
method, that is, adjust the feeling of resisting the body load without exerting force. The intensity
of this exercise should be moderate, generally more than 30 minutes, to break down fat.
Therefore, the most suitable riding time is 30 to 40 minutes, and the heart rate is 100-110
beats/min.
2. To train muscles
Riding an exercise bike to exercise the muscles. Choose easy resistance, warm up at a slow
speed for 5 minutes, and then as a high-speed riding for about 5 minutes, with a heart rate of
170-180 beats/minute, and then gradually slow down the riding for 5-10 minutes so that the
heart rate returns to 100 beats/minute or more. So as a group, you can even do a few groups
and arrange a 3-5 minute break between groups.

- 4 -
PARTS IDENTIFICATION
1. Front cover of
housing
2. The upper cover of the
armrest cover
3. Handrail fixing
screws
4. Handrail slide rail
fixing screws
5. Foot tube screw
6. Installation tools
7. Handrail slide
8. Rear foot tube
9. Handrail
10. Forefoot tube
11. Flywheel
12. The armrest slide
rail is fixed
13. Resistance
adjustment knob
14. Saddle slide
15. Saddle
adjustment knob
16. Saddle height
adjustment knob
17. Crank
18. Saddle
19. Pedals
20. Monitor

- 5 -
ASSEMBLE INSTRUCTION
Before assembling, you should remove the components from the box and make sure all the
parts have been supplied fully according to the product. Assembly instructions are described in
steps and illustrated below:
1. Take the front foot tube out and put it into the strip hole at the rear of the frame, put a flat
washer Ф8 and a spring washer Ф8 on the bolts in turn, then put on the cover nut, and lock it
with our special open-end wrench (the installation method of the rear leg is the same as
above).
Note: After the front and rear legs are installed, the product may have three feet on the
ground. At this time, the height of the black foot cover on the leg can be adjusted to balance
the product.
2. Take out the pedals, you will find the pedals marked with "L" and "R", take out the pedals
marked with "R", remove the nut on the pedals, and insert them into the threaded holes of
the crank on the right side. Rotate a part of the hour hand until it stops, and then use our
special open-end wrench to lock it. Finally, screw the nut in a little bit by hand, and then
tighten the nut with our open-end wrench. Take out the "L" pedal, remove the nut, insert it
into the threaded hole of the left crank, and turn it counterclockwise until it stops. Then use
our special open-end wrench to lock it, and finally screw the nut in a little bit. Tighten the nut
with our open-end wrench.
Note: The crank is also marked with "L" and "R" corresponding to the marks on the pedals. If
installed backwards, the slippage of the crank may damage the product. And the pedals
must be locked, otherwise the pedals will be used for a long time. It may fall off, and the nut
is divided into left and right. The "L" pedal corresponds to the inner ring with a blue non-slip
nut, and the "R" pedal corresponds to the inner ring with a white non-slip nut.
Note: The pedals in the schematic diagram may be different from the actual product, the
picture is for illustrative purposes.

- 6 -
3. As shown in the figure, first connect the induction line at the main frame tube with the
induction line at the armrest tube, and insert the armrest slide rail tube into the front cover of
the chassis, and insert it into the frame head tube to align the holes. Insert the flat washer
and the screws in turn (flat washer for the plane, arc-shaped flat washer for the arc surface).
Tighten and fix it with a wrench. Finally, click down into the front cover of the chassis.
4. Take out the armrest, align the three holes on the armrest with the threaded holes on the
armrest fixing seat, pad the flat washer, and insert the cylinder-head screw (flat washer for
the flat surface and arc-shaped flat washer for the arc surface) to lock it with an Allen key.
Set the removed armrest cover to the position of the armrest as shown in the figure, and
align it with the 4 slots at the lower cover of the armrest slide rail. Press lightly down the
armrest cover and it will automatically be locked in place.
5. Take out the electronic watch. First remove the screws with an Allen wrench, take out the
back cover and insert the battery. 3. Use the screws just removed to align the holes and fix
them with an Allen wrench 4. After installing the above steps Insert the sensor line into the
electronic watch in the heart rate as shown in the figure.

- 7 -
6. With the resistance adjustment knob as shown in the figure, turn the knob clockwise to
increase the resistance of the exercise bike (when the resistance is adjusted to the
maximum value of 8, it is normal that friction sounds may be produced), otherwise the
resistance decreases.
7. Insert the saddle on the saddle post. Pull open the ball joint pull pin, lift the seat cushion
seat up to a suitable height, loosen the ball joint pull pin, make the pin penetrate the small
hole of the seat cushion seat, and then lock the ball joint pull pin. (Loosen the locking bolts,
you can move the cushion seat back and forth, and after adjusting to a comfortable position,
you can tighten the bolts).
Resistance adjustment knob
Rear
Front
Up
Down

- 8 -
MONITOR FUNCTION DECRIPTION
Display parameters
Time, Speed, Distance, Odometer, Pulse, Calories
Time ..........................................................................................................................00:00-99.59
Speed ...................................................................................................................... 0-99.9 Km/h
Distance..................................................................................................................... 0-999.9 Km
Odometer................................................................................................................... 0-999.9 Km
Calories.....................................................................................................................0-999.9 Kcal
Pulse.........................................................................................................................40-240 BPM
Scan: When “SCAN” flashes, each function will be displayed one by one in turn. When it is not
displayed, enter the lock display mode and fix it on a certain function.
How to use
1. Press the center button to turn on the display.
2. When “SCAN” flashes, each function will be displayed one by one in turn. Press the button
at this time, "SCAN" will disappear, and stop the display in turn at the same time, enter the
lock mode and fix it on a certain function, and then you can press the button to select the
function you want to display.
3. Press and hold for 2 seconds to clear each reading (except ODO total distance). The total
ODO distance will not be cleared without replacement as long as the battery is always
charged.
Matters needing attention
When the movement is stopped and there is no key operation within 4 minutes, the electronic
watch will automatically shut down.
When there is motion sensing or key operation, the electronic watch will automatically turn on.

- 9 -
EXERCISE GUIDELINES
Before using your treadmill, it is best to take 5 -10 minutes doing warm up stretching exercises.
Stretching prior to exercise will improve flexibility and reduce chances of exercise related injury.
1. Downward stretch
The body bends forward slowly so that the back and
shoulders relaxed, hands to touch the toes as far as
possible. Maintain 10 to 15 seconds, and then relax.
Repeated 3 times (see Figure 1).
2. Crus sinew stretch
Put one leg straight, the other leg inward to keep straight the
inside. A hand to touch the toes as far as possible. Maintain
10 to 15 seconds, and then relax. To do a leg each repeat 3
times (see Figure 2).
3. Crus and heal sinew stretch
Two hands extending wall or table stand, one foot in the
post. Hind legs to keep upright and lean to the walls or trees
direction. Maintain 10 to 15 seconds, and then relax. To do
a leg each repeat 3 times (see Figure 3).
4. Muscles stretch
Right hand extending the wall or cable, keep balance, then
the left hand back stretch to seize the left ankle to the hips
slowly pulls, until you feel the front thigh muscles tense. Pull
about 10 ~ 15 seconds, then relax. To do a leg each repeat
3 times (see Figure 4).
5. Sartorius muscle (inner thigh muscles) stretch
The sole of the feet relative, seated knee outward. Hands
grasp the feet to the groin direction pull slowly. Maintain 10
to 15 seconds, then relax. Repeated 3 times (see Figure 5).

- 10 -
INSTRUCTION OF SCANNING QR CODE
Method 1: Scaning QR code by Zalo (Vietnam app)
- Open Zalo. - Click ( + ) and select Scan QR code
- Move the camera to QR code - Click “ Yes ” to redirect to the warranty registration
registration page
Method 2: Scan QR code on iphone with iOS11.
- Activate scanning QR code by camera: Go to Settings > Camera > Scan QR Code).

- 11 -
- After completed install, open camera
and move the camera to QR code,
then you will receive a notification,
please click "Connect" and follow the
instructions.
Method 3: Scan QR code on Android with Google Assistant
Instructions for using Google Assistant on Android.
Hold the Home button to
open the Google Assistant
application and follow the
illustration
After clicking on the icon
above the application to
open the camera, move it to
QR code and click on the
link in the image
Click the "Start" and follow
the instructions
TERMS AND CONDITIONS OF PRODUCT RETURN
CONDITIONS OF RETURN - RENEWAL
I. Regulations on return
Customers need to check the status of the goods and can exchange/return the goods in the
following cases:
•The goods are not of the correct type or model in the ordered order or as on the website at
the time of order.
•Not enough quantity, not enough sets as in the order.
•The product is not working.
Customers are responsible for submitting relevant documents proving the above deficiencies to
complete the return/exchange of goods.
II Regulations on the time to notify and return products

- 12 -
•Time of return notice: within 7 days after receiving the product in case the product lacks
accessories, gifts, or broken.
•Product delivery time: within 14 days after receiving the product.
•Product return location: Customers can bring products directly to our office/store or by
mail.
In case you have comments/complaints related to product quality, please contact our hotline.
III. Conditions of return - renewal
The product is intact, not scratched, scratched, distorted, broken, cracked, impacted,
flammable, moldy, or chemical.
•The product has not been open for repair by the user or by a third party.
•Products with full documents: delivery note, warranty card, VAT invoice (if any), manual,
catalog ...)
•Goods are confirmed to have technical defects checked by the company's technician.
•Product intact box (no distortion, no tearing box, packaging, foam,..) full of original
accessories, full promotional gifts (if any).
•Accessories must be complete and intact.
•If lost accessories or promotions or cases are scratched, fees will be charged depending on
the case of the product.
Note: Our company does not accept returns in the following cases.
•You want to change the category for your liking, but the product really does not have any
defects.
•You do not operate properly, causing damage to the goods.
•You do not comply with the regulations as required to enjoy the warranty (for example, do
not present the warranty card, the company's vouchers when exchanging).
•You self-affect external conditions such as packaging tear, scratches, scratches, breakage,
...
•The goods have been checked, agreed to buy by you, but then you asked to return the
goods due to the wrong form (scratches, distortions, yellowing, broken ...).
•Please check the goods and sign the receipt of the status with the Delivery Officer
immediately upon receiving the goods. When detecting one of the above cases, you can
discuss directly with the Delivery Officer or immediately respond to the customer receiving
the customer order.
CONDITIONS FOR HOME SUPPORT
I. Free case
1. Massage chair products are supported for free at home nationwide
2. If the product is newly received and defective because the manufacturer is bulky, the
warranty department will let the technician handle it at home for free in Hanoi and Ho Chi Minh
City.
3. New products received defective parts, the warranty department will send free parts
compensation to customers.
II. Charge case
1. Error caused by the user
2. Home installation service
Travel and accommodation costs, if any + labor costs 250.000 vnd/ half a day –500.000/day.
WARRANTY CONDITIONS
I. Warranty conditions:
•Purchase invoice or electronic warranty registration is required
•All products must be intact and free from modified erasers.
•Damage to the product due to manufacturer error.
•For innovative non-electric products within 7 days of purchase, if there is a manufacturer
fault

- 13 -
•For electrical products, 18-month warranty is free of charge if there is a manufacturer's fault
•For health care products such as scales, blood pressure monitors, blood glucose meters, oil-
free fryers with 24-month warranty
II. Warranty refusal cases:
1. Product is out of warranty or without warranty card of the Company.
2. The product is not physically intact, dropped, collided, exploded, and traces of user repairing
voluntarily.
3. Products are damaged by natural disasters, lightning, floods, fires, computer viruses,
insects, animals, oxidized humid environment, sand and soil, due to improper transportation.
4. Misuse of power source or improperly
5. No warranty accessories such as gifts, accessories, and accessories come with the product
depending on the product.
6. Products, components, accessories that are easily scratched, peeling, ... such as fryer,
stainless steel pot, rice cooker, ...
7. For high pressure washers, components, accessories such as spray gun, spray body, hose,
connector ... will not be covered under warranty.
* Attention: Customers must pay shipping cost if any.
III. Warranty period
•Time to receive warranty: from 8H to 17H from Monday to Saturday (except Sunday and
holidays, New Year).
•Hotline: 1900.1738
IV. Warranty refund period
•All products of the Company provide free warranty when customers bring to the Company to
ensure that there are full warranty cards of the machine still within the warranty period as
prescribed.
•Time to resolve warranty from 5-7 days from the date of receipt except Sunday, holidays
and depending on the case of damage.
1. In the case of minor equipment failure, the return time is between 5 and 7 working days from
the date of warranty receipt.
2. In case the device is severely defective, it is necessary to wait for the parts to be replaced,
the return time of the device should not exceed 4 weeks (28 days) from the date of receipt of
warranty.
CUSTOMER SERVICE CENTER
South: 12/9 Tay Quarter, Highway 13, Vinh Phu, Thuan An, Binh Duong Province.
North: Xam Thi Village, Hong Van Commune, Thuong Tin District, Hanoi
Hotline: 1900 1738
Website: www.MishioVietnam.com

- 14 -
VN
TRƯC KHI SDỤNG SẢN PHẨM
Cảm ơn bạn đã lựa chọn sản phẩm của công ty chúng tôi! Để đảm bảo an toàn và hữu ích, vui
lòng đọc kỹhướng dẫn sửdụng trước khi sửdụng và giữlại để tham khảo khi cần thiết.
Đặc điểm kỹthuật sản phẩm thực tếcó thểthay đổi một chút so với hình minh họa và có thể
thay đổi mà không cần báo trước.
Hình ảnh chỉmang tính chất minh họa cho sản phẩm, vui lòng xem trực tiếp sản phẩm thực tế
để biết thêm chi tiết.
HƯNG DN AN TOÀN QUAN TRỌNG
ĐM BO RNG BN Đ ĐC TON BHƯNG DN TRƯC KHI LP RP VSỬ
DỤNG XE ĐP TẬP NY. ĐẶC BIỆT LƯU Ý CC BIỆN PHP AN TON SAU ĐÂY:
1. Khi không sửdụng xe đạp tập, vui lòng xoay núm điều chỉnh lực cản theo chiều kim đồng
hồđể bánh đà không quay.
2. Sửdụng không đúng cách hoặc sửdụng xe đạp tập quá lâu có thểgây ra chấn thương.
Người dùng nên chú ý đến thời gian sửdụng và sức khỏe của bản thân khi sửdụng lần đầu
tiên. Bạn có thểđiều chỉnh lực đạp phù hợp trước tiên, sau đó từ từtăng lực sau một thời
gian luyện tập.
3. Xe đạp tập thểdục này là thiết bịtập thểdục gia đình, có trọng lượng chịu tải tối đa là 120
kg / 265 lbs.
4. Thiết bịkhóa của thiết bịnày là núm điều chỉnh lực cản (xem sơ đồ bộphận). Xoay núm
theo chiều kim đồng hồcho đến khi bánh răng thứ 8 báo rằng bánh đà đã bị khóa. Trong
quá trình sửdụng, xoay theo chiều kim đồng hồđể tăng lực đạp và ngược chiều kim đồng
hồđể giảm lực.
5. Vui lòng kiểm tra kỹxe đạp tập trước khi sửdụng lần đầu. Kiểm tra xe theo đúng nguyên
tắc lắp đặt, định kỳ1-2 tháng sau khi sửdụng. Vui lòng giữcho xe hoạt động bình thường
và sửdụng các phụkiện đi kèm ban đầu.
6. Nếu xe đạp tập không hoạt động bình thường, vui lòng liên hệvới trung tậm chăm sóc
khách hàng hoặc nhà phân phối để được hướng dẫn cụthể.
7. Cần phải mặc quần áo và mang giày phù hợp khi luyện tập.
8. Chỉđược sửdụng xe đạp tập sau khi đã cài đặt chính xác và kiểm tra độ an toàn.
9. Sức khỏe của bạn có thểbịảnh hưởng khi tập thểdục quá sức hoặc không đúng cách.
Tham khảo ý kiến của bác sĩ trước khi bắt đầu một chương trình tập thểdục. Bác sĩ của
bạn sẽgiúp xác định khối lượng bài tập tối đa mà bạn có thểtựtập luyện và có thểnhận
được thông tin chính xác trong quá trình tập luyện của bạn.
10. Trẻem và người khuyết tật chỉđược thực hiện dưới sựkiểm soát của những người có thể
hỗtrợvà tư vấn.
11. Vui lòng không sửdụng sản phẩm này để thực hiện các hành động nguy hiểm.
12. Nếu xe bịhư hỏng, vui lòng sửdụng các bộphận chính hãng để sửa chữa hoặc thay thế.
Không sửdụng phụkiện từcác nhà cung cấp không xác định.

- 15 -
13. Cảnh báo: Trước khi bắt đầu bất kỳbài tập nào, vui lòng tham khảo ý kiến bác sĩ. Điều này
cực kỳquan trọng đối với những người từ35 tuổi trởlên và những người có vấn đề vềsức
khỏe.
14. Lực cản của xe đạp tập này có thểđiều chỉnh được. Hãy điều chỉnh lực phù hợp với bạn
trước khi tập luyện.
15. Vui lòng kiểm tra cẩn thận tất cảcác núm điều chỉnh và ốc vít trước khi sửdụng để đảm
bảo an toàn cho bạn.
16. Xe đạp tập thểdục chỉcó thểsửdụng cho một người tại một thời điểm, những người khác
nên giữkhoảng cách an toàn trên 50cm khi xe đang được sửdụng.
17. Khi sửdụng, vui lòng điều chỉnh độ cao của tay cầm và độ cao của yên xe hợp lý. Chiều
cao của yên dựa trên chiều cao tham chiếu của người sửdụng khi ngồi trên yên và chân
vừa chạm hoàn toàn vào bàn đạp.
18. Khi sửdụng, kiểm tra bàn đạp của xe đạp còn nguyên đai nguyên kiện hay không, lắp chân
vào, buộc chặt và cốđịnh, không để chân trượt được. Đồng thời, dây giày cũng phải được
buộc chặt để tránh vướng víu khi đạp xe. Nếu không cốđịnh bàn đạp đúng cách, cộng với
quán tính của bánh đà, chân bạn có thểdễdàng trượt ra khỏi bàn đạp, gây nguy hiểm.
19. Những nguy hiểm có thểdo bánh đà gây ra. Ví dụ, khi đi xe ở tốc độ cao, nó có thểgây ra
một sốtác động đến chân:
Sau khi đạt đến tốc độ nhất định, dừng chuyển động, không cốgắng dùng sức của chân để
dừng bánh đà đang quay ởtốc độ cao;
Nên sửdụng núm điều chỉnh lực để điều khiển phanh (vòng quay càng lớn theo chiều kim
đồng hồthì lực cản càng lớn) tránh xảy ra tai nạn. Chờbánh đà dừng lại hoàn toàn trước khi
xuống xe;
Khi bánh đà đang quay, không được dùng tay hoặc các vật khác để chạm vào bánh đà.
20. Xe đạp tập thểdục nên được đặt ởnơi cố định và bằng phẳng, không được đặt ởnơi
nghiêng để tránh bịđổ.
HƯNG DN TP LUYỆN
Sửdụng xe đạp tập thểdục đúng cách có thể giúp cho hông và chân thon gọn, tăng lượng oxy
trong máu, giúp tinh thần thoải mái hơn. Vậy làm thếnào để chúng ta sửdụng một chiếc xe đạp
tập phù hợp một cách an toàn?
Thứnhất: Làm nóng cơ thể trước khi tập luyện.
Các bài khởi động đầy đủ trước khi vận động không thểthiếu như chạy bộ, squat, nâng cao
đùi, ép chân, vặn mình, xoay cánh tay. Nên tập các bài tập làm cơ thể ra mồhôi nhẹ, thường
trong vòng 5-10 phút.
Thứhai: Điều chỉnh độ cao và vịtrí trước sau của yên xe và chiều cao tay cầm.
Để tận dụng tối đa bài tập và đạp xe hiệu quảnhất có thể, hãy đảm bảo yên xe của bạn được
điều chỉnh chính xác. Điều này cũng sẽ giúp bạn cảm thấy thoải mái hơn khi tập luyện.
1. Điều chỉnh độ cao yên xe: Ngồi trên yên xe và đặt chân lên bàn đạp sao cho mũi chân ở
trên trục bàn đạp. Khi bàn đạp ởđiểm thấp nhất, bạn sẽthấy đầu gối hơi cong một góc 25-
30 độ. Lực đạp ởvịtrí này là lớn nhất và thoải mái nhất. Nếu hông lắc qua lại trên yên, lúc
này là do yên xe đang ở vịtrí quá cao. Trong trường hợp này, vui lòng hạyên xe xuống.

- 16 -
2. Điều chỉnh yên trước và sau: Ngồi trên yên xe, khi hai bàn đạp cách mặt đất bằng nhau,
đầu gối phía trước không được quá mũi chân, nhưng cũng không được ngồi quá vềphía
sau. Góc giữa bắp chân trước và mu bàn chân không được lớn hơn 90 độ.
3. Điều chỉnh độ cao tay cầm: Sau khi điều chỉnh yên xe, hãy điều chỉnh tay cầm đến độ cao
cao hơn một chút so với yên xe. Hãy giữcho lưng của bạn càng thẳng càng tốt, đặc biệt là
đối với những người béo phì và những người có cơ thể yếu hơn. Nếu tư thế ngồi đạp
không đúng cách có thể gây tổn thương cột sống thắt lưng.
4. Phải buộc chặt dây giày, sau đó cho buộc vào dây đai cốđịnh của bàn đạp. Những dây đai
này có thểcho phép bạn sửdụng nhiều lực hơn vào bàn đạp trong khi tập thểdục.
Thứba: Tư thế đạp xe phải đúng cách.
Tư thế đạp xe sai sẽảnh hưởng đến hiệu quảtập luyện và gây hại cho cơ thể. Các tư thế như
cúi gập thắt lưng, nằm dài, động tác đạp không chuẩn là những tư thế không đúng trong quá
trình đạp xe.
Tư thế ngồi đúng: Ngả người vềphía trước, duỗi thẳng tay, hóp bụng, thởbằng bụng, hai chân
song song với nhau, phối hợp khớp gối và khớp háng, chú ý nhịp nhàng khi đạp xe.
Tư thế đạp chân: Tư thếđạp xe đúng phải bao gồm: đạp, kéo, nâng, đẩy 4 động tác liên tiếp.
Bước chân đầu tiên chuyển sang bước tiếp theo, sau đó bắp chân thu vềphía sau, sau đó
nâng lên, cuối cùng đẩy vềphía trước, như vậy bạn vừa hoàn thành một vòng. Một nhịp đạp tốt
không chỉgiúp tiết kiệm năng lượng mà còn cải thiện tốc độ.
Thứtư: Tốc độ đạp xe.
Tần suất và cường độ là nguyên tắc cơ bản của việc tập thểdục. Khi bắt đầu, bạn nên tìm tần
suất phù hợp, sau đó tăng lượng bài tập lên. Một người bình thường đạp xe từ60 đến 80 vòng
mỗi phút. Khởi động ởtốc độ thấp cho mỗi lần đạp xe, sau đó đạp xe hơn 20 phút ở tần số
trung bình và cao, và cơ thể bạn có thểđổ mồhôi nhẹ.
Thứnăm: Mục đích của các phương pháp đạp xe khác nhau là khác nhau, nhưng bạn
nên làm theo khảnăng của mình. Nếu bạn cảm thấy không khỏe, vui lòng ngừng tập
luyện và tham khảo ý kiến của bác sĩ hoặc huấn luyện viên cá nhân.
1. Tập luyện để giảm cân.
Đối với những người muốn giảm cân bằng phương pháp đạp xe có thểáp dụng phương pháp
đạp xe aerobic, tức là điều chỉnh cảm giác chống lại tải trọng của cơ thể mà không cần tác
dụng lực. Cường độ của bài tập này nên vừa phải, thường là hơn 30 phút, để phân hủy chất
béo. Vì vậy, thời gian tập luyện phù hợp nhất là từ30 đến 40 phút, và nhịp tim là 100-110 nhịp /
phút.
2. Để rèn luyện cơ bắp
Đạp xe đạp tập thểdục để rèn luyện cơ bắp. Điều chỉnh lực đạp nhẹnhàng, khởi động ởtốc độ
chậm trong 5 phút, sau đó đạp xe ởtốc độ cao trong khoảng 5 phút, với nhịp tim 170-180 nhịp /
phút, sau đó đạp xe chậm dần trong 5-10 phút để nhịp tim trởvề100 nhịp / phút trởlên. Bạn có
thểkết hợp các bài tập thành một nhóm, thậm chí có thểthực hiện một vài nhóm và sắp xếp
thời gian nghỉ3-5 phút giữa các nhóm.

- 17 -
CHI TIẾT SẢN PHẨM
1. Nắp bảo vệphía
trước
2. Nắp bảo vệtay
cầm
3. Bộvít cốđịnh tay
cầm
4. Bộvít cốđịnh thanh
đỡ tay cầm
5. Bộốc vít ống
chân
6. Bộphụkiện
7. Thanh đỡ tay cầm
8. Chân sau
9. Tay cầm
10. Chân trước
11. Bánh đà
12. Khe gắn thanh đỡ
tay cầm
13. Núm điều chỉnh
lực đạp
14. Thanh đỡ yên xe
15. Núm điều chỉnh
yên xe trước sau
16. Núm điều chỉnh độ
cao yên xe
17. Tay quay bàn
đạp
18. Yên xe
19. Bàn đạp
20. Đồng hồđiện tử

- 18 -
HƯNG DN LẮP RÁP
Trước khi lắp ráp, bạn nên tháo các bộphận ra khỏi hộp và đảm bảo rằng tất cảcác bộphận
đã được cung cấp đầy đủ theo sản phẩm. Hướng dẫn lắp ráp được mô tảtrong các bước và
minh họa bên dưới:
1. Lấy chân trước ra, đặt nó vào phía trước và bên dưới khung xe sao cho khớp với các lỗbắt
vít. Lần lượt đặt vòng đệm dẹp Ф8 và vòng đệm lò xo Ф8 vào các bu lông, sau đó gắn đai
ốc vào và vặn chặt chúng vào khung xe bằng cờ-lê để cốđịnh chân trước (cách lắp đặt
chân sau giống như trên).
Lưu ý: Sau khi lắp chân trước và chân sau, sản phẩm có thểcó ba chân trên mặt đất. Lúc
này, có thểđiều chỉnh độ cao của nắp bảo vệchân màu đen để sản phẩm được cân bằng.
2. Lấy bàn đạp ra khỏi hộp. Bàn đạp được đánh dấu "L" và "R" tương đương với bên trái và
phải. Để lắp bàn đạp phải, bạn cần tháo đai ốc trên bàn đạp, và lắp chúng vào các lỗren
của tay quay phía bên phải, xoay theo chiều kim đồng hồcho đến khi nó dừng lại, sau đó
sửdụng cờlê có đầu mởđặc biệt để vặn chặt nó. Cuối cùng, vặn đai ốc vào phía bên trong
tay quay, sau đó siết chặt đai ốc bằng cờlê để cốđịnh bàn đạp. Tương tự với bàn đạp trái.
Lưu ý: Tay quay cũng được đánh dấu "L" và "R" tương ứng với các dấu trên bàn đạp. Nếu
lắp ngược lại, có thểlàm hỏng sản phẩm. Và bàn đạp phải được cốđịnh vào tay quay, nếu
không bàn đạp sẽkhông thểsửdụng được lâu dài và nó có thểbịrơi ra. Đai ốc cũng được
chia thành trái và phải. Bàn đạp "L" tương ứng với đai ốc chống trượt màu xanh và bàn đạp
"R" tương ứng với đai ốc chống trượt màu trắng.
Lưu ý: Bàn đạp trong hình có thểkhác với sản phẩm thực tế, hình ảnh mang tính chất minh
họa.

- 19 -
3. Như hình dưới, kết nối đường dây cảm biến ởkhung xe chính với đường dây cảm biến ở
thanh đỡ tay vịn. Lắp thanh đỡ tay vịn và nắp bảo vệvào phía trước của khung xe, căn
chỉnh các lỗbắt vít, lần lượt lắp vòng đệm và vít vào (vòng đệm dẹp cho mặt phẳng, vòng
đệm hình vòng cung cho bềmặt vòng cung). Vặn chặt và cốđịnh bằng cờlê. Cuối cùng,
đẩy nắp bảo vệxuống sao cho khớp với khung.
4. Lấy tay cầm ra khỏi hộp, căn chỉnh ba lỗtrên tay cầm sao cho khớp với các lỗren trên
khung đỡ tay cầm, lần lượt lắp vòng đệm và vít vào (vòng đệm dẹp cho mặt phẳng, vòng
đệm hình vòng cung cho bềmặt vòng cung). Sau đó cố định tay cầm bằng cờ-lê Allen.
Đặt nắp bảo vệtay cầm vào phía trên tay cầm như trong hình dưới và căn chỉnh nó cho
khớp với 4 rãnh ởnắp dưới của khung đỡ tay cầm. Nhấn nhẹnắp tay cầm xuống và nó sẽ
tựđộng được khóa vào vịtrí.
5. Lấy đồng hồđiện tửra khỏi hộp. Đầu tiên tháo các vít bằng cờlê Allen, sau đó tháo nắp sau
của đồng hồvà lắp pin. Sửdụng các vít vừa tháo để căn chỉnh các lỗvà cốđịnh chúng lại
bằng cờlê Allen. Sau khi cài đặt các bước trên gắn dây cảm biến vào đồng hồđiện tửnhư
trong hình.
Table of contents
Languages:
Other Mishio Exercise Bike manuals
Popular Exercise Bike manuals by other brands

CARDIOSTRONG
CARDIOSTRONG Ergometer BC70 Assembly and operating instructions

Pro-Form
Pro-Form 200 Csx Bike manual

Pro-Form
Pro-Form 320 Cx Bike manual

Flow Fitness
Flow Fitness RACER DSB600i user manual

BH Hipower
BH Hipower H923 Instructions for assembly and use

Pro-Form
Pro-Form LE TOUR DE FRANCE user manual

Pro-Form
Pro-Form 1550cwi Bedienungsanleitung

Pro-Form
Pro-Form PFIVEX33613.0 user manual

Star Trac
Star Trac S-UBx owner's manual

Pro-Form
Pro-Form 115 Csx Bike user manual

Life Fitness
Life Fitness INTEGRITY AND CLUB Series Assembly instructions

HEALTH RIDER
HEALTH RIDER Health Rider R1000t Bike Bedienungsanleitung