10
At Dehydrate, can use it for Warm function
1. Set the function dial to Dehydrate.
2. Set the temperature dial to between 90°C and
120°C.
3. Set the oven timer dial to the desired warming
time to turn on the oven and start warming.
The power light will illuminate. The timer will
ring once when the cycle is complete and the
oven will power off when the time expires.
4. To stop warming mid-cycle, turn the oven timer
dial to the OFF position.
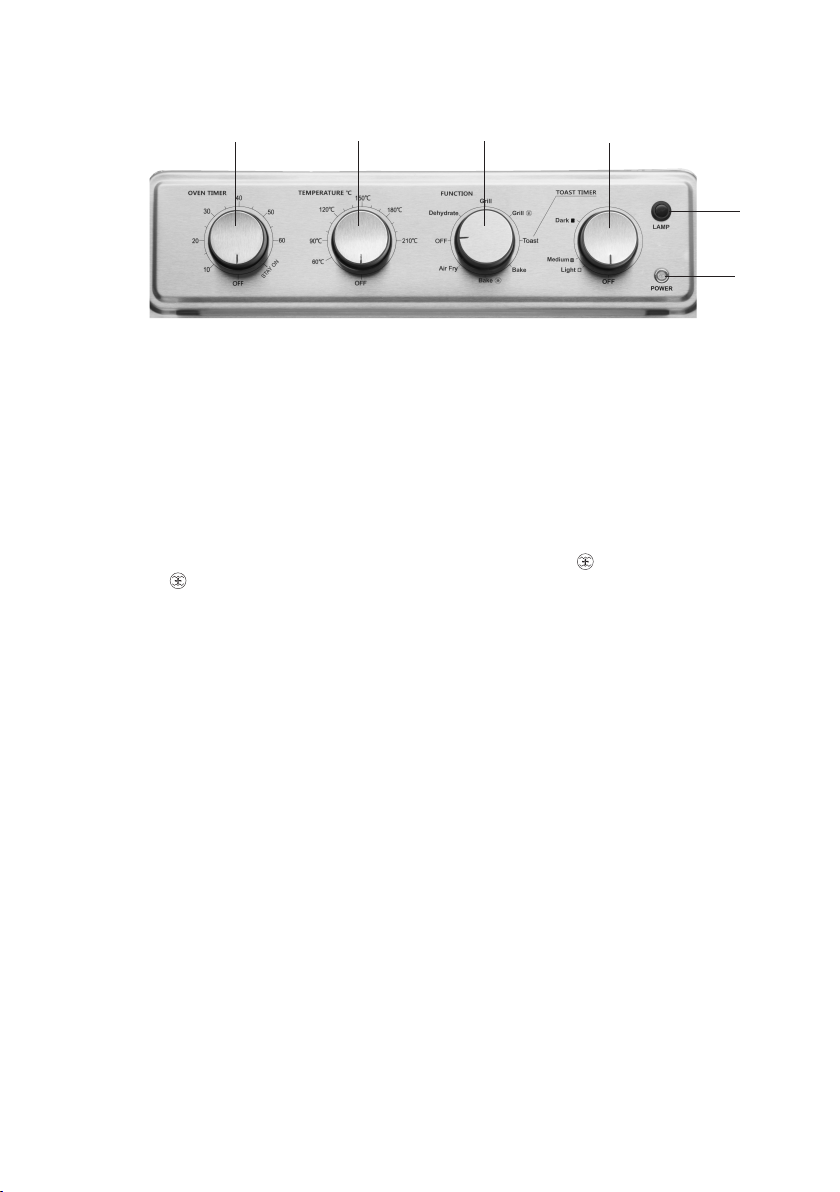
Toast
You can also use the air fryer oven for toasting
bread, using the supplied oven rack in position (2).
1. Set the function dial to Toast.
2. Set the temperature dial to 210°C.
3. Set the toast timer dial to the desired darkness
level (Light, Medium, Dark) to turn on the
oven and start toasting. The power light will
illuminate. The timer will ring once when the
cycle is complete and the oven will power off
when the time expires.
Note: if your desired darkness level is
Light, advise you turn the toast timer dial
to Dark rst, then turn it back to Light
position for good performance.
4. To stop toasting mid-cycle, turn the toast timer
dial to the OFF position.
Warning: Never turn the toast time dial
beyond Dark level to avoid overcooking.
Toasting tips
Make sure that the crumb tray is properly in its
place on the bottom of the oven cavity.
Always position your bread in the middle of the
rack for even toasting. For example, if toasting four
items, place two at the front and two at the back.
If toasting six items, place three at the front and
three at the back.
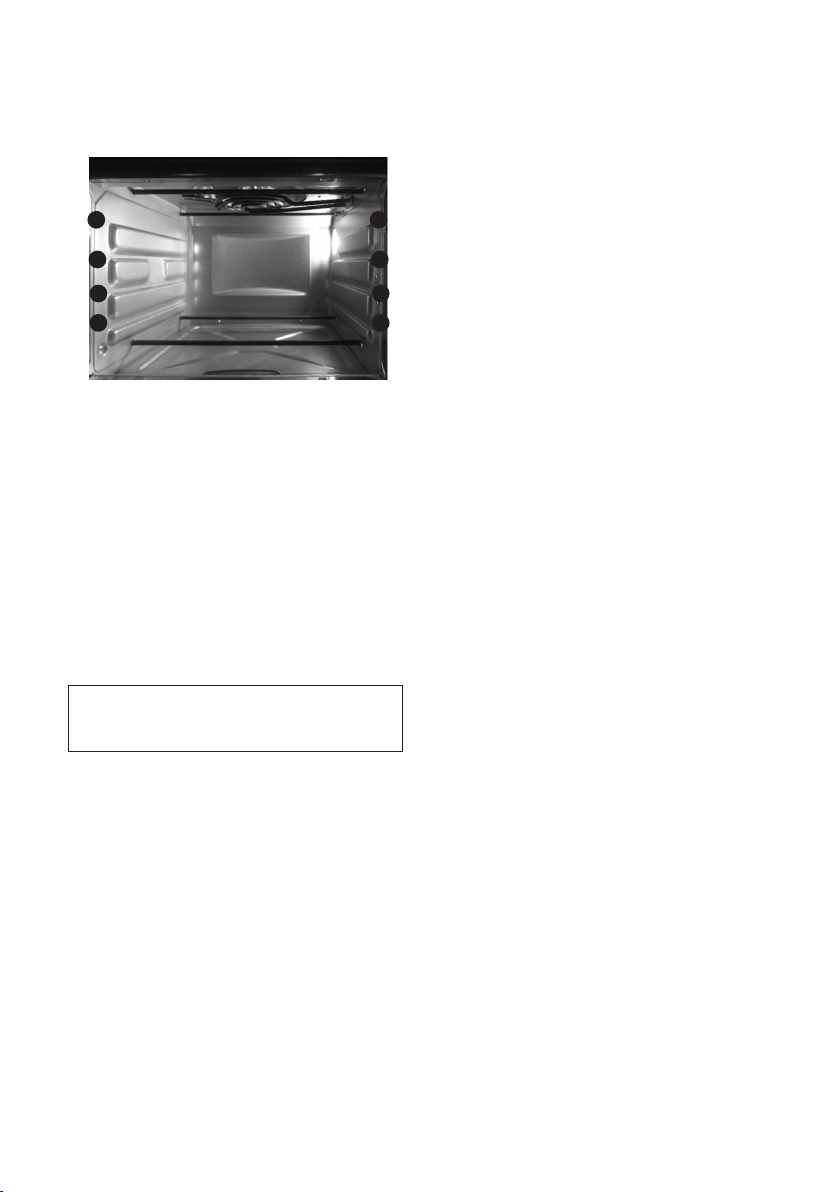
Air Fry
Use the supplied baking pan in position (1) and the
air fryer basket in position(2) or (3) when air-frying.
1. Set the function dial to Air Fry.
2. Set the temperature dial to the desired cooking
temperature.
3. Set the oven timer dial to the desired cooking
time to turn on the oven and start air-frying. The
power light will illuminate. The timer will ring once
when the cycle is complete and the oven will
power off when the time expires.
4. To stop air-frying mid-cycle, turn the oven timer
dial to the OFF position.
Air-frying tips
• Which food? Many foods that are traditionally
fried can be air-fried using only a fraction of the
oil required for other frying methods. Air-fried
foods will taste lighter and less greasy than deep-
fried foods.
• Which oil? You can use most oils for air-frying.
Olive oil will give you a richer avour. Vegetable,
canola or grapeseed oil has a lighter, milder
avour. For a crispy, golden result, brush a small
amount of oil evenly on the food to be air-fried,
or use an olive oil or non-stick cooking spray.
• Crumbed or battered? You can use a variety of
coatings to add avour and texture to the food
you are air-frying, for example, breadcrumbs
(seasoned or plain), panko breadcrumbs,
cornakes, potato chip crumbs, quinoa or
various ours. Press the dry coating rmly onto
the (battered and/or seasoned) food pieces to
ensure good adhesion during air-frying.
• Flip or shake it?Most foods do not need to
be ipped during cooking, but larger items,
like chicken llets, should be ipped halfway
during cooking to ensure quick, even cooking
and browning. When air-frying large quantities
of food that crowd the basket, toss the food
halfway through the cooking cycle to ensure
even cooking and browning.
• Which temperature? Use higher temperatures for
foods that cook quickly, like bacon and thinly
sliced vegetable crisps, and lower temperatures
for foods that take longer to cook, like crumbed
chicken pieces.
• Which size? Food pieces cook more evenly if
they are cut to the same size.
• Condensation? Most foods release water when
they are being cooked. If the door of the oven
has condensation droplets during cooking, wait
until the appliance has stopped operating, then
wipe the droplets off the door. When cooking
large quantities for an extended period of time,
condensation may build up, which could leave
some moisture on your benchtop.