Mistral MSEM508 User manual

Model: MSEM508
Sewing Machine
Instruction Manual

2
Important Safeguards
When using this electrical appliance,
the following basic safety precautions
should always be followed:
For Your Safety
• To protect against the risk of electric shock,
DO NOT IMMERSE the main unit, adapter or
cord in water or any other liquid.
• Pleasereadtheseinstructionsbefore
operating and retain these for future
reference.
• Beforeconnectingtheappliancetothe
power supply, check that the voltage
indicated on the appliance corresponds with
the voltage in your home. If this is not the
case,contactyourlocalqualiedtechnician
and DO NOT use the appliance.
• Ifthesupplycordoranypartisdamaged,
cease use of this appliance immediately to
avoid a hazard.
• Donothangthepowercordovertheedge
oftableanddonotletcordcontacthot
surfaces, including stovetop.
• Placetheapplianceontheatsurface.Do
not place on the heated surface or near a
hotgasorelectricburneroroven.
• Thisapplianceisnotintendedforuseby
persons (including children) with reduced
physical,sensoryormentalcapabilities,
or lack of experience and knowledge,
unlesstheyhavebeengivensupervisionor
instruction concerning use of the appliance
byapersonresponsiblefortheirsafety.
• Childrenshouldbesupervisedtoensurethat
they do not play with appliance.
• Donotcovertheairinletortheairoutlet
when the appliance is working.
• Donottouchtheinsideoftheappliance
while it is operating.
• Keeptheapplianceanditsmainscordoutof
the reach of children.
• DONOTPLACEtheUnitonstovetopsurfaces.
• NEVERUSEthisappliancewithanextension
cord of any kind.
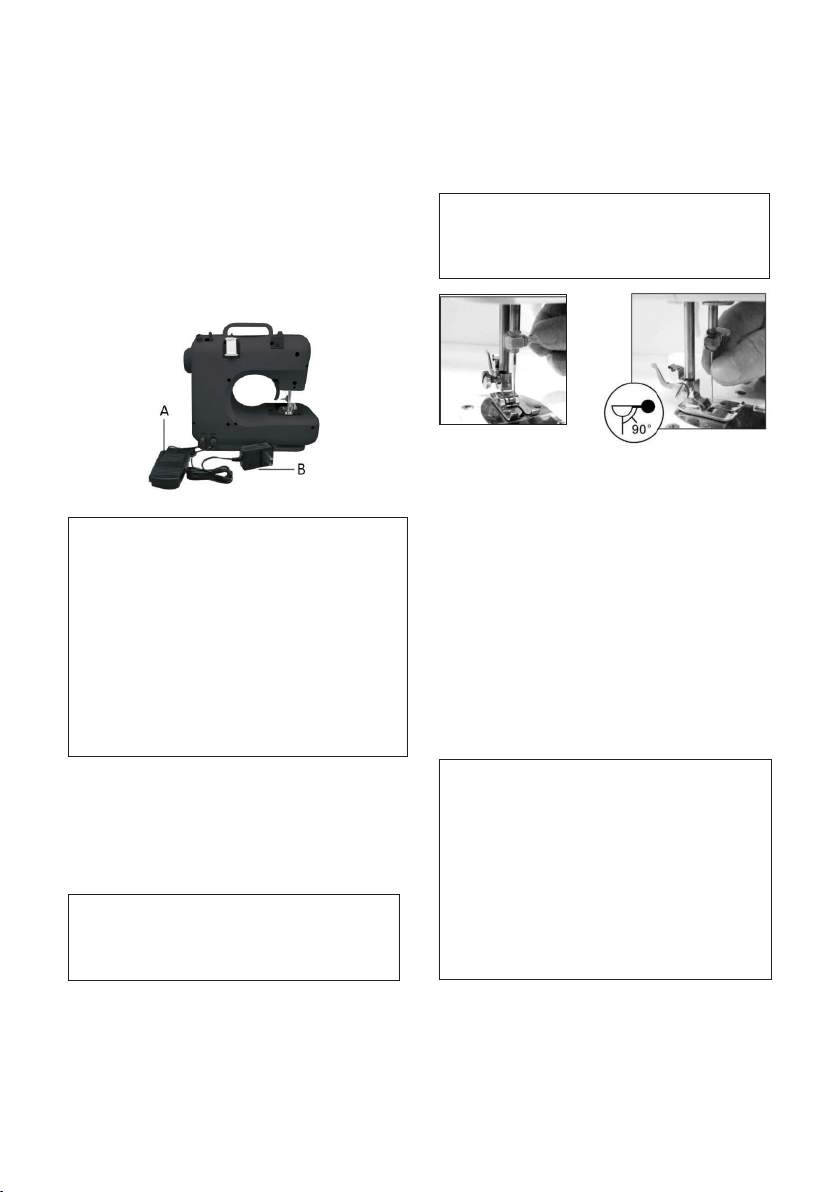
• Alwaysswitchofftheappliance,disconnect
from the power supply and remove foot
pedal when:
changing the needle;
threading the needle;
changingbottombobbin;
changing any parts;
cleaning the machine;
after each use.
• Neverrunthemachinewhenthere’sthread
intheneedle,butnofabriconthemachine.
This could damage the machine.
• Alwayskeepyourhandsawayfromthe
needle, hand wheel, upper thread tension
dial and pattern selection dial when the
appliance is running.
• Neverattempttoopenthehousingofthe
appliance, or to repair the appliance yourself.
This could cause electric shock.
• Neverleavetheapplianceunattended
during use.
• Switchofforunplugtheappliancewhen
leaving it unattended.
• Unplugtheappliancebeforecarryingout
maintenance.
• Thisapplianceisnotdesignedforcommercial
use.
• Donotusetheapplianceoutdoors.
• Donotusetheapplianceforotherthan
intended use.
• Neverusetheapplianceifdamagedin
anyway.
• Wheneverthesewingmachineisnotinuse
make sure it is switched off and unplugged
from the power supply and remove the foot
pedal.
• Keepthemachineinadryandventilated
place.
Warning
Ifthesupplycordisdamaged,thecordmustbe
replacedbythemanufacturer,itsserviceagent
orsimilarlyqualiedpersonsinordertoavoida
hazard.
Thisproducthasnotbeendesignedforanyuses
otherthanthosespeciedinthisbooklet.
Save These Instructions
THIS APPLIANCE IS DESIGNED FOR
HOUSEHOLD USE ONLY

3
Features of Your Sewing Machine
1
2
9
10
11
8
3
4
5
6
7
1
2
8
3
7
6
5
4
Front view
1. Take-up lever
2.Upperthreadtensiondial
3.Patternselectiondial
4. Thread cutter
5.Light
6. Needle clamp screw
7.Bottombobbin
8. Drawer
9. Hand wheel
10.Reversebutton
11.Power&speedswitch
Back view
1.Bobbinwinderpin
2.Bobbinwinderstop
3. Foot pedal input
4.Bobbinwindertensiondisk
5.Presserfootlifter
6.Presserfoot
7.DCinput
8. Spindle

4
Your Sewing Machine
USING THE FOOT PEDAL (A) AND
ADAPTOR (B)
1. Connectthefootpedalbyinsertingthe
jack into the foot pedal input socket. Then
you can use the foot pedal to turn on the
machine instead of using the hand switch
(Power&speedswitch).
2. Connecttheadaptor’sjacktotheDCinput
socketonthebackofthemachine,and
connect the plug to the main power supply.
Caution:
• Make sure the foot pedal is unplugged
from the machine when you are not
using it, so the sewing machine won’t
accidentally start up.
• The foot pedal cannot be used
together with the power & speed
switch.
Make sure the switch is placed at the
position “OFF”.
• There is no speed selection when using
foot pedal to control the machine.
NEEDLE REPLACEMENT
Iftheneedlebreaks,oryouneedadifferent
needletosewadifferentkindoffabric,just
follow these steps:
Caution: To prevent injury from
accidentally starting up the machine,
make sure to turn off the switch, remove
the foot pedal and the adaptor plug rst.
1. Turn the hand wheel to raise the needle to
its highest position. Hold the old needle and
loosen the needle clamp screw. Remove the
old needle and discard it properly. (Fig.1)
2. Insert the new needle into the clamp with the
atsidetowardthecorrectdirection(tothe
back).Besuretopushtheneedlecompletely
intotheclampbeforetighteningtheneedle
clamp screw.
3. Tighten the needle clamp screw.
Caution: Needle direction must be
correct, and be sure to tighten the
thimble screw, to avoid needle falling
by accident.
Fig.1 Fig.2
PRESSER FOOT REPLACEMENT
1. Removing the presser foot
Turn the hand wheel counterclockwise to
raise the needle to its highest position. Raise
the presser foot lifter, and press the presser
foot locking lever. The presser foot will drop
off automatically from the locking device.
(Fig.3; Fig.4)
2. Installing the presser foot
Putthepresserfootunderthepresserfoot
locking device, lower the presser foot lifter,
press the presser foot locking device to reset
the foot, and lift the presser foot lifter. (Fig.5;
Fig.6)
Caution:
• Always switch off the appliance,
disconnect it from the power supply
and remove the foot pedal when
replacing the presser foot.
• When replacing the presser foot,
please place the machine on a
stable platform.
• When putting down the presser foot,
please do not put your hand or nger
under it to avoid injuring ngers.

5
Fig.3 Fig.4
Fig.5 Fig.6
THREADING THE SEWING MACHINE
1. Threading upper thread
Caution: Always switch off the
appliance, disconnect the appliance
from the power supply and remove the
foot pedal when threading the machine.
(1) Turn the hand wheel to raise the needle to its
highest position.
(2)Putaspoolonthethreadspindle,putonthe
thread spindle cover and then pull out the
thread.
(3)Pullthethreadandletitpassthroughthe
bobbinwindertensiondisk.(mark 2in the
pic.below)
(4) Guide the thread through the groove and
pull it up towards the chromed take-up lever.
(marks 3& 4inthepic.below)
(5) Feed the thread through the hole in the
chromed lever and pull it straight down
towards the needle. (marks 4& 5in the pic.
below)
(6) Feed the thread through the hole in the
needle holder, then through the eye of the
needlefromthefrontsidetothebackand
pullout10cmtotheback.(mark 6in the pic.
below)
1
2
4
5
6
3
2.Replacingthebottombobbin
(1)Slidethebobbincoverbuttontotherightand
removethebobbincover(Fig.7).
(2)Putthenewbobbinintheholder,withthe
threadgoingclockwise.Leave10cmof
thread hanging out (Fig.8).
(3) Make a loop and put it in the hole under the
needle.
(4) Hold the end of the upper thread with
one hand, and turn the hand wheel
counterclockwise with the other hand, the
needlethreadwillpickupthebobbinthread
and pull it up through the hole under the
needle (Fig.9).
(5)Replacethebobbincoverandseparatethe
twothreadsandpullthemtothebackof
the machine under the presser foot, leaving
about15cmhangingthere.(Fig.10)
Caution:
• Always switch off the appliance,
disconnect it from the power supply
and remove the foot pedal when
replacing the bottom bobbin.
• Please use metal bobbins, otherwise
the magnetic holder cannot tense the
bobbin thread and work rightly.

6
Fig.7 Fig.8
Fig.9 Fig.9
SEWING
1. Turn the hand wheel counterclockwise to
raise the needle to its highest position.
2. Raise the presser foot lifter and place the
fabricyouwanttosewunderthepresserfoot
(Fig.11).
3. Lowerthepresserfoot.(Fig.12).
4. Rotate the pattern selection dial to select the
stitch pattern you want.
Caution:
• Before you change the stitch pattern,
please turn off the switch and turn the
hand wheel to raise the needle all the
way up so it doesn’t get stuck and
bent.
• Changing the stitch pattern is not
allowed when the machine is running,
otherwise the needle and/or machine
may damage.
5. Turn the hand wheel several times to make
sure there is no jamming in the stitches.
6. Slidethepowerswitchtotheposition“L”
(meaninglowspeed)or“H”(meaninghigh
speed), and the machine will automatically
startsewing.Werecommendthelowspeed
forbeginners(Fig.13).
7. Whenyounishthesewing,turnoffthe
switch, unplug the adapter, turn the hand
wheel to raise the needle all the way up, lift
the presser foot, and then gently remove the
fabricfromthesewingmachine,andcutthe
thread with the thread cutter (Fig.14).
Tips:
•Pleaseturnthehandwheelifitisdifcult
toremovethefabric,andthenpulloutthe
fabricgently.
•If the thread has tangled or jammed, please
turn the hand wheel and simultaneously
pull the thread slightly to release the thread.
Bottombobbinmechanismisamoreprecise
part, inappropriate actions may damage it.
Pleasetonotpushorpullitbyngerorany
tools.
Fig.11
Fig.13 Fig.14
Fig.12
FEATURES
1. Selection of stitch pattern
Rotate the pattern selection dial to select one
pattern you want from the 16 stitch patterns.
There are pattern illustrations on the surface of
machinebodyforyourreference.
Caution:
• Before you change the stitch pattern,
please turn off the switch and turn the
hand wheel to raise the needle all the
way up so it doesn’t get stuck and
bent.
• Changing the stitch pattern is not
allowed when the machine is running,
otherwise the needle and/or machine
may damage.

7
2. Reverse sewing
Reversesewing(backstitching)isusefulfor
reinforcingthebeginningandendofseams.To
use this function proceed as follows:
(1) Sew forwards as normal, and then press
andholddownthereversestitchbutton
on the front of the sewing machine to sew
backwards.
(2) To sew forwards again simply release the
reversestitchbutton.
Note: Reverse sewing is applicable only
to stitch patterns 1 to 4.
3. Setting the sewing speed
Slidethepowerswitchto“L”or“H”position.(“L”
=lowspeed;“H”=Highspeed)
4. Work
If additional light is needed, press the light switch
toturnthelighton.Presstheswitchagaintoturn
itoff.TheWorklampcannotbereplacedby
yourself.
5. Thread cutter
The machine has a thread cutter on the central
left side of the machine, it can cut off the thread
after sewing or winding thread.
6. Sewing sleeves
Thissewingmachinehasbeendesignedtosew
sleevesoranynarrowopeningsingarment.Pull
out the drawer and position the garment over
the sewing arm if you want to sew the sleeves.
7. Manual buttonhole
(1)Pulltheclothunderthepresserfootandlower
the presser foot on the cloth where you need
tosewbuttonhole,thenchoosethe15th
stitch.
(2) Turn on the switch and sew 5-6 stitches in low
speed, then turn off the switch (Fig.15).
(3)Choosethe16thstitch,turnonswitchand
sewontheclothinsuitablelength,then
turn off switch. Note that try to keep sewed
stitches in straight line (Fig.16).
(4)Choosethe15thstitch,thenturnonswitch
and sew 5-6 stitches in low speed, then turn
off switch (Fig.17).
(5) Raise the presser foot, rotating the cloth for
180° (Fig.18).
(6)Choosethe16thstitch,thenturnonswitch
andsewtillbuttonholeisfullysewed(Fig.19).
Fig.15 Fig.16
Fig.17 Fig.18
Fig.19
The presser foot shown as below can
facilitate the buttonhole sewing.

8
8. Drawer
This drawer is an accessory storage
compartment,whichcanbeslidoutandyou
canstoresparebobbins,needles,etc.init.It
islocatedatthebottomsidebelowthehand
wheel.
WINDING THE BOBBIN
1. Putaspoolofthreadonspoolpin.(Fig.20)
2. Guidethethreadthroughthebobbin
winder tension disk on the upper side of the
machine. (Fig.21)
3. Putthebobbinonthebobbinwinderpin,
windthreadclockwisearoundbobbinseveral
times. (Fig.22)
4. Pushbobbintotheleft.(Fig.23)
5. Switch on the machine to start winding.
(Fig.24)
6. Switch off the machine to stop winding after
appropriatevolumeofthreadyouhadbeen
windedonbobbin.
7. Pushbobbinawayfrombobbinwinderstop,
takebobbinoffthepinandcutthethread.
(Fig.25)
Caution: Before winding the bobbin,
raise the presser foot, take out the
bottom bobbin and the upper thread.
Fig.20
Fig.23 Fig.24 Fig.25
Fig.21 Fig.22
ADJUSTING STITCHING
1. AsshownintheFig.A,normalstitchingshall
havetopandbottomthreadingevenly,
neither over tight nor loose. ( 1= Top thread;
2=Cloth; 3=Bottomthread)
Fig.A
2. Ifthebottomthreadinglookslikeastraight
line(Fig.B),whichindicatesthetopthreadis
tooloose.Pleaseturnupperthreadtension
dialtodirectionwithbiggernumberto
increase pressure until the stitching returns to
normal.
Fig.B
3. If the top thread looks like a straight line
(Fig.C),whichindicatesanover-tighttop
thread.Pleaseturntheupperthreadtension
dialtothedirectionwithsmallernumberto
reducepressureuntilthestitchingbackto
normal.
Fig.C

9
ApplicableClothForSewing
Cotton/Linen Silk/Wool Polyester Elastic
Regular √×√
Thick √×√
Thin √× × ×
Hard √√√
Soft × × × ×
Sewing effective:
√:meanseasytosew
×:meansdifculttosew
: means not smooth to sew
Note:
1. The denition of the fabric thickness:
Thin (fabric): two layers of the fabric thickness < 0.35mm;
Thick (fabric): two layers of the fabric thickness > 0.8mm;
Regular (fabric): two layers of the fabric thickness ≥ 0.35mm and ≤ 0.8mm.
2. The denition of elastic cloth:
If the cloth, which size is “100mm x 30mm”, is extending to over 106mm under 0.5KG
tension force, then the cloth is dened elastic, otherwise it is inelastic.
3. Hard fabric: such as Jeans, ne canvas, etc.
4. Soft fabric: such as towel, duster, etc.
MORE TIPS
1. Makesurethereisfabricundertheneedlewhenthemachineisworkingandneedleismoving,
otherwisethemachinewillgetstuckandthethreadwillbejammed.
2. Turnthehandwheelfor2to3circlesbyhandtotestifitgoessmoothlyornotbeforestartingthe
machine.Directiontoturnthehandwheelshouldbethesameasthearrow’sdirectiononthehand
wheel.
3. Make sure the machine was threaded correctly (do not forget any step or have wrong threading).
4. Do not sew the cloth with too much elasticity, neither too thin (like silk) nor too thick cloth, please
followtheIMfortheapplicablecloth.
5. Ifthemachinegetsstuckorjammedduetowrongoperation,turnoffthepower&speedswitch
immediately.
6. Beforewindingthebobbin,pleasetakeoutthebottombobbinandtheupperthread.
Cloth
Sewing
Presentation
Fabric
specication

10
CareandCleaning
WARNING!
Before cleaning or storing the appliance,
always unplug the appliance from the
electrical outlet.
Never immerse the appliance, adapter
or cord in water or any other liquid.
Wipetheappliancehousingcleanwithadamp
clothandamilddetergent.Applythecleansing
agent to the cloth, not directly onto the
appliance. Dry thoroughly.
Storage
Whentheapplianceisnotinuse,disconnectit
from the power supply.
Storing the appliance and accessories safely in
the original packaging will protect it from dust.
Store the appliance in a dry location, out of
reach of children.
Specications
Adapterinput:..................100-240VAC,50/60Hz,
800mAMax.
Adapteroutput:…………......……12VDC,1500mA
SewingMachine:.........................12VDC,1500mA
NOTE: As a result of continual improvements,
the design and specications of the product
within may differ slightly from the unit
illustrated on the packaging.

11
Notes

Cat.No.MSEM508
October2020
Table of contents
Popular Sewing Machine manuals by other brands

Singer
Singer 2282 Operation and safety notes

Brother Industries
Brother Industries BROTHER LK3-B220 instruction manual

Singer
Singer 152-1 Instructions for using and adjusting

White-Westinghouse
White-Westinghouse WW-6000 Instruction book

Singer
Singer 176-35 parts list

Singer
Singer 86K60 Instructions for using and adjusting