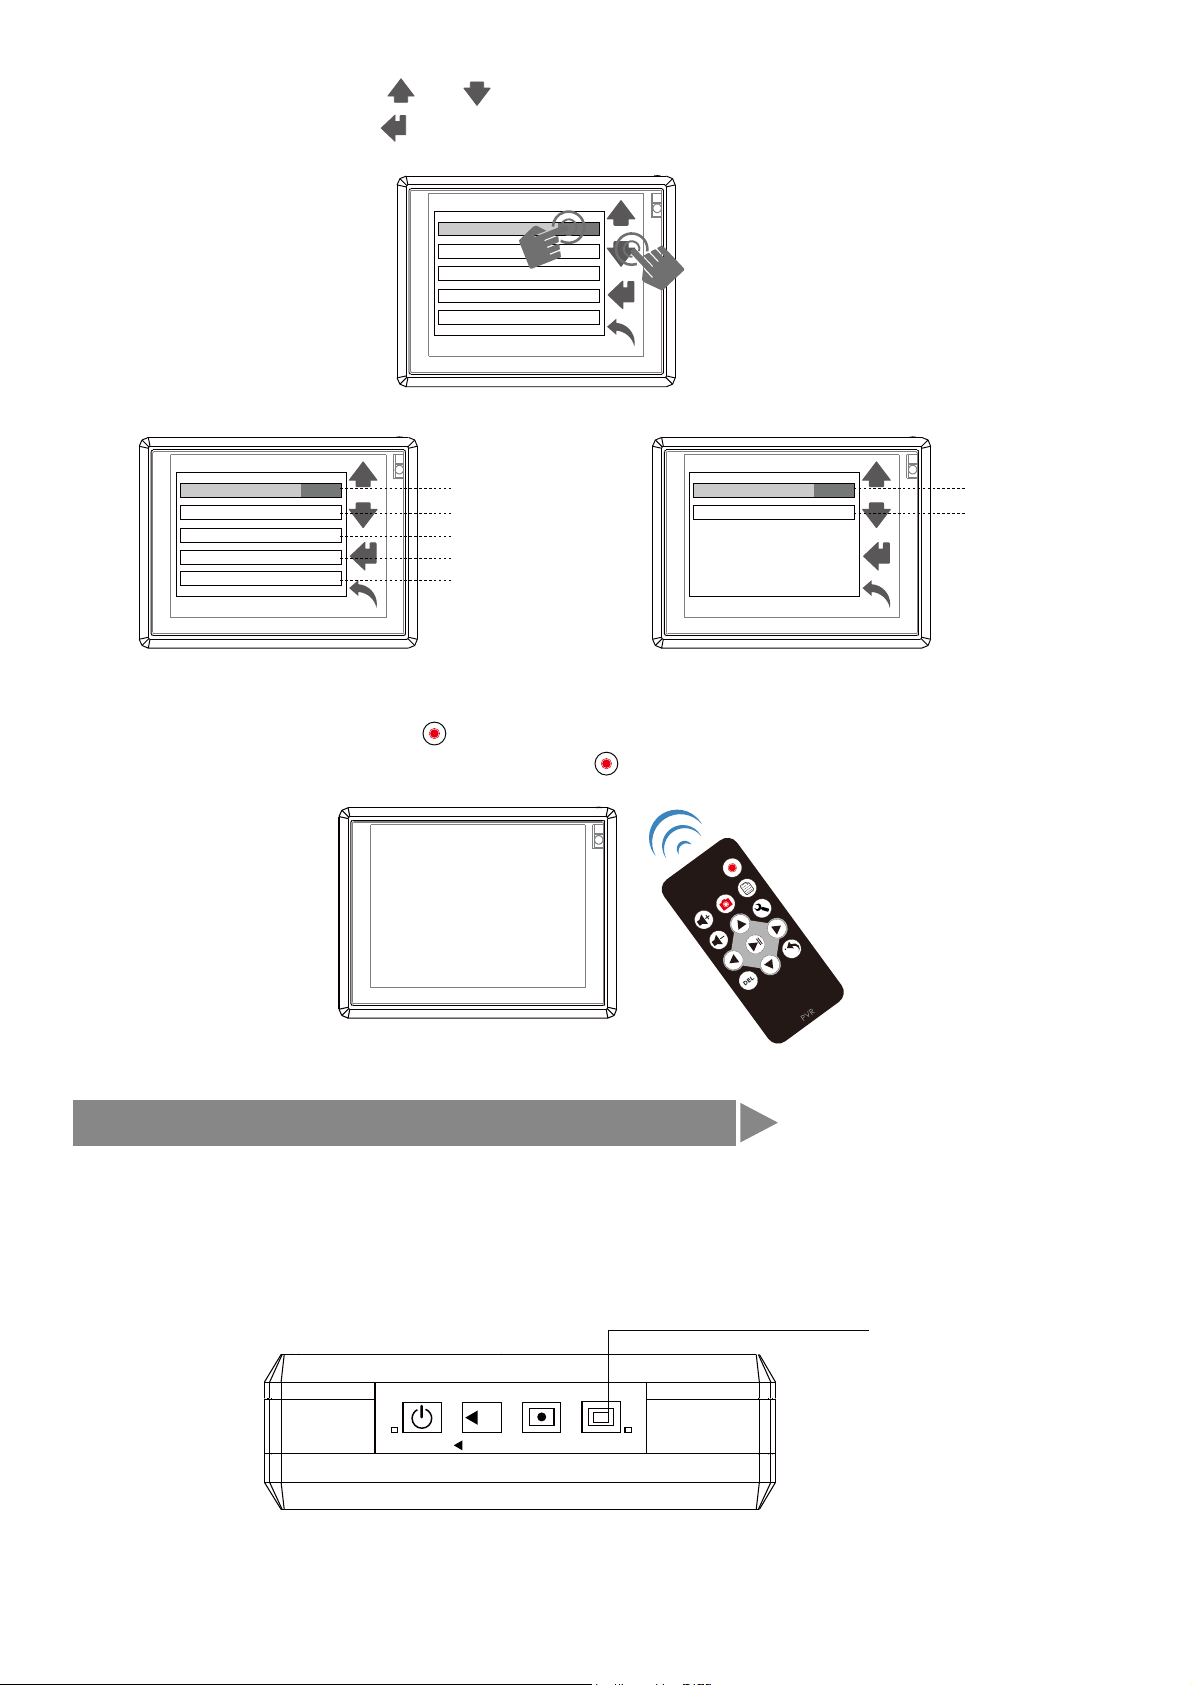
c. press or button ,blue indicator light will turn off, and start REC.
d. Rec. times
b. press button ,blue indicator light will be on, and start REC.
REC. Mode
a. press button ,yellow indicator ( )and red indicator light will be on, now it
enters into start up ready mode
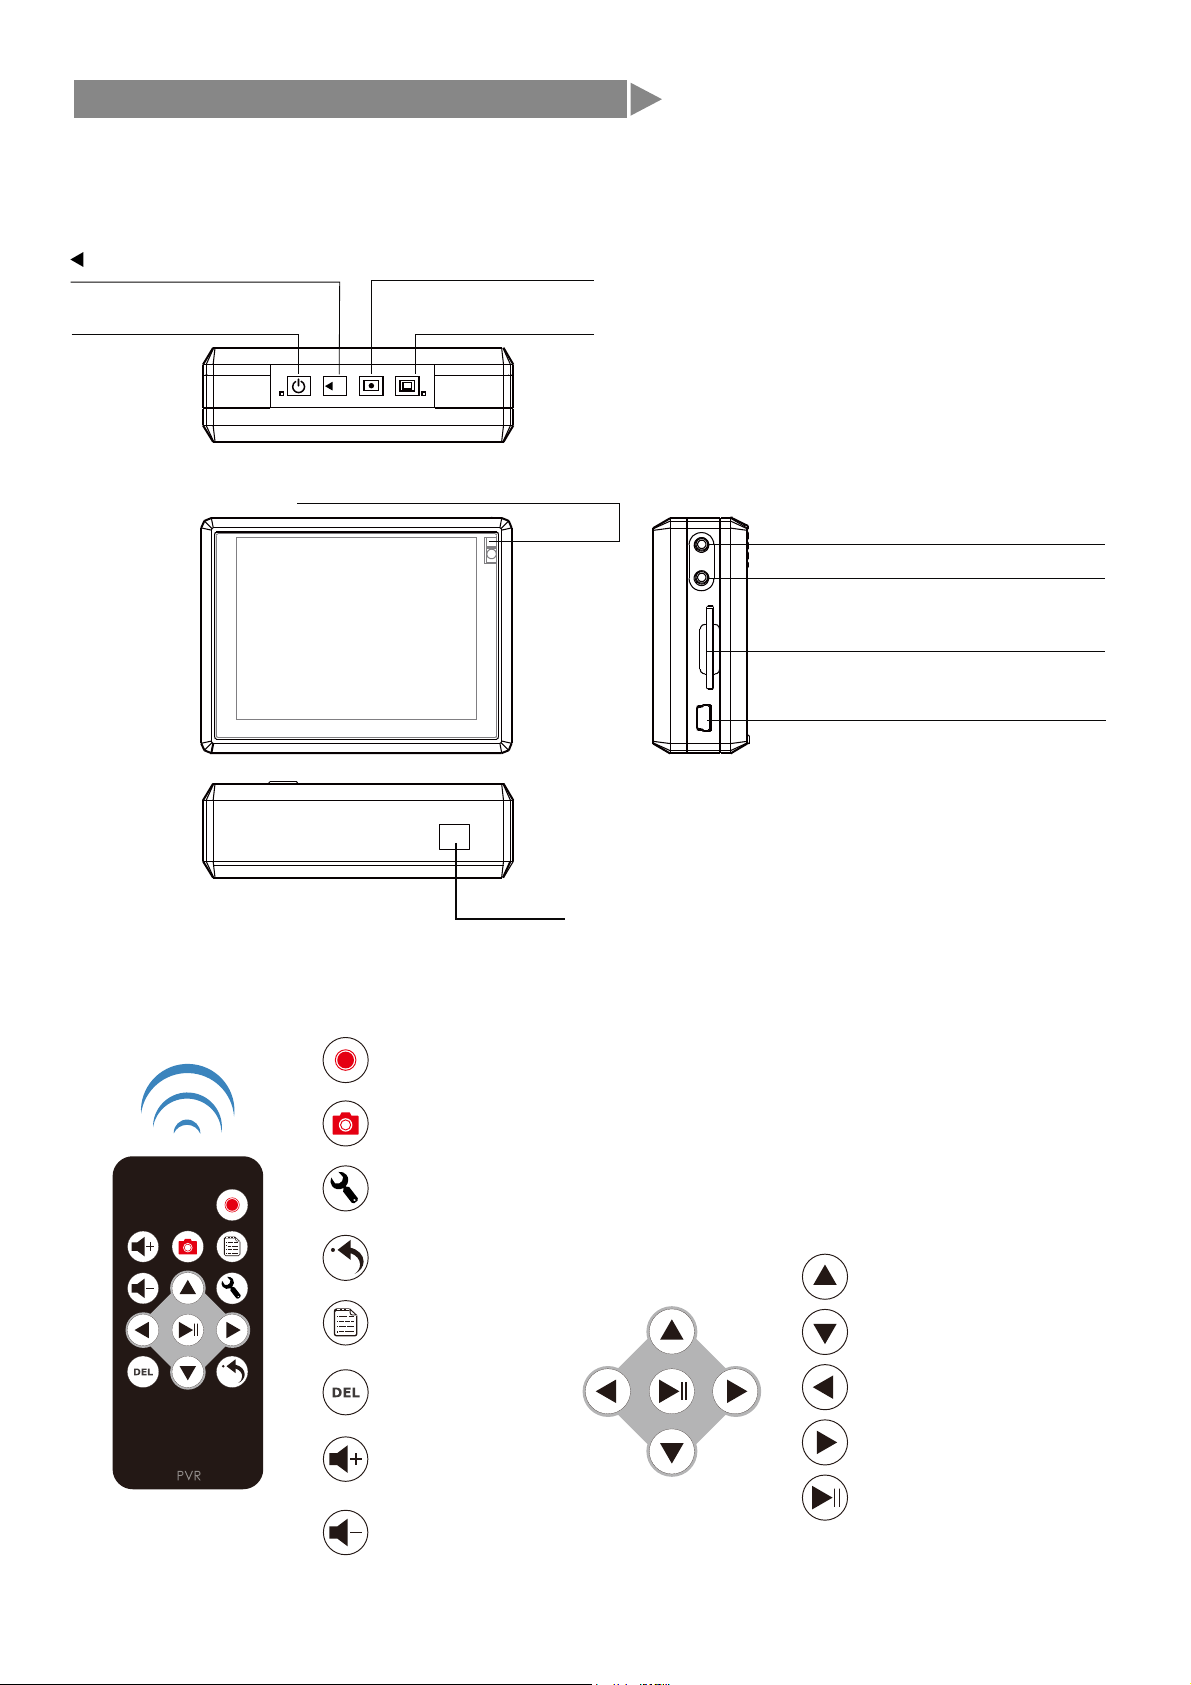
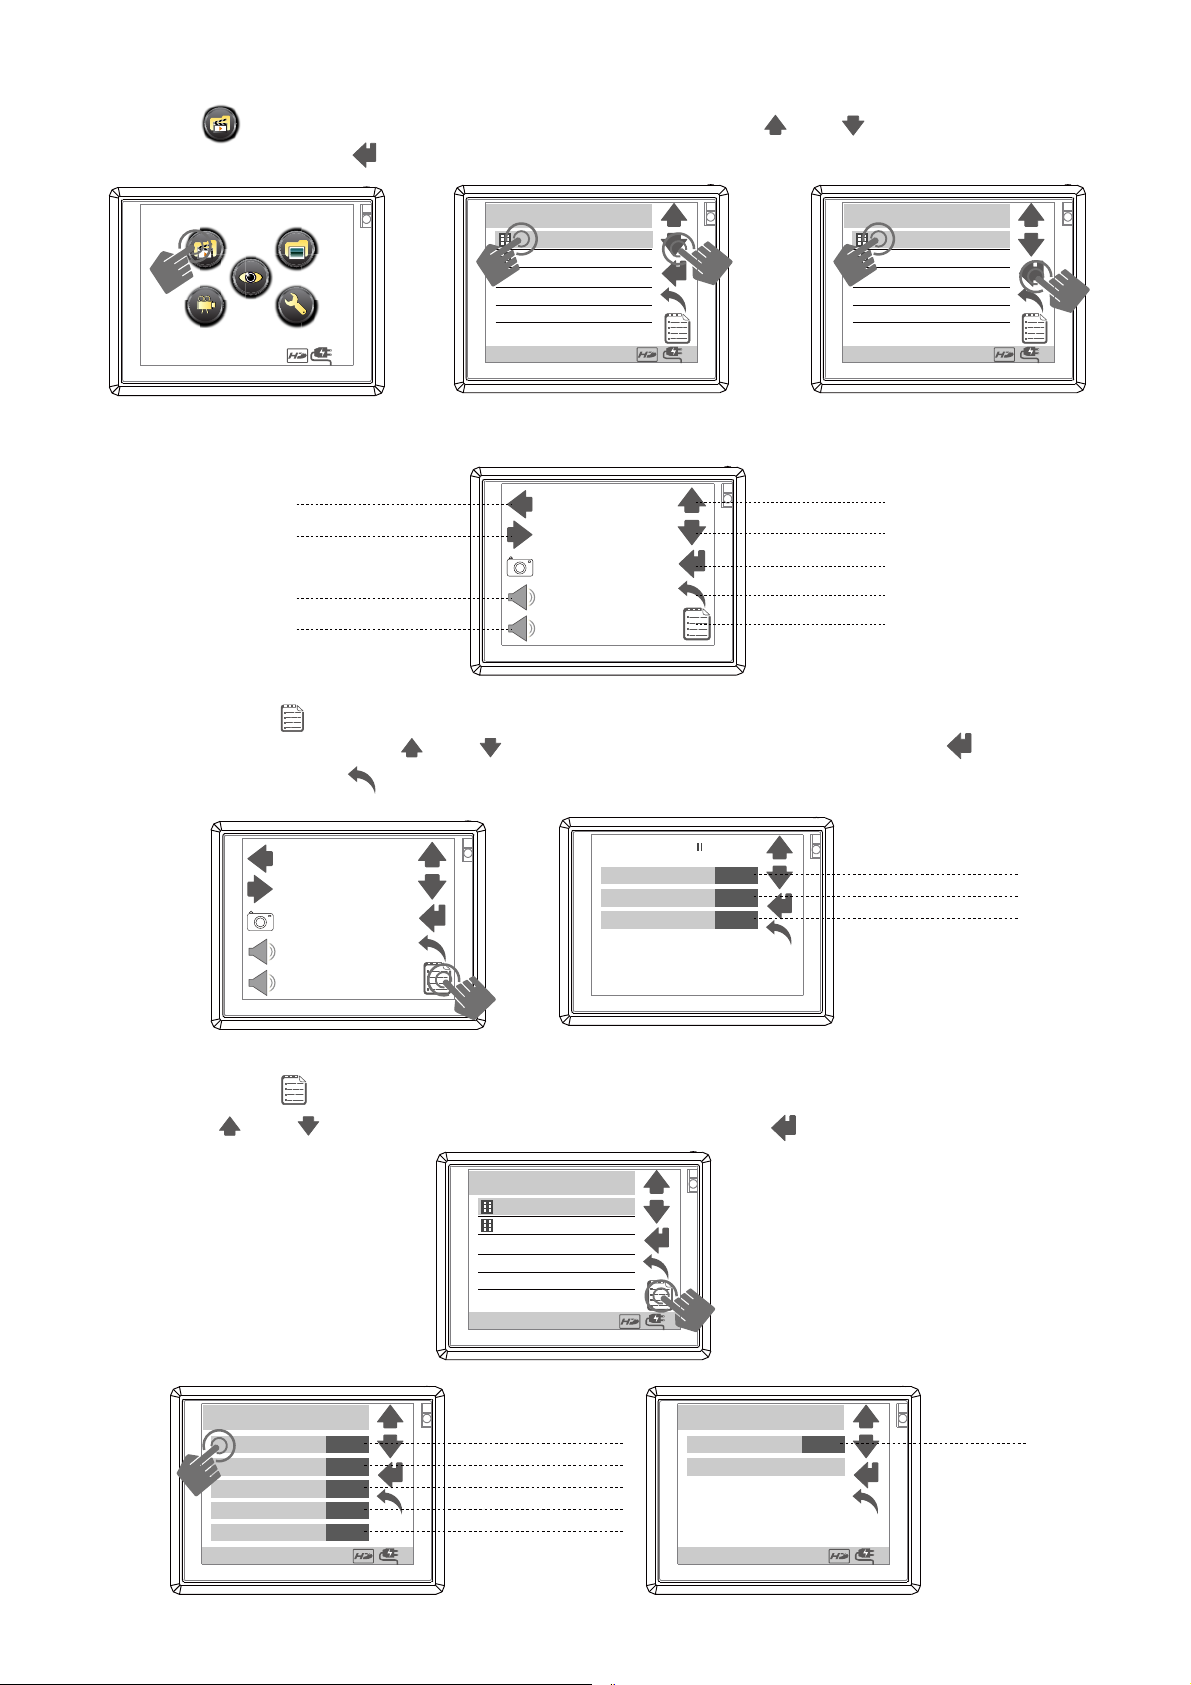
1.Manual button description
A
c. press button ,blue indicator ( ) light will be on, and start REC.
D
A
LED(yellow / red)
Power REC. Snapshot
LED (blue)
A
1
1
2
2
2
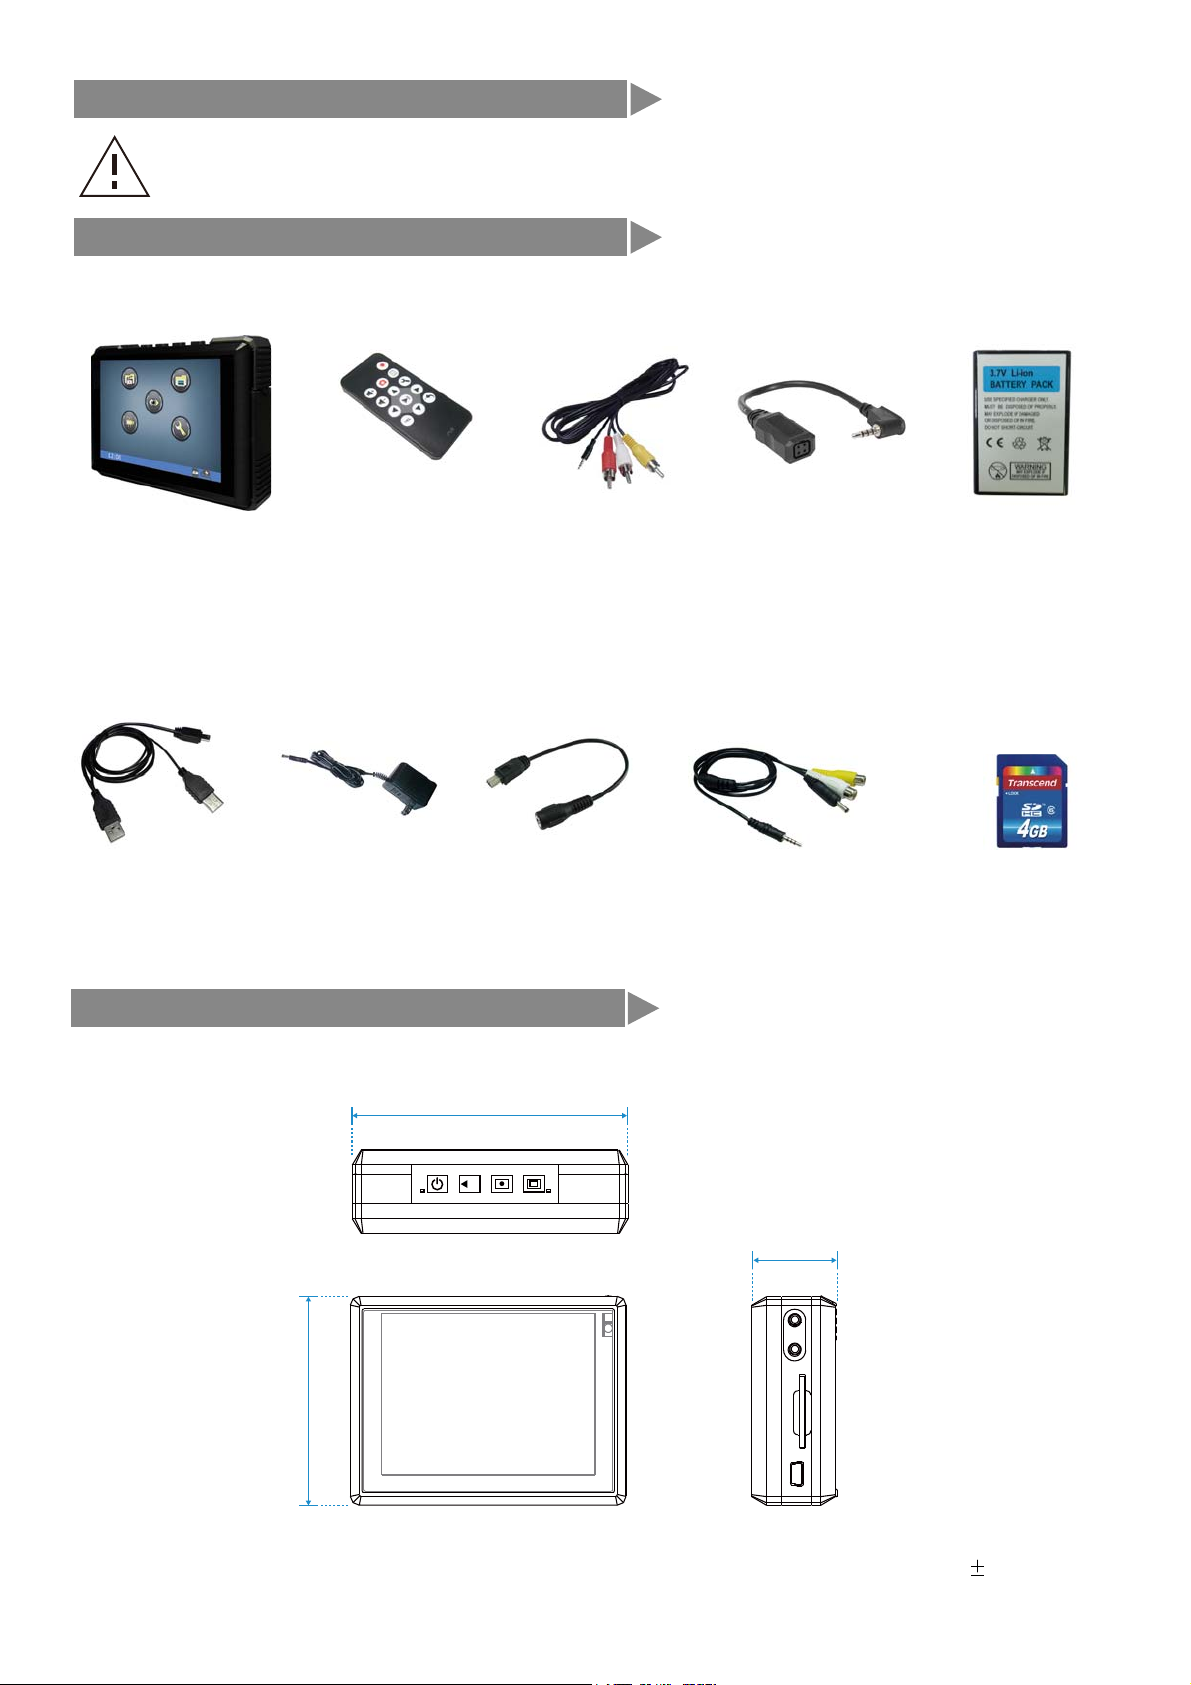
User needs to unlock hold key in order for MP-600 to turn on
BD
C
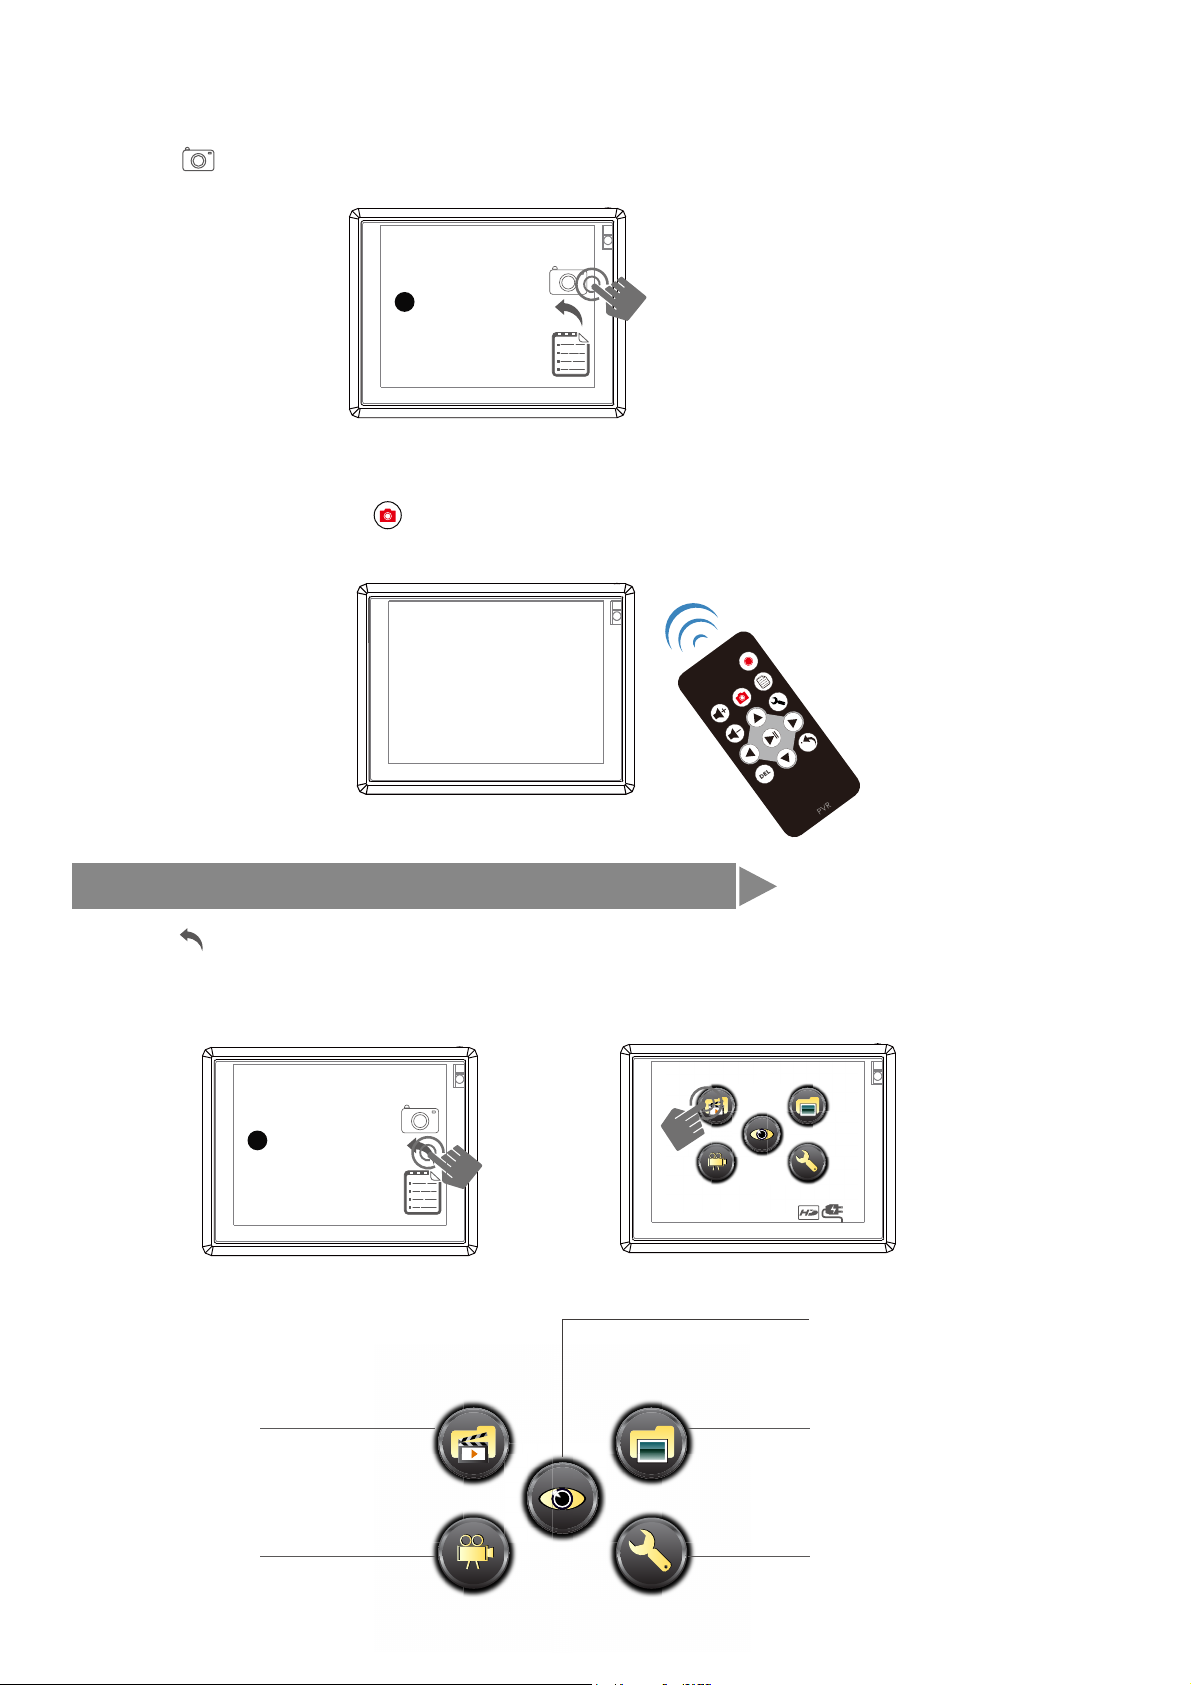
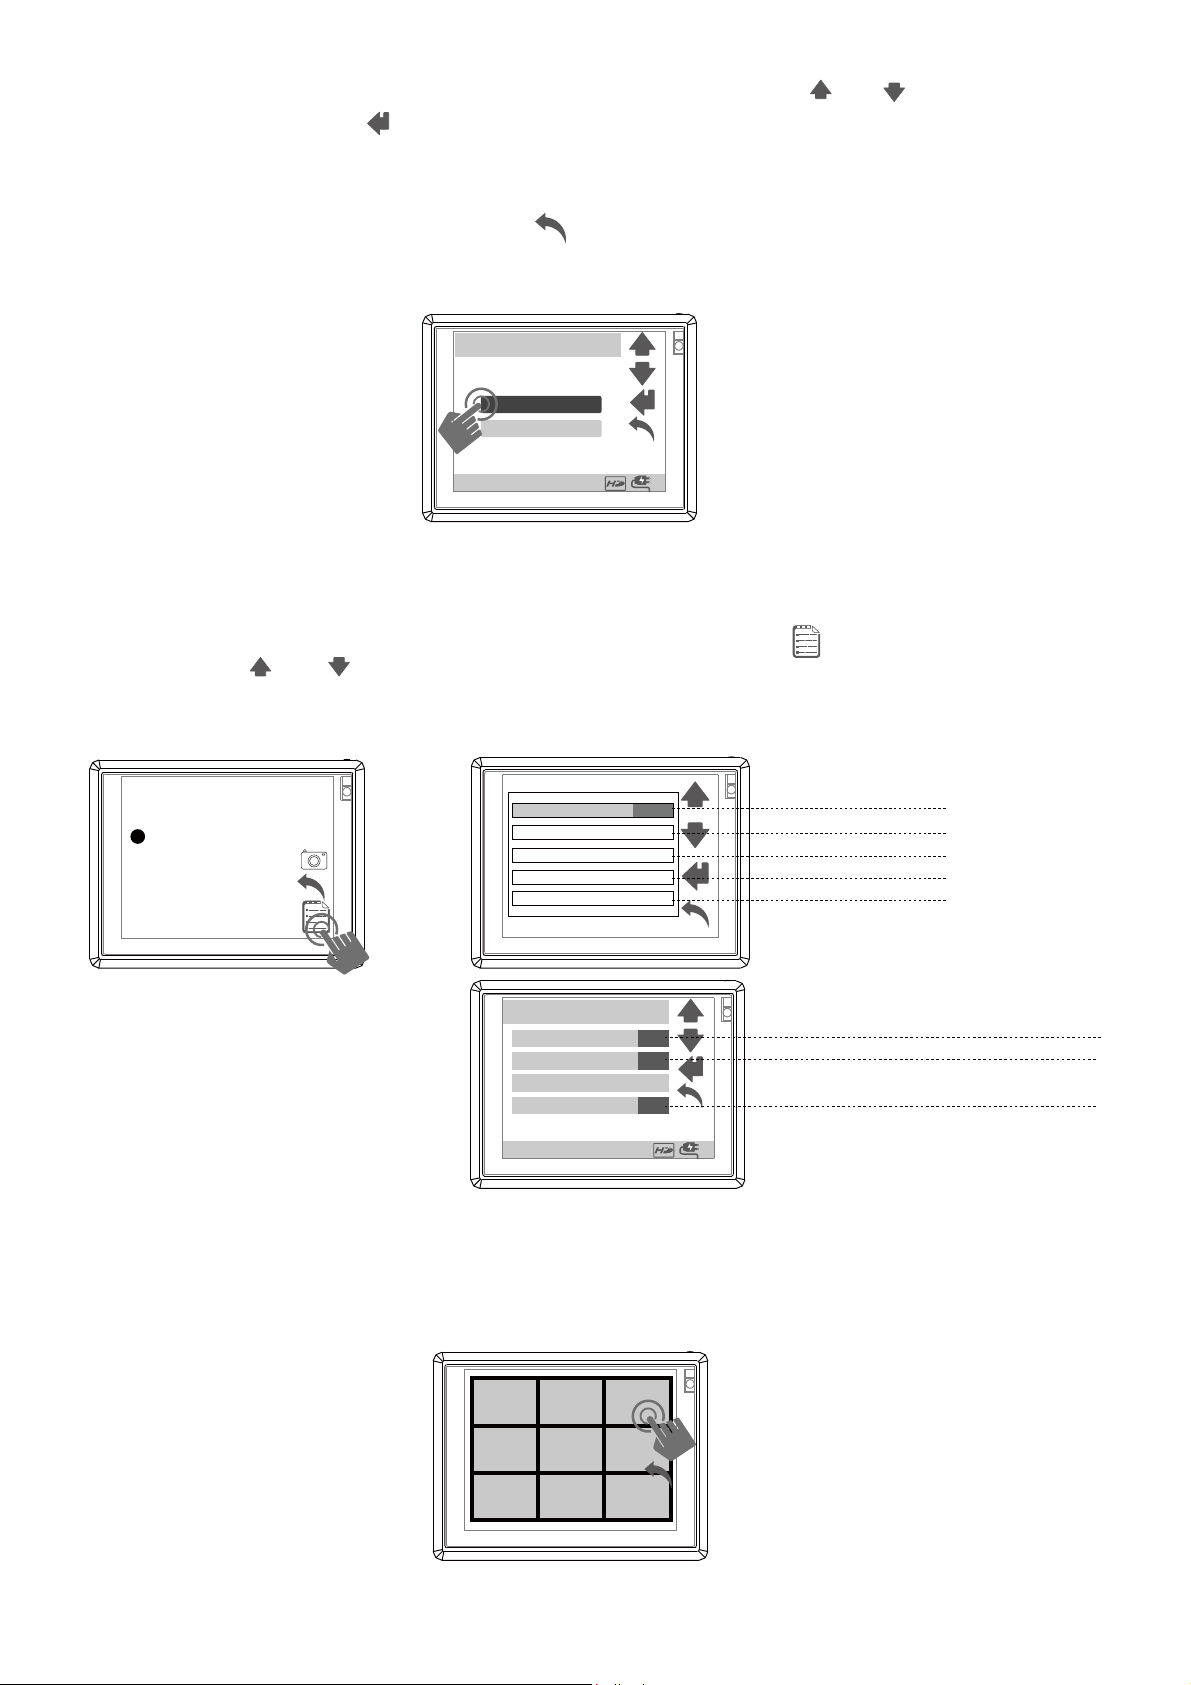
a. touch screen
a. b. c & d.
00:01:30
2.Touch Screen description
M
A
H
TFT LCD Off/Key Lock
Hold
TFT LCD On
e. press button ,into REC. setting
f. press item or press & to choose item
e.
M
f.
Quality QVGA
ON
ON
HD
Dual
Display Information
REC. Date Time
Storage
Display
b. press button ,blue indicator( ) light will flash(one time), and take snapshot.
C