manuals.online logo
Brands
  1. Home
  2. •
  3. Brands
  4. •
  5. Mitsubishi Electric
  6. •
  7. Refrigerator
  8. •
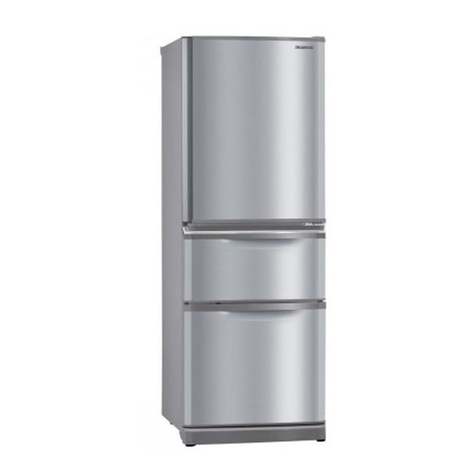
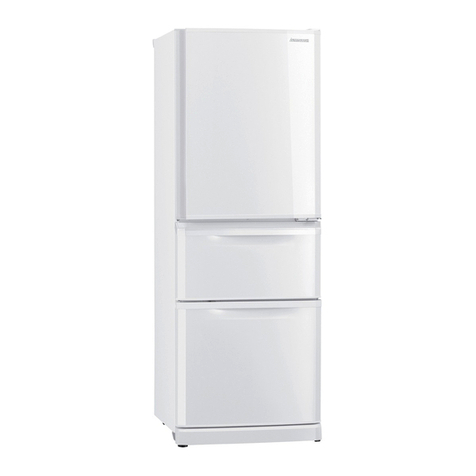
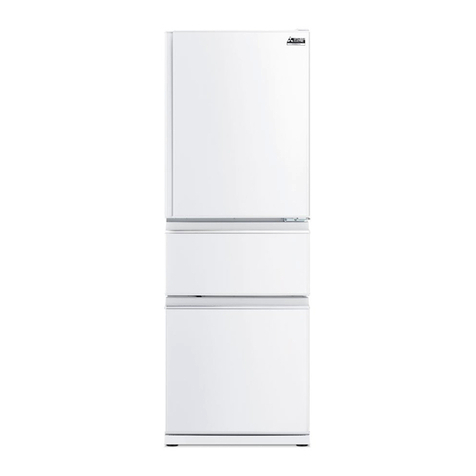
  9. Mitsubishi Electric MR-CDX41EK User manual

Mitsubishi Electric MR-CDX41EK User manual

Contents 目錄 Page 㗁⏗
2-3
4-5
6-7
8
9-10
11-12
13
14-15
15-17
18
19
For your safety, please be sure to follow
these instructions
From installing to running your refrigerator
Using each compartment
How to adjust the temperature
Automatic Ice-Maker
How to remove and clean accessories
How to maintain your automatic ice-maker
What to do in these situations
Troubleshooting
Accessories
MEMO
Refrigerator
/
Sliding case
/
Vegetable and Freezer Compartments
䇚Ḯ⬱ℐ婳⊁⽭思⬰
⽆⬱㓦⅘䭙⇘攳⥳忳廱
⅟啷⭌ίᾅ歖⭌ί哔㝄䙺ί⅟ⅵ⭌
⎬攻㟤䘬ἧ䓐
㹓⹎䘬婧䭨㕡㱽
冒≽墥⅘㨇
旬Ⱄ⑩䘬㉮ᶳ㕡㱽冯㶭㻼
冒≽墥⅘㨇䘬ᾅ梲
⬱ℐ⺢嬘
㓭晄㌺昌
惵ẞ
⁁⾀
Before use
ἧ䓐⇵
Operation
ἧ䓐㕡㱽
Cleaning
ᾅ梲
When in trouble
㚱暨天⸓≑䘬㗪῁
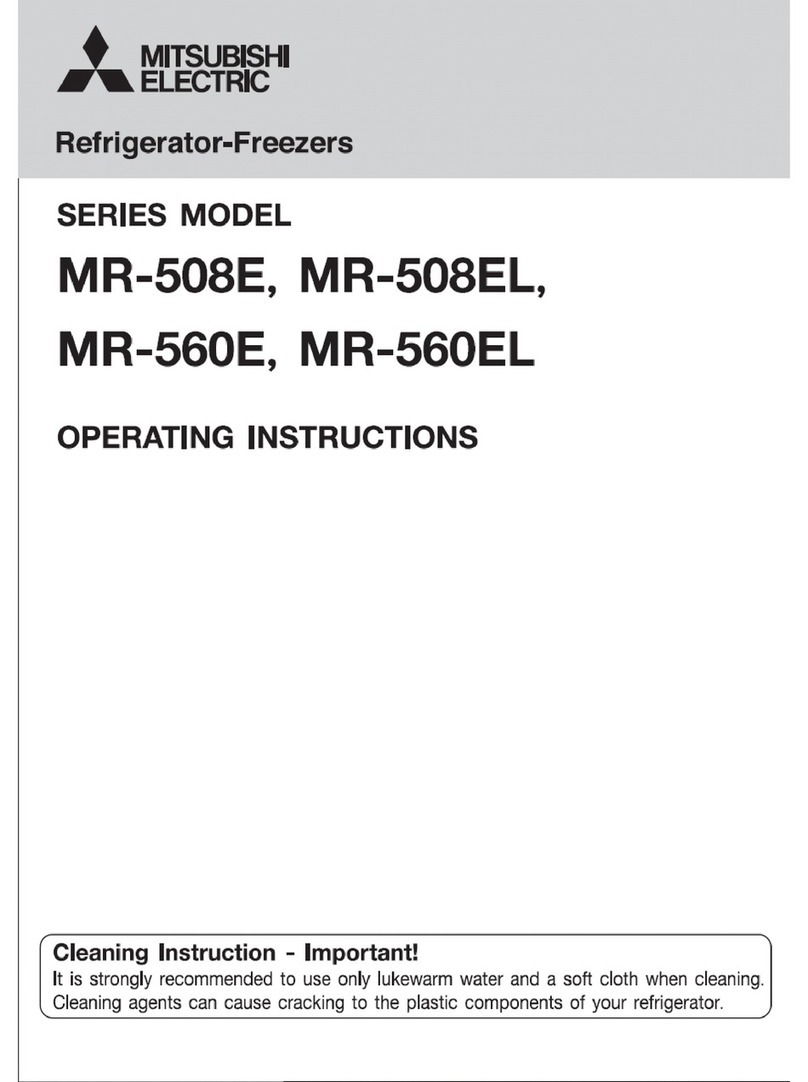
SERIES MODEL
♽೉ဳ⯳
MR-CDX41EK
MR-CDX46EK
Refrigerator-Freezer ಄⮥಄ಓ㔐ᰃ
OPERATING INSTRUCTIONS ᠲ૞ᜰᒁ
Non-Freon Refrigerators
This refrigerator uses non-Freon refrigerant (isobutane) and non-Freon foam insulation (cyclopentane).
These materials are harmless to the environment, which does not affect the ozone layer and global warming.
૶↪㕖᳊೑ᣵ⊛㔐ᰃ
忁ᾳ暒㩫ἧ䓐朆㯇⇑㖪⅟⨺ĩ䔘ᶩ䂟Īġ␴朆㯇⇑㖪䘤㲉昼䅙㛸㕁炷䑘ㆲ䂟炸ˤ
忁ṃ䈑㕁ᶵ㚫⮵䑘⠫忈ㆸ䟜⢆炻ḇᶵ㚫䟜⢆冕㯏Ⰼẍ⍲ἧℐ䎫㘾⊾⓷柴ら⊾ˤ
MR-CDX41EKMR-CDX46EKMR-CDX46EK
䵕ᾖⶍἄ⽭枰䓙⍿忶妻䶜䘬㈨ⷓ⛐ⶍ⟜忚埴ˤ
MR-CDX41EK,
MR-CDX46EK MR-CDX46EK
Maintenance work shall only be carried out at workshop by well-trained maintenance worker.
The types of danger that can result from improper
handling are explained in the sections below.
ٹThe symbols illustrated below have
the following meanings.
Mishandling can lead to serious injury
or death.
Mishandling can lead to bodily injury or
loss of home and household contents.
Do not do
Do not get
wet
Caution
Always connect
an earth wire
Always unplug
electrical plug
from socket
Always follow
instructions
Do not install in an outdoor area
where water can get on it or
where there is a lot of moisture.
➡Page 4
Due to insulation failure, it may cause
an electric shock or fire.
Remove dust from the electrical
plug.
Not doing so can cause a fire
from insulation failure.
Allow some space around the refrigerator.
If the refrigerant (gas) leaks, it can remain in
the area and there’s a risk that it may cause
a fire or explosion. ➡Page 4
To be prepared for an earthquake, affix to
a strong wall or column.
Not doing so may cause injuries from
the refrigerator toppling over. ➡Page 5
Attach ground wire and earth leakage breakers
when use in a humid place and moist place.
It may cause electric shock when electric leakage.
And the following ground connection may
cause electric shock, explosion and fire.
・
・
Water pipe/gas pipe.
Telephone ground lines and lightning rod.
(Please consult with the shop). ➡Page 4
When installing your unit
About the electrical outlet and electrical plug
Do not push the electrical plug with
the back of the refrigerator.
Do not damage the electrical cord.
If the plug is pressed by the refrigerator,
or if the cord is bent, bundled, or a
heavy object is placed on it, it can
cause an electric shock or a fire.
Using them can result in an electric shock or injury.
Do not use damaged cords or plugs or loose outlets.
Do not remove the electrical plug by pulling the cord.
The cord can become damaged and can cause
an electric shock or a fire.
Do not plug or unplug the electrical plug with wet hands.
It can cause an electric shock.
Using an extention cord or plugging in too many power cords
into the outlet can cause heat buildup or a fire.
➡Page 4
Use a dedicated outlet for the power supply that meets
the rating specified on the rating label. (The rating label is
located on the door-liner of the refrigerator compartment.)
If it is plugged with the cord facing upward, extra pressure
gets exerted on it which can cause it to heat up or ignite.
Keep the electrical plug cord facing
downwards and insert the plug in fully.
If the power cord is damaged call Mitsubishi Electric
Service Centre for a technician to replace power cord.
The power cord should be designed for this model.
If the power cord is damaged.
Warning
When replacing the interior refrigerator
light or when taking care of the unit,
pull out the electrical plug.
Not doing so can result in an electric shock
or injury.
For your safety, please be sure to follow
these instructions
For your safety, please be sure to follow
these instructions
About using your refrigerator
Do not damage the refrigerant circuit (piping)
of the refrigerator; do not drive in screws.
Because a flammable refrigerant (gas) is used,
there is the danger of igniting or explosion.
Do not use electrical products inside
the refrigerator unit.
If the refrigerant (gas) is leaking inside the unit,
there is a risk that a spark from the electrical product’s
contact can be a source for ignition or explosion.
Do not store volatile products that can easily ignite.
Benzine, cosmetics and hair styling products can
be the cause for igniting fires and explosion.
Do not store pharmaceuticals or scientific test material.
Anything that needs strict supervision must not
be stored in a home-use refrigerator.
Do not place items on top of the refrigerator.
Items may drop from opening and
closing the door and can cause injury.
Do not hang on the door or door handle, and
do not get on compartment drawer-type doors.
The refrigerator can topple over causing injury.
Do not add a strong impact on the
glass shelf.
The glass will broke and it may cause injury.
Do not put your hands in the mechanical part of the
automatic ice-maker (the upper part of the ice storage box).
Doing so will cause injury.
Do not use flammable sprays nearby.
A spark from the electrical contact can ignite and cause a fire.
Do not do
Always follow
instructions
Always follow
instructions
Do not get wet
Always connect
an earth wire
Do not do
Always follow
instructions
2
Warning
Caution
This appliance is not intended for use by young children or infirm
persons unless they have been adequately supervised by a responsible
person to ensure that they can use the appliance safely.
Children should be supervised to ensure that the refrigerator
is used properly.
This appliance is not intended for use by persons (including children)
with reduced physical, sensory or mental capabilities, or lack
of experience and knowledge, unless they have been given
supervision or instruction concerning use of the appliance by
a person responsible for their safety. Children should be
supervised to ensure that they do not play with the appliance.
Always unplug electrical
plug from socket
Before use Operation Cleaning When in trouble
Caution
Warning
When something abnormal or unusual
occurs, turn off immediately and consult with
“the store where you purchased the unit” or
with a “MITSUBISHI ELECTRIC SERVICE
CENTRE or Customer Service representative.”
Do not use in a shed or a garage.
If small animals damage the wiring,
it can cause an electric shock or a fire.
Do not put any vessels, jars, etc. that
contain water on top of the refrigerator.
If water gets onto electrical parts, it will cause
an electric shock or a fire.
If you sense a gas leakage, do not touch the refrigerator.
Open the window and ventilate the room.
About using your refrigerator
About Malfunctions / Long Term Care
Do not take apart, repair or convert.
Do not continue to use with damaged parts.
This can cause injury, an electric shock or
a fire.
In case the refrigerant circuit is damaged,
do not use any electric appliances or
fire equipment nearby, and open all
windows to provide good ventilation.
If you will not be using the refrigerator for a long
period of time, after pulling out the electrical
plug, open the door and let the interior dry out.
If it is not dried adequately, the cooling unit may
corrode causing the refrigerant (gas) to leak which
can then cause the danger of ignition or explosion.
If it continues to run in an abnormal state,
it can cause an electrical shock or a fire.
If something abnormal occurs (such as a
burning smell), pull out the electrical plug
and stop the refrigerator from running.
It is dangerous if the child gets shut inside.
If there is a possible danger of a child
getting trapped inside while the refrigerator
is not in use, please pull off the door seal.
Always follow
instructions
Do not do
Install on a strong level floor and adjust
the adjustable legs to fix firmly.
The refrigerator may move and cause injury.
➡Page 4〜5
When carrying, use the handles made for
carrying.
If other parts are held while carrying,
it can cause injury.
Be careful not to damage the floor
or injure yourself when moving
the refrigerator.
Lay a protective sheet on the floor
and move the refrigerator slowly.
➡Page 14
Installing and Transporting
About using your refrigerator
If insufficiently attached, it may out and falls,
and may cause injury.
Make sure that glass shelfs or pockets
are attached properly.
Always follow
instructions
Do not do
Do not encapsulate refrigerant other than
our specification.
It may cause rupture, explosion, fire, etc.
when using, repairing, disposal, etc.
Do not do
Do not get wet
Do not wash with water or spill liquid
food items on the unit.
If water and food liquids get on the unit, it can cause an
electric shock or a fire. If that happens, dry off immediately.
A spark from the electrical contact can cause
an explosion or a fire.
The door or furniture may be damaged and
cause any injury.
When the doors are opened or closed,
beware not to hit any furniture.
Please also contact your local maintenance
agent to follow up.
Always follow
instructions
Always unplug
electrical plug
from socket
When Recycling
If it is neglected and refrigerant (gas) leaks, ignition or
an explosion may be caused due to heat from a fire.
When disposing of the unit, transfer it to the
store that you purchased it or to the municipality.
Do not force food items into the refrigerator.
Do not use force to pull out shelves.
Food items may fall out, causing injury.
Do not store bottles in the freezer
compartment.
If the center freezes and bottles crack,
it will cause injury.
Do not place your hands or feet
under the refrigerator.
You can get injured from something
such as the steel plate.
Do not eat foods that have a bad smell
or are discolored.
Doing so may cause food poisoning or other
illnesses.
Observe the following when opening and
closing the doors.
w'RQRWRSHQRUFORVHWKHGRRUVZKHQ
another person is touching the refrigerator.
w'RQRWSXW\RXUILQJHUVRQWKHWRSHGJH
of a drawer type door while closing it.
w
Do not open or close the doors with excessive
force. (Food may fall out and cause injury.)
w%HFDUHIXOQRWWRWUDS\RXUILQJHUVRU
any other part of your body.
w%HFDUHIXOQRWKLWDSDUWRI\RXUERG\
w'RQRWWUDS\RXUIHHWZLWKWKH
bottom drawer. (Danger of your
toes caught by the drawer.)
Not doing this may cause injury.
Do not touch foods or containers
in the freezer compartment
with wet hands.
Doing so can cause freezer burn.
It may cause injury.
Please pay enough attention when crushed
the ice cube in ice storage corner.
Caution
Always follow
instructions
Always follow
instructions
3
From installing to running your refrigeratorFrom installing to running your refrigerator
Where to install your fridge
●
Install in a place where there is no direct
sunlight or heat, and with good ventilation.
This protects against a decrease in cooling power
and saves on electricity bills.
●Install in a place with low humidity.
This prevents rust, electric shock or fires from
occurring.
●Install on a solid and level floor.
This prevents vibrations, noise, and partially
open doors or doors left ajar.
Prevent changes or discoloring by its
mass or heat.
※If the refrigerator adjustment feet sink easily
into the flooring material, please lay a strong
board on top of the flooring.
●Install away from other appliances.
This prevents noise or image disturbances to
the television, etc.
●Leave a space of more than 2 cm to
the left and right, and more than 10 cm
from the ceiling, and more than 5 cm
from the back.
This is to allow heat to escape from the top,
the back and sides.
※If refrigerator is too near to the wall,
it will cause the sound.
Please care the dust within the gap.
Installation
Do not install in an outdoor area
where water can get on it or
where there is a lot of moisture.
Due to insulation failure, it may
cause an electric shock or fire.
Do not get wet
Allow some space around
the refrigerator.
If the refrigerant (gas) leaks, it can
remain in the area and there’s a risk
that it may cause a fire or explosion.
Always follow
instructions
Turning on the power /
installing an earth wire
●
Turn on the power of the refrigerator as soon as possible.
The refrigerator will not be damaged even if you turn on the power
immediately after the installation.
Use a dedicated outlet for the power supply that
meets the rating specified on the rating label.
(The rating label is located on the door-liner
of the refrigerator compartment.)
●To prevent electric shock, installing an earth wire is
recommended.
Install an earth wire or an earth leakage circuit breaker, especially
when installing takes place where there is a lot of dampness
(wooden floor, washing room, basement, etc.).
How to connect the earth wire
If there is an earth terminal
Connect the earth wire to the earth connection screw ( ), and attach
the earth terminal. Also, for the earth wire (copper wire, diameter 1.6mm),
please purchase at the store where you purchased your refrigerator.
If you do not have an earth terminal
Request one at the store where you purchased your refrigerator and
have the earthing done. (D-class earthing/grounding – to be paid for
by customer.)
(due to risk of electric shock,
explosion.)
Water pipes, gas pipes
(dangerous if lightening strikes.)
Telephone lines or a lightening rod earth
Earth terminal
Earth screw connection
(copper wire, diameter 1.6mm)
Earth wire
To get the refrigerator
cooled down faster, plug
it in right after installing.
Lower back section
2 cm. or more
10 cm. or more
Earth screw connection
Earth wire
(copper wire, diameter 1.6mm)
※
Please purchase at the store where
you purchased your refrigerator.
4
Do not install in these places
5 cm. or more
Before use Operation Cleaning When in trouble
Adjustment and affixing
●Please fix the tilt by adjustable legs.
Please adjust the adjustable leg as the following picture to level the refrigerator.
Fix firmly by adjustable legs
in the level and strong floor.
The refrigerator may move and
cause injury.
Refrigerator/front lower
If the left side
of the door
is sagging
If the right side
of the door
is sagging
Raise the right side Raise the left side
Right
Left
Keep the front at a slightly
higher angle. This makes
closing the door easier
and prevents the door
from partially opening.
※After several days from installing, it may sink to the floor by weight.
Please re-adjust the adjustable legs again.
When the tilt cannot be corrected
with the adjustable legs.
If installed in a corner of a room,
there are times when one side of
the back legs sinks into the floor.
When that happens, please make
adjustments in the rear with
caster support (separately sold)
or a strong board underneath
(normally, the thickness of the
board should be 2 – 3 mm.)
For the caster support, please contact
to the shop where you purchased.
Model No.: MRPR-03CS
Rear support
Caster support
or strong board
●After adjusted, please insert the toe grille.
(Toe grille included in the refrigerator)
Toe grille Toe grille
Please insert in parallel until
the cover hit in depth.
Adjustable leg
Caster
Start using
●
It takes time to cool down.
tPut in warm food items or ice
cream after the refrigerator has
been adequately cooled down.
tKeep opening and closing of
the door to a minimum,
and open in a short time.
tIn the summer, it will take
approx. 24 hours to make
the first batch of ice.
●It may smell of plastic.
t
The smell will gradually disappear.
Please be ventilation of the
room not to filled a bad odor.
●
Cool down by strong force
(same in summer time).
tThe side will be hot to radiate
outside of the refrigerator for
cooling.
tOperating noise will loud due
to the compressor is high-speed
operation.
Preparation for the earthquake
●
We recommend you to fix
in the strong places such
as walls, pillars.
tPlease consult with the store
where you purchased for fall
prevention belt for the refrigerator
(Sold separately).
Model No.: MRPR-02BL (2 pcs.)
Because a flammable
refrigerant (gas) is used,
there is the danger of
igniting or explosion.
Do not damage the
refrigerant circuit (piping)
of the refrigerator;
do not drive in screws.
Do not do
Use in hot spring areas
Corrosion control treatment may be
required for the refrigerant circuit (pipe)
due to generation of corrosive gases.
Contact the retail store where you
purchased the refrigerator.
Fixed via belt with the
supports (2 places)
(to provide half-opened
door/noise/move/vibrate)
Always follow
instructions
※Before adjust, please pull the leg cover to the front and remove it.
Turn the adjustable legs to get
them to touch the floor, then affix.
Turn in the direction of
the arrows and lower
the adjustable legs to
place on the floor.
Caster
Adjustable leg
5
Refrigerator / Sliding caseRefrigerator / Sliding case
One-two shelf Illustration of MR-CDX46EK※
The layout of shelf can be changed when rearrange it.
The shelf can be added by set the lower stage.
Install a space to accommodate tall
stuffs in front.
It makes a large space when set up
by overlapping back of the shelf.
To prevent odors?
We are recommend you to wrap or store the foods in airtight
containers.
Kimchi, dumplings, sardine
(seafood), beef, etc.
Foods that uneasy to remove odor
Rice, potato salad, etc.
Foods that easy to absorb odor
Door alarm will inform
when the door opening.
➡Page 8
Air blowing outlet
Food items with a lot of
moisture may freeze if put
near air blowing outlet.
(Especially canned beer
or carbonated drink,
there is a risk of rupture
when freezing.)
Refrigerator Approx.0℃〜6℃
Insert drinks or immediately used foods in refrigerator compartment.
Sliding case can storage the delicious of meats, fishes, dairy products,
processed foods, etc. at a low temperature than refrigerator compartment.
Using each compartment
MR-CDX41EK
has 6 places,
MR-CDX46EK
has 8 places.
Sliding case
compartment
Sliding case
compartment
Free pocket (large)
Adjustable shelf
LED light
Air blowing outlet
One-two shelf
Bottle pocket
Small-Items pocket
It’s an egg case and a small items tray.
By turning the egg case upside-down,
it converts into a small items tray.
Free egg tray
Free pocket (small)
How to remove shelf, pocket, case ➡Page 12
Air blowing outlet
Sliding case (upper)
Sliding case (lower)
6
Before use Operation Cleaning When in trouble
7
Vegetable compartmentVegetable compartment
Freezer compartment
Freezer compartment
You can storage frozen food, ice cream, bread, meat, fish, etc.
Please insert fruit, vegetables and drinks.
If you wrap fruit and vegetables, they will stay fresh longer.
Approx.3℃〜9℃
Approx.-21℃〜-17℃
●When closing the door, food can get in the way causing
the door not to close properly. This can cause frost to form
in the inside, or improper freezing, and will cause a malfunction.
●This may damage food and the freezing case, as well as
the automatic ice-maker.
Door
Maximum level for storing foods
Freezing Case (upper)
Freezing Case (lower)
Put foods in the Freezing Case to below the embossed line level seen at the front.
For smaller items that get damaged easily such as
tomatoes and fruit.
The LED light with specially selected light spectrum
installed in the Vegetable compartment can increase
the Vitamin C and preserve freshness in green vegetables
by introducing photosynthesis process.
Door alarm will inform
when the door opening.
➡Page 8
※For the temperatures indicated, the freezer and refrigerator compartments were adjusted at the “Normal” position,
with an ambient temperature of 30 oC, with refrigerator doors closed and containing no food; after the temperature
stabilized, the temperature criteria was measured toward the lower-mid interior of the refrigerator.
Vegetables Case
Sliding Case
Freezing Case (upper)
Freezing Case (lower)
Ice Storage Container
LED light in the vegetable case
●
●
It can damage food items or damage the sliding case.
If the sliding case is taken out and used separately, the vegetable compartment will become dry.
Do not put tall items in the sliding case.
Please take heed
●
●
With exposure to the LED light, photosynthesis process for green vegetables will be enabled, the effect will depends on the initial freshness of the vegetables stored.
Do not use any sharp objects to scratch or adjust the LED light to prevent damage which may affect its normal operation and effectiveness.
●
If the LED light is damaged or not operating, do not adjust or repair, please seek technical assistance from the authorized service center.
●Store vegetables using transparent containers or wrappings to enable exposure to the LED light.
Suggestions
Notice
8
How to adjust the temperatureHow to adjust the temperature
You can stop ice-making, adjust the temperature in refrigerator/freezing
compartment, and set the lower freezing storage by operation unit
in back of the refrigerator compartment.
※Illustration of MR-CDX46EK
Usually set at
“MID” setting
Gets 2~3 oC
higher than “MID”
If it’s too cold
Gets 2~3 oC
lower than “MID”
If you want it colder
Approx. -2~2 oC
For storing meat, fish, processed
foods (dumplings, etc.) and
yogurt for around 1 week.
Yogurt
The refrigerator compartment can be
switched over to be a chilled compartment.
Refrigerator and Vegetable compartment
Ice-making stop light (red)
Red light off…Auto ice-maker is working.
Red light on….Auto ice-maker is stopped.
Ice-making stop setting
Freezer compartment
Usually set at
“MID” setting
Gets 2~3 oC
higher than “MID”
If it’s too cold
Gets 2~3 oC
lower than “MID”
If you want it colder
Press when you want to stop auto ice-making,
or doing ice-making again. ➡Page 10
Ice-making stop switch
Chilled
Door opening time
1 min. 2 min. 3 min. 4 min.
More than 5 min.
Alarm sound Pi Pi Pi Pi
Piiii Piiii Pi Pi Pi Pi
Piiii Piiii Piiii
Pi Pi Pi Pi Piiii
Piiii Piiii Piiii
Piiii continuity
after
Pi Pi Pi Pi
Pi Pi
continuity
When the refrigerator or freezing door is opening more than 1 minute,
the door alarm will work to inform you.
The number of times of sound by the door opening time are as the follows.
・
・
Make sure that the door is not half-opened, and
pinching the foods (at the back of packing/case)
(please check one time a month).
Door open-close sensor is attached in the doors
of refrigerator/freezing compartment.
When door alarm ringing
If alarm not stop after the door closed, please check “When alarm non-stop” ➡Page 15
Before use Operation Cleaning When in trouble
9
You can make ice cube in ice storage corner by put the water in water supply tank of
the refrigerator compartment. Please do periodically maintain to make a good ice cube
by cleaning. Please drain the water in water supply tank when you do not making ice.
Automatic Ice-MakerAutomatic Ice-Maker
Water supply Tank Approx. 1.1 L.
About the first batches of ice.
Please discard the first 2 - 3 batches of ice
(approx. 30 cubes) made at the very beginning.
Also, discard ice that isn’t used in over 1 week.
There may be times when there may be dust
or an odor on them.
Water to Use for Your Auto Ice-Maker.
We recommend that you use water such as tap
water which contains less bacteria.
If you use mineral water or water from a filtering machine,
please increase the number of cleaning times, and be sure
to clean it thoroughly. ➡Page 13
Take out the water supply
tank, remove the tank plug,
and fill with water.
Put the tank plug on the water supply
tank, carry carefully without tilting it,
and return to its original position.
●
●
●
When carrying the water supply tank, make sure
that the “ ” symbol is in the closed position.
If the tank is tilted, water will spill out.
If the water supply tank is not properly in position,
ice cannot be made. Make sure that there is
nothing blocking the tank receiving area.
How to
make ice
Tank Plug
Water Supply Pipe
Purification Filter
Water Supply Pump
Pipe
Ice Storage Box
Ice Server
Ice-Maker Tray (in freezer compartment)
Noise Reduction Mat
Reduces noise of dropping ice
Do not remove.
(Do not remove.)
Tank Lid
Fill water to the
“full line” mark.
Tank plug
OPEN
CLOSED
Tank plug
OPEN
CLOSED
How to remove the tank plug.
Turn to the “Open” position and lift off.
How to put in the tank plug.
Warning
Fill with potable
water only.
10
(Control panel in the
refrigerator compartment)
Water supply tank
Put the water supply
tank back in place.
Take out the freezing case (upper) and the ice storage box.
And discard water or ice.
●Do not put the food items when making ice.
Please gently close the door of freezing compartment.
Ice cube may get dirty.
Do not insert water over full water mark in water supply tank.
Water channel in the ice tray may freeze, ice cube may
connect together, and convex may come out, if insert
water over the mark or pour water by kettle.
●Please do not store anything above the level on the side
of the freezing case (upper).
(The door may half-opened, and it may cause failure/damage).
●
Do not insert any drinks such as hot water, juice, tea, soft drink, etc.
other than water in water supply tank (heatproof temperature 60oC).
It may cause failure.
●
Ice-making will stop when the amount of storage ice is given quantity.
Ice cube will flat when it thick some, please insert ice server
horizontally in front side of ice storage corner as the left figure.
●
●
Maximum level for
storing foods
Ice tray
Detection Lever
(Detects volume
of ice stored.)
Ice server
Door
Ice storage box
Freezing Case (upper)
Take out the water supply tank,
close the freezer door.
●
Ice made with water containing a lot of mineral substances
such as mineral water, can cause to ice to form with a white
sediment (white crystals). These are only mineral substances
that have become crystallized. It is harmless.
●
If ice is stored for a long period of time, the
ice cubes may cling together or become smaller.
(This is known as the phenomenon of sublimation.)
About the ice
●
Ice-making may take longer with frequent
opening/closing of the door, or depending
on the ambient temperature.
It may cause injuries.
Please pay enough attention
when crush the ice which stuck
in ice storage corner.
Caution
To stop
ice-making
Press button
when the ice-making
stop light (red) is off.
The ice-making stop
light (red) will turn on.
Press button
when the ice-making
stop light (red) is on.
The ice-making stop
light (red) will
turn off.
When you will not make ice for a long time ※
Also do this when moving or transporting unit.
Empty the ice-making tray by taking out the ice or by forcing water to go into the ice storage box.
Press for about 5 seconds. (at temperature adjustment panel,
inner back of refrigerator compartment.) - (Press until it makes a beeping sound.)
●
●
The Stop ICE MAKER OFF light (red) will blink for about 1 minute. (It drops down the ice-making tray’s water or ice.)
When the light stops blinking, it will return to the previous indication.
Stop making ice.
●If the ICE MAKER OFF light (red) is off, press and check to confirm
that the ICE MAKER OFF light is on.
Wash with water, dry, and put back in place: the water supply tank (water supply pump,
pipe, water filter), freezing case (upper), ice storage box and the noise reduction mat.
➡Page 13
To restart ice-making, press to cancel the ICE MAKER OFF function.
(The ICE MAKER OFF light will go off.)
To restart
ice-making
Red light
Press
Freezing case
(upper)
●The red light is on when
ice-making stopped.
Keep ice at an even level
The ice cubes connected Protrusion on the ice
Please take heed
Before use Operation Cleaning When in trouble
Dust
11
How to remove and clean accessoriesHow to remove and clean accessories
This can cause injury, an electric shock
or a fire.
Do not take apart, repair or convert.
Do not continue to use with damaged parts.
Do not do
If it is not unplugged, it will
cause an electric shock.
Unplug the electrical plug.
Always unplug electrical
plug from socket
※Wait 10 minutes or more before you replug the electrical plug into the outlet. If you plug it in
immediately after unplugging it, the refrigerator will not run.
How to maintain Q&A
Q. If realized the dirt?
A.
Please wipe before the dirt difficult to wipe out.
●
●
●
●
Wipe with soft towel soak with warm water.
For hard to remove dirt, please use a kitchen
detergent (neutral type) and wipe off with water.
Wipe off oil stain or citrus juice immediately.
Door packing may cause damage or cold air
leakage if you leave the dirt. Please wipe off
the moisture with dry towel after wipe off with
soft and soak towel.
Q. Shelf, case and pocket can remove?
A. For removable parts,
please see ➡Page 12
●Do not use the following items.
Alkalinity or alkalescent kitchen detergent, polishing
powder, soap powder, alcohol, benzine, thinner,
petroleum, acid, scrub brush, hot water, etc.
Plastic parts (door handle, cap, case, etc.)
will crack, and glass shelf or painted surface may
damage or rust.
Power Plug
For safety, please do periodically care of
power plug and cords.
Unplug the electrical plug from
the outlet and inspect.
Is there any damage or abnormal
heat coming from the plug or cord?
Wipe away dust from the plug
and around the plug area with
a dry cloth.
Insert the electrical plug fully
into the outlet. Change
Maintain
Wipe out the dust in power plug
periodically.
It may cause fire or insulation failure.
Refrigerator rear side and floor
The place where in convection of air is easily
to accumulate dust and black dirt. Please do
periodically care for energy saving.
Remove the toe grille.
We recommend laying out protective
materialon the floor to prevent
the floor from being damaged.
Also, be careful not to injure yourself.
Turn the adjustable supports to raise them
from the floor,and pull out the refrigerator.
Remove the dust from the rear panels,
walls and floor, and wipe off any dirt.
Check for water dripping on the floor.
Do not put your hands or feet
under the refrigerator.
It may cause injury.
Do not do
Always follow
instructions
Soot and dust
Please take heed
12
Use reverse procedures to put accessories back in place.
Point when attach free pocket
Insert the left and right
partway, push the top
of claw part in the center
of free pocket, and fit
the claw part.
※Illustration of MR-CDX46EK
Freezer Compartment
Open the drawer-door fully.
Lift up the freezing case
(upper) towards you.
Lift up the freezing case
(lower) towards you.
Take out the freezing case
(upper), and while slightly
lifting up the door draw
out and tilt downwards.
Vegetable Compartment
Open the drawer-door
fully.
Lift out the case.
Lift out the case.
Take out the small vegetables
case. While lifting the
drawer-door slightly,
draw out and tilt downward.
Glass shelf / One-two shelf
Lift up the front side by both hands.
※If forcefully pull in front, it may cause damage to door side.
Please slowly pull and take out.
Pull forward and take out.
If the glass is not attached properly, it will out
and falls which may cause injury.
To ensure that glass side is attached
or removed.
Always follow
instructions
Sliding case (upper), (lower)
※
※
Pull forward.
Wide chilled case lid cannot remove.
If difficult to take out, please remove wide chilled
after removed bottle pocket.
Free pocket (large), (small) /
Bottle pocket / Small-Items pocket
※
Lift upward holding right
and left sides.
The piece is
attached quite firmly.
Draw forward to remove. Bottle pocket
It may falls if do not attached
properly, and may cause injury.
Make sure that you removed
and attached properly.
Always follow
instructions
Sliding case lid
Sliding case (upper) Sliding case (lower)
Liquid-Catching Indentations
Wipe away any dirt, liquid or condensation.
Liquid catchers
Toe grille
Remove by pull
forward every
single side.
Before use Operation Cleaning When in trouble
13
How to maintain your automatic ice-makerHow to maintain your automatic ice-maker
Please do periodic care to prevent the occurrence of water
scale, mold, etc. Please remove water when not made the ice.
Take out
ice cubes.
●
●
●
●
Do not use washing agents such as kitchen detergents, benzene or bleach to clean the water filter. It will cause ice to have an odor.
If you use a bleach to clean your water supply tank or lid, please follow product directions carefully.
Assemble the water supply pump properly and firmly. If it is not assembled properly, it may not make ice or it may make a loud sound.
Please surely attached the lid of water supply tank. If the lid is not attached properly, the lid may be out and the water supply tank will falls.
Take ice out of the
ice storage container,
close the freezer door.
Fill water supply tank
with water, put back
in original position.
Press for about 5 seconds (at temperature adjustment
panel at inner back of freezer compartment.)
●
●
The stop ice-maker light (red) will blink for about 1 minute.
(It rinses the ice-maker tray with water from the water supply tank.)
When light stops blinking, it will return to the previous indication.
Repeat 2 or 3 times.
Remove the Freezing Case (upper) discard water and ice.
Do not throw out the noise prevention mat.
Freezing Case
(upper)
※Do not use dishwasher or dryer
because it may cause deformation.
For once-a-week
If mold forms easily in the certain types of water, clean about 2 or 3 times a week.
Water supply tank / Purification filter
Take off the lid
and wash with
water.
(Temperature
tolerance
approx 60 oC)
Purification filter Remove and wash with water.
Normally, it does not need replacing.
Please replace for the following reasons:
●
●
●
If something other than water was put in
and the opening got blocked.
If it is damaged.
If mold, etc. is forming.
Water supply pump
For once-a-month
Turn the pump
and take out.
Take out the pipe,
Turn the cap and remove,
Take out the impeller
and wash with water.
Water tank
Pipe
Water supply pump
Impeller※
Pipe
Cap
Water supply pipe
For once-a-month
Take out
the water
supply tank.
Water supply
tank
Water supply
pipe
Take out the
water supply pipe
and wash with
running water.
Water receptacleWater receptacle
Hose part
The water receptacle
and hose part
cannot be removed.
Return back to
original positions.
Facet A
Facet B
Water supply pipe
Make sure to insert the water
supply pipe properly so that
there’s no difference in surface
level between facet A and facet B is.
Return the water supply tank and, if does not
sit in properly, re-set the water supply pipe.
If removal or assembly are not done correctly,
a problem such as a water leakage will occur.
If it is not assembled properly, it may not make ice or it may make
a loud sound. Please check on the following.
The claw on the cap ( )
is turned to put onto the
protruding part ( ) of
the water supply pump.
①
②
②①
Impeller
Turn
Turn Water supply tank
※Check to make sure that
the impeller is inside.
Attach the water supply
pump properly to the
water supply tank by
turning and attaching.
Insert the pipe into the
water supply tank opening,
Connect the pipe to the
water supply pump.
※
Check to make sure that there are no substances
at the connection point of the two pipes.
Water supply tank
Pipe
Remove it from
tank.
※
The impeller is made with a
magnetic material. Clean thoroughly
with water, making sure there
are no substances on it.
Cleaning the ice-making tray (rinsing)
Pointers for assembling the water supply pump
To buy another filter, please
inquire at the store where
you bought your unit.
Return parts by following the reverse procedure.
Notice
14
・Minimize opening/closing of doors and avoid putting in more food.
When not in use for a long time (Remove the power plug)
Clean the auto ice-maker.
Clean the interior after unplugging the refrigerator.
Keep the door open for 2 - 3 days to let it get dry.
➡Page 10, 13
 ※If not allowed to dry properly, mold and odors can occur, or refrigerant (gas)
may leak due to corrosion of the cooling unit.
When transporting
Empty any water or ice from the water supply tank and ice-making tray.
Wear protective gear (gloves).
Remove the toe grille, and then rotate and raise the adjustable leg.
Remove the power plug.
Lay towels under the drainage port and the lower rear edge of
the refrigerator and position a container or tray with a height of
about 3 cm. on the towels to collect the water.
➡Page 10
➡Page 5
※
※
※
The towels prevent floor damage, and water from being spilled on the floor.
Because the refrigerator is heavy, the work must be performed by at least 2 people.
The work must not be performed by small children or people who are not
capable of doing heavy work. Ask a specialist transportation company.
Tilt the refrigerator slowly to the rear by about 30 degrees, and drain
the water from the evaporation tray via the drainage port on the
lower rear side. (The evaporation tray is not visible from the outside.)
2 or more people should hold the hand-holds on the lower inside of the
front and the upper side of the rear, and carry the refrigerator slowly.
・
・
Do not lay or load on its side (it will cause damage to the compressor.)
If you are moving, it won’t be necessary to convert the electrical
power frequency. (Can use 50 or 60Hz).
Water discharge outlet
Front side - lower
section inner edge
Back side - upper
section handle
・
・
The frost may melt, and the water may spill from the cooler in back of freezer compartment during transport.
It may take 1 day from unplug until frost melt.
When takes time to move such as relocation
When moving the unit / when changing the direction of the unit
Because a flammable refrigerant (gas) is used, there is the danger
of igniting or explosion.
Do not damage the refrigerant circuit (piping) of the
refrigerator; do not drive in screws.
Do not do
Remove the toe grille, and then rotate and raise the adjustable leg.
When changing the direction of the unit, please use caster wheels or place a protective cloth under the back legs.
Move in a forward or backward direction.
Page 5
➡
※If moved other than a in forward or backward direction, there’s a risk of damaging the floor.
What to do in these situationsWhat to do in these situations
When there’s a power failure
Before use Operation Cleaning When in trouble
15
When alarm non-stop ringing
Make sure that each door closing without a gap.
Inspection is required due to a possibility that the abnormality has occurred.
Please contact the store where you purchased.
When ice-making light (red) blink
You can stop alarm sound temporarily.
Press button (ice-making stop switch) in control part of refrigerator compartment more than 5 seconds.
※
※
Please note that if we press icon to stop door alarm, ice cube or water will be driven to
ice storage box. Please refer Page13 Cleaning the ice-making tray (rinsing).
If alarm did not stop, or if alarm continue ring periodically, please check around the device.
How to stop alarm (PiPi continuous sound)
Inspection is required due to a possibility that the abnormality has occurred such as the refrigerator not cool.
Please contact the store where you purchased.
※
The light (red) may blink during cleaning the ice tray, this is not abnormal situation.
➡
➡
Page 13
TroubleshootingTroubleshooting
Especially when starting use or summer time
Please check the following points before request for repair or contact us.
If the problem cannot be solved, please contact the store where you purchased.
Not cool at all!
・It takes time until cool when starting use.
In summer time, it may take approx. 24 hours
until cooling.
➡Page 5
・Check that unplugged or breaker dropped
or not.
Outside of the refrigerator is hot!
・
・
It may hot outside especially after installation
or during the summer (approx. 50 – 60oC).
It is because there is the heat radiation and dew
formation preventing pipes on the side and ceiling.
There is no problem in this situation because
this operation is necessary to keep the unit cool.
There is a radiating fan at the bottom,
the warm air may come out.
Heat radiation
pipe
Dew formation
preventing pipe
If this happens…
Please check this out.
Please do this. This is the reason.
It doesn’t cool
properly.
It only makes small
amounts of ice.
The ice is melting.
Foods get frozen
in compartments
besides the freezer.
How to cool
Is it right after installing the unit?
Is the temperature adjustment
set on a left of “MID”?
Is the flow of cold air being blocked?
Are doors being opened often, or
are doors improperly sealed shut?
Is there not enough space around the unit, is the sun
directly on it, or is the radiation of heat being blocked?
Is the refrigerator compartment temperature
set at “COLDER” or at right of “COLDER”?
Are foods with a lot of moisture
placed at the back end of the shelf?
Is the ambient temperature less
than 5 oC?
It will take about 4~5 hours to cool down. During
summer, it may take about 24 hours to make ice.
Please adjust the temperature to “MID” or
“COLDER.”
Please check to see that too much food isn’t
placed in the refrigerator and that the door
is properly sealed shut.
Please check to see that it’s installed properly.
➡Page 4
Please adjust the refrigerator compartment
temperature to “MID.”
Please put foods such as tofu, vegetables, fruit, and foods
with a lot of moisture or drinks towards the front part.
If the freezer compartment temperature is adjusted to a left
of “MID”, foods will be less likely to freeze.
➡
Page 8
What to do in these situationsWhat to do in these situations (continue)(continue)
16
It’s got a loud sound
It’s got sounds
that worry me
The following sounds
do not mean there’s
a problem.
Troubleshooting (continue)
If this happens…
Please check this out.
Please do this. This is the reason.
It doesn’t make
ice at all Water in
the tank doesn’t
decrease It takes
too long to make
ice.
Water supply
tank/pipe freeze.
Ice cube is small
Ice cube stick
together.
Is it just a short time after
installation?
Are food items or the ice server
left in the water supply box?
Is the ice-maker in the “ICE MAKER OFF”
setting? (red light on.)
Are the water supply pump and pipe properly
attached to the water supply tank?
Is there enough water in the water
supply tank? Is the refrigerator tilted?
It takes about 12 hours to make the first batch of ice.
In the summer, it may take about 24 hours.
The ice-maker will judge that there is a lot of ice.
Please take food items, etc. out of the ice storage box.
Also, please level the ice evenly to the forefront.
Please turn off the “ICE MAKER OFF”
red light. ➡Page 8, 10
Please place the outlet for the pipe inside
the tank correctly. ➡Page 13
The number of ice cubes in one batch may be reduced.
Pour water into the water supply tank.
➡Page 9
Automatic Ice-MakerSound
Did you attached water supply tank/pipe
in refrigerator compartment without any gaps?
Or, did you attached tank pipe in
water supply tank without any gaps?
Did the ice cube is in the ice
storage corner for a long time?
Are you using mineral water to
make ice?
Did surrounding of the items
contact with the refrigerator?
The sound suddenly gets louder.
The sound changes.
When I open the door, there’s sometimes
a “krik” sound coming from the
inside, or a sound like water running.
Please check the attachment around water
supply tank. If there is a gap, cool air may
leak and water may be freeze. ➡Page 13
The ice cube will become small or stick together if put in
the ice storage corner for a long time (calls sublimation).
We recommend you to stop doing ice-making
when not use the ice cube. ➡Page 8
This is because there is a waterway that flows water
evenly into the ice-maker tray. Please do not fill water
above the “full line” mark on the water supply tank.
If ice is made with water that has a lot of mineral substances,
white sediment may form inside the cubes. It is harmless.
Please give a gap around. It makes sound when
the refrigerator connect with the goods or walls.
If it is right after installation, or hot out, or
if doors are open/closed often, it goes into
high-speed operation to chill with greater power.
This is the sound of the fan motor starting up.
There’s a “phyoon” sound when
I close the door.
This creaking sound occurs when warm air
enters and the plastic expands.
This is the sound of refrigerant (gas) flowing
through.
Sometimes there are sounds like “shuu”
or “plub-plub” (boiling water sound)
or “shaaa”(water flowing sound).
The ice has white
“things” in it.
There are protrusions
on the ice. 2~3 cubes
get connected. −
Clattering sound.
After plugging it in, there’s sometimes
a “gu” or “gween” sound (every
1~2 hours) when the ice-maker is off.
This is the auto ice-maker sound. Even if there’s no
water in the water supply tank, the auto ice-maker and
the pump will make a sound about every 100 minutes.
Sometimes there’s a “wheeen” or
“klik-klak” sound (every 1~2 hours).
This is the sound of the auto ice-maker
doing a operations check. Even when it is on
“ICE MAKER OFF” it will do the checking.
Doors open easily
Doors don’t close.
Is food or a case blocking the
door?
Is there food caught at the back
of the case of a drawer-door?
Is the electrical cord caught between
the body of the unit and the door?
Does the refrigerator wobble or
seem unstable?
Are the adjustable legs touching the floor?
Make sure again that you close
the doors properly.
Put away items properly so that they don’t
interfere when closing the door.
Remove the item. Please do not let food
items, the electrical cord, plastic bags, etc.
get in the way.
Bring the adjustable leg down, and raise
the front higher, with a slightly raised front,
closing doors becomes easier. ➡Page 5
Please check “when alarm rings”,
“When alarm did not stop”. ➡Page 8, 15
Alarm rings
Doors
Before use Operation Cleaning When in trouble
17
If this happens…
Please check this out.
Please do this. This is the reason.
Did you open the door frequently,
or is there a gaps?
Is there a time of rainy weather
or elevated humidity?
Is the surface in a thin line
stepless in both sides?
Is the refrigerator installed near a TV?
Is the power source for the refrigerator
taken from near the antenna cable inlet?
Have you put in strong-smelling
foods without using a food wrap?
Is the water supply tank unclean?
Please close the door properly.
Dews and frost will come out when the moisture in the air is cooled.
Dews and frost are attach when the humidity is high.
Dew may temporarily attach. Please wipe with dry towel.
And frost is easily attach in the freezer compartment.
It is a mark get when molding of the plastic.
It seem a resin molding mark. It is not a scratch.
Please set your refrigerator at a distance from TVs, etc.
We recommend a single power outlet and
that earthing is done.
If the smell is strong, the odor-removing device
cannot remove it all, so please wrap such items.
➡
Page 13
Please do a regular cleaning maintenance.
Others
Dew/Frost
Dew attached in the outer
or inside the refrigerator
Frost adhere to the
freezer compartment
Water dripping on the floor
There is a scratch line
in transparent parts
I get static noise
from the TV, etc.
The odor bothers me
(Food items / ice).
Troubleshooting (continue)
Quickly open and close the door
Cold air may leakage outside, or power
consumption may increase if open a long
time or open the door frequently.
Do not block the air outlet or suction port
The foods may not easily get cold if block
the cool air. The temperature near air outlet
may decrease, moist foods may easy to freeze.
Leave some space between the foods.
Cool air may not flow very well, the
foods may not easily get cold if you
not leave a space between the foods.
Cool down hot foods before put in the refrigerator
The temperature inside may rise,
and may affect to freshness of
the other foods.
Leave space
To economize power
■
This refrigerator uses non-freon foam insulation material. Non-freon foam insulation material (cyclopentane)
does not deplete the ozone layer and their contribution to global warming is extremely low, making them
environmentally friendly substances.
Non-Freon Refrigerator
18
AccessoriesAccessories
Refrigerator compartment
Vegetable
compartment
Freezer compartment
Accessories
Model name
Quantity Quantity
MR-CDX41EK MR-CDX46EK
Adjustable shelf
One-two shelf
Sliding case (upper)
Sliding case (lower)
Water supply tank (including purification filter)
Free pocket (large)
Free pocket (small)
Small-Item pocket
Free egg tray
Bottle pocket
Vegetable case
Sliding case
Freezing case (upper)
Freezing case (lower)
Noise reduction mat
Ice server
Toe grille
1
1
1
1
1
1
1
-
1
1
1
1
1
1
1
1
1
2
1
1
1
1
1
1
1
1
1
1
1
1
1
1
1
1
MODEL NAME COUNTRY NAME
MR-CDX41EK/CDX46EK-P
MR-CDX41EK/CDX46EK-ML
MR-CDX41EK/CDX46EK-H
SINGAPORE
MALAYSIA
HONG KONG
This appliance is designed for use in Singapore, Malaysia and HongKong only and can not be used in any other country.
No servicing is available outside of Singapore, Malaysia and Hong Kong.
CAUTION
1. This appliance is designed for use in ambient temperature listed below.
The internal temperatures could be affected by such factors as the location of the refrigerating appliance, ambient
temperature and the frequency of door opening, and, if appropriate, a warning that the setting of any temperature
control device might have to be varied to allow for these factors.
2. A rise in temperature of the frozen food during manual defrosting, maintenance or cleaning could shorten the storage life.
3. Food to be frozen is not to be placed in direct contact with food in storage and, if appropriate, that it could be necessary
to reduce the quantity to be frozen if freezing every day is anticipated.
4. The electrical power failure for 1-2 hour will only slightly affect the inside temperature. However, open & close of the
door results in the temperature loss. In case there is more than 24 hours electrical power failure, the food should be
taken out from the fridge.
5. In case you are leaving or there is no food in the fridge for more than 3 weeks, The fridge should be unplugged and
cleaned.
MODEL NAME AMBIENT TEMPERATURE RANGE CLIMATIC CLASS
MR-CDX41EK, CDX46EK-P 16 oC ~ 43 oC T
MR-CDX41EK, CDX46EK-ML 16 oC ~ 43 oC T
MR-CDX41EK, CDX46EK-H 16 oC ~ 38 oC ST
Before use Operation Cleaning When in trouble
19
MEMOMEMO
忚埴拗婌㑵ἄ㗪炻䓐ẍᶳ䘬栗䣢Ἦ⋨⇍婒㖶⮯天䘤䓇
䘬⌙晒⍲℞䦳⹎ˤ
ٹ⚾䇯姀嘇䘬⏓シ⤪ᶳ㇨䣢ˤ
忚埴拗婌㑵ἄ㗪炻⎗傥忈ㆸ㬣ṉㆾ侭
慵 䘬ね㱩
忚埴拗婌㑵ἄ㗪炻⎗傥忈ㆸ ⭛ㆾ侭
㇧⯳ˣ屉䓋䫱䘬㎵⭛䘬ね㱩
䤩㬊
䳽⮵ᶵ天㻹㯜ˣ
ᶵ天䓐㯜⺬㽽
㲐シ
⊁⽭忋㍍㍍
⛘䶂
⊁⽭⮯暣㸸㍺柕
⽆㍺⹏󰵶㉼↢
⊁⽭㊱䄏㊯
䣢忚埴㑵ἄ
ᶵ天⮯⅘䭙姕伖⛐⭌⢾ˣ㍍妠
㯜䘬⟜㇨ㆾ㽽㯋庫慵䘬⟜㇨
➡䫔ĵ枩
⏎⇯䓙㕤䳽䶋ᶵ列炻
⎗傥⮶农妠暣࡮䀓䀥ˤ
⍣昌暣㸸㍺柕䘬䀘⠝
⏎⇯⎗傥⺽崟䳽䶋ᶵ列炻
⮶农䀓䀥ˤ
⬱㓦㗪⅘䭙䘬␐⚵䔁㚱䨢晁
⏎⇯⅟⨺炷㯋橼炸㱬㺷㗪⎗傥㺗䔁炻
⮶农叿䀓࡮䆮䁠ˤ➡䫔ĵ枩
䇚Ḯ枸旚⛘暯炻⮯℞⚢⭂⛐䈊⚢
䘬䇮⡩ㆾ㞙⫸ᶲ
⅘䭙⎗傥󱀇Ὰ炻⮶农⍿ ˤ➡䫔Ķ枩
⤪⛐㽽⹎ㆾ㯜㯋慵䘬⛘㕡ἧ䓐炻
暨⬱墅⛘䶂⍲㺷暣㕟嶗☐
㺷暣㚱⎗傥⮶农妠暣ˤ
㬌⢾炻㈲⛘䶂忋㍍⇘ẍᶳ䈑ẞ炻
㚱⎗傥⮶农妠暣ˣ䆮䁠ㆾ䀓䀥ˤ
・
・
㯜䭉ˣ䄌㯋┱䭉
暣娙⛘䶂ˣ性暟憅
炷婳⎹䴻扟⓮㞍娊炸➡䫔ĵ枩
姕伖㗪 斄㕤暣㸸࡮暣㸸㍺柕
斄㕤暣㸸࡮暣㸸㍺柕
ᶵ天⮯暣㸸㍺柕㒈⡻⛐⅘䭙䘬側朊ˤ
ᶵ天⺬⢆暣㸸暣乄䶂
⤪㝄忚埴㒈⡻ˣ㓦伖慵䈑ˣ⻶㉀ˣ
㋮㜇炻⎗傥⮶农妠暣ˣ䀓䀥ˤ
⏎⇯⎗傥⮶农妠暣࡮叿䀓ˤ
ᶵ天ἧ䓐㎵⢆䘬暣乄䶂ㆾ㍺柕ˣ
㍺⎋檮≽䘬㍺⹏
ᶵ天䓐≃㉱㉼暣㸸㍺柕䘬暣乄䶂
⏎⇯暣乄䶂⎗傥㎵⢆炻⮶农妠暣࡮叿䀓ˤ
ᶵ天䓐㽽ㇳ㍺㉼暣㸸㍺柕
⏎⇯⎗傥⮶农妠暣ˤ
劍ἧ䓐⺞攟䶂ㆾ↮㍍㍺柕炻⮯⎗傥⮶农䘤䅙ㆾ
⺽崟䀓䀥ˤ➡䫔ĵ枩
婳ἧ䓐䫎⎰㈨埻夷㟤㧁䰌ᶲ㇨䣢夷㟤ᶼ䁢暒㩫╖䌐⮰
䓐䘬暣㸸㍺⹏ˤ炷㈨埻夷㟤㧁䰌ỵ㕤⅟啷⭌攨⠲ᶲˤ炸
⤪㝄⍵㕡⎹㍺ℍ炻⇯暣乄䶂⮯⍿⇘
屈匟炻⎗傥⮶农䘤䅙࡮叿䀓ˤ
ἧ暣㸸㍺柕䘬暣乄䶂㕡⎹㛅ᶳ炻
⮯㍺柕䘬㍺憅㍺⇘㟡悐
⤪暣㸸䶂䟜㎵㗪炻婳⇘ᶱ厙暣㨇㚵⊁󰵶⽫岤屟ᶨ㟡㕘
䘬暣㸸䶂ˤ⊁⽭䡢⭂㇨岤屟䘬暣㸸䶂⮰䁢㛔㨇侴姕ˤ
䔞暣䶂㎵⢆㗪炻⽭枰忂䞍ᶱ厙暣
㨇㚵⊁󰵶⽫㚜㎃
嬎⏲
㚜㎃ㆾ㩊㞍⅘䭙䄏㖶䅰㗪炻
㉼↢暣㸸㍺柕
⏎⇯⎗傥⮶农妠暣࡮⍿ ˤ
䇚Ḯ⬱ℐ婳⊁⽭思⬰䇚Ḯ⬱ℐ婳⊁⽭思⬰
斄㕤ἧ䓐䘬㲐シḳ枭
ᶵ天㎵⢆⅘䭙䘬⅟⨺⚆嶗炷惵䭉炸炻
ᶵ天ㇻℍ坢䴚䫱
㛔⅘䭙ἧ䓐⎗䅫⿏⅟⨺炷㯋橼炸炻⚈㬌⎗
傥⮶农叿䀓࡮䆮䁠ˤ
ᶵ天⛐⅘䭙ℏἧ䓐暣⫸䓋⑩
⤪㝄⅘䭙ℏ䘤䓇⅟⨺炷㯋橼炸㱬㺷炻⇯⎗傥
䓙㕤暣⫸暞ẞ㍍溆䘬䀓剙⮶农叿䀓࡮䆮䁠ˤ
ᶵ天㓦ℍ℟㚱㎖䘤⿏⭡㖻叿䀓䘬䈑⑩
⤪㝄㓦ℍ㰥㱡ˣ⊾⥅⑩ˣ伶檖∹炻⇯⎗傥
⮶农叿䀓࡮䆮䁠ˤ
ᶵ天⛐⅘䭙ℏᾅ⬀喍⑩ㆾ⊾⬠㧋⑩
ᶵ天⛐⭞䓐⅘䭙󰵶ᾅ⬀⽭枰忚埴♜㟤
䭉䎮䘬䈑⑩ˤ
ᶵ天⛐⅘䭙䘬ᶲ朊㓦伖䈑⑩
⏎⇯䈑⑩⎗傥䓙㕤攳斄⅘䭙攨侴
句ᶳ炻⮶农⍿ ˤ
ᶵ天榶⛐⅘䭙攨ㆾ㉱攨㈲ㇳ炷㈲ㇳ炸
ᶲ炻ᶵ天䪁⛐㉥Ⰴ⺷⅘䭙攨ᶲ
⏎⇯⅘䭙⎗傥󱀇Ὰ炻⮶农⍿ ˤ
婳⊧⮵䍣䐫Ⰼ㝞㕥≈⻟䁰㑆㑲≃
㕥≈㑆㑲㚱⎗傥⮶农䍣䐫䠶塪炻⺽农⍿ ˤ
ᶵ天⮯ㇳ㓦ℍ冒≽⇞⅘㨇䘬㨇㡘悐
炷⅘⟲󱁻⬀䙺䘬ᶲ悐炸󰵶
⏎⇯⎗傥⮶农⍿ ˤ
ᶵ天⛐旬役ἧ䓐⎗䅫⿏☜曏∹
⏎⇯⎗傥䓙㕤暣⫸㍍溆䘬䀓剙炻⮶农叿䀓࡮䀓䀥ˤ
䤩㬊
⊁⽭㊱䄏㊯
䣢忚埴㑵ἄ
⊁⽭㊱䄏㊯䣢忚埴㑵ἄ
䳽⮵ᶵ天㻹㯜ˣ
ᶵ天䓐㯜⺬㽽
⊁⽭忋㍍㍍⛘䶂
䤩㬊
⊁⽭㊱䄏㊯
䣢忚埴㑵ἄ
2
嬎⏲
㲐シ
󱂛䪍ᶵ⭄㑵ἄ㛔⅘䭙炻橼⻙侭劍䃉Ṣ䚋嬟Ṏᶵ⎗㑵ἄ炻
ẍ䡢ᾅ㑵ἄ⬱ℐˤ
婳㲐シᶵ天嬻󱂛䪍⛐⅘䭙䍑侵ˤ
昌朆㗗⼿⇘怑䔞Ṣṽ䚋䜋ㆾ㊯⮶⤪ỽ㑵ἄ㬌暣☐炻
ẍ䡢ᾅἧ䓐侭䘬⬱ℐ炻⏎⇯㬌暣☐󰵯ᶵ枸㛇橼㟤ˣ
䞍奢ˣ䱦䤆ᶲᶵ嵛䘬Ṣṽㆾ仢󰶘䚠斄䴻槿⍲䞍嬀Ṣṽ
ĩ⊭㊔⮷䪍Īἧ䓐ˤ
⮷⬑⫸ㅱ⛐䚳䭉ᶳ⥍┬ἧ䓐⅟啷㩫ˤ
⊁⽭⮯暣㸸㍺柕
⽆㍺⹏󰵶㉼↢

This manual suits for next models

1

Other Mitsubishi Electric Refrigerator manuals

Mitsubishi Electric MR-255J User manual

Mitsubishi Electric

Mitsubishi Electric MR-255J User manual

Mitsubishi Electric MR-260C User manual

Mitsubishi Electric

Mitsubishi Electric MR-260C User manual

Mitsubishi Electric MR-L710E User manual

Mitsubishi Electric

Mitsubishi Electric MR-L710E User manual

Mitsubishi Electric MR-S45N User manual

Mitsubishi Electric

Mitsubishi Electric MR-S45N User manual

Mitsubishi Electric MR-508B Series User manual

Mitsubishi Electric

Mitsubishi Electric MR-508B Series User manual

Mitsubishi Electric MR-FV24J User manual

Mitsubishi Electric

Mitsubishi Electric MR-FV24J User manual

Mitsubishi Electric MR-WX627Z User manual

Mitsubishi Electric

Mitsubishi Electric MR-WX627Z User manual

Mitsubishi Electric MR-EX655W-N-A User manual

Mitsubishi Electric

Mitsubishi Electric MR-EX655W-N-A User manual

Mitsubishi Electric MR-CX492EP User manual

Mitsubishi Electric

Mitsubishi Electric MR-CX492EP User manual

Mitsubishi Electric MR-385T User manual

Mitsubishi Electric

Mitsubishi Electric MR-385T User manual

Mitsubishi Electric MR-WX60F User manual

Mitsubishi Electric

Mitsubishi Electric MR-WX60F User manual

Mitsubishi Electric MR-508E Series User manual

Mitsubishi Electric

Mitsubishi Electric MR-508E Series User manual

Mitsubishi Electric MR-G57N User manual

Mitsubishi Electric

Mitsubishi Electric MR-G57N User manual

Mitsubishi Electric MR-CX450ER User manual

Mitsubishi Electric

Mitsubishi Electric MR-CX450ER User manual

Mitsubishi Electric MR-385E Series User manual

Mitsubishi Electric

Mitsubishi Electric MR-385E Series User manual

Mitsubishi Electric MR-L650EH User manual

Mitsubishi Electric

Mitsubishi Electric MR-L650EH User manual

Mitsubishi Electric MR-L650E User manual

Mitsubishi Electric

Mitsubishi Electric MR-L650E User manual

Mitsubishi Electric MR-C375C User manual

Mitsubishi Electric

Mitsubishi Electric MR-C375C User manual

Mitsubishi Electric MR-385S User manual

Mitsubishi Electric

Mitsubishi Electric MR-385S User manual

Mitsubishi Electric MR-WX500C User manual

Mitsubishi Electric

Mitsubishi Electric MR-WX500C User manual

Mitsubishi Electric MR-385C Series User manual

Mitsubishi Electric

Mitsubishi Electric MR-385C Series User manual

Mitsubishi Electric MR-LX68EM User manual

Mitsubishi Electric

Mitsubishi Electric MR-LX68EM User manual

Mitsubishi Electric MR-B46F User manual

Mitsubishi Electric

Mitsubishi Electric MR-B46F User manual

Mitsubishi Electric MR-CX35EM User manual

Mitsubishi Electric

Mitsubishi Electric MR-CX35EM User manual

Popular Refrigerator manuals by other brands

Electrolux ERN 29650 Installation and instruction manual

Electrolux

Electrolux ERN 29650 Installation and instruction manual

AEG S7401CMX2 user manual

AEG

AEG S7401CMX2 user manual

Samsung RF20HFENB Service manual

Samsung

Samsung RF20HFENB Service manual

Electrolux ER8912B Instruction booklet

Electrolux

Electrolux ER8912B Instruction booklet

Grundig GKNM46220DZ User instructions

Grundig

Grundig GKNM46220DZ User instructions

Miele KFN 14947 SDE ed Operating and installation instructions

Miele

Miele KFN 14947 SDE ed Operating and installation instructions

Vissani HMDR1030WE instruction manual

Vissani

Vissani HMDR1030WE instruction manual

NEFF KI2822SF0 user manual

NEFF

NEFF KI2822SF0 user manual

VOX electronics KS-0610 operating instructions

VOX electronics

VOX electronics KS-0610 operating instructions

GE SIDE-BY-SIDE REFRIRATOR 22 Owners and installation manual

GE

GE SIDE-BY-SIDE REFRIRATOR 22 Owners and installation manual

Kenmore 59666252400 Use & care guide

Kenmore

Kenmore 59666252400 Use & care guide

Smeg FAB28ROR3 manual

Smeg

Smeg FAB28ROR3 manual

AEG AUK1173R user manual

AEG

AEG AUK1173R user manual

Avanti BCA5105SG-1 parts list

Avanti

Avanti BCA5105SG-1 parts list

CombiSteel MBB74551320 user manual

CombiSteel

CombiSteel MBB74551320 user manual

Marvel MABV224-SG31A owner's guide

Marvel

Marvel MABV224-SG31A owner's guide

Thermo King UT-1280 Operator's manual

Thermo King

Thermo King UT-1280 Operator's manual

Electrolux ERT1501FOW3 manual

Electrolux

Electrolux ERT1501FOW3 manual

manuals.online logo
manuals.online logoBrands
  • About & Mission
  • Contact us
  • Privacy Policy
  • Terms and Conditions

Copyright 2025 Manuals.Online. All Rights Reserved.