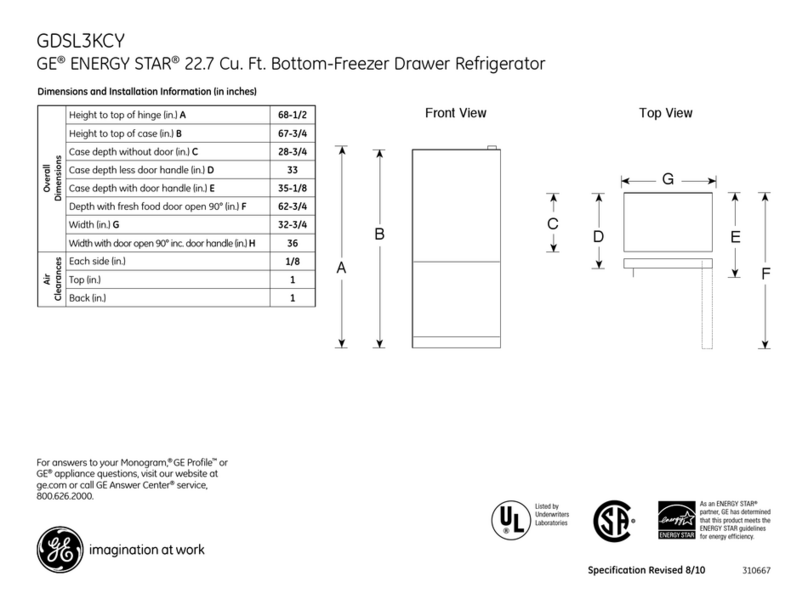
GE SIDE-BY-SIDE REFRIRATOR 22 Service manual

GEAppliances.corn
o
Lf)
(b
o
Lf)
0_
4.-
Safety Instructions ........... 2-4
Operating Instructions
Automatic Icemaker ............ 15, 16
Care and Cleaning ............. 18, 19
ClimateKeeper2 TM. ................... 6
Crispers and Pans ................. 14
CustomCooF _ . .................... 7, 9
Ice and Water Dispenser ....... 17-18
Quick Ice .......................... 17
Refrigerator Doors ................. 13
Replacing the Light Bulbs .......... 20
Set Features ........................ 6
Shelves and Bins ............... 11, 12
Temperature Controls ............... 5
TurboCooF" ......................... 6
Water Filter ........................ 10
Installation Instructions
Installing the Refrigerator ...... 30-33
Having the Refrigerator ........ 26-29
Preparing to Install
the Refrigerator .................... 25
Trim Kits and Panels ........... 21-24
Water Line Installation ......... 34-36
Troubleshooting Tips ...... 38-4o
Normal Operating Sounds .......... 37
Consumer Support
Performance Data Sheet ........ 43,44
State of California Water
Treatment Device Certificate ....... 46
Warranty (Canadian) ............... 41
Warranty (U.S.)..................... 42
Write the model end seriol numbers
here:
Model #
Serial #
Find these numbers on a label inside
the refrigerator compartment at the
top on the right side.
Models 22, 23, 25, 26, 27 and 29
Profile CSte6 CSte
R frig roteurs
La section frangaise commence _la page 47
Profile Lado aLado
Refrigerodores
La secci6n en espaflol empieza en la p_gina 93
200D8074P052 49-60647-1 07-12 GE

IMPORTANT SAFETY INFORMATION.
READ ALL INSTRUCTIONS BEFORE USING.
WARNING!
Use this appliance only for its intended purpose as described in this Owner's Manual.
SAFETYPRECAUTIONS
When using electrical appliances, basic safety precautions should be followed, including the following:
Thisrefrigerator must be properly installed
and located in accordance with the Installation
Instructions before it isused.
Donot allow children to climb,stand or hang
on the shelvesinthe refrigerator. Theycould
damage the refrigerator and seriously injure
themselves.
Donot touch the cold surfaces inthe freezer
compartment when hands are dump or wet.
Skinmay stick to these extremely cold surfaces.
Donot store or usegasoline or other flammable
vapors and liquidsin the vicinity of this or any other
appliance.
Inrefrigerators with automatic icemukers,
avoid contact with the moving parts of the ejector
mechanism, or with the heating element located
on the bottom of the icemaker.Donot placefingers
or hands on the automatic icemaking mechanism
while the refrigerator isplugged in.
Keepfingers out of the "pinch point" areas;
clearances between the doors and between
the doors and cabinet are necessarilysmall.
Becareful closingdoors when children are
in the area.
Unplugthe refrigerator before cleaning and making
repairs.
NOTE:Westrongly recommend that any servicing
be performed by a qualified individual.
NomLCD models: Setting either or both controls
to 0 (off)does not remove power to the light circuit.
LCDmodels: Turning the cooling systemoff does
not remove power to the light circuit.
Donot refreeze frozen foods which havethawed
completely.
Always cleanthe CustomCoolTM Tray after thawing
food.

DANGER! RISK OF CHILD
GEAppliances.com
ENTRAPMENT
PROPERDISPOSAL OF THE REFRIGERATOR
Childentrapment and suffocation are not problems
of the past.Junked or abandoned refrigerators are
still dangerous...evenif they will sit for 'Justa few
days."If you are getting rid of your old refrigerator,
pleasefollow the instructions below to help prevent
accidents.
Before You ThrowAway Your Old
Refrigerator or Freezer:
Takeoff the doors.
Leavethe shelvesin place sothat children may not
easily climb inside.
Refrigerants
All refrigeration products contain refrigerants,
which under federal law must be removed prior
to product disposal. If you are getting rid of an
old refrigeration product, check with the company
handling the disposal about what to do.
USEOFEXTENSION CORDS
Because of potential safety hazards under certain conditions, we strongly recommend against the use
of an extension cord.
However,ifyou must use an extension cord, it isabsolutely necessarythat it be a UL-listed(inthe United States)
or a CSA-listed(inCanada),3-wire grounding type appliance extension cord having a grounding type plugand
outlet and that the electrical rating of the cord be 15 amperes (minimum)and 120 volts.

IMPORTANT SAFETY INFORMATION.
READ ALL INSTRUCTIONS BEFORE USING.
WARNING!
HOW TOCONNECT ELECTRICITY
Do not, under any circumstances, cut or remove the third (ground) prong from the power cord.
For personal safety, this appliance must be properly grounded.
Thepower cord of this appliance isequipped
with a 3-prong (grounding)plug which mates
with a standard 3-prong (grounding)wall outlet
to minimizethe possibilityof electric shock hazard
from this appliance.
Have the wall outlet and circuit checked by
a qualified electrician to make sure the outlet
is properlygrounded.
If the outlet isa standard 2-prong outlet, it isyour
personal responsibility and obligation to have it
replaced with a properly grounded 3-prong wall
outlet.
Therefrigerator should always be plugged into its
own individual electrical outlet which hasa voltage
rating that matches the rating plate.
Thisprovides the best performance and also prevents
overloading housewiring circuits which could cause
a fire hazard from overheated wires.
Never unplug your refrigerator by pulling on
the power cord. Alwaysgrip plugfirmly and pull
straight out from the outlet.
Repairor replaceimmediately all power cords
that have become frayed or otherwise damaged.
Do not usea cord that showscracks or abrasion
damage along its length or at either end.
When moving the refrigerator away from the wall,
be careful not to roll over or damage the power cord.
READAND FOLLOWTHISSAFETYINFORMATIONCAREFULLY.
SAVETHESEINSTRUCTIONS
4

About the temperature controls. GEAppliances.com
Not all features are on all models. Your controls may be similar to the following:
f
!
I
Touch-LEDDispenser Control
NOTE:Therefrigeratorisshippedwith
protectivefilm coveringthetemperature
controls.Ifthisfilm wasnotremoved
duringinstallation,removeitnow.
AdJust Temperature
<AEl_Or%mr_ _armer_ _ _orrner_ T_rbOoCoo_
® .... o_,......... .o. ,.o................o.
Thetemperaturecontrolsarepresetinthefactoryat37°F(3°C)
fortherefrigeratorcompartmentandO°F(-18°C)forthefreezer
compartment.Allow24hoursforthetemperaturetostabilize
tothepresetrecommendedsettings.
Refrigeratortemperaturescanbeadjustedbetween34°Fand46°F
(1°Cto8°C),andthefreezertemperaturescanbeadjustedbetween
-6°Fand+8°F(-21°Cto -13°C).
To change the Refrigerator temperature: Tactile-LED
Dispenser Control
The temperature controlscan displayboth the SETtemperature as
wellas the actual temperature inthe refrigerator and freezer.The
actualtemperature may varyslightlyfrom the SETtemperature
based on usage and operating environment.
On some models, setting both controls to the warmest setting
untilthe displayflashes(off)willstop coolingin both the freezer
and refrigeratorcompartments.
On other models, setting eithercontrol to the warmest setting
untilthe displayflashes (off)willstop the coolingto the freezer
and refrigerator.
NOTE:Turningthe refrigerator offviathe controls on the touch
paneldoes not shut offelectricalpowerto the refrigerator.
NOTE:Therefrigeratorisshippedwith protectivefilm coveringthe
temperaturecontrols,tfthisfilm wasnotremovedduringinstallation,
removeit now.
® • • ® 0 ®
ilte ore ush abe ick I Loc
Ho14Ssecondsto Reset Ho14sseconds
@
Tactile LEDDispenser Control.
Turning the cooling system off: Tactile-LED Dispenser
Control
On some models, setting both controls to the warmest setting
untilthe displayflashes(off)willstop cooling inboth the freezer
and refrigeratorcompartments.
On other models, setting eithercontrol to the warmest setting
untilthe displayflashes (off)willstop the coolingto the freezer
and refrigerator.
NOTE:Turningtherefrigeratoroff viathe controlsonthetouch
paneldoesnotshutoff electricalpowerto therefrigerator.
Touch-LEDDispenser Control:
Pressand release the FREEZERTEMP/FRIDGETEMP pad.
Pressto set freezer temperature to 5.The display will
show OFF.To turn the unit back on, press the FREEZER
TENPt_RIDGE TENP pad. Press to set the freezer and
refrigerator temperatures to the preset points of 0°F (-
18°0 V
for the freezer and 37% (3°0 for the refrigerator.
When the unit is turned back on, it will take up to 24 hours
to stabilize.
Touch-LED Dispenser Control:
Tochange the temperature, pressand releasethe FREEZER
TEMP/FRIDGETEMPpad. The SET light willcome on and
the display willshow the set,_emRgrature. To change the
temperature, tap either the or " pad until the desired
temperature is displayed.
Once the desired temperature has been set, the temperature
display willreturn to the actual refrigerator and freezer
temperatures after 5 seconds. Several adjustments may be
required. Each time you adjust the controls, allow 24 hours
for the refrigerator to reach the temperature you have set.
ThetemperaturecontrolscandisplayboththeSETtemperature
aswellastheactualtemperatureintherefrigeratorandfreezer.
TheactualtemperaturemayvaryslightlyfromtheSETtemperature
basedonusageandoperatingenvironment.
Performance Air Flow S stem
ThePerformance Air-FlowSystem isdesigned
to maximize temperature control in the refrigerator and
freezer compartments. Thisunique specialfeature consists
of the AirTower along the back wall of the refrigerator and
the AirTunnel on the bottom portion of the freezer rear wall.
Placingfood infront of the louvers on these components will
not affect performance. Although the AirTower and the Air
Tunnelcan be removed,doing sowill affect temperature
performance. (Forremoval instructions, on-line,contact
us at ge.com or call 800.GE.CARES.InCanada,contact us
atgeappliances.caor call 1.800.561.3344.)

About Set Features.
Thispad isusedto selectthe following
features: TurboCool,Quick Ice,Door Alarm
and Water Filter.
Pressing SETFEATURESrepeatedly will cycle
through all of the availablefeatures and then
exit the mode. If no key ispressed,the mode
will exit and return to displaying features
currently set.
About TurboCool.TM
i Turbot D
OR
How it Works
TurboCool TM rapidly cools the refrigerator
compartment in order to more quickly
cool foods.UseTurboCoolT"when adding
a large amount offood to the refrigerator
compartment, putting away foods after they
have been sitting out at room temperature or
when putting away warm leftovers.It can also
be used ifthe refrigerator has been without
power for an extended period.
Onceactivated, the compressor will turn
on immediately and the fans will cycle on and
off at high speedas needed for eight hours.
The compressor will continue to run untilthe
refrigerator compartment cools
to approximately 34% (!°C),then it will cycle
on and off to maintain this setting. After
8 hours, or if TurboCoolT"ispressed again,
the refrigerator compartment will return
to the original setting.
About ClimateKeeper2/ Ionsome models)
How to Use
Tactile LEDDispenser Control:
Howto Use
PressTurboCooP.The-[urboCooltemperature .
displaywillshowTcandtheLEDwillbeactivated.
AfterTurboCooPiscomplete,theTurboCoot_"
indicatorlightwillgoout.
NOTES:Therefriqeratortemperaturecannotbe
changedduringTurboCooP.
Thefreezertemperatureisnotaffected
duringTurboCooP.
Whenopeninqtherefrigeratordoorduring
TurboCool_",tTqefunswillcontinueto runIt
theyhavecycledon.
Touch-LEDDispenser Controls:
PressSETFEATURES.The refrigerator
temperature display will show TurboCoolTM
and/or TC.PressON/OFF.
After TurboCool_"iscomplete, the refrigerator
compartment will return to the original setting.
NOTES:
Therefricleratortemperature cannot be
changed during TurboCooP.
Thefreezertemperature isnot affectedduring
TurboCoolTM.
Whenopening the refrigerator door during
TurboCoolTM, the fans will continue to run if
they havecycledon.
How it Works
TheClimateKeeper2TM isthe industry's
most advanced refrigeration system,
deliveringoptimum temperature and
humidity performance to keepfood garden
fresh longer and reduce freezer burn.
TheClimateKeeperZ" system features two
evaporators--one for the refrigerator and
one for the freezer.
Thisprovidestwo separate cooling systems,
and separatesthe airflow between the fresh
food and freezer compartments during
normal cooling operations.*
This ensuresthat the humidity levelsin
the fresh food compartment are significantly
higher than in a conventional system,**
allowing fresh produce and other unsealed
foods to retain their moisture content and
freshness longer. Moisturesensitivefoods
such asfresh fruit, salads,rice,etc.,can now
be stored on open shelveswithout excessive
moisture loss.
Dueto the higher humidity in the refrigerator,
you may on occasion experience fog or small
amounts of moisture in the refrigerator
compartment. This isnormal and may come
and go as different food loads and
environmental conditions change. Wipe dry
with a paper towel if desired.
The separate airflow system minimizes
the mixing of air between the two
compartments, which reduces fresh food
odor transfer to improve the taste of ice.
The ClimateKeeper2_"systemalso reduces
the number of defrosting cycles in the freezer
evaporator,thereby reducing freezer burn.
*Freezerair is usedin the CustomCool
feature.
**Testingshowsa higher levelof humidity in
the FreshFoodsectionin ClimateKeeperZ"
refrigeratorsversusconventionalunits.

About CustomCoo/i"(onsome models) GEAppliances.com
Touch LED Dispenser Control
How it Works
TheCustomCool TM feature isusedto quickly
chill items,thaw items or hold the pan at a
specific temperature. Thisfeature isu system
of dumpers, u fun, u temperature thermistor
and u heater.
Thepan istightly sealedto prevent
temperature fluctuations inthe restof
the refrigerator.The controlsfor this pun
are located on the dispenser with the
temperature controls.
ExpressThaw_
ii
ExpressChillTM
How to Use
0
O
iiiiiii!
Emptythe pan. Placethe Chill/Thaw tray
in the pan. Placethe items on the tray
and close the pan completely.
Touch LEDDispenser Control'.
Selectthe ExpressThawT",ExpressChill'"
or SelectTempTM pad.Thedisplay and SET
light will come on.Tapthe pad until the
light appears next to the desiredsetting.
Usethe following chart to determine the
best setting to use.
ExpressChill can be set to !5, 30 or 45
minutes.The default is 15 minutes.
Tostop a feature before it isfinished:
Touch LEDDispenser Control'.:
Tapthat feature's pad until no options are
selected and the display isoff.
DuringExpressThaw and ExpressChill,
the display on the controls will count
down the time
inthe cycle(on some models).
, After the E×pressThaw cycleiscomplete,
the pan will reset to the MEATsetting
(32°F[0°C])to help preserve thawed items
untilthey
are used.
Thedisplayed actual temperature of the
CustomCool pan may vary slightlyfrom
the SETtemperature based on usageand
operating environment.
NOTE:Forfood safetyreasons,it is
recommended that foods be wrapped in
plastic wrap when usingE×pressThaw.
Thiswill help contain meatjuices and improve
thawing performance.
7

About ExpressChilElon some models) GEAppliances.com
,_,')_S_
• 15MIN
ExpressChill e30
• 45MIN
.....................................................................................• SET
How it Works
TheExpressChilr"feature isa system
of dampers,a fan and a temperature
thermistor.
Thepan istightly sealedto prevent the pan's
temperature from causing temperature
fluctuations in the rest ofthe refrigerator.
Thecontrols for this pan are located in the
top of the refrigerator or on the dispenser
with the temperature controls.
ExpressChill_"
How to Use
0
@
Emptythe pun.Placethe Chilltray inthe
pan.Placethe items on the tray and
closethe pan completely.
Selectthe 5xpressChill'_pad.On some
models,you can then selectthe chill time
(usechart to determine best setting).
Othermodels will only haveone option
(45minutes).On models with multiple
settings,tap the pad until the light
appears next to the desiredsetting.
To stop a feature before it is
finished, tap that feature's pad
until no options are selectedand
the display isoff.
During ExpressChill,thedisplay on the
controls will count down the time
in the cycle.
How to Remove end Replace the Drawer
Toremove:
0 Pullthe drawer out to the stop position.
0 Rotateall four swing locksto the unlock
position.
Liftthe front of the drawer up and out.
Toreplace:
Hake sureall four swing locksare in
the unlock position.
Placethe sides of the drawer into
the drawer supports, making sure
the swing locksfit onthe drawer slots.
Lockall four swing locks by rotating them
to the lock position.
8

About CustomCooL "Ionsome models)
CustomCoo/TM Chart
NOTE:Results may vary depending on packaging, starting temperature and other food traits.
ExpressThaw T" ExpressChill T"
0.5 Lb.(4 hours} 15 Minutes
Hamburger Patties(0.5Ib) _ ! BeverageCan(12oz)
IndividuallyWrapped 2 SmallJuice Boxes(6-8 oz each)
FiletMignon (0.5Ib) 30 Minutes
1.0 Lb.16hours} 2 to 6 BeverageCans(12ozeach)
ChickenBreasts(!.0 Ib) 2 Plastic20 oz Bottlesof Beverage
Ground Beef(!.0 Ib) 4 to 6 SmallJuice Boxes
Steak (!.0 Ib) (6-8 oz each)
2.0 Lbs.(10 hours} _ 3 FoilJuice Packets
ChickenBreasts(2.0Ibs) Wine (750 ml bottle)
Ground Beef(2.0Ibs) 45 Minutes
Steak (2.0Ibs) 2 Literof Beverage
3.0 Lbs.(12 hours} _ 1/2 Gallon ofJuice
ChickenBreasts(3.0Ibs) Gelatin-1 package
Ground Beef(3.0Ibs)
Steak (3.0Ibs)
SelectTemp _"
Citrus Setting (43°F[6°C]}
Oranges, Lemons,Limes,Pineapple,
Cantaloupe
Beans,Cucumbers,Tomatoes,
Peppers,Eggplant, Squash
ProduceSetting (35°F[2°C]1
Strawberries, Raspberries,Kiwifruit,
Pears,Cherries,Blackberries,Grapes,
Plums,Nectarines,Apples
Asparagus, Broccoli,Corn,
Mushrooms,Spinach,Cauliflower,
Kale,GreenOnion,Beets,Onions
Meat Setting (32°F[O°C]}
Raw Meat, Fishand Poultry

About the water filter, (on some models)
Water Filter Cartridge
Thewater filter cartridge is located in the back upper right corner
of the refrigerator compartment.
When to Replace the Filter on Models With a
Replacement Indicator Light
There isa replacement indicator light for the water filter cartridge
on the dispenser.This light will turn orange to tellyou that you
need to replacethe filter soon.
Thefilter cartridge should be replaced when the replacement
indicator light turns red or ifthe flow of water to the dispenseror
icemoker decreases.
When to Replace the Filter on Models Without a
Replacement Indicator Light
The filter cartridge should be replaced every six months
or earlier ifthe flow of water to the water dispenser or icemaker
decreases.
Removing the Filter Cartridge
Ifyou are replacing the cartridge,first remove the old one by
slowlyturning itto the left. Do not pull down on the cartridge.A
small amount of water may drip down.
Installing the Filter Cartridge
0 Ifyou are replacinga SmartWater cartridge with
an adapter, it must be removed before installing the
cartridge.To remove the adapter,turn it to the left about 1/4
turn.
Ifyou are replacing a Water by Culligancartridge,
leavethe adapter in place.This adapter will stay in the
refrigerator when you replacefuture cartridges.
0
0
With adaoter Without adapter
(appearance may vary)
On models ithout a replacement indicator light,
applythe month and year stickerto the new cartridge to
remind you to replacethe filter in six months.
Fillthe replacement cartridge with water from the tap to
allow for better flow from the dispenser immediately after
installation.
O
0
Lineup the arrow on the cartridge and the cartridge
holder.Placethe top of the new cartridge up insidethe
holder.Do not push it up into the holder.
Slowly turn itto the right until the filter cartridge stops.
DONOTOVERTIGHTEN.Asyou turn the cartridge, it will
automatically raise itselfinto position.Thecartridge will
move about 1/2 turn.
10
ca_rid
Ho!de<_
Runwater from the dispenser 1-1/2gallons (aboutthree
minutes)to clear the system and prevent sputtering.
Pressand hold the WATERFILTERpad (on some models)on
the dispenser for 3 seconds.
®
CWater_
Hold 3 seconds to Reset
NOTE:A newly-installed water filter cartridge may cause water
to spurt from the dispenser upon first use.
Filter Bypass Plug
Youmust usethe filter bypass plug when a replacement filter
cartridge is not available.Thedispenser and the icemuker will not
operate without the filter or filter
bypassplug.
SmartWater
J
Filter--_'_
Bypass ,
Plu
Water byCulligaq
Tousethe filter bypassplug on Water byCulligan models,you
must first remove the filter adapter from the cartridge holder by
turning itto the left.
Forthe maximum benefit ofyour filtration system. GE
recommends the useof GEbranded SmartWater filters only.
UsingGEbranded filters in GEand Hotpoint refrigerators provides
optimal performance and reliability. GEbranded SmartWater
filters are alwaysthe right choice because they are patented and
designedspecifically for GEproducts. GESmartWater filters meet
rigorous industry NSFstandards for safety and quality that are
important for products that are filtering your water. GEhas not
qualified non-GEbranded filters for usein GEand Hotpoint
refrigerators and there isno assurance that non-GEbranded
filters meet GE'sstandards for quality, performance and reliability.
Ifyou have questions visitour Website
at GEAppliances.com,or call !.800.GE.CARES(1.800.432.2737).
Replacement filters:
Toorder additional filter cartridges in the United States,
visit our Website at GEAppliances.com, or call GEParts and
Accessories, 800.626.2002.
Seefilter label for type of filter to order (MWFor MSWF)
Customersin Canada should consult the yellow pages
for the nearest ivlabeServiceCenter.

About the shelves and bins.
Not all features are on all models.
Refrigerator bin
J ' .... ,
Freezer tilt-out bin
Refrigerator Door Bins end Freezer Door Tilt-Out Bins
Bins
The larger refrigerator door binsand freezer
tilt-out door binsare adjustable.
Toremove: Lift the front of the bin straight
up,then lift up and out.
Toreplace or relocate: Engagethe back side
of the bin in the molded supports on the
door.Thenpush down on the front of the bin.
Binwill lock in place.
Thesnugger helps prevent tipping, spilling or
slidingof small items stored on the door shelf.
Placea finger on either side of the snugger
near the rear and move it back and forth
to fit your needs.
TopFreezerBins
DO notblOCk
Top freezer bin
Do not block
CAUTION:
Becareful when
placing itemsin
the top bin.Make
surethat items
do not blockor
fall into theice
chute.
CAUTION:
Partmust bein
placeasshown
for proper ice
dispensing.Food
cannot bestored
in this location.
Top freezer bin (on some models)
Press tab and pull shelf forward
to remove
Slide-Out Spillproof Shelf
Theslide-out spillproof shelf allows you to
reach items stored behind others.Thespecial
edgesare designedto help prevent spills
from dripping to lower shelves.
To remove:
Slidethe shelf out until it reaches
the stop,then pressdown on the tab
and slidethe shelf straight out.
Toreplace or relocate:
Linethe shelf up with the supports and slide
it into place.The shelf can be repositioned
when the door isat 90° or more. To reposition
the shelf,slide the shelf past the stops and
angle downward. Slideshelf down to the
desiredposition, line up with the supports
and slideinto place.
Make sure you push the shelves all the way
back in before you close the door.
QuickSpace'" Shelf
This shelfsplits in half and slides under itself
for storage of toll items on the shelf below.
This shelfcon be removed and replaced
or relocated just likeSlide-OutSpillproof
Shelves.
On some models,this shelfcannot be used
in the lowest position.
11

GEAppliances.com
Not all features are on all models.
Freezer Baskets
Toremove, push the basket all the way to the
back of the freezer.Lift up until the back pins
are disengaged. Lift the entire basket up and
pull out.
Make sureyou push the baskets all
the way back in before you close the door.
Slide-Out Freezer Shelves
Toremove, slideout to the stop position,
lift the front past the stop position and
slideout.
Make sure you push the shelves all the way
back in before you close the door.
Fixed Freezer Shelves
Thereare two types of fixed
freezer shelves.
Toremove this type ofshelf:
O Lift the shelf up at the left side.
O Bring the shelf out.
Toremove this type ofshelf:
Lift up the left side ofthe shelf and slideit
left into the center of the shelf supports.
Rotatethe right sideof the shelf up
and out of the shelf supports.
NOTEFORDISPENSER MODELS:In order to
take fulladvantage of the tilt-out ice bin, only
store items on the shelf below the ice bin that
are no taller than the lowest point on the bin.
Door Wine/Beverage Rack Ion some models)
This rack holds up to 5 cans or one bottle To replace:
ofwine. _ Reattach the rack to the sides
The rack hangs from the sides of the of the bin.
Engage the back side of the bin in
dairYToremove:bin _ the molded supports on the door.
Then push down on the front of the bin.
Empty the wine/beverage rack. The bin willlock into place.
Holding the bottom of the dairy bin,
liftthe front straight up, then liftup
and out.
_To detach the rack from the dairy bin, pull
the rack'ssidewires out of the holeson
each sideof the dairy bin.
12

About the refrigerator doors.
Refrigerator Doors
The refrigerator doors may feel different than
the onesyou are usedto. Thespecial door
opening/closing feature makessurethe
doors closeall the way and are securely
sealed.
When opening and closing the door,you will
notice a stop position.Ifthe door isopened
past this stop point, the door will remain
open to allowyou to load and unloadfood
more easily.When the door isonly partially
open,it will automatically close.
Theresistanceyou feel at the stop
position will be reduced asthe door
isloaded with food.
When the door is only partially open,
it will automatically close.
Beyond this stop the door will stay
open.
Door Alignment
If doors are uneven, adjust the refrigerator
door.
O Usinga 7/16_<wrench, turn the door
adjusting screw to the right to raise
the door,to the left to lower it. (Anylon
plug, imbedded in the threads of the pin,
prevents the pinfrom turning unless
a wrench isused.)
O After one or two turns of the wrench,
open and closethe refrigerator door
and check the alignment at the top
of the doors.
13

About the crispers and pans.
Not oil feotures ore on oil models.
GSAppliances.com
Fruit and Vegetable Crispers
Excess water that may accumulate in
the bottom ofthe drawers should be
wiped dry,
On some models, the bottom drawer has
full extensionslidesthat allow full access
to the drawer.
HI LO
o
Adjustable Humidity Crispers
Slidethe control all the way to the HI setting
to provide high humidity recommended for
most vegetables.
Slidethe control all the way to the LO
setting to provide lower humidity levels
recommended for most fruits.
Convertible Deli Pan
Theconvertible deli pan has itsown cold
air duct to allow a stream of cold air from
the freezer compartment or fresh food
compartment to flow to the pan.
The vorioble temperature control regulates
the air flow from the Climate KeeperAir
Tower.
Set the control to the coldest setting to store
fresh meats.
Setthe control to cold to convert the pan
to normal refrigerator temperature and
provide extra vegetable storage space.
Thecold air duct isturned off.Variable
settings between these extremes can
be selected.
About crisper removal.
Not oll feotures ore on oll models.
Crisper Removal
Crispers can easily be removed by pulling
the drawer straight out and liftingthe drawer
up and over the stop location.
If the door preventsyou from taking out
the drawers,first try to remove the door bins.
If this does not offer enough clearance,
the refrigerator will needto be rolledforward
until the door opens enough to slidethe
drawers out. Insome cases,when you roll
the refrigerator out, you will needto move
the refrigerator to the left or right asyou
roll it out.
14

About the automatic icemaker.
A newly installed refrigerator may take 2_2to 24 hours to begin making ice.
GEAppliances.com
Automatic Icemaker
Theicemakerwill produce seven cubes
per cycle-approximately 100-130 cubes
in a 24-hour period,depending on freezer compartment
temperature, room temperature, number of door openings
and other use conditions.
If the refrigerator isoperated beforethe water connection is
made to the icemaker,set the power switch in the OFF
position.
When the refrigerator has been connected
to the water supply,set the power switch
to the ON position.
Theicemakerwill fillwith water when it coolsto !5°F (-10°C).A
newly installedrefrigerator may take 12to 24 hoursto begin
making
icecubes.
Youwill hear a buzzing sound each time
the icemaker fills with water.
Throw away the first few batches of ice
to allow the water lineto clear.
Besure nothing interfereswith the sweep
of the feeler arm.
When the bin fills to the levelof the feeler arm, the icemaker
will stop producing ice.
It is normal for several cubes to bejoined together.
If ice isnot usedfrequently, old icecubes will become cloudy,
taste stale and shrink.
Special note about dispenser models:
Some models have a tilt-out icebin.
Thebin can be tilted out us shown in the illustrations,and it
will hold itselfup whileyou take iceout or turn the icemaker
power switch on and off. Besureto put the bin back in
place before closing the door.
To restore your ice level from an empty bucket stage, the
following steps are recommended:
O 12 hours after the first batch of icehasfallen into the bin,
dispense3 to/4 cubes.
O After an additional 6 hours, dispense
3 to 4 cubes again.
Thesesteps will restore your ice levelin
the shortest amount of time.
cemaKer
Switch =eeler Arm
(on some models)
Power
Switch cemaKer
Gree
Power L_gn_ FeelerArm
(on some models)
NOTE:
In homes with lower than average water pressure, you may
hear the icemaker cycle multiple times when making one
batch of ice.
15

About the automatic icemaker. (cant) GEAppliances.com
Models with tilt out ice bin
To access ice and reach the
icemaker power switch:
Ol_iftthe bin, then pull it
forward until the bin stops.
Accessing Ice and Reaching
the Power Switch on Dispenser
Models
There ore two types of ice storage bins
on dispenser models. One has a shelf above
the bin, the other does not.
Special note for models with tilt-out
ice bin:
Thesemodels have a tilt-out ice bin.
Thebin can betilted out as shown in
the illustrations,and it will hold itself
up while you take ice out or turn the
icemaker power switch on and off.
Besure to put the bin back in place
before closing the door.
NOTE: In order to take full advantage of the tilt-
out ice bin, only store items on the shelf below
the ice bin that are no taller than the lowest
point on the bin.
Models with a shelf
above the ice bin
To access ice, pull the bin forward.
iiii
......................... i!i k
i i i
To reach the power switch, pull the
shelf straight out. Always be sure to
replace the shel_
OLower the bin to access ice
or reach the power switch.
On some models,
to access ice or reach
the power switch:
/
_ _i _
O ull the bin forward until the
bin stops.
11-
Oower the bin to access ice
or reach the power switch.
Removing Ice Bin (dispenser models)
CAUTION:The ice binis heavy when full.
Setthe power switch to the OFFposition
before removing the bin.
When replacing the bin, be sure to press
itfirmly into place. If it does not go all the way
back, remove it and rotate the drive
mechanism 1/4 turn. Then push the bin
back again.
Dispenser Models only
16

About the ice and water dispenser. (on some models) GEAppliances.com
To Use the Dispenser
SelectCUBED,CRUSHEDor WATER.
Presstheglassgentlyagainstthetop
ofthedispensercradle.
Thespillshelfisnotself-draininq.Toreducewater
spotting,theshelfanditsgrille_houldbecleaned
regularly.
tfnowater isdispensedwhentherefrigeratoris
firstinstalled,theremaybeairinthewaterline
system.Pressthedispenserarmforat leasttwo
minutestoremovetrappedairfromthewaterline
andto fillthewatersystem.Toflushoutimpurities
inthewater line,throwawaythefirstsixglassfuls
ofwater.
CAUTION:Neverputfingersoranyotherobjects
intotheicecrusherdischargeopening.
Locking the Dispenser
PresstheLOCKorLOCKCONTROLSpadfor
3secondsto lockthedispenserandcontrolpanel.
Tounlock,pressandholdthepadagainfor
3seconds.
Dispenser Light
TheLIGHTpadturnsthenight I!ghtinthe
dispenseron andoff.Thelightalsocomeson
whenthedispensercradleispressed.Formodels
Quick Ice
Whenyouneedtospeedupiceproduction,use
theQuickIcefeature.Whilethisfeatureisturnedon,
thefreezerfanrunscontinuouslyfor/48hours,or
untilthefeatureisturnedOFEDuringthisperiod,
iceproductionwillincreaseupto/40%.Modelswith
theintegratedicefeaturesystemrequireatFIRST
USEat leasthalfan8oz.glassoficeto bedispensed
every6to 12hours.Thiswillhelptheicemakerfillthe
bucketproperlysothatdispensingisbetter.
witha bulb,i.fthelightburnsout,itshouldbe
replacedwitha 6 watt 12Vmaximumbulb.For
LEDmodelscontactFactoryService.
Door Alarm
UseDoorAlarmto soundifeitherdoorisopen
formorethan3minutes.Thealarmwillstop
oncethedoorisclosed.ForLCDmodels,a popup
?creenwillappear.Thealarmcanbesilenced
bytouchingtheLCDscreen.
TouchLEDDispenserControl:
PresstheSETFEATURESpadonceandDOOR
ALARMwillblink.PressON/OFFandthedoor
alarmwillbesetandtheiconwillturnsolid.Press
ON/OFFagainto turnthealarmoff.
Door Alarm (onTactile LEDDispenser
Control model)
FD'rq TOset the alarm,
pressthis pad until the
DO indicator light comes on.
LAlarmJ Thisalarm will sound if
either door is open for
more than ] minutes.
Thelight goesout and
the beeping stops when
you close the door.
Howto Use
TouchLEDDispenserControl:
PresstheSETFEATURESpadtwi.cepndQUICKICE
willblink.PressON/OFFtoturntheteatureon,
thenagaintoturn itoff.
Quick Ice (onTactileLEDDispenserControl
model) When you need ice in a
_U _ hurry' pressthis pad t°
speed up iceproduction.
Ick I Thiswill increaseice
production for the
following 48 hours or until
you pressthe pad again.
Precise Fill (on some models)
Thiswater dispenserisequippedwith afeature
called"precisefill."Thisfeatureallowsyouto
choosea preciseamountofwater(cupsor
ounces)thatyouwouldlikedispensed.Pints
andLitersarealsoavailablefor LCDmodels.
TouchLEDDispenserControl
O PressthePRECISEFILLCUPS/OZpad.
TheWATERpadwilllightandtheCRUSHED
andCUBEDicepadswillturnoff.Thelast
unitusedwillbedisplayed.
PressthePRECISEFILLpadagainto toggle
betweencupsandounces.
Ifyou selectedOUNCES,presstheA or V pad
to selectthenumberofouncesyouwouldlike
to havedispensedbetween2-99 ounces.
Thedefaultis8 ounces.
Ifyou selectedCUPS,pressthe A or v pad
toselecttheamountyouwouldliketo have
dispensed.Theyaredisplayedas1//4,1/3,1/2,2/]
and]//4,with thehighestamountbeing163//4
cups.Thedefaultis1cup.
Pressthecupagainstthecradleandwater
willbegindispensing,ttwillautomaticallystop
whentheamountsethasbeendispensed.
Thedisplaywillshowtheamountofwater
dispensed,beep,thenresetafter5 seconds.
NOTE:Donotleavethedispenserunattended
whenwaterisbeingdispensed.
Otfyou wouldliketo stopdispensingwater
beforethespecifiedamounthasbeen
dispensed,just removethecupfrom the
cradle.Thedisplaywillshowtheamountthat
hasbeendispensedfor 5seconds,tfthe cup
switchispressedagainwithinthattime,the
dispenserwillcontinueuptothesetamount.
tf not,thedisplaywillreturntotheset
amount.
17

About the ice and water dispenser Consome models)
Important Facts About Your Dispenser
Do not add ice from trays or bags to
the storage drawer. It may not crush or
dispense well.
Avoid overfilling glass with ice and use
of narrow glasses. Backed-up ice can
jam the chute or cause the door in the
chute to freeze shut. If ice is blocking
the chute, poke it through with a
wooden spoon.
Beverages and foods should not be
quick-chilled in the ice storage drawer.
Cans, bottles or food packages in the
storage drawer may cause the
icemaker or auger to jam.
To keep dispensed ice from missing
the glass, put the glass close to, but
not touching, the dispenser opening.
Some crushed ice may be dispensed
even though you selected CUBED.
This happens occasionally when a few
cubes accidentally get directed to
the crusher.
After crushed ice isdispensed, some
water may drip from the chute.
Sometimes a small mound of snow
will form on the door in the ice chute.
This condition is normal and usually
occurs when you have dispensed
crushed ice repeatedly. The snow
will eventually evaporate.
18
Care and cleaning of the refrigerator
Dispenser drip area.
Cleaning the Outside
The dispenser drip area, beneath the grille,
should be wiped dry.Water left in this area
may leave deposits. Remove the deposits
by adding undiluted vinegar to the well. Soak
until the deposits disappear or become loose
enough to rinse away.
The dispenser cradle. Beforecleaning,
lock the dispenser by pressing and holding
the LOCKor LOCKCONTROLSpad for
3 seconds.Cleanwith warm water and
baking soda solution-about a tablespoon
(15ml) of baking soda to a quart (Zliter)
of water. Rinsethoroughly and wipe dry.
Thedoor handles and trim. Cleanwith
a cloth dampened with soapy water.
Drywith a soft cloth.
The stainless steel panels and door handles
(on some models) can be cleaned with
a commercially available stainless steel
cleaner. Aspray-on stainless steel cleaner
works best.
Do not useappliance wax or polish
on the stainlesssteel.
Keepthe outside clean. Wipe with a
clean cloth lightly dampened with kitchen
appliance wax or mild liquid dish detergent.
Dry and polishwith a clean, soft cloth.
Do not wipe the refrigerator with a soiled
dish cloth or wet towel. Thesemay leave
a residue that can erode the paint. Do not
use scouring pads, powdered cleaners,
bleach or cleaners containing bleach
because these products can scratch
and weaken the paint finish.
Cleaning the Inside
To help prevent odors, leave an open box
of baking soda in the fresh food and freezer
compartments.
Unplug the refrigerator before cleaning.
If this is not practical, wring excessmoisture
out of sponge or cloth when cleaning around
switches,lights or controls.
Usewarm water and baking soda solution-
about a tablespoon (15ml)of bakingsoda to
a quart (1liter)of water. This both cleans and
neutralizesodors. Rinseand wipe dry.
Useof any cleaning solution other than
that which is recommended, especially
those that contain petroleum distillates,
can crack or damage the interior of
the refrigerator.
Avoid cleaning cold glass shelves
with hot water because the extreme
temperature difference may cause them
to break. Handle glass shelves carefully.
Bumping tempered glass can cause it
to shatter.
Do not wash any plastic refrigerator parts
in the dishwasher.
Thechill/thaw tray is dishwasher safe.

GEAppliances.com
Behindthe Refrigerator
Becareful when movingthe refrigerator
away from the wall. Alltypes of floor
coveringscan be damaged, particularly
cushioned coverings and those with
embossedsurfaces.
When pushing the refrigerator back, make
sureyou don't roll over the power cord or
icemaker supply line.
Pullthe refrigerator straight out and return it
to position by pushing it straight in.Moving
the refrigerator in u sidedirection may result
in damage to the floor covering or
refrigerator.
Preparing for Vacation
Forlong vacations or absences,remove
food and unplug the refrigerator. Clean
the interior with u baking soda solution of
one tablespoon (15ml)of baking sodato one
quart (1liter)of water. Leavethe doors open.
Setthe icemaker power switch to the O (off)
position and shut off the water supply to
the refrigerator.
If thetemperature can drop belowfreezing,
have a qualified servicerdrain the water
supply system to prevent serious property
damage due to flooding.
Preparing to Move
Secureall loose items such as shelvesand
drawers bytoping them securelyin place
to prevent damage.
When usingu hand truck to move
the refrigerator,do not restthe front or back
of the refrigerator against the hand truck.
This could damage the refrigerator. Handle
onlyfrom the sidesof the refrigerator.
Be sure the refrigerator stays in an upright
position during moving.
19

Replacing the light bulbs.consome models)
NOTE: Turning the refrigerator off via the controls on the touch panel does not shut off electrical power to the
refrigerator or to the light circuit.
Yourlight shieldwill looklike
oneof thefollowing:
OR
Refrigerator Compartment--Upper Light
0 Unplug the refrigerator. 0 After replacing the bulb with an
0 Thebulbs are located at the top of appliance bulb of the same or lower
0
the compartment, insidethe light shield.
On some models,a screw at the front of
the light shieldwill have to be removed.
On other models,the screw islocated
in the pocket located at the back of
the light shield.
Toremove the light shield,on some
models,press in on the tabs on the sides
of the shieldand slideforward and out.
On other models,just slidethe shield
forward and out.
wattage, replacethe light shieldand
screws (onsome models).When
replacingthe light shield,make sure
that the tabs at the back of the shield
fit into the slots at the back of the light
shield housing.
Plugthe refrigerator back in.
Refrigerator Compartment--Lower Light
This light is located above the top drawer.
Unplugthe refrigerator.
Removethe convertible meat drawer
control knob by pulling straight out.
0 Liftthe light shield up and pull it out.
After replacing the bulb with an
appliance bulb of the same or lower
wattage, replacethe shieldand
the knob.
Plug the refrigerator back in.
Freezer Compartment
Unplugthe refrigerator.
Removethe shelfjust above the light
shield.(Theshelfwill be easierto remove
if it isemptied first.) On some models,a
screw at the top of the light shieldwill
need to be removed.
Toremove the light shield, pressin
on the sides,and lift up_andout.
Dispenser (on some models)
@Replace the bulb with an appliance
bulb of the same or lower wattage,
and reinstall the light shield. When
reinstalling the light shield, make sure
the top tabs snap securely into place.
Replace the screw (on some models).
Reinstall the shelf and plug
the refrigerator back in.
Unplugthe refrigerator.
Thebulb islocated on the dispenser
under the control panel. Removethe light
bulb by turning it counterclockwise.
Replace the bulb with a bulb of
the same size and wattage.
Plug the refrigerator back in.
/i_i!i:__ii_I __ _iiiii_iii_i_iiii_
I/j Oisplay
Refrigerator Compartment (on models with LEDlighting)
Somemodels may have LEDlighting If this assembly needsto be replaced,call
display on the top and/or sidesof the GEServiceat 1.800.432.2737in the United
fresh food compartment and in the rear Statesor 1.800.561.3344inCanada.
and sideof the freezer compartment
20
Other manuals for SIDE-BY-SIDE REFRIRATOR 22
17
This manual suits for next models
11
Table of contents
Languages:
Other GE Refrigerator manuals

GE
GE Monogram ZFSB27DYSS User instructions

GE
GE Profile PCF23NGW Manual

GE
GE Profile 42 Operating instructions

GE
GE GTM18GBEES Manual

GE
GE GTR10 Operating instructions

GE
GE Profile PFSS2MJXSS Manual

GE
GE GTS18XCS Manual

GE
GE TBX16SYBAA User instructions

GE
GE Side-by-Side 36" User manual

GE
GE GBC12IAXLSS Operating instructions