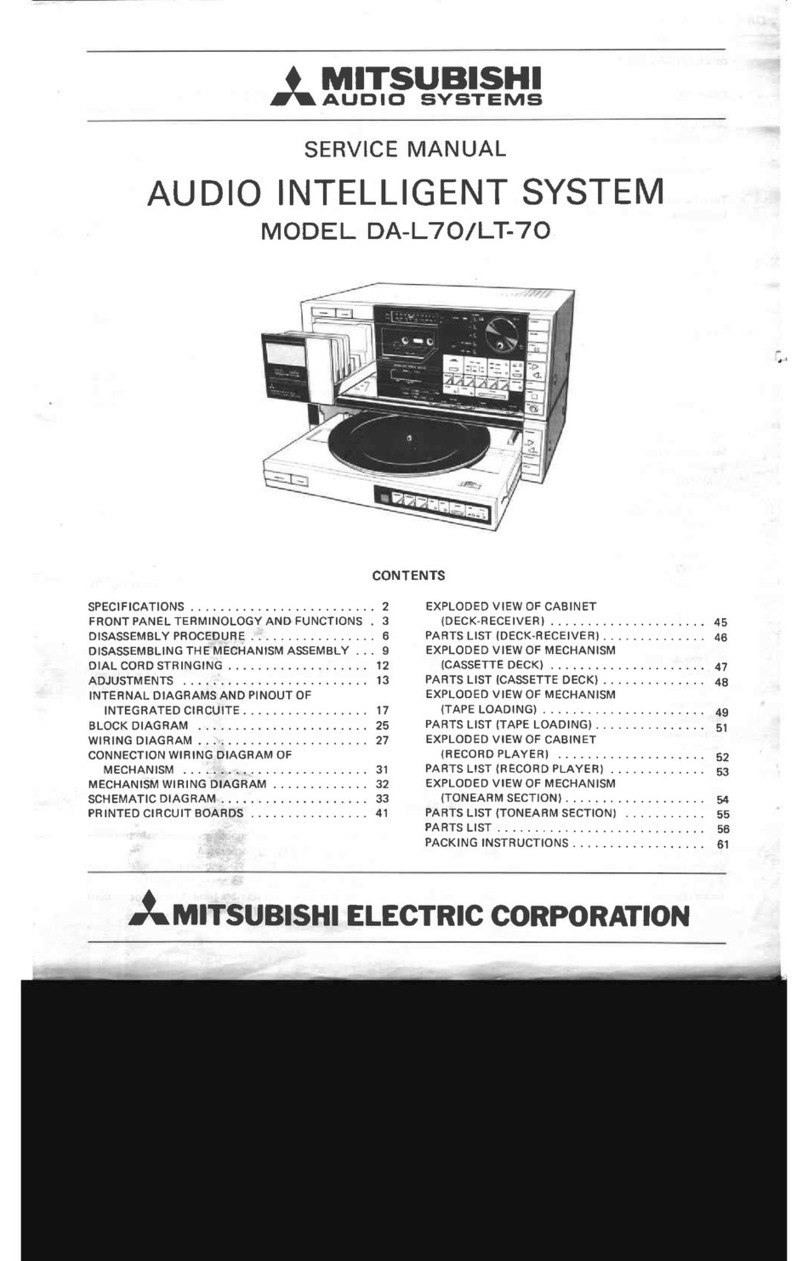
Mitsubishi DA-L70 User manual

J..MITSUBISHI
DA-L70
AM/FM Stereo Cassette Auto Changer System
LT-70
Linear Tracking Fully Automatic Turntable
INSTRUCTION BOOK
it
Congratulations on your choice of the Mitsubishi
AM/FM Stereo Cassette Auto Changer System
DA-L70, Linear Tracking Fully Automatic Turn-
table LT-70.
For best performance results, please read this
instruction book carefully before use.
it
CAUTION: TO REDUCE THE RISK OF ELECTRIC
SHOCK, DO NOT REMOVE COVER
(OR BACK).
NO USER-SERVICEABLE PARTS INSIDE.
REFER SERVICING TO QUALIFIED SERVICE
PERSONNEL.
it
The lightning flash with arrowhead
symbol, within an equilateral triangle,
is intended to alert the user of the
presence of uninsulated "dangerous
voltage" within the product's enclosure
that may be of sufficient magnitude to
constitute a risk of electric shock to
persons.
WARNING-TO PREVENT FIRE OR SHOCK
HAZARD, DO NOT EXPOSETHIS APPLIANCE
TO RAIN OR MOISTURE,
Noise Reduction System manufactured under license from Dolby
Laboratories Licensing Corporation. 'Dolby' and the double-D
symbol are trademarks of Dolby Laboratories Licensing Corpora-
tion. Specifications of this unit are subject to change without
notice for improvement. Under Licence of Staar S.A., Brussels,
Belgium.
it
The exclamation point within an equi-
lateral triangle is intended to alert the
user of the presence of important
operating and maintenance (servicing)
instructions in the literature accompa-
nying the appliance.
For future reference a spacehas been provided below for
recording the serial number of your system.
Serial No.

2
PRECAUTIONS
1.GENERAL
e Besureto usethe correct A.C. mainsvoltage.
o Do not plug in or unplug the power cord with wet hands.
o Handle the power cord with care. •
Do not remove the power plug by pulling on the
power cord. If the insulation becomesdamaged,the
conductor breaks, or poor contacts occur, request
servicefrom your authorized servicedealer.
e Do not touch the inside of this unit nor removethe case
and bottom covers.
e Disconnect the power cord at the first sign of trouble.
e To back up the microcomputer circuits, this unit ispart-
ly connected to the mains even if the POWERswitch is
in OFF position. Disconnect the power cord when you
do not intend to usefor a long period of time.
2. LOCATION
• This unit can become unstable if operated in extremely
high or low temperatures. Place it in a well ventilated
areafor correct heat dissipation.
Avoid placing in direct sunlight, near air conditioners,
poorly ventilated areasor in areasof excesshumidity or
dust. Do not block the ventilation holeson the cabinet.
e Howling sounds (Acoustic Feedback) may occur if this
unit is in direct contact with the speakers.
Be sure to leave an appropriate space between the
speakersand the side of this unit.
3.
CONNECTIONS
Ql
Be sure to turn off the power before making connec-
tions.
a Use extreme care in making the correct connections.
Reversingthe R (right) and L (left) speakerleadsor plus
(+)
and
mtnust=}.
will lead to poor sound quality.
III
Makeall connections securely.
• If alternative speakersare used, makesurethat they are
of norminal impedanceof 8 to
16
ohms.
6>
Do not supply excessiveinput to the speakers.
When using speakers with a lower power handling
capacity than the rated output power of this unit
(30W/ch), avoid excessivevolume levels.
4.
OPERATION
e Before placing the power switch in the ON or OFF posi-
tion, always setthe volume control to the minimum level.
• Do not touch the turntable platter while it isrotating.
• Do not touch the tonearm when it is moving.
5. CARE
o Do not stack record disks on the platter and do not use
a warped record disk.
•• Do not usedirty record disks.
5. MA NTENANCE
(1)CLE,6.NING OF HEADS
Deposit of dust and dirt cause poor contact between the
headsand tape,and will leadto:
e Deteriorating tone quality.
@
Reducedvolume.
• Failure to record.
• Erratic reproduction of sounds (sounds disapper mo-
mentarily).
• Failure to erasepreviously recorded sounds.
The headsshouId becleanedat least once in every 10 hours
use,to obtain bestrecording and playback performance.
Cleaning method is to cleanby utilizing a cleaning tape.
In this case,just run the tape through once.
(2) CLEANI NG OF STYLUS
If dust should accumulate on the stylus tip, sound quality
will deteriorate. Removethe dust with a soft brush. Besure
to use the brush from the inside of the stylus toward the
outside. You may damagethe stylus tip if
vou
touch it with
your fingers.
7. CLEANiNG THE CABINET
When dust, dirt, ect. are deposited on the surface, wipe
off with a soft, dry cloth. Do not usevolatile agentssuch
asalcohol, thinner, benzine,and insecticidesfor cleaning.
THIS PRODUCT IS DESIGNED AND WARRANTED FOR
CONSUMER HI-FI USE ONLY. NOT INTENDED FOR
INDUSTRIAL OR PRO-AUDIO APPLICATIONS.
BEFORE MAKING ANY CONNECTIONS
Removethe shipping screws.
*
Pleasebe careful not to losethe shipping screwsasthey
will be needed if the unit is ever transported again to
another location.
Turntable
Lift up the tonearm
basewith a long. thin
rod and fix it with screws
when transporting again.
Shipping screws •
(Black)
Bottom Panel
RearPanel CassetteReceiver

UNIT CONNECTIONS, REAR PANEL TERMINOLOGY AND FUNCTIONS.
Connect the speaker system and compact disk player as shown below.
To reduce interference, setting should be made away from the TV or etc., as possible. ~
----
Antenna Terminal
See page 4 for de-
, tails on how to con-
i
neet the antennas.
Compact
Disk
PI.ye,
Connect television stereo multiplex
tuners, video disk players, stereo
multiplex televisions and other
components
if
desired.
1~1.
I
\~-
~ IrFJ=~
.0.,:.1.1 1 1 [,lSW
' .•• ••••• - ._.~ .. La±:r .
AM loop Antenna
e
[
---~
Power Cord
After all unit connections
have been made, insert
the plug of the power
cord into
an
AC
120V
wall outlet.
- --- ---
Q
[]
Plus Polarity Lead Wire for the Speakers
(for the SS-L70 the lead wire marked with
a
red line)
[
Connect an external cassette
tape deck if desired.
Speake,
o
1
Reset
Switch
Press this switch
if
the
unit is malfunctioning
due to static electricity
etc. The unit should. re-
t~_~n to n~_rmal
operatlon~
1
Recording Volume
:J
Use this control to adjust
the recording level.
:~:
Turntable
e
3

4
PROCEDURE FOR CONNECTING ANTENNAS
1;
~
~
l~
Outdoor FM Antenna
"T -shaped" FM Antenna
FMantenna
su~iedwith
this unit.
B8
Besure'to switch the power off when makingconnections.
• Remain AM loop antenna
connected when applying
outdoor AM antenna.
Illustration only; Refer to
IMPORTANT SAFE-
GUARDS FOR AUDIO
PRODUCTS for proper
antenna connections.
Loop antenna
.......---.-----1
holder (Accessory)
Removethe
double-facetape
separator.
Antenna Terminals
®
l~,~,: l&
WARN1N~ 10
I'Iit,V Nf
flRl 041 SHOC~ HAZARO
IX) NOT fOS.(
HIS
APJ'lIANCL TO K.AI'>IO~ MOISllJU
AnENT N I ISQUEOf ClIOC NE
PASINI(Vut
®
DDuL
DDDDDuL
DDDDDDDDuL
:.:;. "c,,",
lDDDDDDDDDDDlJ
~ ~ ~',;I,
"~"'is)"~~
o
0
fItffi
~~~. - - @
0...
®
®
_•.....
----
:--'::"''7' i.: ,~'''''''
-
GND
(Ground
terminal)
AM Loop Antenna
The unit is packed with the AM loop antenna taken off from the chassis.
MQl.Intthe holder first asshownin the illustration and then connectto the
antenna terminal. To receiveAM broadcasts,select the desired station
first and then move the loop antenna in the appropriate direction and
position to achieveoptimum reception conditions.
If no satisfactory reception can be obtained while attached to the chassis.
peel off the double-face separator on the loop antenna supplied asa
standard accessoryto allow it to be usedmounted to apostor wall (etc.).
i.i0.
FRONT PANEL TERMINOLOGY
AND FUNCTIONS
TURNTABLE
1. Power Switch (POWERI
Pressthis switch once to turn on the power, and pressit
onceagainto turn off the power.
2. Open Button (OPENI
Pressingthis button will cause the turntable unit to slide
out from the main unit.
3. Turntable Platter
4. Rubber Sheet
5. Tonearm
6. Tonearm ReverseButton (REVI
Pressingthis button will movethe tonearm out towards the
outer edgeof the record.
7. Tonearm Forward Button (FWDI
Pressingthis button will movethe tonearm forward towards
the inside of the record.
8. Tonearm Up and Down Button (UP/DOWNI
Pressingthis button once will raise the tonearm from the
record surface.Pressingit onceagainwill lower the tonearm
onto the record surface.
9. Stop Button (STOPI
Pressthis button to stop record playback.
10. Sensitivity SelectSwitch (SENSITIVITYI
Seepage9.
1\I
,I
i
.1
.I

5------------------------------~
.-----------------6
11. Program Mode Button PROGRAM)
Press this button to set the unit to the Program mode.
Pressing it once again will disengagethe unit from the
Program mode.
4-----------------------.
3--------------,
12.
Tune Number Designation Button TRACK)
Pressthis button when designating the desired tune nurn-
bers.
2
I
13. Memory Button MEMORY)
Pressthis button when entering the tune number into the
memory of the unit.
~~
~,/
~
14. Program Call Button CALLI
Pressthis button to call out the programs.
I......
9
15. Program Clear Button CLEAR)
Pressthis button to clear the programs.
16. Start Button START)
Pressthis button to start Automatic Playback, Music Search
Playback, Program Playback or Manual Playback.
~--------------------------10
1112131415
I
17. Repeat Indicator REPEAT)
This indicator will light up during Repeat Playback of the
record.
18. Repeat Button REPEAT)
Press this button to carry out Repeat Playback of the
record. The Repeat indicator will also light up.
20. Speed Selector Button SPEED)
The indicator will light up Tor only 33·1/3 RPM.
Normally the unit will automatically be setto 33·1/3 RPM
for 30 cm (12") recordsand 45 RPMfor 17cm
(7")
records.
However, the rotational speed can be selectedmanually by
pressingthis button.
).. •• T$U8tSHII""' ••kTI. ••.C~•••
(.futy .•.
PIOMI\TlC
lUKN1...a11
19. Speed Indicator SPEED)
This indicator will light up at 33·1/3 RPM.
II
20
-
'----------19
I
18
I
17
I
16
~
..
,-,.,.
5

6
21 23 24 26
25
IIIIII11111I111111111I1111111I1I111111111111I111111111111111111111111111111
Oil
SIll
R:~ G4
~a
00 10:] 102 10<\ 1CI6 'n8
~"•• ,~~>
."lA'C;:;:: 'lXII
1:>OJ ',""'"
1<.01
I
UL'
~'(AW.l~
~,.tSUJISHI
AM/fM STEREO CASSETTE
AlITOCHAN<iEllS~llM UA-110
DO""
,n••~
Ii
0:::
1
(1 'XWN' ~
~l.
27 28 29
:rJ
31 32 33
III
34
--11-1----35
;;;===
36
" 37
r-~~,~'"l~"""H:T::<4~
':v
38
L~
J~'I':JL~~Jl3
-&"
39
~~~[A5~tLJQ :::
40
I
C~<
I "'~
1[" ,,~, )
'r
41
. 0 0
I "
bill
42
22
66
CASSETTE RECEIVER
21. Power Switch (POWER)
Pressthis switch to turn on the power. and once again to
turn off the power.
CAUTION:
This unit is partly connected to the mains even if the
POWER is in OFF position. Disconnect the power cord
when you do not intend to usefor a long period of time.
22. HeadphoneJack (PHONES)
23. CassetteMagazine
The CassetteMagazineis capable of accepting up to 7 cas-
sette tapes.
-
64
63 61
62
24. CassetteMagazineOpenand CloseButton
(OPEN/CLOSE)
Pressingthis button will cause the Cassette Magazine to
slide itself out from the main unit. Pressingit once again
will causethe CassetteMagazineto retract itself back into
the main unit.
25. CassetteHolder
26. Station Frequency Dial
--_._------_
..
_
..
_
.....
-
..
_-------_._---_._----------_._--
.----_
...
,,--_
...
,.
-----_.
__
._-_
..
_---
----_
....
,------_._._.,
.•.
-_
..
'
43 44 45 46 47
I '''
om••"m·
~Kocolo
l:--:.
i_,"<~"""'L
I ~
":'1"::1';;:
r=~
"'"
kU'MUTI
~~W
:::1
f..
A
iM'2
~lI'IAT
I
I ,~
pi
CLiAII
SIARf
,-{
58 56 54 50 51 48
00
59
57 55 53
52
49
27. FM Stereo Indicator (STEREO)
This indicator will light up when FM stereo broadcastsare
being received, The indicator will not light up when the
MUTE/MODE switch isset to OFF/MONO (.•
-7 .-.).
28. FM Muting/Mode Switch (MUTE/MODE)
This switch should normally be set to ON/AUTO
('-'-7
.• l. Set this switch to OFF/MONO ( .•...• .-. ) when there
is excessive noise or reception interference during FM
stereo reception. Although the broadcastwill bereceived in
monaural, the noisewill be reduced.
:1
;.1
J
it
;i
:1
1,
II
ji
J
;)
.,
'I
(\
J
: I
'"I
'I
,I
}
\1
I
'I
I
I
1

29. ReceptionBandSelectorSwitches(FM, AM)
Pressthese switches to select either FM or AM broadcasts.
30. High FrequencyBoostSwitch (HIGH BOOST)
Pushthis switch on ( •.
-+ .-.)
to boost the treble.
31. Low FrequencyBoostSwitch (LOW BOOST)
Pushthisswitch on ( •.
-+ )
to boost the bass.
32. Tuning Knob (TUNING)
Use this knob to tune in either AM or FM broadcast sta-
tions.
33. PauseIndicator (PAUSE)
This indicator lights up when the unit hasbeenput into the
PAUSE mode by pressingthe PAUSE button. Pressingthe
PAUSE button once again will disengagethe unit from the
PAUSE mode,and will causethis indicator to go out.
34. Tuner Button (TUNER)
Press this button to listen to either AM or FM radio.
35. CD/Auxiliary Input SelectButton (CD/AUX)
Pressthis button to listen to the components connected to
the CD/AUX terminals of this unit.
36. PauseButton (PAUSE)
37. TapeFastForward Button (FF)
38. TapePlaybackButton (PLAY A)
Pressthis button to listen to side A of the tape.
39. TapePlaybackButton (PLAY B)
Pressthis button to listen to side B of the tape.
40. Tape Rewind Button (REW)
41. Stop Button (STOP)
42. MicrophoneJack (MIC)
43. TapeIndicators (TAPE SELECTOR)
normal: This indicator will light up when Normal tape is
being used.
special: This indicator will light up when Chrome tape is
being used.
metal: This indicator will light up when Metal tape is
being used.
44. RecordingIndicator (RECORD)
This indicator lights up when the unit is in the RECORD-
ING mode.
45. RecordingButton (RECORD)
This button can be usedto put the unit into the RECORD-
ING mode by pressingit simultaneously with the PLAY A
button, the PLAY B button, or the START button.
46. Blank Skip/lntro ScanIndicator
(BS/IS)
47. Blank Skip/lntro ScanButton (BS/IS)
Seepage12.
48. RepeatButton (REPEAT)
Pressingthis button once will causethe unit to repeat the
playback of the tape, and the REPEAT indicator (C; ) on
the fluorescent display panel will light up. Pressingit once
againwill disengagethis function.
49. RecordingMute Button (RECMUTE)
Pressingthis button will createa five second long soundless
section on the tape and will set the unit to the recording
standby mode.
50. PeakIndicator (PEAK)
51. Memory Button (MEMORY)
52. Dolby NR Button (DOLBY NR)
53. Start Button (START)
54. Tune Number DesignationButton (TRACK)
55. Side DesignationButton (SIDE A/B)
56. ProgramClearButton (CLEAR)
57. TapeNumber DesignationButton (TAPE NO.)
58. ProgramCall Button (CALL)
59. ProgramMode Button (PROGRAM)
60. Next TAPE/PROGRAM Button (NEXT)
Pressingthis button when a cassettetape is mounted in the
cassette holder will exchangethat tape with the next tape
from the cassettemagazine.
Pressing this button during program playback will switch
the unit to the next program.
61. Microphone Mixing LevelControl Knob (MIXING)
Sliding this knob towards the right will increasethe volume
of the microphone, and sliding it towards the left will in-
creasethe sound of the sourcewhich you select.
*
Normally, setthis knob to the left asfar asit will go.
62. Volume Control Knob (VOLUME)
63. Left and Right Volume BalanceKnob (BALANCE)
64. Timer Switch (TIMER)
Use this function when making unattended recordings or
when using the cassettetape deck asa musical alarm clock.
*
Normally this switch should be setto OFF.
65. FluorescentDisplay
7

8
LISTENING TO RADIO BROADCASTS
t,
Press
the POWE R switch
(The power will g© en)
2.
Press the TUNER button ,
l,
Pressthe FM or
AM button
4.
Tune in
the
desired station
5.
Set
the MUTE/MODE
switch to
the ON/AUTO
( ..•••..--+.11. I
position.
Set
the MUTE/MODE switch
to the OFF/MONO (
.II.
-> •••••
1 position
if
exees-
sive reception noise is en-
countered when listening
to FM stereo broadcasts.
The broadcast will be reo
ceived in monaural and
the Stereo indicator will
go out.
6.
Adjust the Volume Control Knob
NOTE:Radio broadcastscannot be heard
unless the antennas are connected
(Seepage4).
*
Be sure to slide down the volume
control (VOLUME) before connect-
ingthe headphones.
*
No sound will be reproduced from
the speakers while the headphones
areconnected.
*
When listening to music with a pair
of headphones, a moderate volume
should be used in order to prevent
damage to your ears.Avoid listening
to music at high sound output levels
for long periods of time.
PROCEDURE FOR AUTOMATIC PLAYBACK (LT-70)
,t
1
,I
Since the power for the turntable is supplied from the cas-
sette receiver, first pressthe POWER switch of the cassette
receiver and then turn on the POWER switch of the turn-
table.
1.
Press the POWE A switch [the power will go on
I.
2.
i"rsss
the OPEN button
[the
turntable unit will slide
out from
the cabinet)
3.
Place a record onto the turntable platter.
il
~
•.D
<I.•.
jII
\1
,I
~I
~I
.1
I
/'
I
II
I'
Ii
4.
Push the turntable unit back into the cabinet.
Pushin the center of the front panel.
5.
Press the START button
1
Record playback will begin from the
first tune.
*The tonearm will return to its resting
position when the final tune has been
played back and the turntable platter
will stop rotating.
Ii
Press the REPEAT Button for Repeat Playback '
(The repeat indicator will light up)
• Press the STOP Button to Stop the Record Playback-----------I

Auto SUl EJ
Selector [Automatlc
Record Size
Sei .'Ctod
This function will automatically switch the record
player to
33
RPM
(33-1/3
RPIVl) for
30
cm
(12")
records and
45
RPM for
17 ern (7")
records.
Q
Change the speed manually by pressing the
SPEED button if it is incorrect. The speed will
not be selected automatically if it is set manually.
EXAMPLE: Playback of a
17
cm
(7"),33-1/3
RPM
Record.
1)
Press the SPEED button and manually set the
speed from
45
RPM (indicator is not lit up)
to
33 RPM (Indicator lights up)
2)
Press the START button
Auto Functions
If tape playback, CD/AUX input or radio broadcast
is selected during record playback, the record play-
back will automatically stop.
There is no need to press the STOP button.
PROCEDURE FOR MUSKC SEARCH
PLAYBACK
(LT-70)
The turntable will search out the beginning of the desired
tune.
1.
Press the
POWER switch
2.
Press the OPEN
button
Place a record onto
the turntable platter
Push the turntable
unit back into
the cabinet
Automatic
MlilSic
Sil1m:h
SeOl%it.il1ity
Select switch
When the Automatic Music Search Function does
not operate properly, or when the tonearm will not
lower onto the first tune of a 30 em (12") record,
then change the setting of the automatic music
search sensitivity select switch and set it to the posi-
tion that gives the correct operation.
Q
M Set the switch to this position for most
normal records.
o
H ...
Set the switch to this position when the
tonearm fails to detect the divisions between
tunes and the unit under-counts the number of
tunes, or when the tonearm fails to lower onto
the first tune of a 30 cm
(12")
record.
o
L ... Set the switch to this position when the
tonearm raise or lowers in the middle of
a
tune
or when the unit over-counts the number of
tunes.
LE
I~-· -~
1,".",--. " ....'.." ....".
c==-
C-=::::::JC]
r ..... -
----------_
..
_---------------
'Ii
0
PaBsh the TRAC { button
and
select ---I
the desired tune
m. mi:JsL
The display will change each time the
TRACK switch is pressed. This
tea-
Q-Ol~~-·······-[3]
ture can select up to the 9th tune.
2.
Press ths START button.
Record playback will start from the desig-
nated tune and will continue until the final
tune has been played, after which the tone-
arm will return to its rest position and the
turntable platter will stop rotating.
'" BV pressing the
REPEAT
button,
the
turntable
will
rapiay the entire f6cord :lisk
from
the
first
tune to
tile
final
tune
"fil lf
record disk
playback trem the
designated tune number has been completed.
€I
After the designated tune has been played back,
the track number display will change to minus
[=J .
?I

10
PROCEDURE lFOR PROGRAM PLAYBACK (LT-70)
--------------------------------------------------------
This unit is capable of random program playback for up to
9 tunes.
1.
Pressthe
POWERswitch
2.
Pressthe OPEN
button
3. Placea record onto
the turntable platter
10
Press the PROGRAM button
l·
The program mode indicator will light up
Wl
e
lJ..
oWl.n.,
display indicates that the unit is in the pro-
gram standby mode.
o
A
l'Pl
display indicates that a previous program is
still remaining. Pressthe CLEAR button.
Display
--- 4.
Pushthe turntable
unit back into
the cabinet .
~~r---
icator
Program Operation Indicator
J.
2.
Press
the
TRACK
button and select
the desired tune number.
The display will change in the following
manner each time TRACK button is
pressed.
1tnl_D_1:sl_ _~
l1LJ U l£J .
LdJ
30
Press
the
MEMORY
button
The tune number display will go out for
an instant indicating that it has been
memorized.
B_ ,_iG1
~J
LJ
·LtJ
4.
Repeat Steps :'2and ::I
• The memory can accept up to
9
tunes.
• The memory will not accept atenth tune
and the display will changeto
1tJ .
NOTE
Dirt on the cartridge stylus or dirt on the reflective
panel in the right center portion of the turntable
unit can lead to malfunctioning. Be sure to always
keep these parts clean. Do not put oil. other fluids or
foreign objects which reflect light on the black area
surrounding the reflective panel.
50
Press the Start button,
o
The program mode indicator will go out, the pro-
gram operation indicator will light up
lill' .
and
record playback will be carried out in the pro-
grammed order.
C
During program playback the display will show
the number of the tune being played back
[1f .
<1>
After the record has been played back, the tone-
arm will return to its rest position and the rota-
tion of the turntable platter will stop.
" By
pressing the
REPEAT
button the program con-
tents will
be played back
repeatedly.
•• Press the STOP button to stop
the playback.
To listen to the program playback once again. first
pressthe PROGRAM button and then pressthe START
button.
" COl1firming the prograM
contents
1.
Press the PROGRAM button to set the display
to
tp] .
Pressthe CALL button to change 1m'to
®
if the program mode indicator is lit up.
2.
Pressthe CALL button ...•
Ri
(Display the first
program) .
3.
Pressthe CALL, button ...•
8J
(Display the second
program)
4.
Continue the aboveprocedure.
5.
Pressthe CALL button ...•
tEl
(Repeat steps
2 - 5)
When the number of programsdoes not exceed
8.
the display will return to
ID
after the tune num-
ber display hasgoneout.
III
Cancelling the
entire
program
1.
Pressthe PROGRAM button
-e-
display
ID
(This
does not have to be done if the program mode
indicator isalready lit up
WJ .)
2.
Pressthe CLEAR button
->
display
IDl
III
Correcting the program (Example: Changing the
second program from
-tiJ
to
t1J. '.
1.
Pressthe PROGRAM button
->
display
tEl
(Press
the CAL L button and set the display to
ill
if the
program mode indicator is lit
up.)
2.
Pressthe CALL
button+-
0
(First program)
Pressthe CALL button
-+
'j\t{J.
(Secondprogram).
3.
Press the TRACK button until the TRACK
displayshows
0
191 .
4. Pressthe MEMORY button.
~
I
';1
l
,I
'I
~\.
JI
l
\
1\
:l..

PROCEDURE FOR MANU AlL JPllLAYBACK
(LT-70)
Use manual playback under the following circumstances.
e
When you wish to playback only a certain portion of
a
tune.
@
When the record disk size does not match up with the
Standards and therefore the automatic playback feature
does not function:
'" When the automatic playback feature will not function
due to the special shape, grooves or color of the record.
1.
Press
the
OPEN button
to
bring
tile
ti.irll-
table
unit
forward.
2. Place
ill
record disk
011
the
tllmtabfilBl pilllttGL
3.
Press the MANUAL buttons (
C>
<J
l.
Move the tonearm to the desired
position. Pressing the I> button
(REV) will move the tonearm to-
wares
the outside of the record disk,
and pressing the
<J
button (FWD)
will move the tonearm towards the
inside of the record disk.
4.
Push the turntable unit back
into
the
cabinet.
5.
Press the START
button.
6.
Press the UP/DOWN button.
The tonearm will lower itself onto
the record disk and playback will
begin.
<JFWO
NOTE
• Since the record disk speed will automatically be
switched, press the SPEED button and set the
unit to the desired record disk speed.
• Press the STOP button after manual playback has
finished since the tonearm will not automatically
return to its rest position.
PROCEDURE ]FOR OONUNUOUS PLAYBACK (DA-L70)
Up to 7 cassette tapes can automatically be played back in a row.
11.
Press the POWER
swit.:i"l.
2.
Pres ;
tile
Ofi>EN/ClOSE button.
rn~< l
cassette magazine wil extend itself forward.)
3.
l«))ad
cmreUril
tapes
intI:
the c_tte
m<l fj l(inill.
iUp
to
"I
© I$$ lt(~1 i tapas ean ill®
ioad@d into
the
cassette
maglllline.)
Note the direction of side A and
B.
Side A should be facing forward.
Note
the correct positioning
of
the cassette tape. The tape side should be facing downwards.
4. Press
the
O "Er\I/ClOSE
button. [The cassette
Mllga<£iWlil
wm
retract itself
back into the unit.)
5.
Press
the
DO LElY N R
button for tapes that have
been
recorded with Dolby
noise
reduction.
Q
The Dolby NR indicator
DO
will light up on
the florescent display tube.
'" Press
the
REPEAT button
if
you wish to
repeat the playback.
The repeat indicator (
c:; )
will light up and
the playback of tapes 1-7 will be repeated.
If the REPEAT button is pressed once
again, the repeat indicator (
c;: )
will go out
and the repeat function will be disengaged.
~~m[~I~-'1
ctJ~LiJct)LdjIA5Cjj
I"
J .
Press the STOP button to stop the playback.
l.··
I·····l~,,~ 0
O~l'::::=::_~IJ
-- 6.
Press either
PLAY A
(playback from side
A)
or
PLAY B
(playback from side 13).
9
Playback will begin from the first tape. The
auto-reverse feature will automatically
switch the tape to side
B
after side A has
finished. After the first tape has been played
back, it will be exchanged with the second
tape. Of which the first side A will be play-
ed back, and then side
B.
After the last
tape (maximum of
7
tapes) has been played
back, the tape will be stored in the cassette
magazine and the unit will stop.
@
If either PLAY A or PLAY
B
is pressed with
a tape inside the cassette holder, then play-
back will begin from the tape that is inside
the cassette holder.
IE
During playback. if you wish to listen to the next
tape. then press the NEXT button.
" Changing tape
sides
during playback
If you are listening to side A, then press PLA Y B.
If you are listening to side B, then press PLAY A.
11

rz
1==2~~~~~
.['7c;;;;-..
i ~
I~"'"
j
I
1'',\[11[00 ]
~j
L~
r
'-6Ki-'~
l[":
c> II
BS/~ ()
I
f
I
I
H
~t': ]
ISTOP~
i[~J
Ii
o A l~I(H<l~e
selector
This feature automatically sets
the unit to the type of tape be-
ing used whether it is normal
'(ape, special (chrome) tape, or
metal
tape.
(The corresponding
TAPE SELECTOR indicator will
light up.)
B
Tape fast-forward
(FFl
First press the STOP button and
then the FF button if you wish
to wind a tape quickly forward
during tape playback.
e
Tape
rewim;,
iREW)
First press the STOP button and
then the REW button if you
wish to quickly rewind a tape
during tape playback.
" QuiC ~reverse
The Quick reverse feature makes
the changing from side A to side
B instantaneous. The leader tape
portion of the cassette is not
played back.
PLAY
commands
will
not
be
accepted during
the following
operations.
o
During OPEN/C LOSE operation of the cassette magazine.
o
While cassette tapes are being exchanged. (The TAPE
NO.
indicator of the display tube will
ftash.)
.j
I
,
~
'" Bloml<:sfdr)(3SI---~---
Press the
88/18
button when
listening
'[0
a tape
that has only
partially been
recorded.
(The
indicator will light up for the
8S
function):
The tape vvill
automatically be fast-forwarded
if
an unrecorded section of
10
seconds or more is detected.
e
iot.re
S :<lirl OS}
This feature enables you to
Iisten to only the introductions
of each
tu ne,
1.
Press the BS/ I
8
button. (The
indicator will light up).
2. If you wish to carry out the
lntro Scan from side A, press
the PLA Y A button first and
then the FF button. (The
indicator will begin to flash.)
3. If you wish to carry out the
Intro Scan from side B, press
the PLAY B button first and
then the FF button. (The
indicator will begin to flash).
One after anot her. the fi rst
10
seconds of each tune will
be played back. (maximum
of 7 cassette tapes).
4. If during Intra Scan play-
back. you find a tune that
you wish to listen to, press
the BS/IS button and dis-
engage the IS mode. (The
indicator will go out.)
,he microcomputGr will pmtect. the
Ui"li1
from
the follow-
in mistakes.
<;)
When
a
cassette tape is loaded upside down.
o
When a cassette tape is protruding from the cassette
magazine.
e
When a strong force in the opposite direction is en-
countered during the OPEN/CLOSE operation of the
cassette magaz ine.
~.i
Whs5'l
tapes
that have
been recorded with Dolby
noise
reduction
are
mined
with
tapas that have
been recorded
without Dolby noise reduction, then Eiither press the Dolby
i\lR
button according to each
tape or
use the
program
play-
back
feature.
(Stle the section on
progr<lm
playback.l
Auto
function
If the radio or the turntable is started during tape
playback, then the tape playback will automatically
stoo. There is no need to press the STOP button.
f
t
..............._._..__....__. ~~-=--------__
----"'-li----
NOTE
Be sure to set the TIMER switch to OFF. If the
TIMER switch is set to REC, then the broadcast
from the radio will be recorded when the power is
turned on.

PROCEDURE FOR MUSIC SEARCH PLAYBACK (DA-L70)
13
This feature offers you an easy setting to choose the desired
tape side and tune from the 7 cassette tapes loaded into the
unit.
1. Press the POWER switch.
2. Press the OPEN/C LOSE button. (The cas-
sette magazine will extend itself out from
the unit.)
3. Load cassette tapes into the cassette maga-
zine. (UP to 7 cassette tapes can be loaded
into the cassette magazine.)
4. Press the OPEN/CLOSE button once again.
(The cassette magazine will retract itself
back into the unit.)
pl~
"-'~l;; ,j:;;:'::~'l~
n_ ::;~ [-
L-
J
[)i;ftl(~' .--.::
\Q'P<~
,,~:-="I
m~:~/;7~i:i~i'-:.::·:
:::I~
""~""". I L
t;;8iii:ilil111 J~,r~ ..o.
&; -- .
--~~?SJr
r'}_<~:~::=J__
c :~
1. PreSs the TAPE NO. button and select the desired--
tape.
The TAPE NO. display indicator will change from
: - -: one by one each time the TAPE NO.
button is pressed.
• Both sides of the tape will be played back if
only the tape number is designated.
2.
If you wish to designate the sid., then press the
SIDE A/B button and select the desired side.
The SI DE A/B indicator will change from ~ ~
I > • 41 • ~ each time the SI DE A/B button is
pressed.
• The designated side will be played back to the
end.
NOTE
Be sure to set the TIMER switch to OFF, If the
TIMER switch is set to REC, then the broadcast
from the radio will be recorded the next time the
power is tuned on.
-- 3.
If you wish to designate the tune as well, then
press the TRACK button and select the
desired tune.
The TRACK NO. indicator will change one by
one from
I -
9
each time the TRACK but-
ton is pressed.
• Beginning from the tune designated, that
side will be played back until the end.
The entire side designated can be listened
to by setting the TRACK indicator to :
~4.
Press the DOLBY NR button if the tape has
been recorded with Dolby noise reduction.
The Dolby N R indicator
III
will light up.
5.
Press the START button. •
Playback will begin from the designated tape
side and tune. After the designated tape or side
has been played back, the unit will stop with
that tape loaded in the cassette holder.
• If the unit refuses to operate when you
press the START button. and the TAPE NO.
indicator is
E .
that indicates that you
have made an input error. Carry out the
above steps 1-5 once again.
~~--.
=
ECORO
0
~~+
J:J
EAK 8S/lS
RE MUTE
0
c=::J
DOLBY' ~[ REPEATo]
NEXT
TN'[If'~OGlV.M1
TAPE SELECTOR
c=::J """"'IW~I""'"
=
=
=
Sr.-'\RT
P"'~~[AlA
o~
CAll
• Press the REPEAT button for repeat playback.
The repeat indicator ( c;: )will light up. and the music
search playback will be repeated.
• Press the STOP button to stop the tape playback.
• When you wish to use music search playback during pro-
gram playback or continuous playback,
Change the function to music search playback by carry-
ing out the above steps 1-5.
•Single tune search forward and
,
.
backward (MSS)
"
During PLAY A or PLAY B play-
L..·""
back ,~
~
• Press the F F button to listen
to the next tune. Repeat this
operation for the tunes follow-
<],
ing after. IfFW
L--
•
Press the REW button to listen-
to the same tune once again.
bTOI'
I
Display tube
-
II
H':J\(K
PItOCR ••••••• I
G::::C
C[)0
9- ?
~~M~U ~
Lf
C;; Dl
-"lUX
\.IOl8Y~R
II:(PfAl
The music search feature of this unit operates by
detecting the unrecorded blanks between tunes.
Therefore the music search feature will not operate
correctly under the following circumstances.
• Voice recordings (conversations etc.) where the
sound is not continuous.
• Tapes with an excessively narrow blank between
consecutive tunes.
• Tapes with noise interference recorded in the
blanks between consecutive tunes.
• Tapes with blanks inside tunes.
• Tapes with extremely quiet passages inside tunes.
• Tapes with extremely short tunes of less than 15
seconds.
H
Ii
II
d
I,ll
~
;;
III
i:1
i'
Ii
i-
I,
II
Ii,
l/
"
i,
.
,I
i)

14
PROCEDURE FOR PROGRAM PLAYBACK (DA-L70)
Program playback can be carried out for up to 9 combina-
tions of tape sides and tunes from among the
7
cassette
tapes loaded into the unit.
~ 1.
Press the POWER switch.
~ 2.
Press the OPEN/CLOSE button. (The cas-
sette magazine will extend itself out from
the
unit.)
3.
Load cassette tapes into the cassette maga-
zine. (Up to 7 cassette tapes can be loaded
into the cassette rnaqazine.)
I--
4. Press the OPEN/CLOSE button once again.
(The cassette magazine will retract itself
back into the unit.)
1
_._-"."",
...
", ....
,.,
..
_..
~
~-l:-I::~i~~~;::r-
.~j'~-;~'-~..
I~:J~-[
[dl.~;i~',.
'-l::~~
y .
r"'
,- ..,,·-"'=1
.'~,~',>
1-~il~~T::':I::::I~,
....__1
I~'
-f:]
I
r2l'a
OJ
ir-''''j' -
~~'"''''i;; _'__- ' ~_
~'~~:'::,Ji,:,~._J~~_~~~_OI_;-
'" Press the REPEAT button to repeat the program con-
tents.
The repeat indicator
(C;)
will light up,
At program playback mode, however, one-side repeat
playback cannot be carried out.
IO
During playback press the NEXT button to listen to the
next program.
The NEXT command will not be accepted unless the
TIMER switch is set to OFF.
•• Press the STOP button to stop the playback. Press the
PAUSE button to temporarily stop the playback.
• First press the PROGRAM button and then the START
button to carry out the program playback once again
from the beginning.
• Playback will begin from the first program.
e Press the NEXT button to listen to a following pro-
gram.
1. Press the PROGRAM button
•• PROGRAM will appear on the display.
•• The unit is in the program standby mode when the
display shows "'""''' 0
I
., A previous program is still remaining if the display
shows """"'"
pI.
Press the CLEAR button.
If the START button is pressed without first press-
ing the CLEAR button, the program playback will
be carried out with the contents of the previous
program.
2. Press the TAPE NO, button and select the desired
tape,
The TAPE NO. display indicator will change from
i - -:
one by one each time the TAPE NO.
button is pressed.
• Both sides of the tape will be played back if
only the tape number is designated.
Display tube. PilI'•• ''''''II.., 'I ••
1
1'1':;\(1(
-, G>
-I(](]0
Q.D
r:.l:';~:-~
C .:,
C;
OJ ~',~
DOl lYNII.
NII'IM
~4.
Press the TRACK button and select the desired
tune.
The TRACK indicator will change one by one
from : - :::: each time the TRAC K button is pres-
sed.
5.
Press the DOLBY NR button if the tape has been
recorded with Dolby noise reduction.
The DOLBY NR indicator
DD
wilt liqht up.
6.
Press the MEMORY button.
• This completes the data input of the first pro-
gram.
The display will show
F' :
(for 1 second) after
which the input contents will display.
E
(error) on the display shows that you have
made an input error. Re-input the correct data,
7. Repeat steps 2-6 to program the unit further.
• The unit can accept up to 9 programs.
*
The display will show
:=
from the tenth pro-
gram which will not be accepted.
~
~~~_L£j
I
I
w
0
I "'"
~J[
I "'" ~
I
I
8.
Press the START button.
3. If you wish to designate the side, then press the PROGRAM will go out from the display and PRO-
SIDE A/B button and select the desired side. GRAM OPERATION will be displayed, Playback
The SIDE A/B indicator will change from I):lj ...• will begin in the programmed order. The display
B> ...• <lJ ...•
I):lj each time the SI DE A/B button shows the program contents currently being played.
is pressed. • The fluorescent display tube will flash during
• The designated side will be played back to music search or while the tape or side is being
the end if no TRACK is designated, exchanged.
I
l
I
i
f
-i
I
1
II
t

• Checking the contents of the program one by
one.
1. Press the PROGRAM button. The display will
( P will light up for
2
•• To clear the entire program contents
1. Press the PROGRAM button. The display will
(n
'11 I' h
f
2
l'0f'U"IR
1'1
I
I'
r:
WI Ig
t
up or see-
onds and then go
out.)
2.
Press the CLEAR button. The display will
show
( c:
will light up for
2
sec-
'\
J
seconds and then go out.
2.
Press the CALL button. The display will
change from P : (for
2
seconds) to the first
PI()C.itAM
program (
11"'''''''1
= G>
,1m
=
I
f)PIR~TU" .-) , [.
3.
Press the CALL button. The display will
change from Pel (for
2
seconds) to the
see-
and program
(1IrM~~;,;;,5
<8 '-/
=').
In this
manner you can check the program contents
one by one.
• Automatically listing up the program contents.
1.
Turn the PROGRAM mode off. (PROGRAM
will go out from the
displav.)
2.
Press the CALL button.
• The display will show in order the program
contents from P: to
F'
3
for
2
seconds
each.
NOTE
Be sure to set the TIMER to OFF. If the TIMER
switch is set to REC, then the broadcast from the
radio will be recorded the next time the power is
turned on.
onds and then go
out.)
• The program contents can also be cleared by
pressing the CLEAR button in the PRO-
GRAM mode.
• Changing a program.
1.
Press the PROGRAM button. The display will
( P will light up for
2
see-
conds and then go
out.)
2.
Press the CALL button. The display will
change from P
I
(for
2
seconds) to
PROI..k.v,. -,
13>
~~.\~.t;~J..":J
'00
,
(First program.) Press
the CALL button again and again until the
program to be corrected appears.
3.
Change the previous program contents to the
new program by entering the data in the order
of TAPE NO., SIDE A/B, TRACK DOLBY
NR,and MEMORY.
PROCEDURE FOR CONTINUOUS
RECORDING (DA-L70)
1. Press the POWER switch.
2.
Press the OPEN/CLOSE button. (The cas-
sette magazine will extend itself out from
the
unit.)
3.
Load cassette tapes into the cassette maga-
zine. (Up to
7
cassette tapes can be loaded
into the cassette magaz i
ne.)
4. Press the OPEN/CLOSE button once again.
(The cassette magazine will retract itself
back into the
unit.)
_.._'..~_. ";F::~':~;:c::::::r-... ".~.~
-~-~)f~~'
1-~~,~I:Vr.::~,~
~O:~
='':~'
1.~_L~:::L~:~~r~i_~
";'"='=~..
I~B';B~r."1
I;:j
c.lI2I:::a:;J ~
r-- ....
_}~~~:~.il ·
~;:~~~_-.t~::::_;
• The recording level of this unit has been preset
to the optimum value. It will therefore always
give you the best recording.
• The recording is not affected by the high boost/
low boost controls, nor
by
the volume/balance
controls.
• When using the DA-L70 and the LT-70 in con-
junction with other stereo components, if the
recording level does not match (excessive distor-
tion or tape hiss noise in the recorded signal),
then adjust the recording level with the REC
VOLUME on the rear panel. Use the peak indi-
cator as a guide to setting the proper recording
level.
RK
VOLUME
~
mill m~"
1"1,
15
1'1:
i
Ii
,'II:
Ii:
'11:,
~~
1,1
j':
,ii;
i"
',II
~~
,
'
.;i
;1:
ili
iil
,'I
I
'.L.
.1
~I~
r
I
i:j
u
'·'1
M
t~
ili
I',
,
'
I
, I
~
'il'
,j'
~
~
iii
~
Ii
'Iii'
, I
~i
~
r.l
,
~
~
,
.
I
I
,
q

16
• For partially recorded cassette tapes, you may
have to search out the position from where to
begin the recording.
III
For cassette tapes that you do not wish to record
on, either remove them from the cassette maga-
zine or break off their erasure protection tabs.
1.
Press the DOLBY NR button if the recording is to be
made with Dolby noise reduction.
The DOLBY NR indicator
DO
will light up.
2.
Press the PAUSE button.
i
The PAUSE indicator will light up.
3.
Simultaneously press the RE---
CORD and PLAY buttons.
The first cassette tape will be
loaded from the cassette mag-
azine into the cassette holder.
The unit will go into the re-
cording standby mode and the
RECORD indicator will light up.
*
If you wish to record on a
cassette tape loaded in the
cassette holder, be sure to ope-
rate th is step prior to the
step 2, or this command will
be neglected.
B5/15
reusr
DO
NFXT
T.-WI/PR()(,RAM
T.\PL
SlLtcTOR
=
RlCOR[)
J
cc
PEAK
=1=1=
c=:J RlC MUll
4. Press the REC MUTE button to
creare a blank unrecorded space if
necessary.
The PAUSE indicator will flash and
a blank unrecorded section of about
5 seconds wi II be created.
~1[Ff.
6~-+-1~:C>
<J,
c=:J
IKlW
I
@]
5.
Play the sound source to be recorded.
6.
Press the PAUSE button once again.
The PAUSE indicator will go out and recording will
begin from the first tape, Continuous recording for up
to a maximum of 7 tapes is possible,
The QUICK REVERSE feature will switch the tape to
side B quickly when side A is finished and the leader
tape portion of the cassette is passed,
• Press the STOP button to stop the recording.
• Press the PAUSE button to temporarily stop the record-
ing.
The PAUSE indicator will light up,
Press the PAUSE button once again to restart the re-
cording.
The PAUSE indicator will go out and the recording will
start again,
• During recording, prass the REC MUTE button to create
a blank unrecorded section.
1. 1) Press lightly.
The PAUSE indicator will flash and a blank un-
recorded section of about 5 seconds will be cre-
ated after which the indicator will stop flashing
and the unit will go into the recording standby
mode.
2) Continuously press for more than 5 seconds.
The PAUSE indicator will flash and a blank un-
recorded section will be created for as long as
you keep the REC MUTE depressed, The indi-
cator will stop flashing and the unit will go into
the recording standby mode when you release the
REC MUTE button.
2. Press the PAUSE button.
This will begin the next recording .
• This feature is convenient for cutting out com-
mercials or for creating blank unrecorded sec-
tions between tunes,
I
• Erasing the recorded contents from a tape.
• Making a new recording on a prerecorded tape
wi II automatically erase the previous record-
ing.
Proceed as follows to erase the previous re-
cording without making a new one.
1) Press the CD/AUX button. (Turn off the
power switch of the component connected
to the CD/AUX jack.
2) Simultaneously press the RECORD and PLAY
button.
Be sure not to insert the plug of a microphone
into the MIC jack,
Recording and playback with Dolby noise reduction.
• Dolby noise reduction lowers tape hiss noise by
boosting high frequency signals during recording
and then lowering the high frequency signals by
exactly the same amount to restore the high fre-
quency signals to their original levels.
• "Dolby" and the DOUBLE-D symbol are trade-
marks of the Dolby laboratories licensing corpo-
ration.
(Manufactured under license from Dolby licens-
ing Corporation.)
NOTE
The recordings that you make can be used for your
own personal enjoyment. All other uses unless ac-
companied by the permission of the copy right
holder, constitute infringements on current patent
laws.
NOTE
Be sure to set the TIMER to OFF, If the TIMER
switch is set to REC, then the broadcast from the
radio will be recorded the next time the power is
turned on.

PROCEDURE ]FOR SINGLE TAPE RECORDKNG
Use the following procedure to record on only a single tape.
1. Press the POWER switch.
2.
Press the OPEN/CLOSE button. (The cas-
sette magazine will extend itself out from
the
unit.)
3.
Load cassette tape into the cassette maga-
zine. (Place it into the first tape position.)
4.
Press the OPEN/CLOSE button once again.
(The cassette magazine will retract itself
back into the
unit.)
c=:J1
. "" ""'-1I
o
3. Pr0SS me
sIDe
A/a bl tton and designate siti1er
unit directional Of bi.,jJil'flctional
riiCordi~g.
The display will show ~ ,
B>
or
< l .
Desig-
nating ~ ,results in bi·directional recording
with quick reverse function.
NOTE
Note that using the PAUSE button during single tape
recording will disengage the single tape recording
mode and activate the continuous recording mode.
Press the STOP button to temporarily stop the reo
cording. Repeat the
above
steps 2·5 to restart the
recording.
II" Press ti10 DOLBY NR button if the recording
is
to
be made with Dolby noise reduction.
The DOLBY NR indicator
DO
will light up.
2.
Press the TAPE MO. button and desig-
I
nate the first ~ape.
The display will show : .
e
If
you wish to record on a cassette
tape other than the first tape, des
J
I
P1AYc>
"
IT"rE/~~;R"""'1
c::::t
<l.
~t=J
OlE]
<TO'O
I
l
4.
Simultaneousl
y
P
RECORD and START
buttons.
The RECORD indicator
will light up and the re-
cording will begin,
5.
Play the
sound
source to be recorded.
---------_._-----------
lP'ROClEDlURJE FOR
PROGRAM RECORDING
1. ?rass the PROGRAM button
The unit is in the program standby mode when the dis-
play shows
C~·"·'
G
J .
A previous program is still remaining if the display
shows
I~.."" pI·
Press the CLEAR button.
2.
PVG5S the TAPE
NO. burton and select
the
diesired
tape.
The TAPE NO. display indicator will change from
I
fj
one by one each time the TAPE NO, button is
pressed,
•• Both sides of the tape will be recorded if only the
tape number is designated.
3.
8f
you
wish to
ciesigl13te
she
side,
then press the SIDE
A/B button and
select the desiredside.
The SIDE
A/B
indicator will change from ~
-+
B>
<1'1
-7 ~
each time the SI
DE
A/B button is pressed.
4.
Press the DOLBY NR button
if
the recording is to be
mada with Do by noise reduesicn.
The DOLBY NR indicator
[JiJ
will light up.
5.
i"rass the MEMORV button,
6.
Repeat steps
2·5
to program further.
The memory can accept up to
9
programs,
7.
Play the
sound source to
be
recorded.
8.
Simultaneously press the RECORD and START
buttons.
The RECOR
D
indicator will light up and the recording
will begin.
9.
Press
the PAUSE button to
'1GmpO~ari y
stop the pro-
gram recording.
The PAUSE indicator will light up, Press the PAUSE
button once again to restart the program recording.
NOTE ~
Be sure to set the TIMER switch to OFF, __ ~
11
-,I
JI
i,1
-,
,I
.1
II
i,1
i
iil
I
I:
:; I
I,
~i
i
"I
II
-,
Ii
,
Iii
'i
Ii:
II:
,II
ill.

18
PROCIEDURE FOR SYNCHRONiZED
RECORDING
Synchronized recording can be made between the turntable
and cassette receiver. It is easy to create your own original
tapes.
'[, film HaG t@pe, IOC1It8 the
position from
where recordinq
is to
~e irt
iiJrid
PI"IlSS
the STOP button.
2.
Following steps
1-5
for
PROGRAM
RECOlRDaNG.
memorize
the
tape number and desired
side
onto
the
first prograM
Ii=': l.
3.
SimOJitaneOlllsiy press the
RECORD
and
START
but-
tons, and ~hen press the PAUSE button to set the unit
to the recording standby mode.
4. Playa record, followinq the procedure for listening to
records (P.S -
P.ll .
The PAUSE function will automatically be disengaged
and synchronized recording will begin.
G>
Press the PAUSE button to temporarily stop the
synchronized recording. Press the PAUSE button
once again to restart the synchronized recording.
Synchronized recording
•• Synchronized recording begins automatically
when the cartridge stylus lowers itself onto the
record disk surface. When the cartridge stylus
raises itself from the record surface, a blank
unrecorded section of about 5 seconds will be
created and the unit will go into the recording
standby mode.
'" You can create your own original tapes by using
this function in combination with the PRO-
GRAM PLAYBACK of the turntable (P.10).
PROCEDURlE FOR USING AN
AVDlIO TlIMlER
By connecting an audio timer to this unit, you can auto-
matically record radio broadcasts or playback tapes at any
time desired.
f'3
Connection of the timer
PROCEDURE FOR USING TAPES AS A
MUSICAL ALARM
1.
Turn on the audio timer and set it to the present time.
(Consult the manual of the audio tlrner.)
2.
Play the tape and
adjust the
playback
volume.
ISee 1".11 ·1".15)
3.
Film
the tape
and
bring it
to
the desired location.
4.
Sat the audio timer
to
the desired time.
The power of this unit will go off.
5.
Set the TIMER switch of this unit to PLAY.
~ Set the TIMER switch to PLAY DOLBY NR IN
for tapes that have been recorded with Dolby noise
reduction.
•• Set the TIMER switch to PLAY DOLBY NR OUT
for tapes that have been recorded without Dolby
noise reduction.
B
IIIPLAY DOLBYNR
out
111
TMER _OFF
r
ill REC DOLBY NR
in out
I
I ••• I
~
lJiIiII
li:J .•.
-=:-
During timer playback if the TAPE NO. indicator
does not appear on the fluorescent display tube,
then music search playback and program playback
cannot be carried out. To use these fuetions, press
the OPEN/CLOSE button to bring out the cassette
magazine from the unit and then operate the unit
once again.
_--L... __ ~ . .~ __~~~ .•..;I
L__
J
E~'~'
iij,
DA-L70
AC wall outlet
~
~
(J
6:
~.~7.;."·..-;.':;·,~;-
Cl." .·0·53..···'
U l_IL~·
UU ..
t1. ..'
,......
--
Audio timer
i i
PROCEDURE FOR USING RADiO BROAD-
CASTS AS A MUSiCAL ALARM
1.
Turn on the audio timer and set
it
to the present time.
(Consult the manual of the audio tirner.)
2.
Listen to the radio broadcast and adjust the volume
control. (See P.R)
3.
Sat the audio
timer
to the desired time.
The power of this unit will go off.
4.
Set the TIMER switch of this unit to OFF.

PROCEDURE FOR UNATTENDED
RECORDING
1.
Turn on the audio timer and set it to the present time.
2.
Prepare the unit for recording.
(SeeP.15 - P.17)
3.
Tune in the desired station,
(SeeP.8)
4.
Sot the audio timer to the desired time.
The power of this unit will go off.
5,
Set the
TIMER
switch of this
limit
to
REC.
•• Set the TIMER switch to REC DOLBY NR IN if the
recording is to be made with Dolby noise reduction.
., Set the TIMER switch to REC DOLBY NR OUT if
the recording is to be made without Dolby noise
reduction.
NOTE
• K.eep the playback volume low enough not to
disturb your neighbors.
• For cassette tapes that you do not wish to record
on, either remove them from the cassette maga-
zine or break off their erasure prevention tabs.
PROCEDURE FOR MiCROPHONE MIXING
You can use microphone mixing together with tapes and
records for sing-along performances. You can create your
own original tapes by recording the results. For sing-along
performances you can use the program playback function
to quickly find the beginning of each tune.
1.
iC@nsultil'l llthe sections or. listening to tapes or
listening to records,
playback the
desired tune on
the record or
tape.
2.
Set the MaC MIXING control as
filr left as
it will
uo (SOURCE)
3.
Insert the
plug of the
I
microphone
into the
5.
Adjust the volume MICjack.
with the
VOLUME
control.
1
BAlANU
VOLUMl MIC:MIXI~C
"'
.•
II
UIT I L I
I
I I I ~ICIIT
"
,
,
,
(, r
8 <I III
S()LJ~U I I I I I I I ,W\
DIDm IllIillllID
JlIJ
JIll[
~-"
-
4.
While singing or speaking into the microphone,
gradually
move
the
MiC MiXING
control towards
the right and adjust the mixing volume to the proper
level.
<l >
Note that raising the microphone volume to high,
or bringing the microphone to close to the
speakerscan result in howling.
e If the microphone is equipped with a ON/OFF
switch, be sure to set the switch to ON.
19
MICROPHONE RECORDING/
RECORDING MICROPHONE MIXING
I>l
Microphone Recording
1.
Prepare
the
unit for recording.
(Consult the section on tape recording.)
20
Turn down the VOLUME control and insert the plug of
the
microphone into the MIC jack.
3.
Set
the
MIC MiXING
control
as far
right
as
it will go
MICI.
4.
Pressthe PAUSE button,
Sing or speak into the microphone.
5.
Adjust the volume with the VOLUME control.
'" This will haveno effect on signalsto be recorded.
iIII
Recording Microphone Mixing
1.
Carry out steps
1
and
:2
from the above section on
microphone recording.
2.
Pi<llY
the second source to
be
mixed (radio or record).
•• Microphone mixing with a tape will require the use
of an additional tape deck.
3.
MOlle the
Mle MIXING
control left and right until the
desired mixing lellel is achieved.
4.
Adjust the volume with the VOLUME control.
e This will have no effect on signals to be recorded.
5.
Press the PAUSE button.
Sing or speak into the microphone along with the music
source.

20
TAIP'lE
DUBBING/ INCREASING THE
QUAUTY OF YOUR SYSTEM
IE
Y~lpe [)ubbnlll dj
You can dub a pre-recorded tape onto another tape by con-
necting a portable radio cassette player or tape deck to the
CO/AU)( and REC OUT terminals on the rear panel of this
unit.
o
See the section on unit connections.
III
Rscofdirig
tmm
ail
e::ternal radio
cassette
)layer or
tape
deek onto this unit.
1.
Press the CD/AUX button
of
this unit.
2.
Operate the external radio cassette player or tape
deck.
3.
Start recording on this unit. (See the section on tape
recording.)
'" Recording from this unit onto an external radio
cassette
player or tape deck.
1. Operate this unit. (See the section on listening to
tapes.)
2.
Start recording on the external radio cassette player
or tape deck.
e
You can easily edit many tapes onto a single original
tape by using the program playback feature.
l'lJ
ill"lcrea~ii'\lQ
ti"le
Quality
of
YO~f System
You can easily increase the quality of your system by
con-
necting a compact disc player or the audio outputs from a
video unit or a television set to the CD/AUX terminal on
the rear panel of this unit.
S
See the section on unit connections.
1.
Press the CO/ AUX
button.
The display will show
fBx
2.
Operate the unit connected.
(Consult
the manual of each
unit.)
3.
Adjust the
playback volume,
*
*
1
Other manuals for DA-L70
1
This manual suits for next models
1
Other Mitsubishi Stereo Receiver manuals