Blade (x3)
Screw to fix
body together
Connect power cord
and fasten until clicks
Motor 1
Front guard (x3) Rear guard (x3)
Motor 1 Motor 2 Motor 3 Base
Motor 2
Motor 3
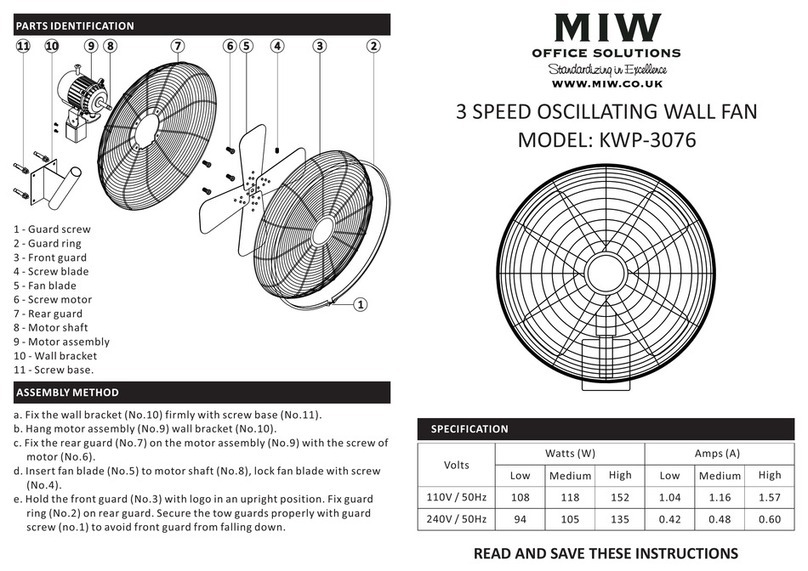
Parts Identification:
Assembly Method:
CAUTION:
• Please read and follow these instructions before operating the fan.
• Ensure all screws are tightened before operating.
• Once assembled, do not alter in anyway.
WARNING:
• To reduce risk of fire or electrical shock DO NOT expose to water.
• To reduce risk of fire or electrical shock DO NOT use this fan with any solid state speed control
device.
• Unplug from electrical supply source before cleaning.
• Do not bend the blades.
• The motor bearings are permanently sealed and do not require additional lubrication.
SAFETY POLICY DURING OPERATION:
• Don't insert a finger or any objects into fan guard when in operation.
• Ensure that the fan is switched off from supply main before cleaning.
OPERATING WRITTEN INSTRUCTIONS
Step 1
• Attach “Motor 3” to “Base” and fix together with the screws provides.
Step 2
• Once complete put “Rear Guard” in place and attach to motor with the screws.
• Secondly align “Blade” with “Motor” and tighten until secure.
• Attach “Front Guard” with “Rear Guard” and tighten with mechanism.
*REPEAT THIS ROUTINE TO ATTACH ALL FANS TO MOTORS*
Step 3
• Connect “Motor 2” lower power cord to “Motor 3” fastening until clicks.
• Finally place “Motor 1” on top of “Motor 2” and connect the power cord, fastening until clicks.
TO ADJUST AIRFLOW UPWARD OR DOWNWARD:
• Tilt fan head to the desired angle, upwards, downwards or left to right.
• If positioning the fan head is stiff, loosen the knob placed at the back of the motor pole, once
complete tighten knob to secure position.
SPEED CONTROL:
• Rotate THE SWITCH to 0, 1, 2 and 3 designates OFF, LOW, MEDIUM, and HIGH.


