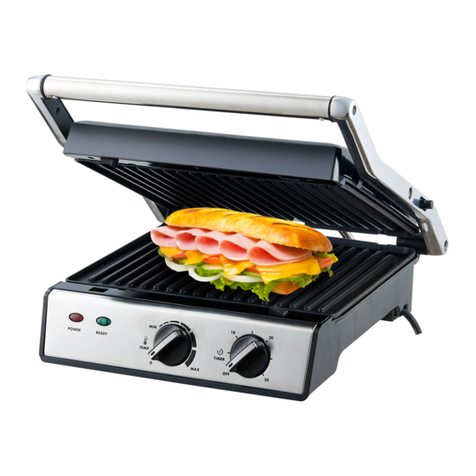
MOA CG24B User manual

Contact Grill CG24B
Instruction Manual
English / Nederlands / Deutsch / Français
www.moacolors.com

Contact Grill - English manual 2
EN
BEFORE USE
Before use, please read this manual carefully.
Only connect the appliance to an earthed wall socket.
This appliance is for household use only. When using electrical
appliances, basic safety precautions should always be followed to
avoid res, electric shocks, burns, or other injuries and damage. Read
these operating and safety instructions carefully.
IMPORTANT SAFEGUARDS (1/2)
1. Do not touch hot surfaces. Use handle or knobs.
2. To protect against risk of electric shock, do not immerse the cord,
plug or cooking unit in water or any other liquid.
3. Close supervision is necessary when any appliance is used by or
near children.
4. Unplug from outlet when not in use and before cleaning. Allow
to cool before putting on or taking off parts, and before cleaning
appliance.
5. Do not operate any appliance with a damaged has malfunctioned
or has been damaged in any manner. In order to avoid the risk of an
electric shock, never try to repair the Contact Grill yourself. Take it to
an authorized service station for examination and repair. An incorrect
reassembly could present a risk of electric shock when the Contact Grill
is used.
6. The use of accessory attachments not recommended by the
manufacturer may result in re, electrical shock, or risk of injury to
persons.
7. Do not use outdoors or for commercial purposes.
8. Do not let power cord hang over the edge of the table or counter, or
touch hot surfaces.
9. Do not place on or near a hot gas or electric burner or heated oven.
10. Unplug the unit when nished using.
11. Do not use appliance for other than intended use.

Contact Grill - English manual 3
EN
IMPORTANT SAFEGUARDS (2/2)
12. Do not intend to operate by means of an external timer or separate
remote-control system.
13. Extreme caution must be exercised when moving an appliance
containing hot oil or other hot liquids.
WARNING: TO REDUCE THE RISK OF FIRE OR ELECTRIC SHOCK,
ONLY AUTHORIZED PERSONNEL SHOULD DO REPAIRS.
To reduce the risk of electric shock this appliance has a grounded plug.
If the plug does not t fully into the electrical outlet contact a qualied
electrician. Do not modify the plug in any way or use an adaptor.
PARTS IDENTIFICATION
1. Handle
2. Upper Housing
3. Lock
4. 180°Angle button
5. Heat Knob
6. Timer
7. Ready Light
8. Power Light
9. Grill Non-stick Plate
10. Bottom Housing
1
2
34
5678910

Contact Grill - English manual 4
EN
BEFORE FIRST USE
Read all instructions carefully and keep them for future reference.
1. Remove all packaging
2. Clean the Cooking Plates by wiping a sponge or cloth dampened in
warm water.
DO NOT IMMERSE THE UNIT AND DO NOT RUN WATER DIRECTLY
ON THE COOKING SURFACES.
3. Dry with a cloth or paper towel.
4. For best results, lightly coat the cooking plates with a little cooking
oil or cooking spray.
Notice: When your Contact Grill is heated for the rst time, it may emit
slight smoke or odor. This is normal with many heating appliances. This
does not affect the safety of your appliance.
HOW TO USE
Before using the appliance for the rst time, peel off any promotional
materials and packaging materials, and check that the cooking plates
are clean and free of dust. If necessary, wipe over with a damp cloth.
For best results, pour a teaspoon of vegetable oil on to the non-stick
plates. Spread over with an absorbent kitchen towel and wipe off any
excess oil.
PREPARING YOUR GRILL TOASTER
1. Select the plates you want to use, and to ensure that it is installed.
2. Close the Contact Grill and plug it into the wall outlet, Red power
light will be ON, Open the Timer, and set the temperature knob to
MIN, Green working light will comes on, indicating that the Grill
Toaster has begun preheating. As this time, you can be the right
Thermostat Knob to set the temperature control to your desired setting:
“MIN” for light colored food and “MAX” for darker food. At rst, try a
setting in the middle . You may later adjust it lower or higher according
to your preference. Different foods will also cook up differently.
3. It will preheating approximately 3~5 minutes to reach baking
temperature, the green ready light will goes off, the Contact Grill is
ready for use.

Contact Grill - English manual 5
EN
TO USE AS A CONTACT GRILL
1. Set the Grill Toaster Temperature Control to your desired setting. At
rst, try a setting in the max.
You may later adjust it lower or higher according to your preference.
2. Prepare the burgers, boneless pieces of meat and thin cuts of meat
or other foods as directed and place it onto the bottom cooking plate.
3. Close the top cooking plate which has a oating hinge that is
designed to evenly press down on the food. The top plate must be fully
lowered to achieve Grill marks on the selected foods.
4. When the foods is cooked use the handle to open the lid. Remove
the food with the help of a plastic spatula. Never use metal tongs or a
knife as these can cause damage to the non-stick coating of the cook
plates.
5. Use the Grill Toaster as a contact grill to cook burgers, boneless
pieces of meat and thin cuts of meat and vegetables.
6. Use the Grill-Toaster as a contact grill , when you want to cook
something in a short amount of time or when you are looking for a
healthy method of grilling. When cooked on the contact grill, food
will cook quickly because you are grilling both sides of the food at the
same time. The ribs on the grill plates combined with the grease spout
at the corner of the plate allow the grease to drip from the meat and
drain off the plates.

Contact Grill - English manual 6
EN
TO USE AS PRESS GRILL
1. Set the Grill Toaster Temperature Control to your desired setting. At
rst, try a setting in the mid.
You may later adjust it lower or higher according to your preference.
2. Prepare the sandwiches as directed and place it onto the bottom
cooking plate. Always place sandwiches towards the rear of the bottom
cooking plate.
3. Close the top cooking plate which has a oating hinge that is
designed to evenly press down on the sandwich. The top plate must be
fully lowered to cook sandwiches.
4. Cook for about 3 to 6 minutes or until golden brown, adjusting the
time to suit your own individual taste.
5. When the sandwich is cooked use the handle to open the lid.
Remove the sandwich with the help of a plastic spatula. Never use
metal tongs or a knife as these can cause damage to the non-stick
coating of the cook plates.
6. Use the Grill Toaster as a Press grill to grill sandwiches, breads and
quesadillas.
7. The Grill Toaster was designed with a unique handle and hinge that
allows the cover to adjust to the thickness of the food. You can easily
grill anything from a thinly-sliced potato to a thick sirloin steak with
even results.
8. When cooking more than one food item in the contact grill, it is
important that the thickness of food items is consistent so the cover will
close evenly on the food.

Contact Grill - English manual 7
EN
TO USE AS OPEN GRILL
1. Place Grill Toaster on a clean at surface where you intend to cook.
The Grill Toaster can be positioned in at position.
2. Upper plate/cover is level with lower plate/base. The upper and
lower plates line up to create one large cooking surface. The Grill
Toaster to this position, locate the hinge release lever on the right arm.
3. With you left hand on the handle, use your right hand to slide the
lever toward you. Push the handle back until the cover rests at on the
counter. The unit will stay in this position until you lift the handle and
cover to return it to the closed position.
4. Use the Grill Toaster as an open grill to cook burgers, steak, poultry
(we do not recommend cooking bone-in chicken, since it does not cook
evenly on an open grill), sh and vegetables.
5. Cooking on the open grill is the most versatile method of using the
Grill Toaster. In the open position, you have double the surface area for
grill.
6. You have the option of cooking different types of foods on separates
without combining their avors, or cooking large amounts of the same
type of food. The open position also accommodates different cuts of
meat with varying thicknesses, allowing you to cook each piece to you
liking.

Contact Grill - English manual 8
EN
TO REMOVE COOKING PLATES
Always unplug the Grill Toaster and allow it to cool before removing
cooking plates.
1. Open the Grill Toaster or adjust Grill Toaster to at position.
2. The plates are magnetic so pull them slightly to pop them up. Grasp
the plate with two hands, slide it out from under the metal brackets, and
lift it out of the base. Repeat this step with the other plate
CLEANING
Always unplug the Grill Toaster and allow it to cool before cleaning.
The unit is easier to clean when slightly warm. There is no need to
disassemble Grill Toaster for cleaning. Never immerse the Grill Toaster
in water or place in dishwasher.
The cooking plates can be cleaned in water or dishwasher.
Wipe cooking plates with a soft to remove food residue. For baked on
food residue squeeze some warm water mixed with detergent over the
food residue then clean with a non abrasive plastic scouring pad or
place wet kitchen paper over the grill to moisten the food residue.
Do not use anything abrasive that can scratch or damage the non-stick
coating.
Do not use metal utensils to remove your foods, they can damage the
non-stick surface.
Wipe the outside of the grill toaster with a damp cloth only. Do not
clean the outside with any abrasive scouring pad or steel wool, as this
will damage the nish. Do not immerse in water or any other liquid.
Do not place in the dishwasher.
Remove and empty the drip tray after each use and wash the tray in
warm, soapy water. Avoid the use of scouring pads or harsh detergents
as they may damage the surface.
Rinse and dry thoroughly with a clean, soft cloth and replace.

Contact Grill - English manual 9
EN
DISPOSAL
Do not dispose of the device in normal domestic waste.
Dispose of the device over a registered waste disposal rm or through
your communal waste disposal facility.
Observe the currently valid regulations. In case of doubt, consult your
waste disposal facility.
WARRANTY
Dear Valued Customer,
Thank you very much for purchasing a MOA product.
We wish you to inform you that this product is covered by a warranty
which complies with all legal provisions concerning existing warranty
and consumer rights in the country where the product was purchased.
Should you nd any defect or malfunction of your MOA product,
please contact the appropriate Customer Care Center.
Sincerely yours,
The MOA Team

Contact Grill - Nederlandse handleiding 10
NL
VOOR HET GEBRUIK
Lees deze handleiding voor gebruik met aandacht.
Sluit het apparaat alleen aan op een geaard stopcontact.
Dit apparaat is alleen voor huishoudelijk gebruik. Bij gebruik van
elektrische apparaten, moeten algemene veiligheidsmaatregelen altijd
opgevolgd worden om brand, elektrische schokken, brandwonden en
andere verwondingen en vormen van schade te voorkomen. Lees deze
gebruiksaanwijzing en veiligheidsmaatregelen zorgvuldig.
BELANGRIJKE
VEILIGHEIDSMAATREGELEN (1/2)
1. Raak geen hete oppervlakken aan. Gebruik handvat of knoppen.
2. Dompel het snoer, de stekker of het kookelement niet onder in
water of een andere vloeistof om risico’s op elektrische schokken te
voorkomen.
3. Scherp toezicht is noodzakelijk wanneer een apparaat wordt
gebruikt door of in de buurt van kinderen.
4. Trek de stekker uit het stopcontact wanneer u hem niet gebruikt
en voordat u hem schoonmaakt. Laat afkoelen voordat u onderdelen
aanbrengt of verwijdert en voordat u het apparaat schoonmaakt.
5. Bedien geen enkel apparaat waarvan een beschadigde defect is of
op enigerlei wijze is beschadigd. Probeer de Contact Grill nooit zelf te
repareren om het risico van een elektrische schok te vermijden. Breng
het naar een erkend servicestation voor onderzoek en reparatie. Een
onjuiste hermontage kan een risico op elektrische schokken met zich
meebrengen wanneer de Contactgrill wordt gebruikt.
6. Het gebruik van accessoires die niet door de fabrikant worden
aanbevolen, kan leiden tot brand, elektrische schokken of letselgevaar
voor personen.
7. Gebruik het niet buitenshuis of voor commerciële doeleinden.
8. Zorg dat het netsnoer niet over de rand van de tafel of het aanrecht
hangt, of in aanraking komt met hete oppervlakken.
9. Niet op of in de buurt van een hete gas- of elektrische brander of
verwarmde oven plaatsen.
10. Koppel het apparaat los als u klaar bent.

Contact Grill - Nederlandse handleiding 11
NL
BELANGRIJKE
VEILIGHEIDSMAATREGELEN (2/2)
11. Gebruik het apparaat niet voor ander dan bedoeld gebruik.
12. Bedien niet met een externe timer of een afzonderlijk
afstandsbedieningssysteem.
13. Wees uiterst voorzichtig wanneer u een apparaat verplaatst dat
hete olie of andere hete vloeistoffen bevat.
WAARSCHUWING: OM HET RISICO OP BRAND OF ELEKTRISCHE
SCHOK TE VERMINDEREN, MOET ALLEEN BEVOEGD PERSONEEL
REPARATIES DOEN.
Om het risico van een elektrische schok te verminderen, heeft dit
apparaat een geaarde stekker.
Als de stekker niet volledig in het stopcontact past, neemt u contact op
met een gekwaliceerde elektricien. Verander de plug op geen enkele
manier of gebruik geen adapter.
ONDERDELEN IDENTIFICATIE
1. Handgreep
2. Behuizing bovenkant
3. Slot
4. 180° knop
5. Warmte knop
1
2
34
5678910
6. Timer knop
7. Klaar voor gebruik lampje
8. Aan/uit lampje
9. Grillplaat met antiaanbaklaag
10. Behuizing onderkant

Contact Grill - Nederlandse handleiding 12
NL
VOOR HET EERSTE GEBRUIK
Lees alle instructies zorgvuldig door en bewaar ze voor toekomstig
gebruik.
1. Verwijder alle verpakkingen.
2. Reinig de kookplaten door een spons of doek af te vegen die is
bevochtigd met warm water.
DOMPEL HET APPARAAT NIET ONDER IN WATER EN STEL HET
WATER NIET RECHTSTREEKS UIT OP DE KOOKOPPERVLAKKEN.
3. Droog af met een doek of keukenrol.
4. Smeer de kookplaten voor de beste resultaten licht in met een beetje
bakolie of kookspray.
Opmerking: wanneer uw contactgrill voor de eerste keer wordt
verwarmd, kan deze een lichte rook of geur verspreiden. Dit is normaal
bij veel verwarmingstoestellen. Dit heeft geen invloed op de veiligheid
van uw apparaat.
HOE TE GEBRUIKEN
Voordat u het apparaat voor het eerst gebruikt, trekt u alle
promotiematerialen en verpakkingsmaterialen eraf en controleert u
of de kookplaten schoon en stofvrij zijn. Veeg indien nodig met een
vochtige doek af.
Voor het beste resultaat giet je een theelepel plantaardige olie op de
antikleefplaten. Verspreid met een absorberende keukenrol en veeg
overtollige olie weg.

Contact Grill - Nederlandse handleiding 13
NL
GEBRUIK ALS CONTACT GRILL
1. Stel de temperatuurregeling van de grillrooster op de gewenste
instelling in. Probeer in eerste instantie een instelling in de max.
Je kunt het later naar wens lager of hoger instellen.
2. Bereid de hamburgers, vlees zonder botten en dunne stukken vlees
of ander voedsel volgens de aanwijzingen en plaats het op de onderste
kookplaat.
3. Sluit de bovenste kookplaat met een zwevend scharnier dat is
ontworpen om het voedsel gelijkmatig naar beneden te drukken. De
bovenste plaat moet volledig worden neergelaten om grillstrepen op het
geselecteerde voedsel te krijgen.
4. Gebruik het handvat om het deksel te openen wanneer het voedsel
gaar is. Verwijder het voedsel met behulp van een plastic spatel.
Gebruik nooit een metalen tang of mes, omdat deze de antikleeaag
van de kookplaten kunnen beschadigen.
5. Gebruik de Grill-broodrooster als contactgrill om hamburgers, vlees
zonder botten en dunne stukken vlees en groenten te koken.
6. Gebruik de Grill-Toaster als contactgrill, wanneer u iets wilt koken
in een korte tijd of wanneer u op zoek bent naar een gezonde manier
van grillen. Wanneer u op de contactgrill kookt, kookt het voedsel snel
omdat u beide kanten van het voedsel tegelijkertijd grilt. De ribben op
de grillplaten in combinatie met de vetuitloop aan de hoek van de plaat
laten het vet van het vlees afdruipen en voeren de platen af.
VOORBEREIDEN
1. Selecteer de platen die u wilt gebruiken en zorg ervoor dat deze is
geïnstalleerd.
2. Sluit de Contactgrill en steek deze in het stopcontact. Het rode
voedingslampje gaat AAN, open de Timer en stel de temperatuurknop
in op MIN. Het groene werklampje gaat branden om aan te geven
dat de grilltoaster met voorverwarmen is begonnen. Zoals deze keer,
kunt u de juiste thermostaatknop gebruiken om de temperatuurregeling
naar uw gewenste instelling in te stellen: “MIN” voor lichtgekleurd
voedsel en “MAX” voor donkerder voedsel. Probeer eerst een instelling
in het midden. Je kunt het later naar wens lager of hoger instellen.
Verschillende soorten voedsel koken ook anders.
3. Het zal ongeveer 3 ~ 5 minuten voorverwarmen om de
baktemperatuur te bereiken, het groene gereedlampje gaat uit, de
Contact Grill is klaar voor gebruik.

Contact Grill - Nederlandse handleiding 14
NL
GEBRUIKEN ALS PRESS GRILL
1. Stel de temperatuurregeling van de grillrooster op de gewenste
instelling in. Probeer in het begin een instelling in het midden.
Je kunt het later naar wens lager of hoger instellen.
2. Maak de broodjes klaar zoals aangegeven en plaats deze op de
onderste kookplaat. Plaats altijd broodjes naar de achterkant van de
onderste kookplaat.
3. Sluit de bovenste kookplaat met een zwevend scharnier dat is
ontworpen om de boterham gelijkmatig naar beneden te drukken.
De bovenste plaat moet volledig worden neergelaten om broodjes te
bereiden.
4. Kook ongeveer 3 tot 6 minuten of tot ze goudbruin zijn, en pas de
tijd aan uw persoonlijke smaak aan.
5. Gebruik de hendel om het deksel te openen wanneer de boterham
klaar is. Verwijder de sandwich met behulp van een plastic of houten
spatel. Gebruik nooit een metalen tang of mes, omdat deze de
antikleeaag van de kookplaten kunnen beschadigen.
6. Gebruik de Grill-broodrooster als een persgrill om broodjes, brood
en quesadilla’s te grillen.
7. De Grill-broodrooster is ontworpen met een uniek handvat en
scharnier waardoor de deksel zich aan de dikte van het voedsel kan
aanpassen. Je kunt gemakkelijk alles grillen van een dun gesneden
aardappel tot een dikke entrecote met gelijkmatige resultaten.
8. Wanneer u meer dan één voedselproduct in het contactrooster
kookt, is het belangrijk dat de dikte van de voedselproducten consistent
is, zodat het deksel gelijkmatig op het voedsel wordt gesloten.

Contact Grill - Nederlandse handleiding 15
NL
GEBRUIKEN ALS OPEN GRILL
1. Plaats de grill-broodrooster op een schoon, vlak oppervlak waar u
wilt koken. De grilltoaster kan in een vlakke positie worden geplaatst.
2. Bovenste plaat / deksel is waterpas met onderste plaat / basis. De
bovenste en onderste platen staan in lijn om één groot kookoppervlak
te creëren. Grill de broodrooster naar deze positie en lokaliseer de
hefboom voor het loslaten van het scharnier op de rechterarm.
3. Gebruik uw linkerhand om de hendel naar u toe te schuiven met
uw linkerhand op het handvat. Duw de hendel terug totdat het deksel
plat op het aanrecht rust. Het apparaat blijft in deze positie totdat u
de hendel en klep optilt om deze terug te brengen naar de gesloten
positie.
4. Gebruik de grill-broodrooster als een open grill om hamburgers,
biefstuk en gevogelte te koken (we raden aan geen kip met been te
koken, omdat het niet gelijkmatig kookt op een open grill), vis en
groenten.
5. Koken op de open grill is de meest veelzijdige methode om de
grill-broodrooster te gebruiken. In de open stand heeft u het dubbele
oppervlak voor grill.
6. U hebt de mogelijkheid om verschillende soorten voedsel op
scheidingen te bereiden zonder hun smaken te combineren of om grote
hoeveelheden van hetzelfde soort voedsel te koken. De open positie
biedt ook ruimte aan verschillende stukken vlees met verschillende
diktes, zodat u elk stuk naar wens kunt koken.

Contact Grill - Nederlandse handleiding 16
NL
KOOKPLATEN VERWIJDEREN
Koppel altijd de Grill-broodrooster los en laat hem afkoelen voordat u
kookplaten verwijdert.
1. Open de grill-broodrooster of stel de grill-broodrooster in op de
vlakke stand.
2. 2. De platen zijn magnetisch, dus trek er een beetje aan om ze op te
tillen. Pak de plaat met twee handen vast, schuif hem onder de metalen
beugels vandaan en til hem uit de basis. Herhaal deze stap met de
andere plaat.
SCHOONMAKEN
Trek altijd de Grill-broodrooster uit en laat hem afkoelen voordat u hem
schoonmaakt. Het apparaat is gemakkelijker schoon te maken als het
iets warm is. Het is niet nodig de Grill-broodrooster te demonteren voor
reiniging. Dompel de grill-broodrooster nooit onder in water of in de
vaatwasser.
De kookplaten kunnen in water of afwasmachine worden gereinigd.
Veeg de kookplaten af met een zachte om voedselresten te verwijderen.
Als u op voedselresten hebt gebakken, knijp dan wat warm water met
reinigingsmiddel over de voedselrestanten en reinig dan met een niet-
schurend plastic schuursponsje of plaats nat keukenpapier over de grill
om de voedselrestanten te bevochtigen.
Gebruik geen schuurmiddelen die de antiaanbaklaag kunnen krassen
of beschadigen.
Gebruik geen metalen keukengerei om uw voedsel te verwijderen, ze
kunnen het antikleefoppervlak beschadigen.
Veeg de buitenkant van de grill-broodrooster alleen met een vochtige
doek af. Reinig de buitenkant niet met een schuursponsje of staalwol,
dit zal de afwerking beschadigen. Dompel niet onder in water of een
andere vloeistof.
Niet in de vaatwasser doen.
Verwijder en legen de lekbak na elk gebruik en was de lade in
warm zeepsop. Vermijd het gebruik van schuursponsjes of agressieve
schoonmaakmiddelen, omdat deze het oppervlak kunnen beschadigen.
Afspoelen en grondig afdrogen met een schone, zachte doek en deze
vervangen.

Contact Grill - Nederlandse handleiding 17
NL
VERWIJDEREN
Gooi het apparaat niet bij het huishoudelijk afval.
Breng het apparaat naar een geregistreerd afvalverwerkingsbedrijf of
naar de plaatselijke milieustraat.
Houd u zich aan de huidige geldige regelgeving. Neem in geval van
twijfel contact op met het dichtstbijzijnde afvalverwerkingsbedrijf.
GARANTIE
Gewaardeerde klant,
Hartelijk dank voor uw aankoop van een MOA-product.
Wij wensen u hierbij mee te delen dat dit product wordt gedekt door
een garantie die voldoet aan alle wettelijke bepalingen inzake de
heersende garantie- en consumentenrechten in het land waar het
product werd gekocht.
Mocht u een defect of storing vaststellen aan uw MOA-product, neemt
u dan a.u.b. contact op met het passende Customer Care Center
(klantenservice), waar u het product heeft gekocht.
Hartelijke groet,
Het MOA Team

Contact Grill - Deutsch Bedienungsanleitung 18
DE
VOR INBETRIEBNAHME
Bitte lesen Sie diese Bedienungsanleitung vor Gebrauch sorgfältig
durch.
Schließen Sie das Gerät nur an eine geerdete Steckdose an.
Dieses Gerät ist nur für den Hausgebrauch bestimmt. Bei der
Verwendung von elektrischen Geräten sollten immer grundlegende
Sicherheitsregeln beachtet werden, um Brände, Stromschläge,
Verbrennungen oder andere Verletzungen und Schäden zu vermeiden.
Lesen Sie diese Betriebs- und Sicherheitsanweisungen sorgfältig durch.
WICHTIGE
SICHERHEITSINFORMATIONEN (1/2)
1. Berühren Sie keine heißen Oberächen. Verwenden Sie Griff oder
Knöpfe.
2. Tauchen Sie das Kabel, den Stecker oder das Kochelement nicht in
Wasser oder andere Flüssigkeiten, um die Gefahr eines Stromschlags
zu vermeiden.
3. Wenn ein Gerät von oder in der Nähe von Kindern verwendet wird,
ist genaue Überwachung erforderlich.
4. Ziehen Sie das Netzkabel aus der Steckdose, wenn Sie es nicht
verwenden und bevor Sie es reinigen. Vor dem Anbringen oder
Entfernen von Teilen und vor dem Reinigen abkühlen lassen.
5. Betreiben Sie kein Gerät, das einen Defekt aufweist oder auf
irgendeine Weise beschädigt ist. Versuchen Sie niemals, den
Kontaktgrill selbst zu reparieren, um die Gefahr eines elektrischen
Schlags zu vermeiden. Bringen Sie es zur Überprüfung und Reparatur
zu einer autorisierten Servicestation. Ein falscher Zusammenbau kann
bei Verwendung des Kontaktgrills zu einem elektrischen Schlag führen.
6. Die Verwendung von Zubehör, das nicht vom Hersteller empfohlen
wird, kann zu Feuer, Stromschlag oder Verletzungen von Personen
führen.
7. Verwenden Sie es nicht im Freien oder für kommerzielle Zwecke.
8. Vergewissern Sie sich, dass das Netzkabel nicht über die Tischkante
oder den Tresen hängt oder heiße Oberächen berührt.
9. Stellen Sie das Gerät nicht auf oder in die Nähe eines heißen
Gasbrenners oder eines geheizten Ofens.
10. Trennen Sie das Gerät ab, wenn Sie fertig sind.

Contact Grill - Deutsch Bedienungsanleitung 19
DE
WICHTIGE
SICHERHEITSINFORMATIONEN (2/2)
11. Verwenden Sie das Gerät nicht für andere als die vorgesehene
Verwendung.
12. Verwenden Sie keinen externen Timer oder ein separates
Fernbedienungssystem.
13. Seien Sie äußerst vorsichtig, wenn Sie ein Gerät bewegen, das
heißes Öl oder andere heiße Flüssigkeiten enthält.
WARNUNG: UM DAS RISIKO VON FEUER ODER STROMSCHLAG ZU
REDUZIEREN, MUSS NUR QUALIFIZIERTES PERSONAL REPARIEREN.
Um das Risiko eines Stromschlags zu verringern, verfügt dieses Gerät
über einen geerdeten Stecker.
Wenn der Stecker nicht vollständig in die Steckdose passt, wenden Sie
sich an einen qualizierten Elektriker. Wechseln Sie den Stecker auf
keine Weise und verwenden Sie keinen Adapter.
TEILEIDENTIFIZIERUNG
1. Griff
2. Gehäuse Oberseite
3. Schloss
4. 180° Knopf
5. Wärmereglerknopf
1
2
34
5678910
6. Timer-Knopf
7. Bereit-Licht
8. Ein/Aus-Licht
9. Grillplatte mit Antihaftbeschichtung
10.Gehäuse Unterseite

Contact Grill - Deutsch Bedienungsanleitung 20
DE
VOR DEM ERSTEN GEBRAUCH
Lesen Sie alle Anweisungen sorgfältig durch und bewahren Sie sie zum
späteren Nachschlagen auf.
1. Entfernen Sie alle Pakete.
2. Reinigen Sie die Kochfelder, indem Sie einen mit warmem Wasser
angefeuchteten Schwamm oder ein Tuch abwischen.
DAS GERÄT NICHT IM WASSER EINSETZEN UND DAS WASSER
NICHT DIREKT AUF DEN KOCHFLÄCHEN LIEFERN.
3. Mit einem Tuch oder Küchenpapier abtrocknen.
4. Die besten Ergebnisse erzielen Sie, wenn Sie die Kochfelder leicht
mit etwas Speiseöl oder Kochspray bestreichen.
Hinweis: Wenn Ihr Kontaktgrill zum ersten Mal erhitzt wird, kann
er einen leichten Rauch oder Geruch abgeben. Dies ist bei vielen
Heizgeräten normal. Die Sicherheit Ihres Geräts wird dadurch nicht
beeinträchtigt.
WIE MAN BENUTZT
Entfernen Sie vor der ersten Verwendung des Geräts alle
Werbematerialien und Verpackungsmaterialien und überprüfen Sie, ob
die Kochfelder sauber und staubfrei sind. Falls erforderlich, mit einem
feuchten Tuch abwischen.
Für ein optimales Ergebnis gießen Sie einen Teelöffel Panzenöl auf
die Antihaftplatten. Mit einer saugfähigen Küchenrolle verteilen und
überschüssiges Öl abwischen.
Table of contents
Languages:
Other MOA Grill manuals
Popular Grill manuals by other brands

Kitchen HQ
Kitchen HQ KHQ GR 45632 user manual

Bull
Bull 18248 Assembly & operating instructions

KitchenAid
KitchenAid 860-0003 Installation Instructions and Use & Care Guide

Ambassade de Bourgogne
Ambassade de Bourgogne CSE 410 M manual

Electrolux
Electrolux E51LB60ESS Use & care guide

Wells
Wells B-40 owner's manual