Mobotix PT DX7 User manual

1/11
OPERATING INSTRUCTIONS
PT DX7 Pan Tilt Unit with USB-Connection for MOBOTIX-Cameras
Article No. / EAN: 0745751300718 Customs Tarif Code: 85437090
Features
Material Cast aluminium/powder-coated
Load capacity 4Kg
Weight 6Kg (Incl. packaging 8Kg)
Rotation range 360° (endless)
Rotation speed 60°/s
Tilt range -80° -> +25°
Tilt speed 40°/s
Dimensions 360x165x185mm
Presets 128
Tours 4
Operating voltage 38-56VDC Pin 4/5+ 7/8-
Power consumption 15W
Protection class IP66
Max ambient temperature -40° - +55°
Pack size without supplies 51 × 42 × 26 cm
2 pcs in one carton carton: 60 × 50 × 52 cm

1 x Bag with bolts an screws for mounting the camera
1 Passive-PoE Adapter
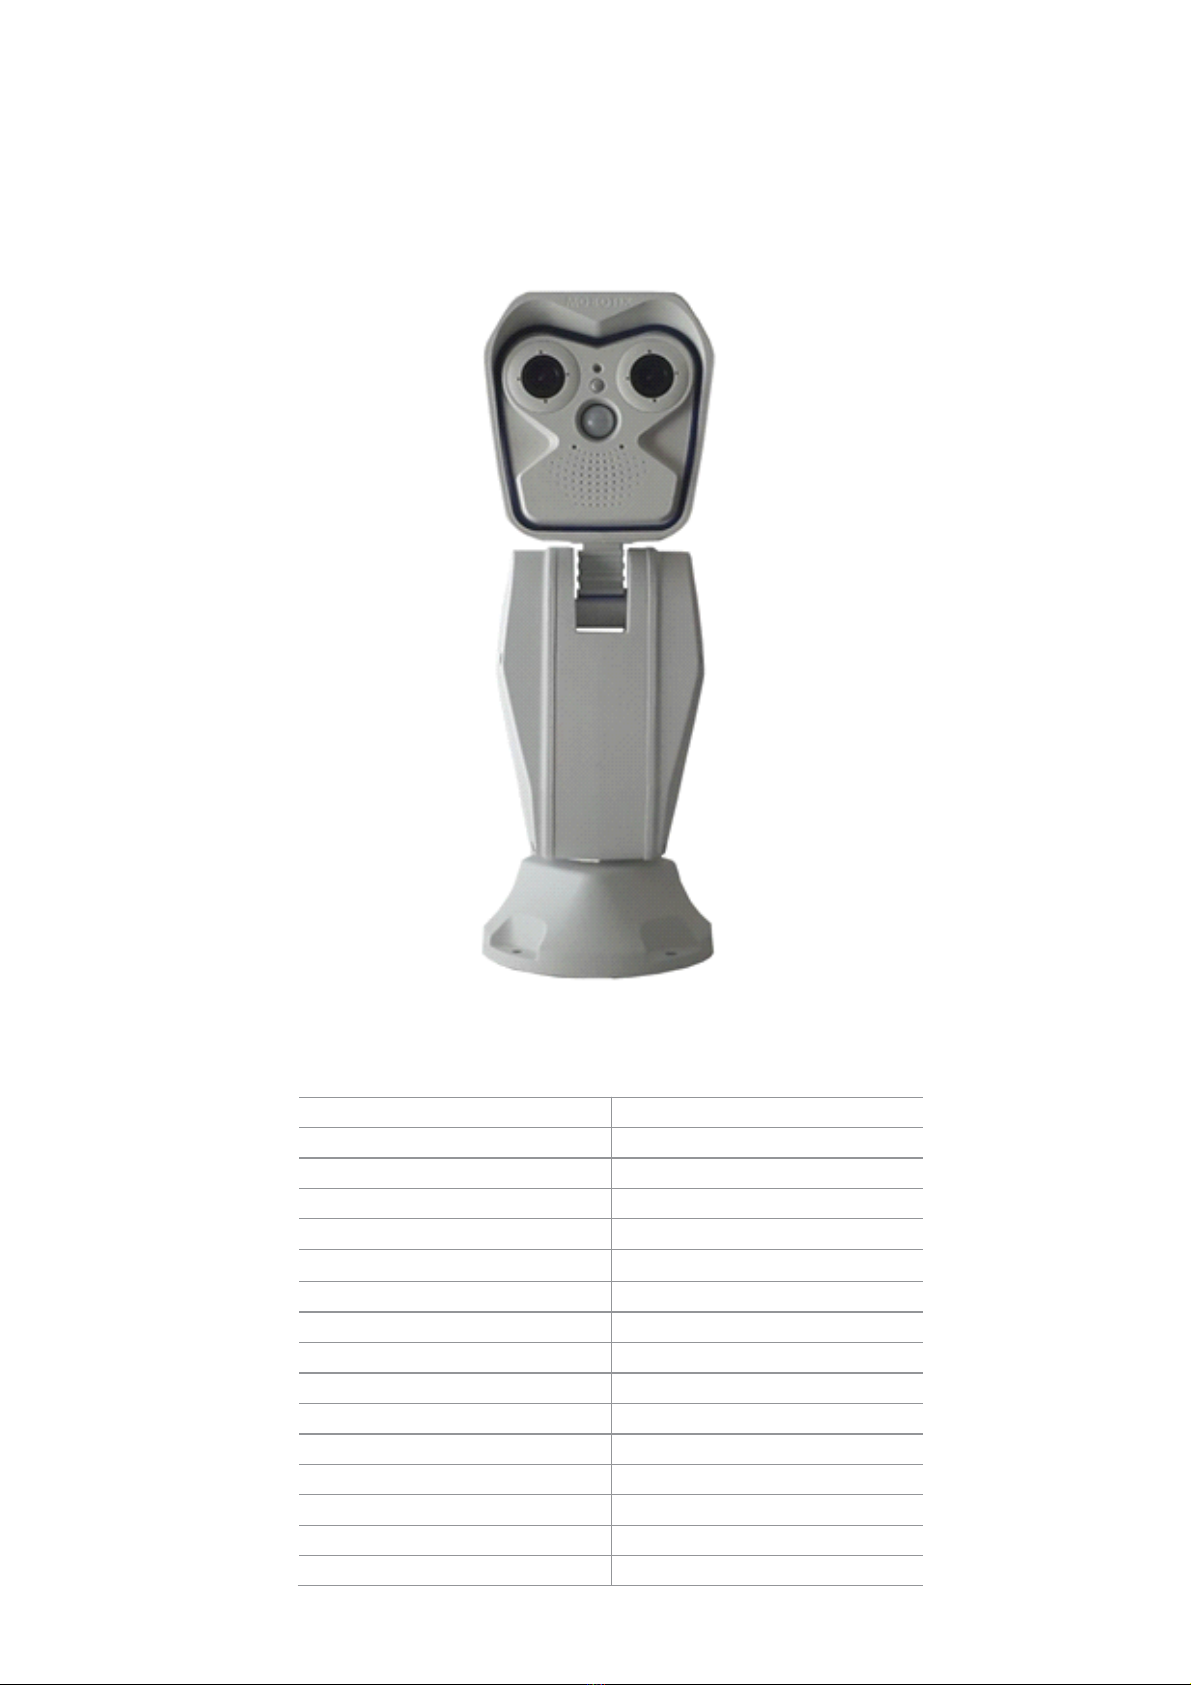
1 x Pan & Tilt motor
For after-Sale service call only authorised technical staff.
Main voltage (Volt)
This plate includes:
on pan & tilt motors there is one plate complying with EC specifications.
Keep this manual close to hand for any future reference. Identification data
Model identification code
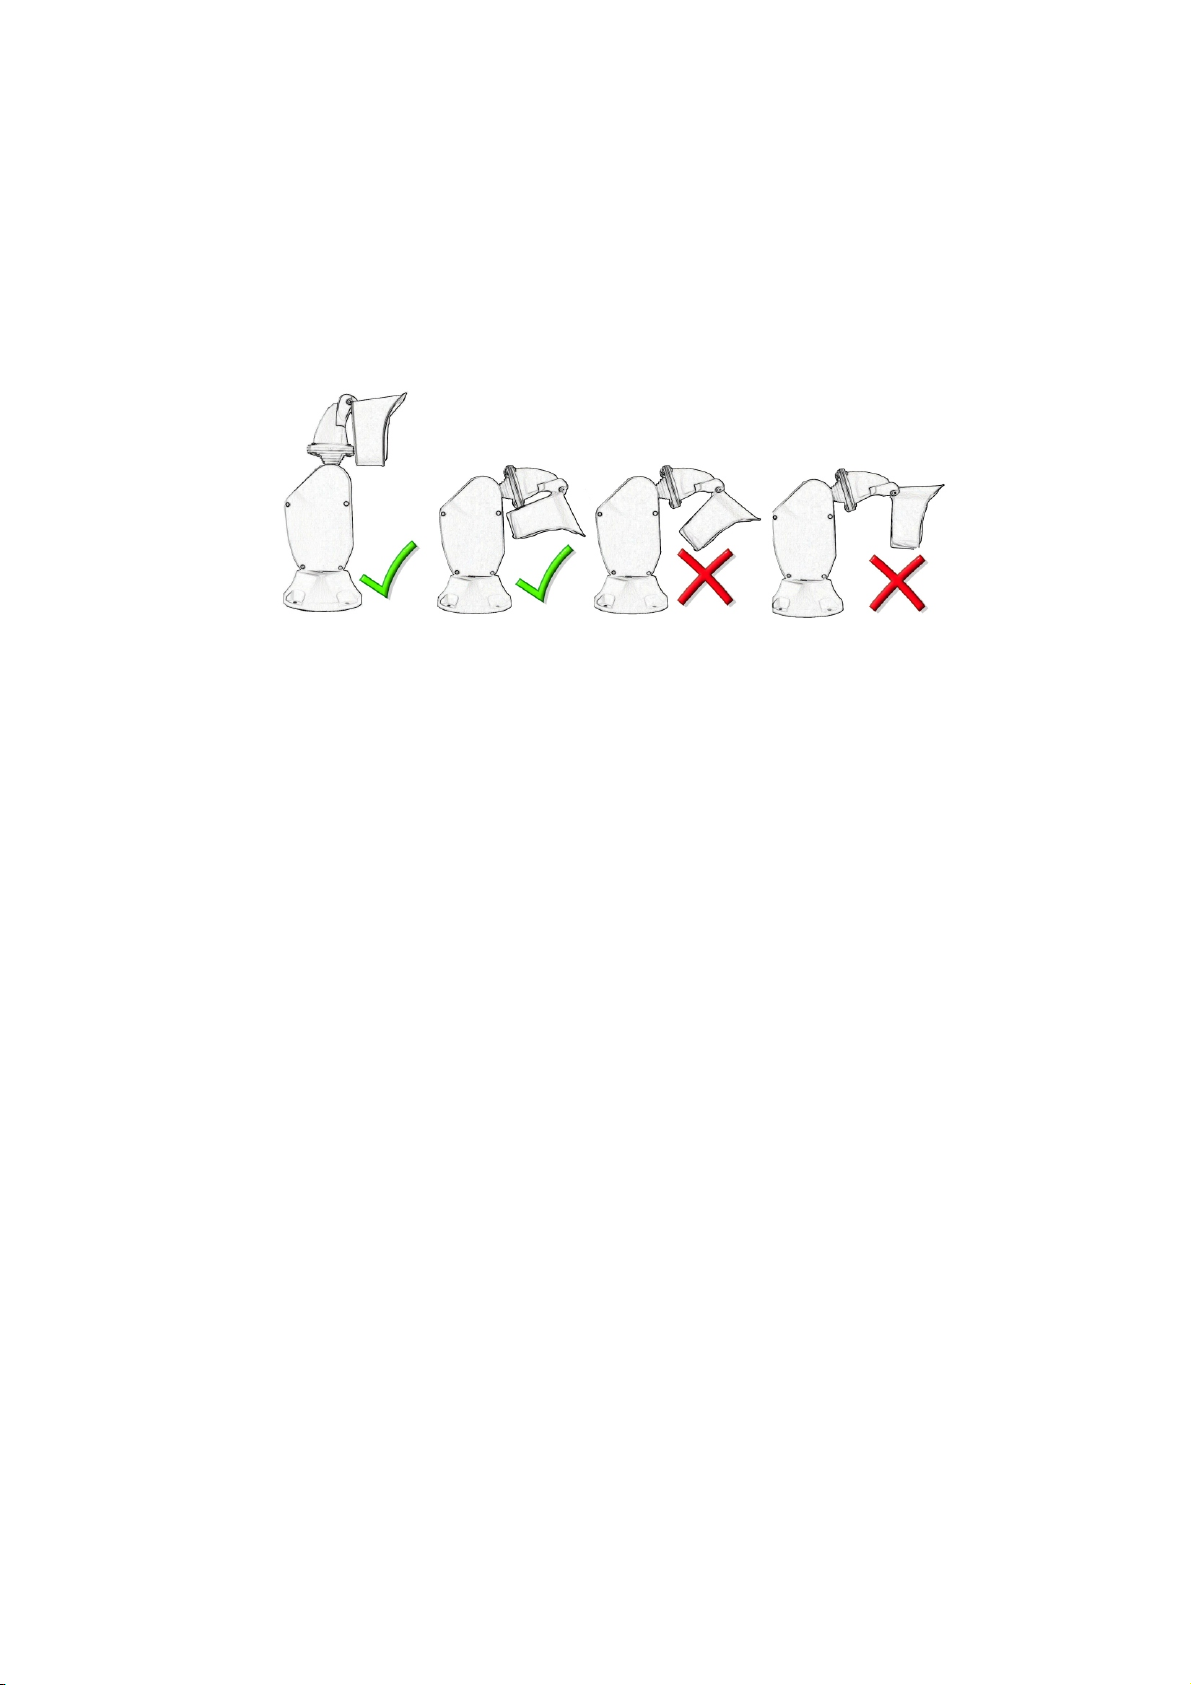
Make sure the appliance is fixed in a solid and reliable way.
The appliance is completely off-line only when the cables connected to other
appliances have been removed.
of falls or abrasions. If this should be the case, immediately contact the supplier.
Check that the contents correspond to the above-mentioned list of materials.
After the delivery, check that the packing is not damaged and shows no evident signs
configuration and use. Read this manual carefully, in particular the chapter
concerning the safety rules, before installing and using the pan & tilt motor.
Pan & tilt motors comply with the normative laws in force at the time of editing of this
manual, concerning electric safety, electromagnetic compatibility and general
requirements.
Anyway, in order to ensure the users (installer, technician and operator), the
following warnings are specified for your safety:
This manual describes pan & tilt motors, together with their specific procedures of
installation,
Safety rules
The appliance (and the complete system, which it belongs to) must be installed only
by qualified technical staff.
The appliance must be opened only by qualified technical staff.
Contents of this Manual
Do not use voltage cables showing wear or ageing, since they may seriously exposure
(see next chapter Identification data).
Do not use the appliance in the presence of inflammable substances.
The tampering of the appliance may void the guarantee terms.
other appliances must be removed.
Do not allow children or people not familiar with the appliance to use it.
Connect to a device corresponding to the specifications indicated on the data plate
the users' safety.
Before any shifting or technical operations on the appliance, the cables connected to
Packing contents
INSTRUCTIONS
2/11

Startup-Procedure
Maintenance
The PT-Units don‘t need a special maintenance.
We recommend to make a service at the manufactory every 2 years.
ATTENTION:
Before powering the P/T-Unit, you have to take notice of the mounting-position.
The camera and possible mounting-devices may not come in contact with other parts.
All screws must be tightend.
The P/T-Unit must be mounted horizontal in all areas.
Before connecting the appliance:
Check that the material supplied corresponds to the specifications indicated on the data plate,
following the chapter identification data.
Check that pan & tilt motor and the other components of the installation are closed in order
to avoid direct contact with energized parts.
Check that all the EMC Regulations, valid at the mounting-place, are adhered to and maybe
upgrade components to ensure the business-protection and the equipment protection.
Make sure that all the parts are fixed in a solid and reliable way.
Check that the electrical capacity and the connection cables will support the system power
consumption.
Using unqualified hardware can endanger the security of the staff and installation.
Check if the power supplys and cables can handle the consumption.
The cables must be connected as shown in this manual.
After powering, the Unit has to do a calibration run in horizontal and vertical direction.
3/11
Mounting
Camera Position

Connection plan
4/11
The cables, coming out of the top of the unit, must be connected
without benchs and pinch points.
(refering to the Mobotix guidelines)
incl. 1m MX-OPT-CBL-LAN
(optional: 2m / 5m / 10m)
CAT 6 or 7
up to 100m
100-240V~
50-/60Hz
Passive-PoE Adapter
Pins 1, 2, 4, 5 (+)
and
Pins 3, 6, 7, 8 (-)
50W

Settings for MOBOTIX Cameras
1.
Admin Menü
Network Setup
Ethernet Interface
5/11

2.
Admin Menü
Hardware-Configuration
Manage Hardware Expansions
Settings for MOBOTIX Cameras
6/11

3.
Admin Menü
Serial Interface
Setup of serial interface, modem and weather station
Settings for MOBOTIX Cameras
7/11

4. Define Softbuttons
Admin Menü
Page Administration
Softbuttons
You can find the Commands for the different Functions on the last Page.
Settings for MOBOTIX Cameras
8/11

5. Insert Softbuttons
Click on a Softbutton, holding the „Shift“-Button
Choose the Position for the new Softbutton.
and then choose the Function you want to have.
Settings for MOBOTIX Cameras
9/11

6. Calling Presets at predefined Times
Admin Menü
Transfer Profiles
IP Notify Profiles
Data Type: action=putrs232&rs232outtext= z.B. %AO%0E...usw.
7. Timing
Admin Menü
Camera Adminstration
Time Tasks
IP NOTIFY “HttpRequest“ (Example is on 1 Minute)
Settings for MOBOTIX Cameras
10/11

Control Commands
11/11
Up
Right
Slow
%FF%01%00%08%00%01%0A
Slow
%FF%01%00%02%01%00%04
%FF%01%00%08%00%0F%18
%FF%01%00%02%0F%00%12
Medium
%FF%01%00%08%00%1F%28
Medium
%FF%01%00%02%1F%00%22
%FF%01%00%08%00%2F%38
%FF%01%00%02%2F%00%32
Fast
%FF%01%00%08%00%FF%08
Fast
%FF%01%00%02%FF%00%02
Down
Left
Slow
%FF%01%00%10%00%01%12
Slow
%FF%01%00%04%01%00%06
%FF%01%00%10%00%0F%20
%FF%01%00%04%0F%00%14
Medium
%FF%01%00%10%00%1F%30
Medium
%FF%01%00%04%1F%00%24
%FF%01%00%10%00%2F%40
%FF%01%00%04%2F%00%34
Fast
%FF%01%00%10%00%FF%10
Fast
%FF%01%00%04%FF%00%04
Stop
Remote Reset
%FF%01%00%00%00%00%01
%FF%01%00%0F%00%00%10
Tour Record Start
Tour Start
1
%FF%01%00%1F%00%00%20
1
%FF%01%00%23%00%00%24
2
%FF%01%00%1F%00%01%21
2
%FF%01%00%23%00%01%25
3
%FF%01%00%1F%00%02%22
3
%FF%01%00%23%00%02%26
4
%FF%01%00%1F%00%03%23
4
%FF%01%00%23%00%03%27
Tour Record Stop
1
%FF%01%00%21%00%00%22
2
%FF%01%00%21%00%01%23
3
%FF%01%00%21%00%02%24
4
%FF%01%00%21%00%03%25
Save Preset 1-32
Call Preset 1-32
1
%FF%01%00%03%00%01%05
1
%FF%01%00%07%00%01%09
2
%FF%01%00%03%00%02%06
2
%FF%01%00%07%00%02%0A
3
%FF%01%00%03%00%03%07
3
%FF%01%00%07%00%03%0B
4
%FF%01%00%03%00%04%08
4
%FF%01%00%07%00%04%0C
5
%FF%01%00%03%00%05%09
5
%FF%01%00%07%00%05%0D
6
%FF%01%00%03%00%06%0A
6
%FF%01%00%07%00%06%0E
7
%FF%01%00%03%00%07%0B
7
%FF%01%00%07%00%07%0F
8
%FF%01%00%03%00%08%0C
8
%FF%01%00%07%00%08%10
9
%FF%01%00%03%00%09%0D
9
%FF%01%00%07%00%09%11
10
%FF%01%00%03%00%10%14
10
%FF%01%00%07%00%10%18
11
%FF%01%00%03%00%11%15
11
%FF%01%00%07%00%11%19
12
%FF%01%00%03%00%12%16
12
%FF%01%00%07%00%12%1A
13
%FF%01%00%03%00%13%17
13
%FF%01%00%07%00%13%1B
14
%FF%01%00%03%00%14%18
14
%FF%01%00%07%00%14%1C
15
%FF%01%00%03%00%15%19
15
%FF%01%00%07%00%15%1D
16
%FF%01%00%03%00%16%1A
16
%FF%01%00%07%00%16%1E
17
%FF%01%00%03%00%17%1B
17
%FF%01%00%07%00%17%1F
18
%FF%01%00%03%00%18%1C
18
%FF%01%00%07%00%18%20
19
%FF%01%00%03%00%19%1D
19
%FF%01%00%07%00%19%21
20
%FF%01%00%03%00%20%24
20
%FF%01%00%07%00%20%28
21
%FF%01%00%03%00%21%25
21
%FF%01%00%07%00%21%29
22
%FF%01%00%03%00%22%26
22
%FF%01%00%07%00%22%2A
23
%FF%01%00%03%00%23%27
23
%FF%01%00%07%00%23%2B
24
%FF%01%00%03%00%24%28
24
%FF%01%00%07%00%24%2C
25
%FF%01%00%03%00%25%29
25
%FF%01%00%07%00%25%2D
26
%FF%01%00%03%00%26%2A
26
%FF%01%00%07%00%26%2E
27
%FF%01%00%03%00%27%2B
27
%FF%01%00%07%00%27%2F
28
%FF%01%00%03%00%28%2C
28
%FF%01%00%07%00%28%30
29
%FF%01%00%03%00%29%2D
29
%FF%01%00%07%00%29%31
30
%FF%01%00%03%00%30%34
30
%FF%01%00%07%00%30%38
31
%FF%01%00%03%00%31%35
31
%FF%01%00%07%00%31%39
32
%FF%01%00%03%00%32%36
32
%FF%01%00%07%00%32%3A
Table of contents
Other Mobotix Camera Accessories manuals