Modelbouw Atelier Apeldoorn CASPER User guide

OWNERS HANDBOOK
for the coalfired locomotive
CASPER
Manufacturer:
Modelbouw Atelier Apeldoorn
Fitislaan 33
NL-7331 VJ APEL OORN
Tel: +31 (0)613 872 716
E-mail: info@modelbou atelier.nl
.modelbou atelier.nl
IMPORTANT: EXPORT TO, AND OPERATION IN THE UNITED STATES OF AMERICA AND CANADA
ARE NOT ALLOWED!
Technical data:
-Dimensions / Weight:
Length: 286mm, Height : 154mm, Width: 114mm. Weight: ca. 3,8 kg
Min. radius: R1 (LGB)
-Engine:
Cylinderbore 14 mm, Stroke 18 mm
Slide valves, Max. working pressure (4 bar)
-Boiler:
Grate dimensions: L x B = 67 x 22,5 mm, 2 fire tubes diam.: 13 mm, 2 safety valves
Other features:
- Water gauge with blow down valve
- Pressure gauge max. 6 Bar
- Hand feed pump
- Axle driven feedpump under footplate
- 2 watertanks, total approx. 220 cc boiler-feed water
- Spokewheels
- Electrical fan for placement in the smoke stack during firing up
- Cylinder cocks
Controls:
- Steamregulator - Blower
- Reversing handle - Firedoor handle
- Bypass-regulator for water – cylinder cocks
Available colours:
Footplate and engine: black. Smokebox: black
Boiler and superstructure : Brunswick green, Maroon or Black.
Page 1 of 9

EEC declaration of conformity:
We declare that coalfired locomotive CASPER 2.0
Boiler serialnumber:...........................
Nominal working pressure: 4 Bar
Hydraulic testpressure: 6 Bar
Safety valves set on: 4 Bar
has been manufactured in accordance with PE 97/23/EEG
All components and assemblies are designed and manufactured according to good craftsmanship.
Signed:
Henk.C.Bunte (managing partner)
date:..............................
SAFETY INSTRUCTIONS
for coalfired locomotive CASPER
Important for your safety an the people aroun you!
If in doubt, please call: (+31) 55 5334138
This is a working, coalfired model locomotive using steam under pressure. Therefore it is neccessary to read
and follow the instructions below carefully.
1. A model steam locomotive is not a toy, therefore keep children at a safe distance from a working
locomotive.
2. These locomotives are intended for outdoor use however, if you use it indoors it must be operated in a well
ventilated area.
3. The whole locomotive will be hot, in particular the smokebox, boiler and firebox. You must use gloves
when handling a hot locomotive.
4. Whilst in use, hot gasses are leaving the chimney, safety valves frequently blow off hot steam. Make sure
you protect your face!
Note: keep children at a safe distance. Never let them look into the chimney or let them come close near the
safety valves.
5. After firing up and opening of the regulator or blower valve, hot water or steam can leave the chimney.
Keep a safe distance for yourself and spectators around you.
6. The safety valves blow off at approx. 4 Bar. Check regularly if this is the case.
7. TAKE CARE:
The locomotive should be operated in such a way that there is always sufficient (approx. ½ a gauge glass)
water in the boiler.
In case of a low water level in the boiler (water is no more visible in the water gauge glass):
A. Stop the locomotive.
B. Close the blower valve.
C. Open the firedoor and kill the fire by removing the pins at the right hand side of the firebox in order
to drop grate and ashpan.
BE CAREFUL: Hot fire will fall on the track or the underfloor.
8. Regularly check, during operation of the locomotive, if the water gauge glass is indicating correctly by
opening and closing the blow down valve.
9. When operating your locomotive always have at hand a fire extinguisher or a bucket of water or a wet cloth
in order to prevent a fire.
Page 2 of 9

PREFACE
Thank you for purchasing Casper, a coal fired locomotive.
Every step has been taken to secure a high quality of craftmanship together with all the various tests to make
sure you have a smooth ride. For optimal use of this locomotive we would urge you to read the manual at
least once and keep it handy for further reference.
Coal fired locomotives give a special feel to the hobby, which we hope you’ll enjoy with Casper for the years
to come.
Henk Bunte / design and development
TOOLS AN OTHER PARTS ELIVERE
The following items are included with your locomotive:
1. one bottle of steam oil.
2. one bag of anthracite beans in the right size.
3. one bag of charcoal beans in the right size.
4. one electrical ventilator for firing up.
5. one coal shovel to fill the fire box.
6. one rake to maintain the fire.
7. one spout suitable for a PET bottle to fill the watertanks.
8. one strain set to screen the coal and charcoal.
9. one brush to clean the fire tubes.
10. one handle to operate the handpump.
RUNNING IN
The locomotive has been tested with compressed air and has made a coalfired testrun. It will still require
running in before all moving parts are less stiff and have bedded in.
ACCESS TO THE CONTROLS
All controls are accessible from the outside, exept for the handpump. In order to use the handpump the roof
has to be opened. To open the roof lift it slightly at the frontside and open by moving it up- and forwards at
the back side of the roof.
I ENTIFICATION OF CONTROLS AN OTHER INPORTANT PARTS
See photographs and explanation on page 7, 8 and 9.
PREPARING FOR OPERATION
1. Put the locomotive with the wheels on a raised platform (i.e. a wooden plank). Place the grate in the fire
box and lock it by placing the upper grate locking pin.
2. Place the ashpan and lock it with the lower locking pin.
Note: Both pins are equal to each other.
3. Place the locomotive on the track.
4. Fill the watertanks with boilerwater bij means of the spout placed on a PET bottle.
Note: Only use filtered rainwater or distilled water. Do not use eminiralise or e-ionize water!
(Using tap water can cause corrosion in the boiler)
5. Put the pump handle on the handpump and fill the boiler half way the watergauge glass with water.
The bypass valve should be closed in this case.
NOTE
The han an mechanical pumps are place in series (i.e. when pumping with the han pump the water is
also pumpe through the mechanical pump ). This gives the opportunity to check visually if the pump system
is blocke , by opening (turning counter clockwise) the bypass valve. The water, in this case, will be pumpe ,
via the return line, in the left watertank.
6. Remove the nylon filler cap from the lubricator and fill it with steam oil up to min. 8 mm under the upper
edge. Replace the cap and fix it fingertight. Open the valve at the underside of the lubricator about 1/8 a turn.
(After running in the locomotive this can be decreased to a minimum in order to get a acceptable use of
steam oil)
7. Lubricate all moving parts (i.e. bearings linkages) with a medium oil, such as motor oil.
FIRING UP AN RUNNING OF THE LOCOMOTIVE
1. Open the fire door by pushing the fire door handle, placed at the left side of the cab, slightly forward and
downwards at the same time.
2. Fill the fire box, evenly over the grate, with charcoal beans soaked in paraffine (lamp oil) up to the
underside of the fire hole.
Page 3 of 9

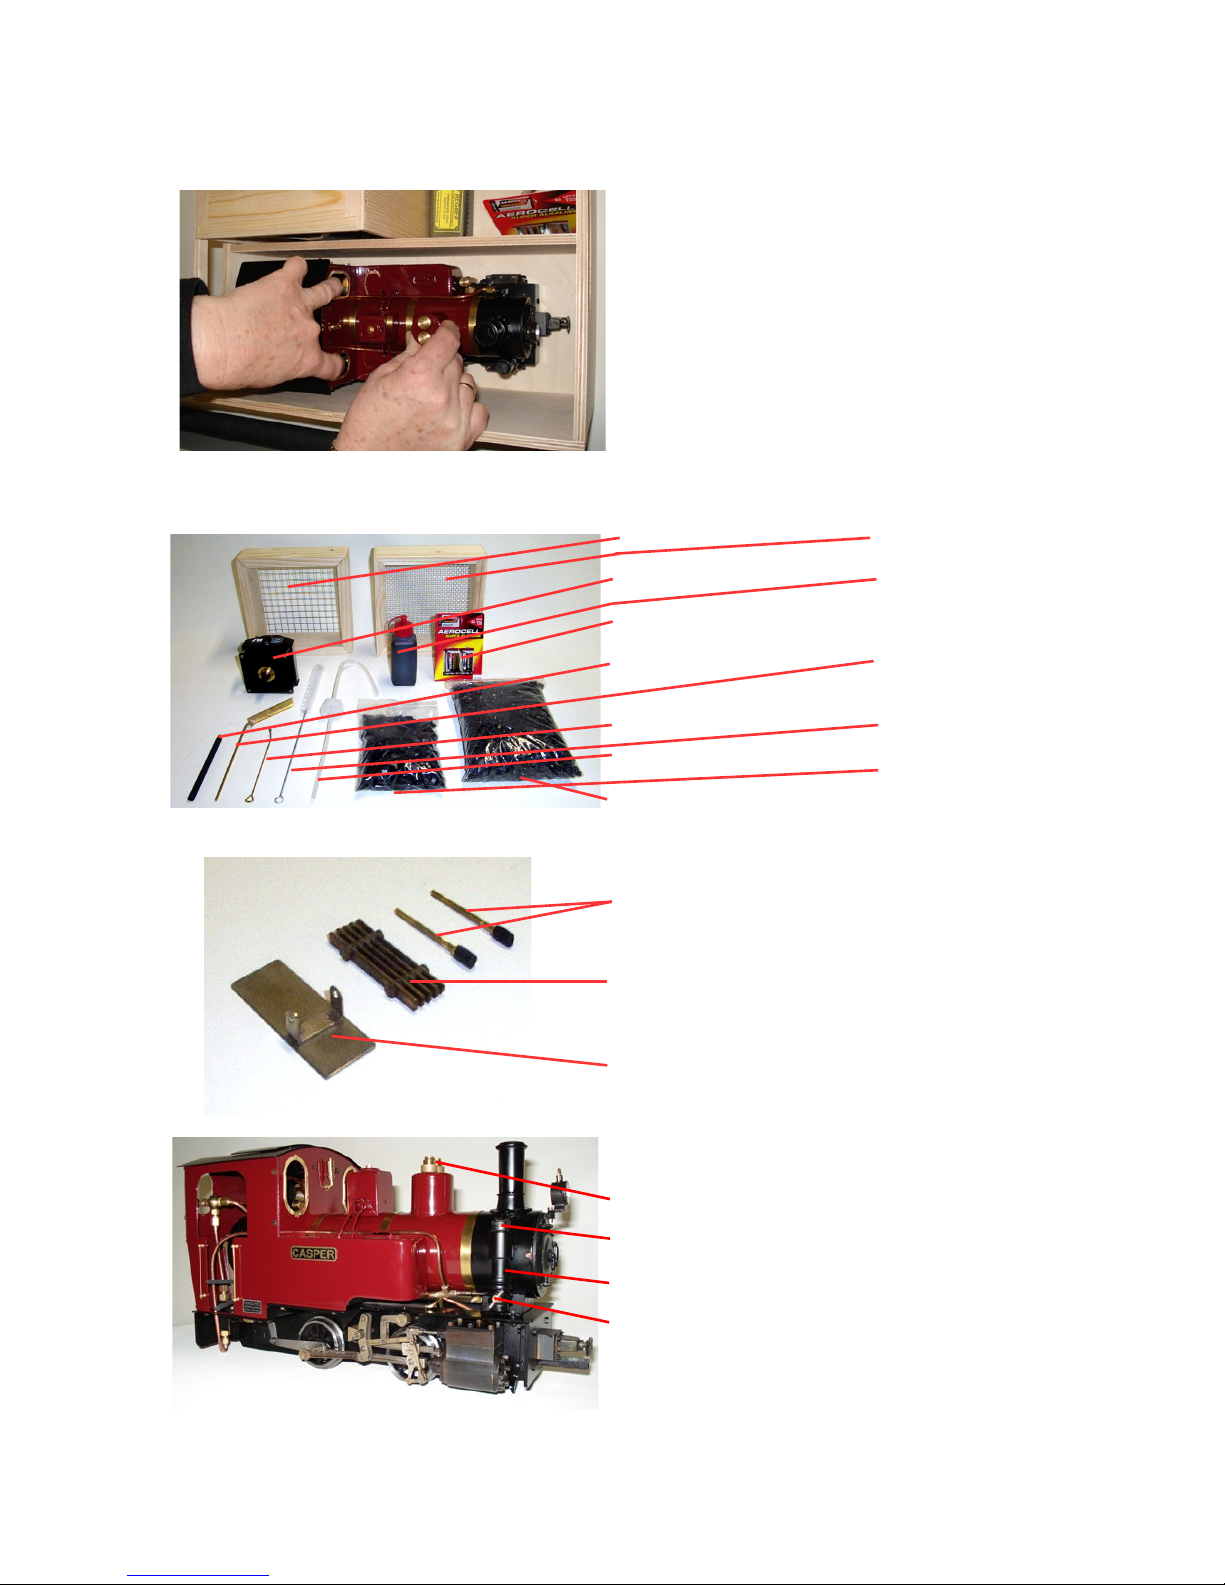
3. Put the electrical fan, after placing the batteries (included), in the chimney and switch ON.
4. Take a small scoop of lamp oil soaked charcoal, light it with an appropriate lighter and place the burning
charcoal in the fire box. Immediately close the fire door.
You may hear the fire in the fire box and smoke will come out of the fan through the chimney.
5. When the pressure gauge reaches pressure of 1,5 – 2 Bar, the blower valve can be opened and when it
operates cleanly, the electrical fan can be taken away and the blower takes over the task of the electrical fan
and causes fire draft.
6. When the charcoal fire glows white, you can start rebuilding the charcoal to a coal fire. Start with one
scoop of anthracite in the front and one scoop in the back of the firebox. Keep the fire door open as short as
possible in order to prevent the fire to go out, due to false air.
7. When the first layer of anthracite starts to glow, you can refill with anthracite, and so on until the charcoal
fire is replaced by an anthracite fire.
8. In the mean time the pressure gauge will indicate approx. 4 Bar and the safety valves will start to blow off.
9. Check if there is sufficient water in the boiler (approx. half way the gauge glass).
Open the blow down valve of the watergauge regularly in order to realise a true reading.
When neccessairy, with the bypass valve closed (turn clockwise), refill the boiler with the handpump.
Check and refill the watertanks.
Put the reverser handle in the direction you want to drive.
12. The regulator can be opened about 45 degrees (counter clockwise). Blower and bypass valves are
closed. After removing the water out of the cylinders through the chimney, the locomotive will start running
and can be coupled to the train.
13. In order to help with decondensation of the cilinders when they are cold, the cylinder cocks can be
opened bij pushing the handle downwards. After decondensation the handle can be pushed upwards in order
to close the cilinder cocks.
URING RUNNING
Just like a scale 1:1 locomotive it is crucial to keep steam production of the boiler in balance with the steam
requirements of the engine. At the same time sufficient draw on the fire should be maintained to prevent
dying of the fire.
This is a matter of experience and you will learn it during the driving the locomotive.
With a heavy load, the exhaust steam will take care for sufficient draw on the fire.
With a light load or low outside temperatures it can be neccessairy to open the blower valve slightly during
running in order to maintain sufficient draw on the fire.
Every 5 to 10 minutes, dependable of the load of the locomotive, a refill of anthracite is neccessairy in order
to prevent dying of the fire.
uring running, pressure gauge, water gauge and water tanks should be observed permanently as follows:
–waterlevel in water gauge to high: bypass valve more open (turn counterclockwise)*
–waterlevel in water gauge to low: close bypass valve (turn clockwise)
–pressure gauge to high (= > ca. 3,5 Bar) close blower valve (turn clockwise)
–pressure gauge to low (= < ca. 1,5 Bar) open blower valve (turn counter clockwise)
–waterlevel in tanks to low: refill
*Surplus water will be pumpe , through the return line, in the left water tank. This gives you also the
opportunity to a visual check of the function of the mechanical pump uring running.
HINT:
Un er certain con itions (i.e. quality of anthracite, higher outsi e temperatures) the boiler is able to pro uce
more steam than neccessairy . Safety valves are constantly blowing off which results in a high water
consumption. This effect can be avoi e by leaving open the fire oor by a small amount in or er to re uce
the raft on the fire.
Always take care of sufficient draft on the fire. If the locomotive is at a standstill always open the blower valve.
LUBRICATION URING A RUNNING SESSION:
When the locomotive is in steam for more than 15 minutes the lubricator should have a refill as follows:
Keep, while the locomotive is still in steam, the regulator closed and open the blower valve. Close the valve
(turn clockwise) at the bottom of the lubricator and remove the Nylon filler cap ( careful! hot, use gloves) refill
the lubricator with steam oil. (When you are not familiar with the amount of oil consumption check the oil level
every time you refill with water and/or coal).
Replace the filler cap and fix it fingertight. and open the lubricator valve at the bottom with 1/8 turn or less.
The locomotive is now ready to run again.
Page 4 of 9

The actions as above are the substance of coal firing a small model locomotive.
Experience will learn you to operate the locomotive in the right way.
TAKE CARE:
The locomotive should be operated in such a way that there is always sufficient (approx. ½ a gauge glass)
water in the boiler.
In case of low water level in the boiler (water is no more visible in the water gauge glass):
A. Stop the locomotive.
B. Close the blower valve.
C. Open the firedoor and kill the fire bij removing the pins at the right hand side of the firebox in order
to drop the grate and ashpan.
BE CAREFUL: Hot fire will fall on the track or the underfloor.
NOTE for more experience rivers:
There is a small safety margin between the bottom of the gauge glass and the crownsheet of the
firebox.
If the driver is convinced of the fact that the water is still above the crownsheet, the handpump can be
used to bring the waterlevel to normal (approx. ½ a gauge glass) again and it is not neccessairy to
drop the fire.
AFTER THE RUN:
1.Open the blower valve and leave it open
2.Let the locomotive cool down.
NOTE: It is good practise as the engine cools to leave the valves and regulator just NOT shut. An 1/8th of
a turn or less is sufficient. This prevents the spindles from jamming on the seat due to the contraction of
the metal on cooling.
3. Put the locomotive with the wheels on a raised platform (i.e. a wooden plank).
4. Remove the locking pins from grate and ashpan.
5. Remove grate and ashpan and clean them.
6. Open the smokebox door and use the bristle to clean the fire tubes. ( o not bend the blower and or
exhaust piping)
7. Clean the inside of the smokebox and the firebox (i.e. with a vacuum cleaner or a brush)
8. Clean the locomotive with a soft cloth.
9. Lubricate all moving parts with a medium oil.
10. Store the locomotive in a dry frost free place.
11. Pump from time to time boilerwater from the tanks into the boiler in order to keep the hand and
mechanical pumps in good condition.
MAINTENANCE
1. From time to time clean all moving parts with liquid paraffine (lamp oil)
2. All moving parts should be oiled with a medium oil (i.e. Motor oil)
3. Check all bolts and nuts from time to time, if they are tightened.
4. Check the 2 safety valves on blowing off at the correct pressure (approx. 4 Bar)
It is recommended to check the boiler every one or 2 years by an expert (i.e. manufacturer, club)
Following points should be checked:
*Visual inspection.
*Hydrostatic pressure test at 6 Bar.
*A test under steam in order to check all controls, pumps, water and pressure gauges.
FABRICATING YOUR OWN CHARCOAL AN ANTRACITE BEANS
The burning process in the fire box can only be optimal with the right bean size of antracite and charcoal.
Therefore a strain set, consisting of two parts is supplied. This set has one fine and one coarse strainer. The
upper (coarse) strainer fits in the lower (fine) strainer.
ependable on the grainsize of charcoal and antracite you will need, before straining, to reduce the size.
Place the upper (coarse) strainer in the lower (fine) one.
Then place the charcoal or antracite that has to be strained, in the upper strainer.
Shake the strainer set for some time horizontally above a dustbin.
After straining the beans that remain on the lower (fine) strainer are usable to fire your locomotive.
THE RIGHT FUEL
For fueling a small firebox only a good quality antracite is suitable.
Antracite burns almost without leftovers.
Page 5 of 9

Fat (bitouminous) coal gives a spectacular smell and plume very similar to a scale 1:1 locomotive, but bakes
together to a 'cake' on the small grate that extinguishes very fast.
However it is great fun to use some lumps of fat coal in the fire box, at the end of a running session and enjoy
the nostalgic smell and smoke.
The charcoal should be the type made from real wood.
Not compressed sawdust as used in briquettes for the barbecue.
EPILOGUE
Casper was developed as the first ‘affordable’ coal fired locomotive.
It’s name derives from our smooth walking dog, and should make it move in a similar fashion.
Now you’ve read all the instructions, you should be set to start your first journey. Like a gas or alcohol fired
locomotive the trick is to keep the locomotive running at a steady and realistic pace. So please make sure
you check up every five minutes on the progress of your fire. Keep a steady eye on the water level, and make
sure the boiler is well fed. Most importantly, never forget to open the blower when you stop, for whatever
reason.
Casper has been designed with the ‘beginner’ in mind. Experienced drivers may find some instructions
tedious, however it will secure a reliable journey every time you start running Casper.
Henk Bunte
Please keep us informed if anything should not be to your satisfaction:
info@modelbouwatelier.nl
www.modelbouwatlier.nl
Page 6 of 9

I ENTIFICATION OF CONTROLS AN OTHER IMPORTANT PARTS
The locomotive can be taken out of the case by lifting
it at the steam dome and two fingers trough the front
window openings.
Upper strainer Lower strainer
Fan for firing up Steam oil
Batteries for fan
Handle for handpump Coal shovel
Rake Brush
Spout Charcoal
Anthracite
Locking pins
Grate
Ashpan
Safety valves
Nylon filler cap
Lubricator
Lubricator needle valve
Page 7 of 9

Blower connection to smoke box
Boiler feed valve
Fire door handle (up = closed)
Pressure gauge
Return line for bypass
Water gauge
Blow down valve for water gauge
(Counter clockwise = open)
Bypass valve (counter clockwise = water flows back in
tanks)
Regulator (counter clockwise = open)
Blower valve (counter clockwise = open)
Fire door “open”
Fire hole
Toggle for fire door (counter clockwise = open)
Blower nozzle
Exhaust nozzle
Fire tubes
Page 8 of 9

Steamdome
Handpump in righthand watertank.
Place handpump handle here
Handpump handle placed on handpump
Lefthand watertank
Note: watertanks are connected to each other by
piping under the boiler.
Reverser handle
(to the front = forward ; to the back = backwards)
Cylinder cocks handle (down = closed ,
up = open)
Mechanical pump
Upper locking pin for the grate
Lower locking pin for the ashpan
Page 9 of 9
Table of contents
Popular Toy manuals by other brands

Faller
Faller Street Peddling Booth quick start guide

Traxxas
Traxxas TRX4 Sport Assembly manual

Hasbro
Hasbro furReal F2533 quick start guide

Eduard
Eduard C-54 exterior quick start guide

Gro Company
Gro Company ollie the owl AKA0030 Instruction manual and safe sleep guidelines

PLAYMOBIL
PLAYMOBIL STUNT SHOW 70549 quick start guide