manuals.online logo
Brands
  1. Home
  2. •
  3. Brands
  4. •
  5. Faller
  6. •
  7. Toy
  8. •
  9. Faller 130520 User manual

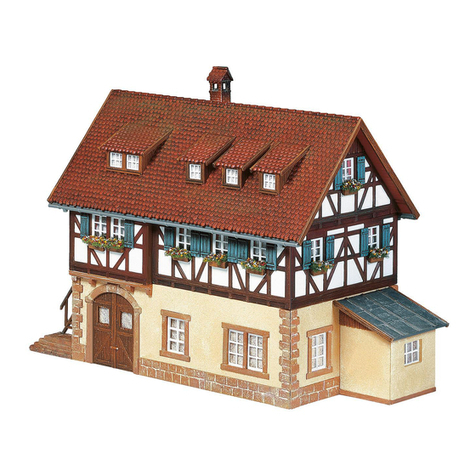
Faller 130520 User manual

Sa. Nr. 228 617 0
LANDWIRTSCHAFTLICHER BETRIEB
BREEDING FARM
EXPLOITATION AGRICOLE
AGRARISCH BEDRIJF Art. Nr. 130520
Vor Beginn des Bastelns sollten Sie sich mit den Spritzlingen und der Anleitung vertraut machen.
Sollte es einmal vorkommen, dass ein Teil im Bausatz fehlt, kreuzen Sie bitte das fehlende Teil in
der Anleitung an und schicken Sie diese bitte an Fa. Gebr. FALLER GmbH, Abt. undendienst,
kundendienst@faller.de, reuzstraße 9, 78148 Gütenbach. Sie erhalten dann umgehend Ersatz.
In diesem Bausatz sind einige unststoffteile übrig.
Before beginning with the assembly please familiarize yourself with the parts and read the instructions carefully.
In case of missing parts please indicate these on the instructions leaflet with a circle and return
the leaflet to Gebr. FALLER GmbH, kundendienst@faller.de, reuzstraße 9, D-78148 Gütenbach, Germany.
You will receive the replacement by return.
Some of the parts in this box are not needed to construct the model.
Avant de commencer le montage de votre maquette bien lire la notice et repérer les grappes.
Si une pièce manque dans une boîte, cochez la pièce correspondante sur la notice et renvoyez-la-nous à
Gebr. FALLER GmbH, kundendienst@faller.de, reuzstraße 9, D-78148 Gütenbach (R.F.A.).
Nous vous ferons parvenir la pièce par retour.
Dans cette boîte se trouvent quelques pièces qui ne seront pas utilisées pour le montage.
Vóór het bouwen zou men de gietstukken en de handleiding moeten bestuderen.
Indien onverhoopt een onderdeel aan het bouwpakket ontbreekt, gelieve men het ontbrekende deel
in de handleiding aan te kruisen en deze te zenden aan Gebr. FALLER GmbH, kundendienst@faller.de,
reuzstraße 9, D-78148 Gütenbach. U ontvangt dan omgaand en gratis het ontbrekende onderdeel.
Van dit bouwpakket worden enkele kunststof delen niet gebruikt.
D
F
GB
NL
Art. Nr. 170688
SPEZIAL-SEITENSCHNEIDER
zum gratfreien Abtrennen von feinsten Spritz-
teilen.
Nur für Polystyrol geeignet.
Special side cutter for cutting off ultra-fine
moulded parts without burrs.
Only suitable for polystyrene.
Pince coupante spéciale pour couper sans ba-
vure les pièces miniatures moulées par
injection. Convient uniquement au polystyrène.
Speciale zijkniptang voor het braamloos af-
knippen van de fijnste gietstukdelen.
Alleen geschikt voor polystyrol.
Für den Zusammenbau des Modells empfehlen wir folgende FALLER-Artikel (sind nicht im Bausatz enthalten):
For the assembly of the kit we recommend following FALLER products (not included in the kit):
Pour l’assemblage du modèle, nous vous recommandons les articles FALLER suivants (non inclus dans le kit):
Om dit model te bouwen adviseren wij de volgende FALLER producten (maken geen deel uit van deze bouwset):
Art. Nr. 170492
FALLER-EXPERT
Flüssigkleber in Plastikflasche mit Spezialkanüle
für feinste lebstoffdosierung.
Liquid cement in plastic bottle with canule
for very fine dosage.
Colle liquide en bouteille plastique
avec bec verseur pour un dosage précis.
Vloeibare lijm in plastic-flacon met doseerbuisje
om nauwkeurig te lijmen.
Inhalt Spritzlinge
Contents Sprues
Contenu Moulages
Inhoud Gietstukken
11x
2 A 2x
2 B 2x
32x
51x
82x
22 AB 4x
26 B 8x
2
8 x
8 x
26/2H02
Deco 2
2/6
3/5
Deco 1
3/4
A
B
A
Fensterfolie
Die beiliegende Fensterfolie entsprechend der Abbildungen ausschneiden und vorsichtig mit wenig lebstoff auf die Rückseite der Fensterrahmen aufkleben.
Window foil
Cut the attached window foil according the illustrations and glue it carefully with a little glue to the rear side of the window frames.
Feuillet transparent pour fenêtres
Découper le feuillet transparent pour fenêtres inclus d’après l’illustration. Coller proprement avec un peu de colle sur la face arrière du cadre des fenêtres.
Vensterfolie
De meegeleverde vensterfolie conform de afbeeldingen uitknippen of uitsnijden en voorzichtig met een beetje lijm op de achterzijde van het raam plakken.
Fensterfolie
Window foil
Feuillet transparent
Vensterfolie
Fensterfolie
Window foil
Feuillet transparent
Vensterfolie
3
2 x
2 x
2 x
2 x
C
B
B
B
B
D
E
F
22/2
22/1
22/2
22/1
C
E
4
FD
1/1
2/5
G
H
IJ
G
I
2 x
2 x
Loch durchstechen (Reedsensor,
liegt nicht bei)
Pirece hole through (Reedcontact,
not included)
Piquez le trou (Reedcontact,
non jointe)
Gat doorstéken (Reedcontact,
niet bijgevoegd)
Art.-Nr. 161670
liegt nicht bei
not included
non jointe
niet bijgevoegd
Art.-Nr. 161675 liegt nicht bei
not included
non jointe
niet bijgevoegd
5
2/7
3/6
3/72/1Deco 3
H
H
J
K
LMNO
2 x 2 x 2 x
K
L
M
NN
Fensterfolie
Window foil
Feuillet transparent
Vensterfolie
6
P
Q
O
P
2/12 2/12 2/112/11 2/10
2/10
2/4
2/4
R
Q
2/18
2/2 2/3
2/9
2/9
2/8
2/8
S
2/18
7
R
nicht kleben
do not glue
ne pas coller
niet lijmen
Nur an dieser Stelle kleben.
Only apply glue to this point.
Coller exclusivement cet emplacement.
Alleen op deze plaats lijmen.
8
TV
WXY
V
WX
2/15
2/17
2/15
2/16
2/192/20
2/14
2/24
2/22 2/25 2/25
2/17
nicht kleben
do not glue
ne pas coller
niet lijmen
nicht kleben
do not glue
ne pas coller
niet lijmen
nicht kleben
do not glue
ne pas coller
niet lijmen
Nur an dieser Stelle kleben.
Only apply glue to this point.
Coller exclusivement cet emplacement.
Alleen op deze plaats lijmen.
9
S
T
Y
2/19 2/21 2/22
2/20
2/25 2/25
2/14
2/17 2/17
abc
d
ef
ab
c
d
nicht kleben
do not glue
ne pas coller
niet lijmen
nicht kleben
do not glue
ne pas coller
niet lijmen
nicht kleben
do not glue
ne pas coller
niet lijmen
nicht kleben
do not glue
ne pas coller
niet lijmen
Nur an dieser Stelle kleben.
Only apply glue to this point.
Coller exclusivement cet emplacement.
Alleen op deze plaats lijmen.
Nur an dieser Stelle kleben.
Only apply glue to this point.
Coller exclusivement cet emplacement.
Alleen op deze plaats lijmen.
10 e
f
g
h
g
12/4
Nur an dieser Stelle kleben.
Only apply glue to this point.
Coller exclusivement cet emplacement.
Alleen op deze plaats lijmen.
nicht kleben
do not glue
ne pas coller
niet lijmen
Art.-Nr. 130525 liegt nicht bei
not included
non jointe
niet bijgevoegd
Art.-Nr. 180624 liegt nicht bei
not included
non jointe
niet bijgevoegd
11
Variante 180624 2/13
2/23
28 mm
ab
28 mm
i
Wird der Taster auf Position a oder b heruntergedückt und gehalten, öffnet sich das Tor.
Achtung: keine Endabschaltung !
Wird der Taster losgelassen, bleibt das Tor in der Position stehen.
Wird der Taster an der gegenüberliegenden Seite
(a oder b) heruntergedrückt und gehalten, schließt sich das Tor wieder.
Achtung: keine Endabschaltung !
If the push button is pressed to position a or b and maintained, the door will open.
Caution: no switching off in the limit position !
Whenever the push button is released, the door will stay in the position.
If the push button is pressed to the opposite side (a or b) and maintained,
the door will close again.
Caution: no switching off in the limit position !
En restant appuyé sur le commutateur en position A ou B, la porte s’ouvre.
Attention : pas d’arrêt en fin de position !
En lâchant le commutateur, la porte reste en position.
En appuyant sur la position inverse du commutateur et en restant appuyé (A ou B)
la porte se refermera.
Attention : pas d’arrêt en fin de position !
Als de knop op positie a of b ingedrukt wordt en vastgehouden, gaan de deuren open.
Let op! Geen eindafschakeling.
Zodra u de knop loslaat blijven de deuren in die stand staan.
Als de knoppen aan de tegenoverliggende zijden (a of b) worden
ingedrukt zullen de deuren weer sluiten.
Let op! Geen eindafschakeling.
Beim Einbau von Art. Nr. 180624 verwenden (Seite 3).
Use when mounting Art. no. 180624 (page 3).
A utiliser pour le montage de la N° 180624 (page 3).
Bij inbouw van Art. nr. 180624 gebruiken (pagina 3).
j
h
i
Art.-Nr. 180624
liegt nicht bei
not included
non jointe
niet bijgevoegd
12 Variante 180624 + 161679
2/13 28 mm
28 mm
i
j
liegt nicht bei
not included
non jointe
niet bijgevoegd
liegt nicht bei
not included
non jointe
niet bijgevoegd
grün
green
vert
groen
grün
green
vert
groen
Variante
Reed ontakt
Variante
Reed ontakt
GND
blau
blue
bleu
blauw
blau
blue
bleu
blauw
rot
red
rouge
rood
rot
red
rouge
rood
GND
i
2 x
2/23
Art.-Nr. 180624
liegt nicht bei
not included
non jointe
niet bijgevoegd
Art.-Nr. 161679
liegt nicht bei
not included
non jointe
niet bijgevoegd
Beim Einbau von Art. Nr. 180624 verwenden (Seite 3).
Use when mounting Art. no. 180624 (page 3).
A utiliser pour le montage de la N° 180624 (page 3).
Bij inbouw van Art. nr. 180624 gebruiken (pagina 3).
13
Funtionsweise:
Beim ersten Einschalten der Steuerung bleiben alle Motoren in der Montageposition stehen.
Wenn z. B. zwischen GND und »Start 1R« eine kurze Verbindung hergestellt wird, z. B. mit einem Taster oder Reedsensor,
läuft der angeschlossene Motor von Getriebe 1 so lange rechts herum, bis der Endschalter »1R« erreicht wird.
Wenn GND mit »Start 1L« kurz verbunden wird, dreht sich der Motor von Getriebe 1 so lange links herum, bis der Endschalter »1L« erreicht wird.
Die Endschaltersignale werden jeweils von der Getriebeeinheit an die Universalschalteinheit gegeben.
Mit dem Poti »P1« kann die Geschwindigkeit für Motor 1 eingestellt werden.
Gleiches gilt auch entsprechend für die anderen Antriebseinheiten.
Art. Nr. 161679 ist für Bahnbetrieb und Car System geeignet.
Die ontaktbleche für die Feinabstimmung nachjustieren (Art. Nr. 180624, Seite 5 Pos. N).
Mode of operation:
When switching the control unit on for the first time, all motors will stay in the assembly position. Whenever a short connection is established for example between »GND« and »Start 1R«,
using a push button or a dry-reed contact for instance, the connected motor of gear 1 will rotate clockwise until reaching the limit switch »1R«.
After a short connection between »GND« and »Start 1L«, the motor of gear 1 will rotate anticlockwise until reaching the limit switch »1L«.
The signals sent out by the limit switches are transmitted by the respective gear box to the all-purpose switching unit.
Potentiometer »P1« allows to adjust the speed of motor 1.
All this similarly applies to the other drive units.
Art. no. 161679 is suitable for use on railway installations and in the Car System.
Readjust the contact plates for precision tuning (Art. no. 180624 ,page 5 Pos. N).
Principe de fonctionnement:
Lors de la première mise sous tension du module de commande, les moteurs restent en position de montage.
En branchant la borne »GND« et »START 1R« sur les bornes de l’inverseur, le moteur 1 avec son entrainement tournera vers la droite jusqu’à la position du fin de course »1R«.
Si on branche la borne »GND« et »START 1L«, le moteur 1 tournera à gauche jusqu’au fin de course »1L«.
Les positions des fins de course sont reportées dans le boitier universel.
La vitesse de rotation du moteur 1 peut être réglée à l’aide du potentiomètre »P1«.
Ceci est identique pour les autres boitiers de transmission.
La référence 161679 est destinée pour la circulation ferroviaire et le Car System.
Les lames de contact pour le réglage fin sont à ajuster (Art. N°. 180624, page 5 Pos. N).
De bediening:
Bij de eerste keer inschakelen van de besturing blijven alle aandrijvingen staan in de start / montage positie.
Als b.v. tussen »GND« en »Start 1R« een korte verbinding gemaakt wordt met een schakelaar of reedcontact zal de aangesloten motor 1 rechtsom draaien zolang er een elektrische verbinding is en het eindpunt,
b.v. deur helemaal open, bereikt is. Maakt u contact tussen »GND« en »1L« zal motor 1 linksom draaien en de deur sluiten. Een eindsignaal wordt door de aandrijféénheid aan de universele schakeléénheid
doorgegeven. Met de potentiometer kunt u de snelheid van motor 1 instellen. Vanzelfsprekend geldt dit ook voor de andere aandrijféénheden.
Art.nr. 161679 is geschikt voor spoorwegmodelbouw en Faller Car Systeem.
De contactveertjes voor de fijnafstemming nauwkeurig instellen (Art. Nr. 180624, pagina 5 Pos. N).
14
3/5
3/1
3/1
k
l
m
n
o
p
k
l
m
m
n
o
3/5
n
8/1
3/11
Deco 7
3/10
5/3
18 mm
19 mm
18 mm
19 mm
2 x
Fensterfolie
Window foil
Feuillet transparent
Vensterfolie
15
j
q
r
p
q
3/9
3/93/9
3/9
nicht kleben
do not glue
ne pas coller
niet lijmen
Gebr. FALLER GmbH
·
Fabrik für Qualitätsspielwaren · D-78148 Gütenbach
Modellbau leicht gemacht
Klebstoffe für den Profi-Modellbauer
170490
SUPER-E PERT 25 g
Seit über 10 Jahren werden die FALLER
EXPERT- lebstoffe angeboten.Dieser
lebstoff für den Profi reagiert schneller,
klebt schneller und dauerhafter. Mit Spe-
zialkanüle und anülenschutzkappe.
170492
E PERT 25 g
Dieser lebstoff wird nach einer neuen
Rezeptur hergestellt, das sorgt für opti-
male lebergebnisse. Die Spezialkanüle
ermöglicht eine besonders feine lebstoff-
dosierung. Der lebstoff kann in kleinsten
Punkten, auch an schwer zugänglichen
Stellen, auf die zu klebenden Teile aufge-
tragen werden.
170500
Modellbaukleber 10 g
für blitzschnelle lebearbeiten. Dieser Se-
kundenkleber (Cyanacrylat) besitzt ver-
besserte lebeeigenschaften, fließt in
kleinste Spalten und neigt weniger zum
riechen. Damit lassen sich fast alle le-
beverbindungen herstellen. ühl und
dunkel lagern.

Other Faller Toy manuals

Faller 222144 User manual

Faller

Faller 222144 User manual

Faller ENZIAN User manual

Faller

Faller ENZIAN User manual

Faller 120136 User manual

Faller

Faller 120136 User manual

Faller Mountain Chalet User manual

Faller

Faller Mountain Chalet User manual

Faller OLD-TOWN WALL SET 232170 User manual

Faller

Faller OLD-TOWN WALL SET 232170 User manual

Faller 120157 User manual

Faller

Faller 120157 User manual

Faller Grandfather clock User manual

Faller

Faller Grandfather clock User manual

Faller 130376 User manual

Faller

Faller 130376 User manual

Faller Summit Cross with Mountain Peak 180547 User manual

Faller

Faller Summit Cross with Mountain Peak 180547 User manual

Faller 130585 User manual

Faller

Faller 130585 User manual

Faller 130204 User manual

Faller

Faller 130204 User manual

Faller COFFEE CUPS ROUNDABOUTS User manual

Faller

Faller COFFEE CUPS ROUNDABOUTS User manual

Faller ICE-CREAM PARLOUR User manual

Faller

Faller ICE-CREAM PARLOUR User manual

Faller 140353 User manual

Faller

Faller 140353 User manual

Faller 231716 User manual

Faller

Faller 231716 User manual

Faller DETACHED HOUSE User manual

Faller

Faller DETACHED HOUSE User manual

Faller TOP SPIN User manual

Faller

Faller TOP SPIN User manual

Faller Two fair booths User manual

Faller

Faller Two fair booths User manual

Faller DAEMONIUM GHOST TRAIN User manual

Faller

Faller DAEMONIUM GHOST TRAIN User manual

Faller HALF-TIMBERED TWO-FAMILY HOUSE User manual

Faller

Faller HALF-TIMBERED TWO-FAMILY HOUSE User manual

Faller 180282 User manual

Faller

Faller 180282 User manual

Faller E-werk 190601 User manual

Faller

Faller E-werk 190601 User manual

Faller 141072 User manual

Faller

Faller 141072 User manual

Faller TOWN CORNER HOUSE User manual

Faller

Faller TOWN CORNER HOUSE User manual

Popular Toy manuals by other brands

REVELL 2053 Assembly manual

REVELL

REVELL 2053 Assembly manual

POLA G 330924 manual

POLA G

POLA G 330924 manual

Brookstone Stunt Copter user manual

Brookstone

Brookstone Stunt Copter user manual

BMI De Havilland DH-1 manual

BMI

BMI De Havilland DH-1 manual

Radica Games Ultimate Bass Fishin' instructions

Radica Games

Radica Games Ultimate Bass Fishin' instructions

LEGO technic 8110 instructions

LEGO

LEGO technic 8110 instructions

Mattel SUPERMAN RETURN J2098 instructions

Mattel

Mattel SUPERMAN RETURN J2098 instructions

Lionel VISION Baggage Car owner's manual

Lionel

Lionel VISION Baggage Car owner's manual

Revell Control HELICOPTER X-RAZOR NEXT user manual

Revell Control

Revell Control HELICOPTER X-RAZOR NEXT user manual

Century UK RAZOR CX 2.4G User handbook

Century UK

Century UK RAZOR CX 2.4G User handbook

Enabling Devices Glitter Gumball Switches 7830B user guide

Enabling Devices

Enabling Devices Glitter Gumball Switches 7830B user guide

LEGO 8109 TECHNIC manual

LEGO

LEGO 8109 TECHNIC manual

Step 2 Disney/Pixar Cars 3 Ride Around Racer 8747 manual

Step 2

Step 2 Disney/Pixar Cars 3 Ride Around Racer 8747 manual

Fisher-Price DFN41 instructions

Fisher-Price

Fisher-Price DFN41 instructions

Hobbico Mini Switch instruction manual

Hobbico

Hobbico Mini Switch instruction manual

JR Venture CP Assembly instructions

JR

JR Venture CP Assembly instructions

LEGO CITY 4440 Building instructions

LEGO

LEGO CITY 4440 Building instructions

Lansay Glitterizz My Electronic Glitter Studio instructions

Lansay

Lansay Glitterizz My Electronic Glitter Studio instructions

manuals.online logo
manuals.online logoBrands
  • About & Mission
  • Contact us
  • Privacy Policy
  • Terms and Conditions

Copyright 2025 Manuals.Online. All Rights Reserved.