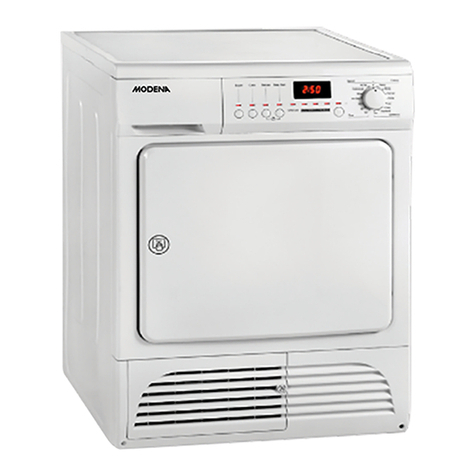
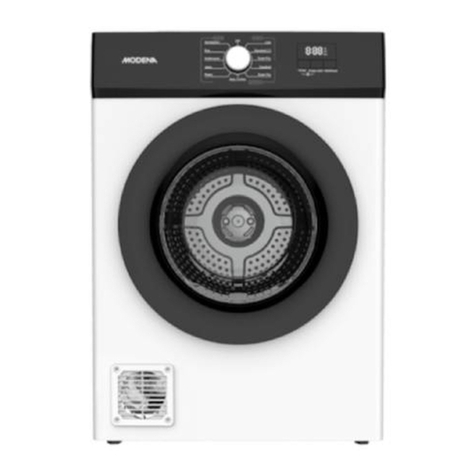
Modena Ettore Series Owner's manual

User
Manual Book
Tumble Dryer
Ettore Series
ED 770

2
Thank you for your trust in choosing MODENA products for your household
needs. With your satisfaction as our priority, we constantly aim to deliver stylishly
designed products equipped with state-of-the-art technology to assist you in
your daily activities.
This is your guidebook containing everything you need to know about our
product. Please reach out to us if you need further assistance or other
information via our Customer Care or our official website www.modena.com.

3
TABLE OF CONTENTS PAGE
- Introduction 2
- Part 1: Name of Parts 4
- Part 2: Installation 4
- Part 3: How to Use 5
- Part 4: International Textile Care Label (ITCL) 9
- Part 5: Maintenance 9
- Part 6: Precaution 10
- Part 7: Problem & Solving 12
- Part 8: Specification 13
- Appendix 13

4
ED 770
- Make sure the air hole on the front and the back part of the tumble dryer is not closed.
- The back part of the tumble dryer will be very hot when it is turned on.
- Make sure the back part of the tumble dryer is hard to be reached when the machine is operating.
- Do not use connecting cable. The plug on the tumble dryer must be connected directly to electrical
socket.
- Install the filter on its place.
- Put the tumble dryer where the power plug can be easily reached after installation.
- Clean the tumble dryer (outside & inside part) from dust/dirt with damp cloth.
- The smell from the heater will disappear after the first period of heating.
Attention:
The tumble dryer must be connected to the electrical source which has been connected to the ground
/ grounded.
IMPORTANT: The heat emitted by the tumble dryer can reach a temperature of 600 C. Make sure the
unit is placed on the floor that can bear high temperature. When operating the unit, the room
temperature must not be lower than 50 C and higher than 350 C because it will affect the dryer
performance.
Electric Connection
Every work that is connected with the electricity in this unit installation must be conducted by
experienced and professional technician.
Warning: This unit must be grounded
The producer is not responsible for every form of damage and loss that is caused by not following the
safety guidance that has been given.
Before activating the unit, make sure that the electric supply is in accordance with the unit
specifications.
Part 1: Name of parts
Part 2: Installation
1. Top Board
2. Control Panel
3. Door
4. Front Panel
5. Side Panel
6. Filter
7. Flex Tube
8. Power Plug
9. Switch
10. Drum

5
If the power plug needs to be changed, follow the explanation below.
The Color of the cable at the power cable shows code as the following:
Green and Yellow –Earth / Grounding
Blue –Neutral
Brown –Live
Green and Yellow cable must be connected to the terminal signed with the letter or symbol (earth) or in
green and yellow color.
PREPARATION BEFORE OPERATING THE TUMBLE DRYER
1. Make sure the electric source is in accordance with the installation guide.
2. Remove the polystyrene block and safety foam which is inside the drum.
3. Before it is used for the first time, it is recommended to clean the inside of the drum by putting
several pieces of moist cloth to the inside of the drum and then dry it for 30 minutes.
4. Sort the cloths that will be dried according to the fabric type and color.
5. Check the International Textile Care Label (ITCL) guide which is attached to the cloth.
6. Soft fabric such as stocking must be put into the washing net bag.
7. Close the pillowcase to prevent small-sized clothing be put gets inside. Hook the button, zipper,
pants and skirts.
8. Do not dry the black-colored cloths together with furry fabrics such as towel with bright color,
because the lint will appear on the dark clothes.
9. Squeeze and spread the shirt before it is dried.
10. Knitted fabric or the kinds will probably wrinkle a little during the drying. Do not dry it too dry for this
kind of fabric.
11. You can also dry item that is starched. However, to get the wanted starched effect, choose the “Iron
dry” program. To remove the starch, wipe the inside of the drum after the drying process with moist
cloth and dry it.
12. It is recommended to dry big and small clothing together.
13. To prevent the cloths in becoming stiff, it is recommended to use cloth moisturizer at the washing
process or use special conditioner for fabric when using the tumble dryer.
14. If certain item is still wet after it is dried, set the drying according to the time of at least 30 minutes.
This is needed especially for the part that is layered (such as collar, pocket, etc.).
15. Turn over the item with double layer of fabric so the drying result is better.
16. Do not put too much weight into the tumble dryer or drying big things such as duvet or sleeping bag
because this will obstruct the air circulation inside the tumble dryer.
17. Do not make it too dry when drying the clothes, this is to avoid the tangling and so that it will be
easier when ironed.
18. Make sure the air ventilation is good and the room temperature is not over 350 C. Cloths that will be
dried must have been SPIN or squeezed beforehand.
19. For maximum result of drying, spin or squeeze the laundry first before handling it to the tumble
dryer.
Part 3: How to Use

6
ED 770
OPERATION - Open the door of the tumble dryer, then put in the clothes that will be
dried one by one, make sure the clothes do not get stuck on the door or
the filter.
- Press the ON/OFF button.
- Choose the needed program by rotating the program knob.
- The indicator light on the start/pause button will turn on.
- This process will automatically stop if you do not press any button for
10 minutes.
On/Off button
Press this button to turn on/off the dryer.
Start/Pause button
After choosing the drying program and the optional program, press this button to
start the drying process. If the door of the dryer is opened when a program is running,
the process will be stopped. Then after the door is closed, press this button once
more to continue the program from where it was stopped. In this case, the light on the “start/pause”
button will blink to remind you that the start button needs to be pressed once more.
Button # 1
:
ON/OFF Button
To turn on and off the tumble dryer.
Button # 2
:
Start/Pause
It functions to start/stop the drying program.
Button # 3
:
Signal
If the signal button is activated, there will be a sound/bell signal in every end of the
program.
Button # 4
:
Intensity
The intensity button function is to set the drying time based on the drying level of
the laundry.
Button # 5
:
Delay
This button will allow you to delay the start of the program to until 24 hours.
Button # 6
:
Anti-Crease
The “Anti-Crease” function is to choose the program duration to prevent crease on
clothes.
Button # 7
:
Program Knob
To choose and set the desired drying program.

7
The choosing knob is divided into some parts as the following:
- Cottons
- Synthetics
- Time
- Special
- Airing
- Wool
Standard Cotton
Option "Less" is used for drying clothes made from cotton. If the cotton clothes are mixed with other
type of fabrics, rotate it to "Extra" or "Standard".
Standard Synthetics
This option is used to dry clothes made from synthetic materials, can be dried with "Standard" or
"Extra".
Time
This option is to set the drying time from 30 minutes, 40 minutes, 50 minutes to 60 min for laundries
that weight less than 1kg.
Delicate
This function is recommended to dry smooth fabrics laundry.
Refresh
This function is to deodorize clothes.
Quick
This function is for drying clothes that long and thick.
Airing
This function is to dry clothes without heat.
Wool
This function is for drying wool material clothes, but they should be dried by hanging.
Optional Program Button
To optimize the drying process some drying program can be combined with the "optional" program.
Optional program is selected after choosing the desired drying program and before pressing the "Start
/ Pause". When this button is pressed, the indicator lights will turn on in accordance with the selected
program, when the button is pressed once more the light will die.
Signal Button
After turning on the unit, the buzzer is off if you do not select any operation. The
buzzer’s function can be activated or deactivated during the process. By
pressing the "Signal" button, the bell will rings and the buzzer indicator light will
on. When the buzzer is active, there will be a sound signal in the following
situation:
- When pressing any button.
- At the end of the program.
When the buzzer is active, if you press the "buzzer" once again, the buzzer will die.
Intensity Button
This button lets you select the intensity level. Intensity can be pressed before
selecting progam.
Delay Button
This button allows you to delay starting the program up to 24 hours. To enable
this function, select the desired drying program and then select the function
"Delay". Each time the button "Delay" is pressed, the delay time increases 1

8
hour. The "Delay" function can be chosen before or after selecting the optional program (Buzzer,
Quick, and Delicate),
Anti-Crease Button
This button is for turning on the anti-crease program for a maximum of 2 hours on
the clothes. If it is not pressed, the "Anti-Crease" program will only work for a
maximum of 30 minutes.
The indicator light on the control panel
These lights indicate the following functions :
- Indicator Lights "Child Lock" This light shows that the program has been locked.
- Indicator Lights "Intensity" This light will turns on after selecting the intensity level
- Indicator Lights "Filter” The lamp will turns on in every cycle and at the end of the
program to remind you that the filter should be cleaned.
- The indicator light "Signal" The lamp will turns on after selecting the sound / bell.
Cooling process
Every drying program ends with a cooling process for 10 minutes. If the laundry is not taken out at the
end of the cycle, the machine will continue to the anti-wrinkle process for a maximum duration of 30
minutes. After the anti-wrinkle process is done and the laundry is not removed, the tumble dryer will
stop automatically. The screen will display “end” and the sound/bell signal will rings for 15 seconds (if
the “buzzer” function is activated). To end it, rotate the program chooser knob to “O” position, and all
the lights will turn off.
“Child Lock” function
When the machine is turned on, press the “Anti-Crease” and “Delay” button
together for several seconds. Then, the system will lock everything. To stop this
function, press the same button together for several seconds.
After the usage
Clean the filter. Use a washcloth to wipe, then dry before reinstall
Changing the chosen program
To change the running program, rotate the program chooser button to the position to cancel the former
program, then choose the new program, and press the start button.
Important!
If the drying program must be stopped before it reaches the end, before putting out the laundry, we
recommend you to rotate the program chooser knob to “Airing” position and wait until the cooling
process is done. This is to avoid the heat piling up in the machine. To continue this process, first, press
the “Stop” button, then rotate it to “Airing” position. After that, press the “start/pause” button once again.
Always clean the filter after every usage.

9
Pay attention to the drying code symbols that attached to the cloth label. In taking care of your
clothes, it is better to look attentively to the drying code symbols on your cloth label before drying it
with the tumble dryer. The explanation is as follows:
Drying
Can be dried using the tumble
dryer
The drying is by spreading it out
The drying with tumble dryer at
high temperature
The drying is by hanging
The drying with tumble dryer at
low temperature
The drying is by using cloth
hanger
Do not dry by using tumble dryer
Not tumble dry normal
In the shade
Dry clean normal cycle petroleum
solvent only
Dry clean normal cycle with any
solvent
Dry clean
Do not dry clean
MODENA tumble dryer is specially designed for long term usage, thus it does not need complex
maintenance. However, some maintenance procedures below are recommended for your tumble dryer
maintenance.
Before doing the maintenance, make sure that the unit is not connected to the electrical source.
Control Panel:
Wipe with a soft damp cloth. Do not use rough objects to clean it. Do not spray the cleaner directly to
the panel.
Some liquid dirt remover products can damage the finish on the control panel. Use these products away
from the dryer and immediately wash your control panel if there is a spill or splash of liquid.
Stainless Drum
To clean the stainless drum, use a damp cloth with a gentle cleanser that can be used to clean the
surface of the stainless material. Clean the rest of the cleaner with a clean cloth.
Outer part of the Machine Dryer:
Wipe it with a soft damp cloth. Do not use rough objects to clean it. Protect the surface from sharp
objects.
Exhaust system Machine Dryer ED 650:
Should be inspected and cleaned once a year to maintain its optimal performance. The outer part of
the exhaust should be cleaned more frequently to ensure the operation of the dryer is working well.
Part 4: International Textile Care Label (ITCL) symbol
Part 5: Maintenance

10
Cleaning the filter:
- Clean the lint filter before usage. Remove the filter by pulling it straight up.
- Cleaning Filter. Use a soft cloth and wipe it with your hand.
- Install filter. If the filter has been cleaned by damp cloth or in the water, please install it
back after being dried.
Doors:
periodically clean the inside of the door to eliminate yarn and lint. The cleanliness affects the
effectiveness of the drying process.
Cleaning Cabinet and inner tube:
Use a soft damp cloth when cleaning the cabinet and inner tube.
1. Do not rinse it with water directly.
2. Do not use brush to clean it.
3. Do not use gasoline and alcohol.
Important Safety Information should always be noticed when using this dryer:
- Clothes with metal accessories are not allowed to be dried with dryer. Dryer will be damaged if the
metal accessories are detached off when drying. Please use the drying rack to dry clothes with
metal accessories.
- Read all instructions attentively before operating.
- Make sure the voltage printed on the dryer is suitable with the voltage at your home before
connecting this dryer to the electricity source.
- To avoid the possibility of fire:
a. Do not dry clothes which have been washed/soaked/sprinkled by gasoline, liquid solvent for
dry cleaning or other flammable liquids because those liquids produce gas that can trigger
explosion.
b. Clothes that made of latex or the likes are not allowed to be dried at hot temperature. These
materials, when heated at certain temperatures, may produce fire spontaneously.
- Do not operate this dryer if the wire or the power plug is damaged, or do not functioned as it is.
- Do not alter or modify the specifications of the product in any form they may cause hazards.
- Make sure the power cable is not suppressed by the unit.
- All forms of electrical work associated with the installation of this unit should be conducted by the
experts who are professional.
- Important!! The unit is not and not to be installed in a built-in.
- If the unit is moved, the moving must be done vertically.
Part 6: Precautions

11
Do not plug in or out the power
plug to the socket with wet
hands.
The machine must be
connected to a power supply
with an efficient grounding,
according to the law.
Do not use an extension
lead.
Do not expose the machine
directly under the sun.
Do not pull the cable to
remove the plug from the
power socket.
After usage, it is advisable
to disconnect the machine
from the power socket.
Safety Reset
1. This dryer has a safety cut out switch that is activated by temperature
2. The safety reset button is on the backboard. If your dryer is not heating this button must be pressed before
the dryer will operate again. You may need to wait 10 minutes for the cooling to occur.
3. The most common reason for the dryer to overheat is a blocked filter. Clean the line filter after each load
to prevent the dryer from overheating.
Safety Reset
Use your finger or a pencil to press the button in until you feel it click.

12
Do a checking for these problems below before contacting our call center if there is problem in the
operation:
The clothes are not dry
after the normal drying
time.
Check:
1. Is the heater settings are correct?
2. Is the timer settings are correct?
3. Is the filter / lint filter has been cleaned? Dirty filters will hinder
air circulation.
4. Is the black button on the back of the dryer has been pressed?
(for the products that has a key)?
5. Is the tumble dryer can heat up - the door should feel warm
after 10-15 minutes of the first cycle of the program?
Drying results are not
satisfactory
Check:
1. Is the selected program is appropriate?
2. Are the filters in a clean condition and not clogged?
3. Is the weight of the laundry appropriate?
4. Is the sensor in clean condition and no deposits that cover its
surface?
Tumble dryer is not
functioning
Check:
1. If the power source has been available?
2. Is the power cord firmly connected to the socket?
3. Is the machine turned on and the door has been closed
properly?
Drum lights not working
Check:
1. Are the lights in good condition?
The drying cycle stops
shortly after it is turned
on. Indicator "End" is on.
Check:
1. Is the laundry weight not too light?
2. Is the laundry too dry for the selected program size? -> Select a
higher drying program?
Drying cycle runs longer
than usual
Check:
1. Is the laundry too heavy/the weight exceeds the capacity of the
selected program?
.
Error code appear on
display
Check:
1. The error code table in appendix to find the problems.
If the problem cannot be identified or resolved, immediately contact the MODENA call center. Before
contacting MODENA call center, check the record unit model, serial number and date of purchase of
units: The call center will require this information.
Part 7: Problems and Solving

13
Model
ED 770
Type of dryer
Tumble Dryer
Dryer capacity (kg)
7
Color
White
Drying time (min)
145
Ideal load for Cotton (kg)
7
Ideal load for Synthesis (kg).
3
Drum Material
Galvanic Steel
Anti-wrinkle program
Yes
On / Off button
Yes
Electric voltage (Volt)
220-240
Frequency (Hz)
50
Power (watts)
2000
Product dimensions (L x W x H) mm
595 x 550 x 840
The design and specifications of the appliance may change without prior notice to improve the quality
of the product. The pictures in this manual are schematic and may not exactly match your product. The
values stated on the machine labels or in the documentation accompanying the product are obtained
in laboratory in accordance with the relevant standards. Depending on operational and environmental
conditions of the appliance, values may vary.
The following recommended load when using the dryer (adjust with the product type):
- Maximum load general rule:
Cotton, linen: drum is full but not too tightly packed;
Synthetic material: do not fill the drum more than half-full;
Delicate fabrics and wool : do not fill the drum more than a quarter-full.
- Clothing weight
The following weights are indicative:
Bathrobe
1600g
Evening dress
265g
Napkins
130g
Knickers
130g
Cotton blanket
930g
Work clothes
800g
Sheets
665g
Shirts
260g
Pillowcases
266g
Pajamas
130g
Tablecloth
330g
Blouse
665g
Towel
265g
Panties
130g
Part 8: Specifications
Appendix: Drying Loads Recommendations

14
The following error code that probably appear on the display of dryer machine:
No
MALFUNCTION
Error
Code
POSSIBLE CAUSE
SOLUTION
1
temperature
sensor error
E36
Temperature sensor is opened or short-
circuit happened
Stop the program and call the
call center
Appendix: Error Code

11/20
This manual suits for next models
1
Table of contents
Other Modena Dryer manuals
Popular Dryer manuals by other brands

Midea
Midea MD-6288 owner's manual

Bosch
Bosch WTX8HKB9SN Installation and operating instructions

Kenmore
Kenmore 110.65132410 Use & care guide

Maytag
Maytag 4KMEDC100 Use and care guide

Electrolux Professional
Electrolux Professional TD6-30 Compass Pro installation manual

LG
LG DLGX0002TM User's guide & installation instructions