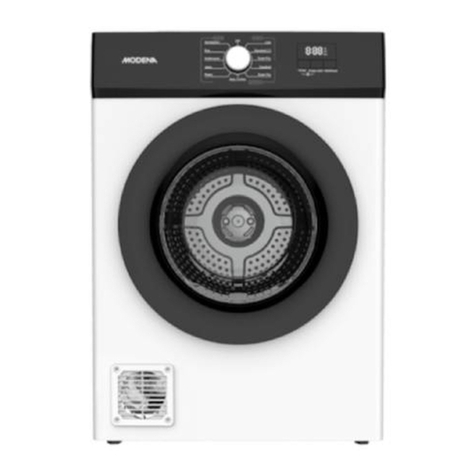
Modena Efficace ED 8107 G Owner's manual

User
Manual Book
Dryer
Efficace Series
ED 8107 G

2

3
TABLE OF CONTENT
Part 1: Safety Information 4
Safety Precaution 4
Grounding Instruction 11
Environmental Notice 11
Part 2: Name of Parts 12
Part 3: Installation Instructions 12
Pre-Installation Consideration 12
Door Installation 13
Adjusting the Leg 15
Connecting the Drain Hose 15
Part 4: How to Use 17
Pre-Use Check 17
Cloth Classification 18
Instruction for Use 18
Control Panel 20
Drying Programs 22
Part 5: Maintenance 23
Emptying the Water Container 24
Cleaning the Filter 25
Cleaning the Heat Exchanger 26
Cleaning the Cooling Air Inlet 27
Cleaning the Humidity Sensor 27
Cleaning the Door 28
Winter Freezing Treatment 28
Part 6: Troubleshooting 29
Error Code 30
Part 7: Specification 32
This guide book explains everything you need to know about your new
product. Please contact our Customer Care should you need further
assistance trhough www.modena.com

4
Safety Precaution
When installing, maintaining and using the dryer, please read these
instructions carefully and operate with caution so as to make full use of
the functions of the dryer and prolong the service life of the dryer. The
Company shall not be liable for any loss caused by improper use.
Important Safety Symbols and Precautions:
WARNING: Dangerous or
unsafe behavior may
result in serious injury,
death, or property
damage.
ATTENTION: Dangerous
or unsafe conduct may
result in personal injury or
loss of property
Do Not Try
Do Not Remove
Do Not Touch
GROUNDING: Make sure the dryer is grounded effectively to
prevent electric shock
Keep the dryer away from heat
sources and open fires (e.g.
Mosquito coils, candles,
cigarettes, hairdryers, etc.). May
cause fire or product distortion.
Do not place this product directly
against the wall. It can damage
power plugs or power cords,
causing hazards such as fire or
electric shock.
PART 1: SAFETY INFORMATION

5
Please install the product in a
place where the plug can be
easily plugged in and out when
cleaning the product or store the
product for a long time. Failure to
do so may result in fire or electric
shock.
This product is only applicable to
220V. To ensure your safety, you
must use a three-core socket
and be careful to check that your
socket is properly and reliably
grounded. Electric shock can
result from product failure or
leakage.
Do not place flammable goods
near the product, such as
curtains or carpets. Hot air
emitted from the product may
cause damage to the object or
cause hazards such as fire.
Do not leave the dryer in a damp
place such as the bathroom or in
a windblown or rainy place. May
cause fire or electric shock.
If the power cord or power plug
is damaged, or the power socket
hole is loose, please immediately
stop using the product and
contact the call center. Poor
contact can lead to hazards such
as electric shock, leakage or fire.
Always connect the power plug
with the cord faces downwards.
If the power supply is connected
in the reverse direction, the
power supply cable may be
disconnected internally, causing
fire or electric shock.

6
Please protect the power cord.
Do not place the power cord
carelessly so it is not trampled
on, pressed, or clamped by other
objects. Possible fire or electric
shock.
Please grab the body when
removing the plug. Do not pull
the cable as it may result in fire
or electric shock caused by a
broken cable.
Do not alter the power cord
without authorization. Can cause
fire or electric shock.
Do not plug in or unplug the
power plug with wet hands. Risk
of electric shock.
Do not install the product in a
room below zero degrees
Celsius. The freezing of parts
may cause the product to
malfunction or damaged.
Do not use an extension socket,
use a dedicated socket to
connect to the power supply.
Possible fire or electric shock

7
Do not sprinkle the water directly
to the product during cleaning.
May result in short circuits or
electric shocks.
Please be careful not to allow
pets or children to enter in the
machine. May cause death due
to suffocation or other injury.
Do not put wet clothes that have
not been spun or squeezed. May
cause fire or electric shock
If there is a dirt on the power
plug, please wipe it clean and let
it dry before using it. Possible fire
or electric shock.
Do not dry clothes stained with
kerosene, gasoline, alcohol and
other combustible substances.
Could lead to an explosion or
fire.
Do not press the touch key on
the panel with a cone or other
sharp object. Possible electric
shock.

8
Do not attempt to repair the
dryer by yourself or allow
inexperienced and unqualified
personnel to do so. May cause
serious damage to the dryer and
personal injury.
If there is a gas leak, open the air
ventilation immediately and do
not touch the power plug.
Possible sparks leading to
explosions or fires.
Do not touch the dryer door or
upper part of the product with
your hands while the product is
running. May cause burns
Do not use flammable gases or
substance (benzene, gasoline,
petroleum, alcohol, etc.) near the
product. There may be
explosions or fires.
When the product is flooded, be
sure to contact the call center.
May cause fire or electric shock.
Please be careful not to get your
hand wedged on the door of the
dryer, Water container, etc.
Possible harm.

9
Please manage your
surroundings to prevent pets,
rats, insects, etc. from entering
the product. Risk of damage to
power cords or fires.
If the product produces abnormal
sound, taste, smoke and other
phenomenon, please contact the
call center. May cause fire or
electric shock.
Please be careful not to allow
children to play with this product.
Possible harm.
Please make sure that the
clothes can be dried with a dryer.
May cause damage to the
product or dried goods.
Do not wipe the product with
liquid detergent or bleach.
Bleach splatter on product
surfaces can cause paint to fall
off or discoloration
Do not put detergent or bleach
into the water container and
drum. Can cause product
malfunction or electric shocks

10
Do not place objects on top of
the product because of the high
temperature on the top and door
when the product is running.
Please do not place objects on it,
which may cause deterioration or
distortion of the product. Falling
objects can cause bodily harm.
This product is only used for
drying. Using the product for
other purposes may cause
abnormal vibrations and may
result in damage to product,
floors, walls, etc.
When the product is installed or
moved, it must be handled by
more than 2 people. Product
drop or product impact may
result in personal injury or
product damage.
Do not install the product inside
a moving vehicle (RV), ship or
aircraft, etc. Please make sure to
consult the nearest after-sales
service store if you can install it
in a special place.
Please dispose of the packaging
materials (plastic, foam, etc.) in
time to avoid children touching
them. Packaging materials can
cause asphyxiation.
Cut the power cord when you
scrap the product, and destroy
the control panel. Reuse can lead
to fire or electric shock.

11
Grounding Instruction
•This appliance must be grounded. When malfunction or breakdown
occurs, grounding will reduce the risk of an electric shock by
conducting the electric current to the ground. This appliance is
equipped with a grounding-equipped conductor cord and a
grounding plug.
•The plug must be plugged into an appropriate outlet that is installed
and grounded in accordance with all local regulations and safety
standards.
•Do not modify the plug provided with the appliance if it does not fit
with the outlet. Have a proper outlet installed by a qualified
electrician.
•Improper connection of the grounding-equipment conductor can
result in the risk of electric shock. Check with a qualified electrician
or service representative if you are in doubt whether the appliance
is properly grounded.
Environmental Notice
The packaging material used is recyclable. We recommend
that you separate plastic, paper and cardboard and give
them to recycling agents. To help preserve the environment,
the refrigerant used in this product is R134a, which does not
affect the ozone layer and has little impact on the
greenhouse effect. According to WEEE (Waste of Electrical
and Electronic Equipment) guidelines, waste from electrical and
electronic devices should be collected separately. If you need to remove
of this appliance in the future, do not throw it away with the rest of your
domestic garbage. Instead, please take the appliance to the nearest
WEEE collecting agents, where available.

12
Pre-Installation Consideration
In order to avoid unnecessary fire, electric shock or personal injury
hazards, all electrical wiring and grounding must be set in accordance
with the national electrical standards. When preparing for installation,
ensure that your power supply is fused or equipped with circuit breakers
for 220V, 50Hz, 15A. To ensure your safety, you must use a three-core
socket and ensure that your socket is properly and reliably grounded.
Please install on a hard, flat, level floor (otherwise, abnormal vibration
and noise, or even malfunction may happened.).
PART 2: NAME OF PARTS
PART 3: INSTALLATION GUIDE
Cooling air inlet
Adjustable foot
Lint filter
Control panel
Water container
Door
Heat exchanger cover

13
•After installing the equipment in the desired position, adjust the
horizontal foot of the dryer if the ground is uneven (do not insert
wood chips or any other items under the foot).
•Avoid direct sunlight and ensure that the room has good ventilation.
•Models with ventilation openings at the bottom should not be
placed on floor materials such as carpets that can block ventilation
openings.
•Cotton chips are not allowed to pile up around the drum dryer.
•Please install the product in an ambient temperature of 5 ~ 35 °C.
•In an environment where the temperature is too high or too low, the
product performance may be reduced.
•Recommended distance between the product and the wall:
oTop: 25 mm
oBoth sides: 25 mm
oBack: 50 mm
Door Installation
This product has a reversible door. You can adjust the door opening
according to your needs.
Remove the door by
unscrewing the 2
screws with a phillips
screwdriver.
If the door is on the left
If the door is on the right

14
Unscrew 5 screws with
a phillips screwdriver
and separate the
mounting brackets (A)
and (B) at the left and
right of the clothes
dryer door.
Switch door hinge, part
(B) and part (A) and
tighten 5 screws with a
phillips screwdriver.
Remove the four
screws in the door lock
position, remove the
door lock and install to
the other side.
Fit door on the other
side and screw down
with 2 screws.
Hinge
Hinge
Hinge
Hinge

15
Adjusting the Leg
Use a leveling tool to
confirm that the
dryer is installed
horizontally. If
not, adjust the
horizontal foot as
required.
Connecting the Drain Hose
If you don't want to use water container or if the dryer is stacked on the
washer, you can connect a drain hose to the product.
Pull the short drain hose out of
the pump outlet (A).
Plug the short hose into (B) pillar
and make it fixed.

16
Plug the provided long drain
hose into (A) pump outlet and
make it fixed. Put the other side
of the hose into floor drain.
ATTENTION!
•When connecting the drains, make sure that the highest point of
the hose does not exceed the product top cover.
•Install the attached drain hose and insert the ends into the floor
drain or other drains to allow direct drainage.
•The end of the drain hoes pipe should not be immersed in water.
•External water may flow back into the product.
•Water may leak if the pipe is loosened.

17
Pre-Use Check
Before first use, please check the following:
1. Make sure that the power plug is plugged in
2. If you opt to use drain hose, please make sure that the drain hose is
installed properly
3. Make sure that the product is installed horizontally (Vibration and
noise may occur if not installed properly)
Please always check your cloth for the following symbols and use the
dryer according to instructions
Symbol
Description
Symbol
Description
Drying
Put it on the hanger
Standard Dry Clothes
Put it on the rope
Do not use clothes
dryer
Dry the cloth by laying
it on a flat surface
Non-drying
Dry in the shade
Dry cleaning
Available in various
solvents for dry
cleaning
Non-dry cleaning
Dry cleaning with
gasoline, pure alcohol
PART 4: HOW TO USE

18
Cloth Classification
•Please confirm the laundry label and select the drying mode as
recommended.
•Drying times and level depending on the type of clothing.
•Do not dry the clothes that will shrink.
•Please classify the clothes according to their type, size, color and
material.
•New towels or synthetic fibers will fluff. Please dry them separately.
•It is recommended to flip the clothes with zippers or buttons, pull
the zippers and fasten the buttons to reduce noise during drying.
Instructions for Use
1. Plug in the power plug.
2. Open the door and put in
clothes.
3. Close the door.
4. Select the program.
5. Press the Start/Pause.
6. Take out the clothes

19
7. Pull off power plug.
8. Clean the filter and empty
the Water container.
ATTENTION!
•Please make sure the filter is clean before usage
•Please classify the clothes that will be dried
•Do not drink the condensation water
•Make sure no clothes between the door and the rubber
sealing ring

20
Control Panel
1
Power
The power key switches the machine on and
off. If the dryer is turned on and left idle for 5
minutes, the power is automatically switched
off.
Press the power key for 3 seconds to turn
the machine off.
2
Start/Pause
Press this key to start or pause the drying
process.
3
Delay
Drying time can be delayed.
Setting method: In the standby state, press
this key to set the delay time.
4
Dry Level
or
Anti Crease
Dry level: very dry, normal, iron dry.
Anti crease setting method: Press the key
for 3 seconds to turn the anti crease
function on or off. At the same time, the key
indicator light will turns on or off.
Table of contents
Other Modena Dryer manuals
Popular Dryer manuals by other brands

Indesit
Indesit IDCE 845 A instruction manual

Miele
Miele PT 8803 operating instructions

Hotpoint Ariston
Hotpoint Ariston TCL831XB Instruction booklet

GE
GE DPGT750EC/GC Technical service guide

Whirlpool
Whirlpool WGD9450WW - 27" Gas Dryer Dimensions

Bosch
Bosch WTH85VC6SN User manual and installation instructions