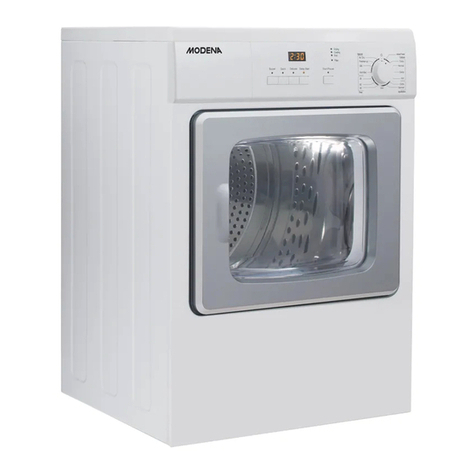
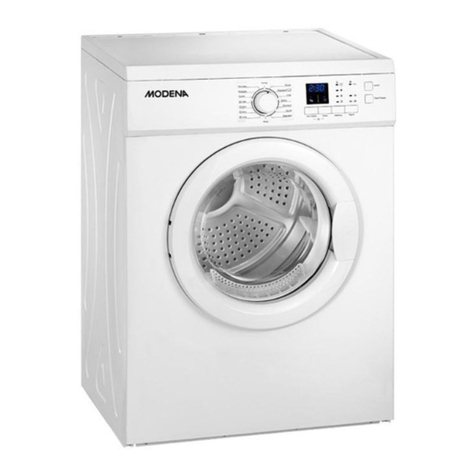
Modena ED 850 Owner's manual

User
Manual Book
Electric Dryer
ED 850
ED 771 WAM

2

3
TABLE OF CONTENTS
PART 1: NAME OF PARTS.......................................................................................4
ED 850.................................................................................................................4
ED 771 WAM........................................................................................................5
PART 2: INSTALLATION..........................................................................................6
PART 3: HOW TO USE ............................................................................................9
ED 850...............................................................................................................10
ED 771 WAM...................................................................................................... 18
PART 4: INTERNATIONAL TEXTILE LABEL (ITCL) SYMBOLS............................19
PART 5: MAINTENANCE.......................................................................................19
PART 6: PRECAUTIONS........................................................................................ 19
PART 7: PROBLEMS AND SOLVING..................................................................... 19
PART 8: SPECIFICATIONS.................................................................................... 19
Appendix: Drying Loads Recommendations ....................................................... 19
Appendix: Error Code ...........................................................................................19

4
ED 850
1. Control Panel
2. Condensed Water Container / Drain Box
3. Filter
4. Door
5. Condenser Door
6. Condenser
7. Feet
PART 1: NAME OF PARTS

5
ED 771 WAM
1. Control panel
2. Drum Light
3. Filter.
4. Adjustable Feet
5. Thermostat Reset Button
6. Side Vent Outlet
7. Vent Pipe Cover
8. Rear Vent Outlet

6
•Make sure the air hole on the front and the back part of the tumble dryer is
not closed.
•The back part of the tumble dryer will be very hot when it is turned on.
•Make sure the back part of the tumble dryer is hard to be reached when the
machine is operating.
•Do not use connecting cable. The power plug of the tumble dryer must be
connected directly to the electrical socket.
•Install the filter on its place.
•Put the tumble dryer where the power plug can be easily reached after
installation.
•Clean the tumble dryer (outside & inside part) from dust/dirt with damp cloth.
•The smell from the heater will disappear after the first period of heating.
Important Warning for Installation
The heat emitted by the tumble dryer can reach a temperature of 600 C. Make sure
the unit is placed on the floor that can bear high temperature. When operating the
WARNING
The tumble dryer must be connected to the electrical source which has
been connected to the ground / grounded.
The producer is not responsible for every form of damage and loss that is
caused by not following the safety guidance that has been given.
Before activating the unit, make sure that the electric supply is in
accordance with the unit specifications.
If the power plug needs to be changed, follow the explanation below.
The Color of the cable at the power cable shows code as the following:
Green and Yellow –Earth / Grounding
Blue –Neutral
Brown –Live
Green and Yellow cable must be connected to the terminal signed with the
letter or symbol (earth) or in green and yellow color.
hold return button for 2 seconds to cancel cooking
completely
PART 2: INSTALLATION

7
unit, the room temperature must not be lower than 50 C and higher than 350 C
because it will affect the dryer performance.
Water Output (ED 850)
Condensed water is not always needed to
be thrown away to the tank, if possible,
the condensed water can also be drained
directly.
To change the direction of the water
output pipe, it can be done by pulling the
water pipe according to the arrow
direction (Look picture A). Then install the
output pipe.
Vent Hose (ED 771 WAM)
To simplify the installation, there is a choice of vent outlets: one at the back, the
other in the left-hand side.
Connect the hose to whichever is more convenient by pulling the ring nut (A) from
the vent outlet at the back, aligning arrows of hose and ring nut, fastening by
screwing hose to the direction of arrow and pushing it firmly back into place. The
unused vents should now be sealed with the special snap cover (B) provided.
Setting the height
1. Set the unit height to prevent vibration and noise. The machine must be set at
a clean place and free from combustible materials, water and ice. To reduce
vibration and noise when the unit is used, the unit must be placed on a flat and
strong surface.

8
2. To set the height, it can be done by rotating the front
part of the leg: to lower the unit, it can be done by
rotating the leg counterclockwise. To heighten it, do
the opposite rotation until the unit is not vibrating
anymore when it is used.
3. After the height adjustment is done, check the unit
balance by pressing each corner of the upper cover,
if it is still unsteady, it means the unit still needs an
adjustment.
4. Do not put pile of towels on the floor close to the unit, because it can cause heat
and disturb the unit performance
Electric Connection
Every work that is connected to electricity in this unit installation must be
conducted by experienced and professional technician.

9
Preparation Before Operating the Tumble Dryer
1. Make sure the electric source is in accordance with the installation guide.
2. Remove the polystyrene block and safety foam inside the drum.
3. Before it is used for the first time, it is recommended to clean the inside of the
drum by putting several pieces of moist cloth to the inside of the drum and
then dry it for 30 minutes.
4. Sort the cloths that will be dried according to the fabric type and color.
5. Check the International Textile Care Label (ITCL) guide that attached to the
cloth.
6. Soft fabric such as stocking must be put into the washing net bag.
7. Close the pillowcase to prevent small-sized clothing gets inside. Hook the
button, zipper, pants, and skirts.
8. Do not dry the black-colored cloths together with furry fabrics such as towel
with bright color, because the lint will appear on the dark clothes.
9. Squeeze and spread the shirt before it is dried.
10. Knitted fabric or the same kinds will probably wrinkle a little during the drying.
Do not dry it too dry for this kind of fabric.
11. You can also dry item that is starched. However, to get the wanted starched
effect, choose the “Iron dry” program. To remove the starch, wipe the inside
of the drum after the drying process with moist cloth and dry it.
12. It is recommended to dry big and small clothing together.
13. To prevent the cloths becoming stiff, it is recommended to use cloth
moisturizer at the washing process or use special conditioner for fabric when
using the tumble dryer.
14. If certain item is still wet after it is dried, set the drying according to the time
of at least 30 minutes. This is needed especially for the part that is layered
(such as collar, pocket, etc.).
15. Turn over the item with double layer of fabric so the drying result is better.
16. Do not put too much weight into the tumble dryer or drying big things such as
duvet or sleeping bag because this will obstruct the air circulation inside the
tumble dryer.
17. Do not make it too dry when drying the clothes, this is to avoid the tangling
and so that it will be easier when ironed.
18. Make sure the air ventilation is good and the room temperature is not over
350 C.
PART 3: HOW TO USE

10
19. For maximum result of drying, spin or squeeze the laundry first before handing
it to the tumble dryer.
ED 850

11
Button # 1
:
Buzzer Button
If the buzzer button is activated, there will be a
sound/bell signal in the end of every program.
Button # 2
:
Quick Button
This function can reduce the drying time for 10 minutes.
Button # 3
:
Delicate Button
“Delicate” function is used for soft fabric drying, the
drying will be done in a lower temperature.
Button # 4
:
Delay Start Button
This button will allow you to delay the start of the
program to until 24 hours.
Button # 5
:
Child Lock
Safety button of chosen program, so that it cannot be
changed during operation.
Button # 6
:
Display Screen
The display screen will show how long the drying process
in hours and minutes, and times will be counted down
every 1 minute.
Button # 7
:
Indicator Light
Indicator light will turn on in accordance with the ongoing
process.
Button # 8
:
Start/Pause Button
It functions to start/stop the drying program.
Button # 9
:
Condenser Indicator Light
The light indicator for the condenser, condensed water
container, and filter changing.
Button # 10
:
Program Chooser Knob
To choose and set the desired drying program.

12
Operation
•Open the door of the tumble dryer, then put in the clothes that will be dried
one by one, make sure the clothes do not get stuck on the door or the filter.
•Choose the needed program by rotating the program knob.
•Indicator light on the start/pause button will turn on.
•This process will automatically stop if you do not press any button for 10
minutes.
The choosing knob is divided into some parts as the
following:
- Cottons
- Synthetics
- Time
- Special
Automatic Drying
This automatic drying is applicable for Cottons, Synthetics, Anti-bacterial and Silk
Program of drying programs. The tumble dryer will detect the moisture level of the
cloth that will be dried and automatically adjust the drying time according to the
chosen drying program. For optimal drying, select the drying program based on the
fabric type that will be dried.
Drying With Timer Program
If needed, you can choose timer program to dry the cloth if the drying time that
you wanted. Choose the 90 program or 60 minutes for cotton, or 30 minutes
program for synthetics. To cancel the running program, rotate the program
choosing knob to “O” position. At the end of the drying, rotate the choosing knob
to “O” position to turn off the machine before taking out the cloth.
Optional Program Button
To optimize the drying process, some drying program can be combined with
“optional” program. Optional program is chosen after choosing the wanted drying
program and before pressing the button “start/pause”. When the button is
pressed, the light indicator will turn on in accordance with the chosen program
function, when the button is pressed once again, the light will turn off.

13
Buzzer Button
After turning on the unit, buzzer will not be activated if you do not
choose any operation. Buzzer function can be activated or non-activated
during the process. By pressing the “Buzzer” button, the bell will ring,
and buzzer indicator light will turn on. When the buzzer is active, there
will be a sound signal in cases such as the following:
- When pressing any button.
- At the end of the program.
When the buzzer is active, if you press the “buzzer” button once again,
the buzzer will turn off.
Quick Button
This function can be chosen at program: “Heavy”, “Strong”, and
“Normal”. By pressing this button, the drying time will be reduced by
10 minutes. Lights on “Quick” button will turn on. This option cannot
be chosen together with “Delicate” option
Delicate
This option can be chosen at parts as the following:
“Cottons”, “Synthetics “, “Time”. When activating the “Delicate” function,
the drying will be done in lower temperature, for soft-fabric cloths. The
indicator light on “Delicate” button will turn on. This function can also be
used together with drying function in with time setting. This function
cannot be used in fast drying / “Quick”
Delay Start
This button allows you to delay the start of a program until 24 hours.
To activate this function, choose the desired drying program then
choose “Delay Start” function, then “start/pause” button. Every time
the “delay start” button is pressed, the delay time is increased by 1
hour.
The “Delay start” function can be chosen before or after choosing
optional programs (Buzzer, Quick, and Delicate). The countdown will
start after you press the start / pause button and the indicator light
on “delay start” button will turn on. The remaining time is displayed
hourly on the display screen. “Delay start” function cannot be used
at “special” program.

14
Display Screen
The display shows information as the following:
- After you choose the drying program, the duration of the drying program
will appear on the screen (in hours and minutes). This can be counted
automatically according to the maximum weight that is received for
every type of fabric and the chosen drying level. When the program is
started, the remaining time is shown every 1 minute.
Delay start
- If you have chosen the delay time using a relevant button, the display
screen will show the countdown hourly. “Delay/start” function will start
after the “start/pause” button is pressed. If you want to check the
chosen program, press the “start/pause” button once more, then the
display screen will show the program duration that is chosen
beforehand. “Delay start” function cannot be used on “special” program.
Choosing the wrong program
- If you choose the program that is not compatible with the program you
have chosen, the screen will display ERS (error). This code will appear
again if you press one of the buttons or rotate the program chooser
during the process.
Indicator light on display screen (ED 850).
- Indicator Light
Will turn on after the drying usage, this is to remind you to clean the
condenser. It is recommended to clean the condenser for three or four
times a year.
- Indicator Light
Will turn on every time a program is finished. This is to remind you to
empty the condensed water container. NOTE! To avoid the alarm ringing
when using the next program, empty the condensed water container
every time after using a drying program.

15
- Indicator Light
Will turn on every time after using the unit, this is to remind you to always
clean the filter. If the filter is not clean, it will affect the efficiency of the
drying process.
Start / Pause button
After choosing the drying program and optional program, press this button to start
the drying process. If the door of the dryer is opened when a program is running,
the process will be stopped. Then, after the door is closed, press this button once
more to continue the program again from where it was stopped. In this case, the
light on the “start/pause” button will blink to remind you that the start button
needs to be pressed once more.
Indicator light on control panel
This light shows these functions:
- “Child Lock” indicator light (ED 850): This light shows that the program is
locked.
- “Drying” indicator light. This light shows that the drying process is operating.
- “Cooling” indicator light. This light shows that the cooling process is
operating. At the end of the drying process, the laundry will be cooled, the
cooling process will take less than 10 minutes.
- “End” indicator light. This light will turn on at the end of the cooling phase,
and during the anti-wrinkle process
Cooling process
Every drying program ends with a cooling process for 10 minutes. If the laundry is
not taken out at the end of the cycle, the machine will continue to the anti-wrinkle
process for a maximum duration of 30 minutes. After the anti-wrinkle process is
done and the cloth is not put out, the tumble dryer will stop automatically. The
screen display will display “End” and the sound/bell signal will rings for 15 seconds
(if the “buzzer” function is activated). To end it, rotate the program chooser knob
to “O” position, and all the lights will turn off.

16
“Child Lock” function (ED 850)
When the machine is turned on, press the “Delicate”
button and “Delay Start” together for some seconds, then
the system will lock everything. To stop this function,
press the same button together for some seconds.
After the usage
Clean the filter
Changing the chosen program
To change the running program, rotate the program chooser knob to the position
to cancel the former program. Then, choose the new program, and press the start
button.
IMPORTANT
If the drying program must be stopped before it reaches the end, before
putting out the laundry, we recommend you rotate the program chooser
knob to “air dry” position and wait until the cooling process is done. This is
to avoid the heat piling in the machine. To continue this process, first,
rotate the program chooser knob to “O” position, then rotate it to “air dry”
position. After that, press the “start/pause” button once again. Always
clean the filter after every usage.

17
Thermostat Reset
If during the operation the heating element doesn’t work, maybe the manual
thermostat is disconnected. First, turn the program selector knob to “Air Dry”
position, and start the Start Button. Approximately 20 minutes later, press the
thermostat reset button.
Thermostat

18
ED 771 WAM
: Buzzer
Signals/sounds end of drying cycle
: Gentle
Reduces drying intensity (recommended for delicate items)
: Overdry Protection Lamp
The indicator lamp lights up when a humidity
Controlled program is selected, to indicate the working
protection function. Function is not active in time controlled
programs 20’,30’, 40’,60’,90’, and “ (Air Dry)”.

19
Start/Pause Button
The drying program is started by pressing this button. The indicator
lamp flashes during the selection phase and lights up during drying.
Filter
The indicator lamp lights up when the filter needs cleaning. Clean the
filter at the end of every cycle.
Program Sequence
Operation
•Open the door of the tumble dryer, then put in the clothes that will be dried
one by one, make sure the clothes do not get stuck on the door or the filter.
•Choose the needed program by rotating the program knob.
•Indicator light on the start/pause button will turn on.
•This process will automatically stop if you do not press any button for 10
minutes.
The choosing knob is divided into some
parts as the following:
- Cottons
- Synthetics
- Time

20
Automatic Controlled Drying
This automatic drying is applicable for Cottons, Synthetics, Anti-bacterial of drying
programs. The tumble dryer will detect the moisture level of the cloth that will be
dried and automatically adjust the drying time according to the chosen drying
program. For optimal drying, select the drying program based on the fabric type
that will be dried.
Time Controlled Drying
If needed, you can choose timer program to dry the cloth if the drying time that
you wanted. Choose the 40, 60, or 90 minutes for cotton, and 20 or 30 minutes
program for synthetics. To cancel the running program, rotate the program
choosing knob to “off” position. At the end of the drying, rotate the choosing knob
to “off” position to turn off the machine before taking out the cloth.
Program Option Buttons
To optimize the drying process, some drying program can be combined with
“optional” program. Optional program is chosen after choosing the wanted drying
program and before pressing the button “start/pause”. When the button is
pressed, the light indicator will turn on in accordance with the chosen program
function, when the button is pressed once again, the light will turn off.
Incorrect Option Selection
If you select an option that is not compatible with the program you have selected,
the option will not be selected.
Select The Buzzer
After turning on the appliance, the buzzer is off if you do no
operation. The buzzer can be turned on or be turned off during the
process. By pressing “Buzzer” button, the buzzer goes off and the
corresponding pilot light comes on. When the buzzer is on, the signal
will sound in the following cases:
This manual suits for next models
1
Table of contents
Other Modena Dryer manuals