equipment that may e damaged y this voltage level is
connected to the attery during charging.
•This appliance can e used y children aged from 8 years
and a ove and persons with reduced physical, sensory
or mental capa ilities or lack of experience and
knowledge if they have een given supervision or
instruction concerning use of the appliance in a safe way
and understand the hazard involved. Children shall not
play with the appliance. Cleaning and user maintenance
shall not e made y children without supervision.
•Make sure that the charger switched to maintenance
mode after normal charging is completed, if you want to
leave it unattended and connected for a long time. If it
does not leave charge mode after maximum time,
disconnect charger from the attery. See technical
specifications elow for info a out time limit.
•All atteries will eventually fail. If that happens during
charging, the charger will detect it, ut there may e
some rare faults in the attery, so do not leave it
charging unattended for longer periods of time.
•You need to have read and understood the full context
of this user guide efore you start using the attery
charger.
G TTING START D
1. Connecting the charger: Connect the charger to the
supply mains. A flashlight on the top will automatically
turn on to assist you in dark situations. The attery
terminal not connected to the chassis has to e
connected first. The other connection is to e made to
the chassis, remote from the attery and fuel line. The
red clamp should connect to the positive (+) pole of the
attery and the lack clamp to the negative (-) pole.
For stand-alone atteries: Connect the charger to the
supply mains. Connect the red clamp to the attery’s
positive (+) pole, and then the lack clamp to the
attery’s negative (-) pole.
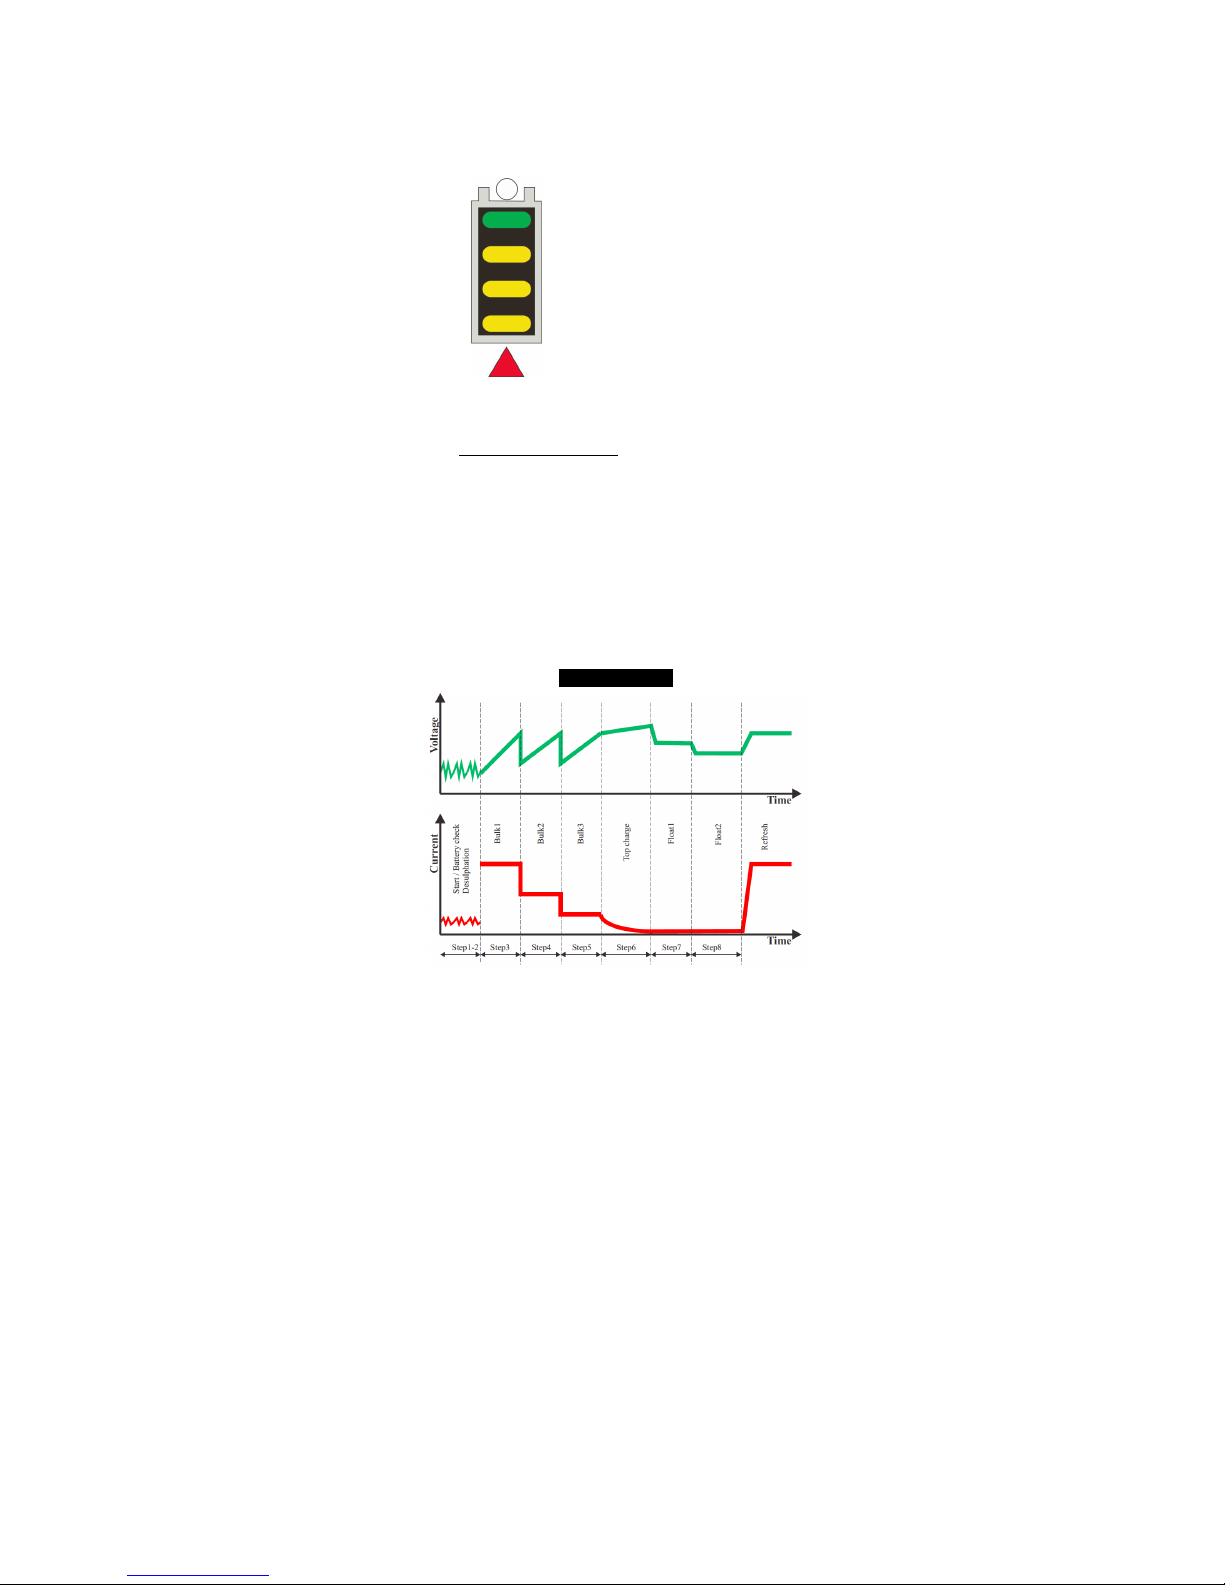
2. When all 4 charge level indicators are constantly lit, the
attery is fully charged and has entered maintenance
mode. The attery will e kept fully charged as long as
charger is plugged in to the mains.
INSTRUCTIONS
1. Connect the charger as explained in GETTING STARTED,
point 1, a ove. The 4 LEDs in the attery sym ol will
flash for a few seconds. Then it will start to analyze the
attery, and the charge level indicators will start rolling
from “ attery empty” to “ attery full”. After a little
while, the LEDs will have a steady light indicating the
current attery charge level, and when charging is
finished all 4 LEDs will e lit.
2. If the red light elow the level indicators is lit constantly,