mogu.bio mogu.bio2 3
Installation Guide General Introduction
Foresta Acoustic system
The FORESTA Acoustic system is born from the intention of bringing Nature back into the everyday’s spaces
we inhabit. Inspired by the unique sensation of walking through the woods, the system combines Nature’s
vernacular materiality (as exemplified by wood) with the radical innovation deriving from mycelium-based
technologies. A wooden structure composed of rails and nodes supports and eases the installation of
triangular acoustic-absorbing modules, as if each single module would represent multiple colored leaves
sprouting from the branches of a tree.
We are thrilled about your interest in Mogu FORESTA system. The whole system is based on biomaterials and
it is (grown and) made in Italy, out of low value residues and the most advanced fabrication technologies,
with the lowest possible environmental impact. FORESTA is based on the combination of a wooden supporting
structure and Mogu Acoustic panels, made of mycelium materials. The panels are the result of transformation
processes which have as input biological materials; Mogu attentively carries out such transformations,
thanks to its advanced technical protocols, derived by Nature and crafted with the utmost care. Despite
M o g u’s best efforts, d u e to the very natu re ch aracterizin g biolo gic al m aterials, o u r pro d u cts m ay b e ar slig ht
differences from the reference standard pattern seen in reference images. Small imperfections, such as color
differences, dimensional variations, irregular edges or minor surface imperfections should be considered as
unique product features and an inherent value of a product that directly derives from Nature.
Mogu FORESTA system is delivered ready to install, as in your preferred configuration. Mogu Acoustic
panels are dimensionally stable, however the wooden components of FORESTA could benefit from 24 hours
acclimatisation to room conditions. Upon delivery, open the boxes and inspect the products immediately.
Eventual damages should be reported to Mogu immediately. If installation happens days after delivery, make
sure to leave the boxes o pen, stored in original packing and in a clean, climate controlled e nvironment free
of moisture. Handling of Mogu products should happen with the utmost care, not imposing any force onto the
material. Wall & ceiling surface where you install Mogu products should be clean and free of dust. Never
install Mogu products on surfaces subject to humidity or on recently painted surfaces; paint should dry at
least a week before installation.
W e r e c o m m e n d a v o i d i n g c u t t i n g a n d g e n e r a l m a n i p u l a t i o n o f M o g u A c o u s t i c p a n e l s . M o g u d e c l i n e s a n y r e s p o n s i b i l i t y
for product performance (acoustics, fire and all declared properties) after alteration. However, if required
by your project, cutting of Mogu Acoustic products is possible with standard saws. We recommend contacting
our Support Team (support@mogu.bio) to receive suggestions concerning the cutting methodology and touch-up
painting afterwards, to ensure the best results. Do not screw into the panels or use any other fixing syste m
r a t h e r t h a n t h e o n e s r e c o m m e n d e d b y M o g u’s in s t all a t io n g u id elin e s. M o g u b e a r s n o r e s p o n s i b ilit y f o r p r o p e rly
checking the environment and surface conditions where the products are installed. The responsibility for the
evaluation of potential issues and compensating for different field conditions is with the installer. You
are welcome to contact us at support@mogu.bio for inquiries concerning installation & products handling.
Nature’s technology
Arrival & Installation
Product handling
Dimensions & weight
Table of Contents
General Introduction p.3
p.4
p.6
p.8
p.12
p.14
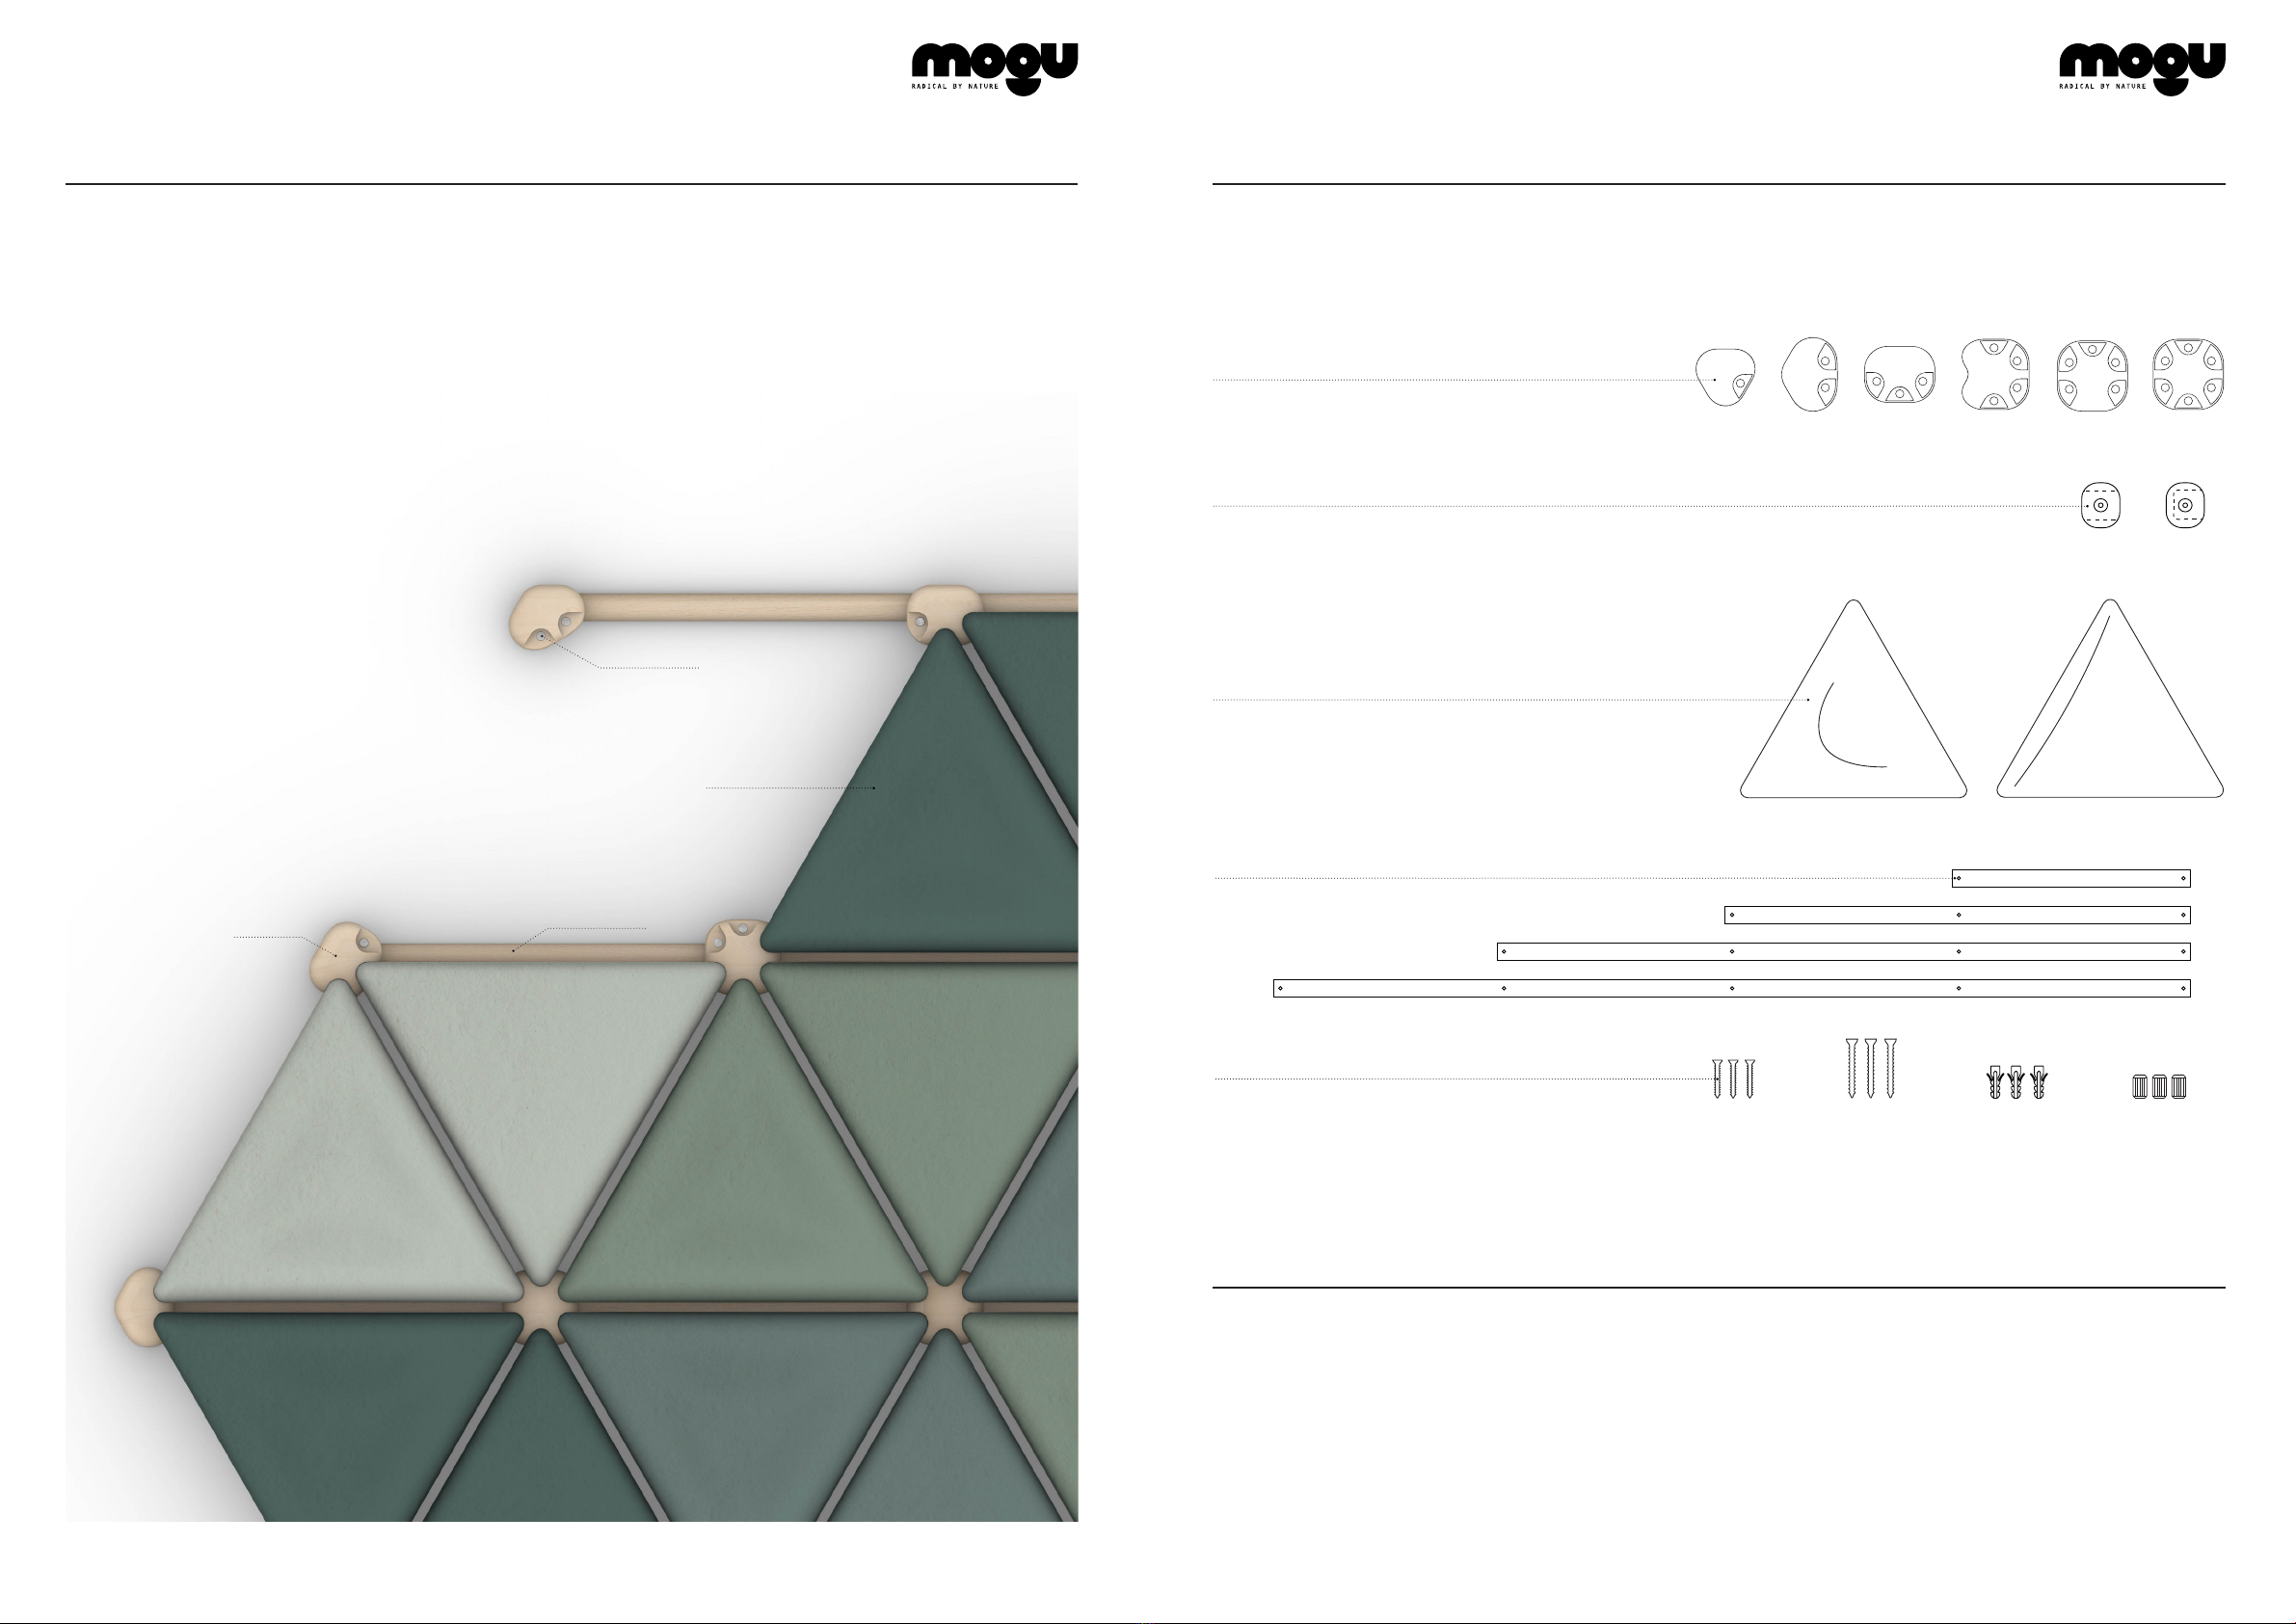
Product Components
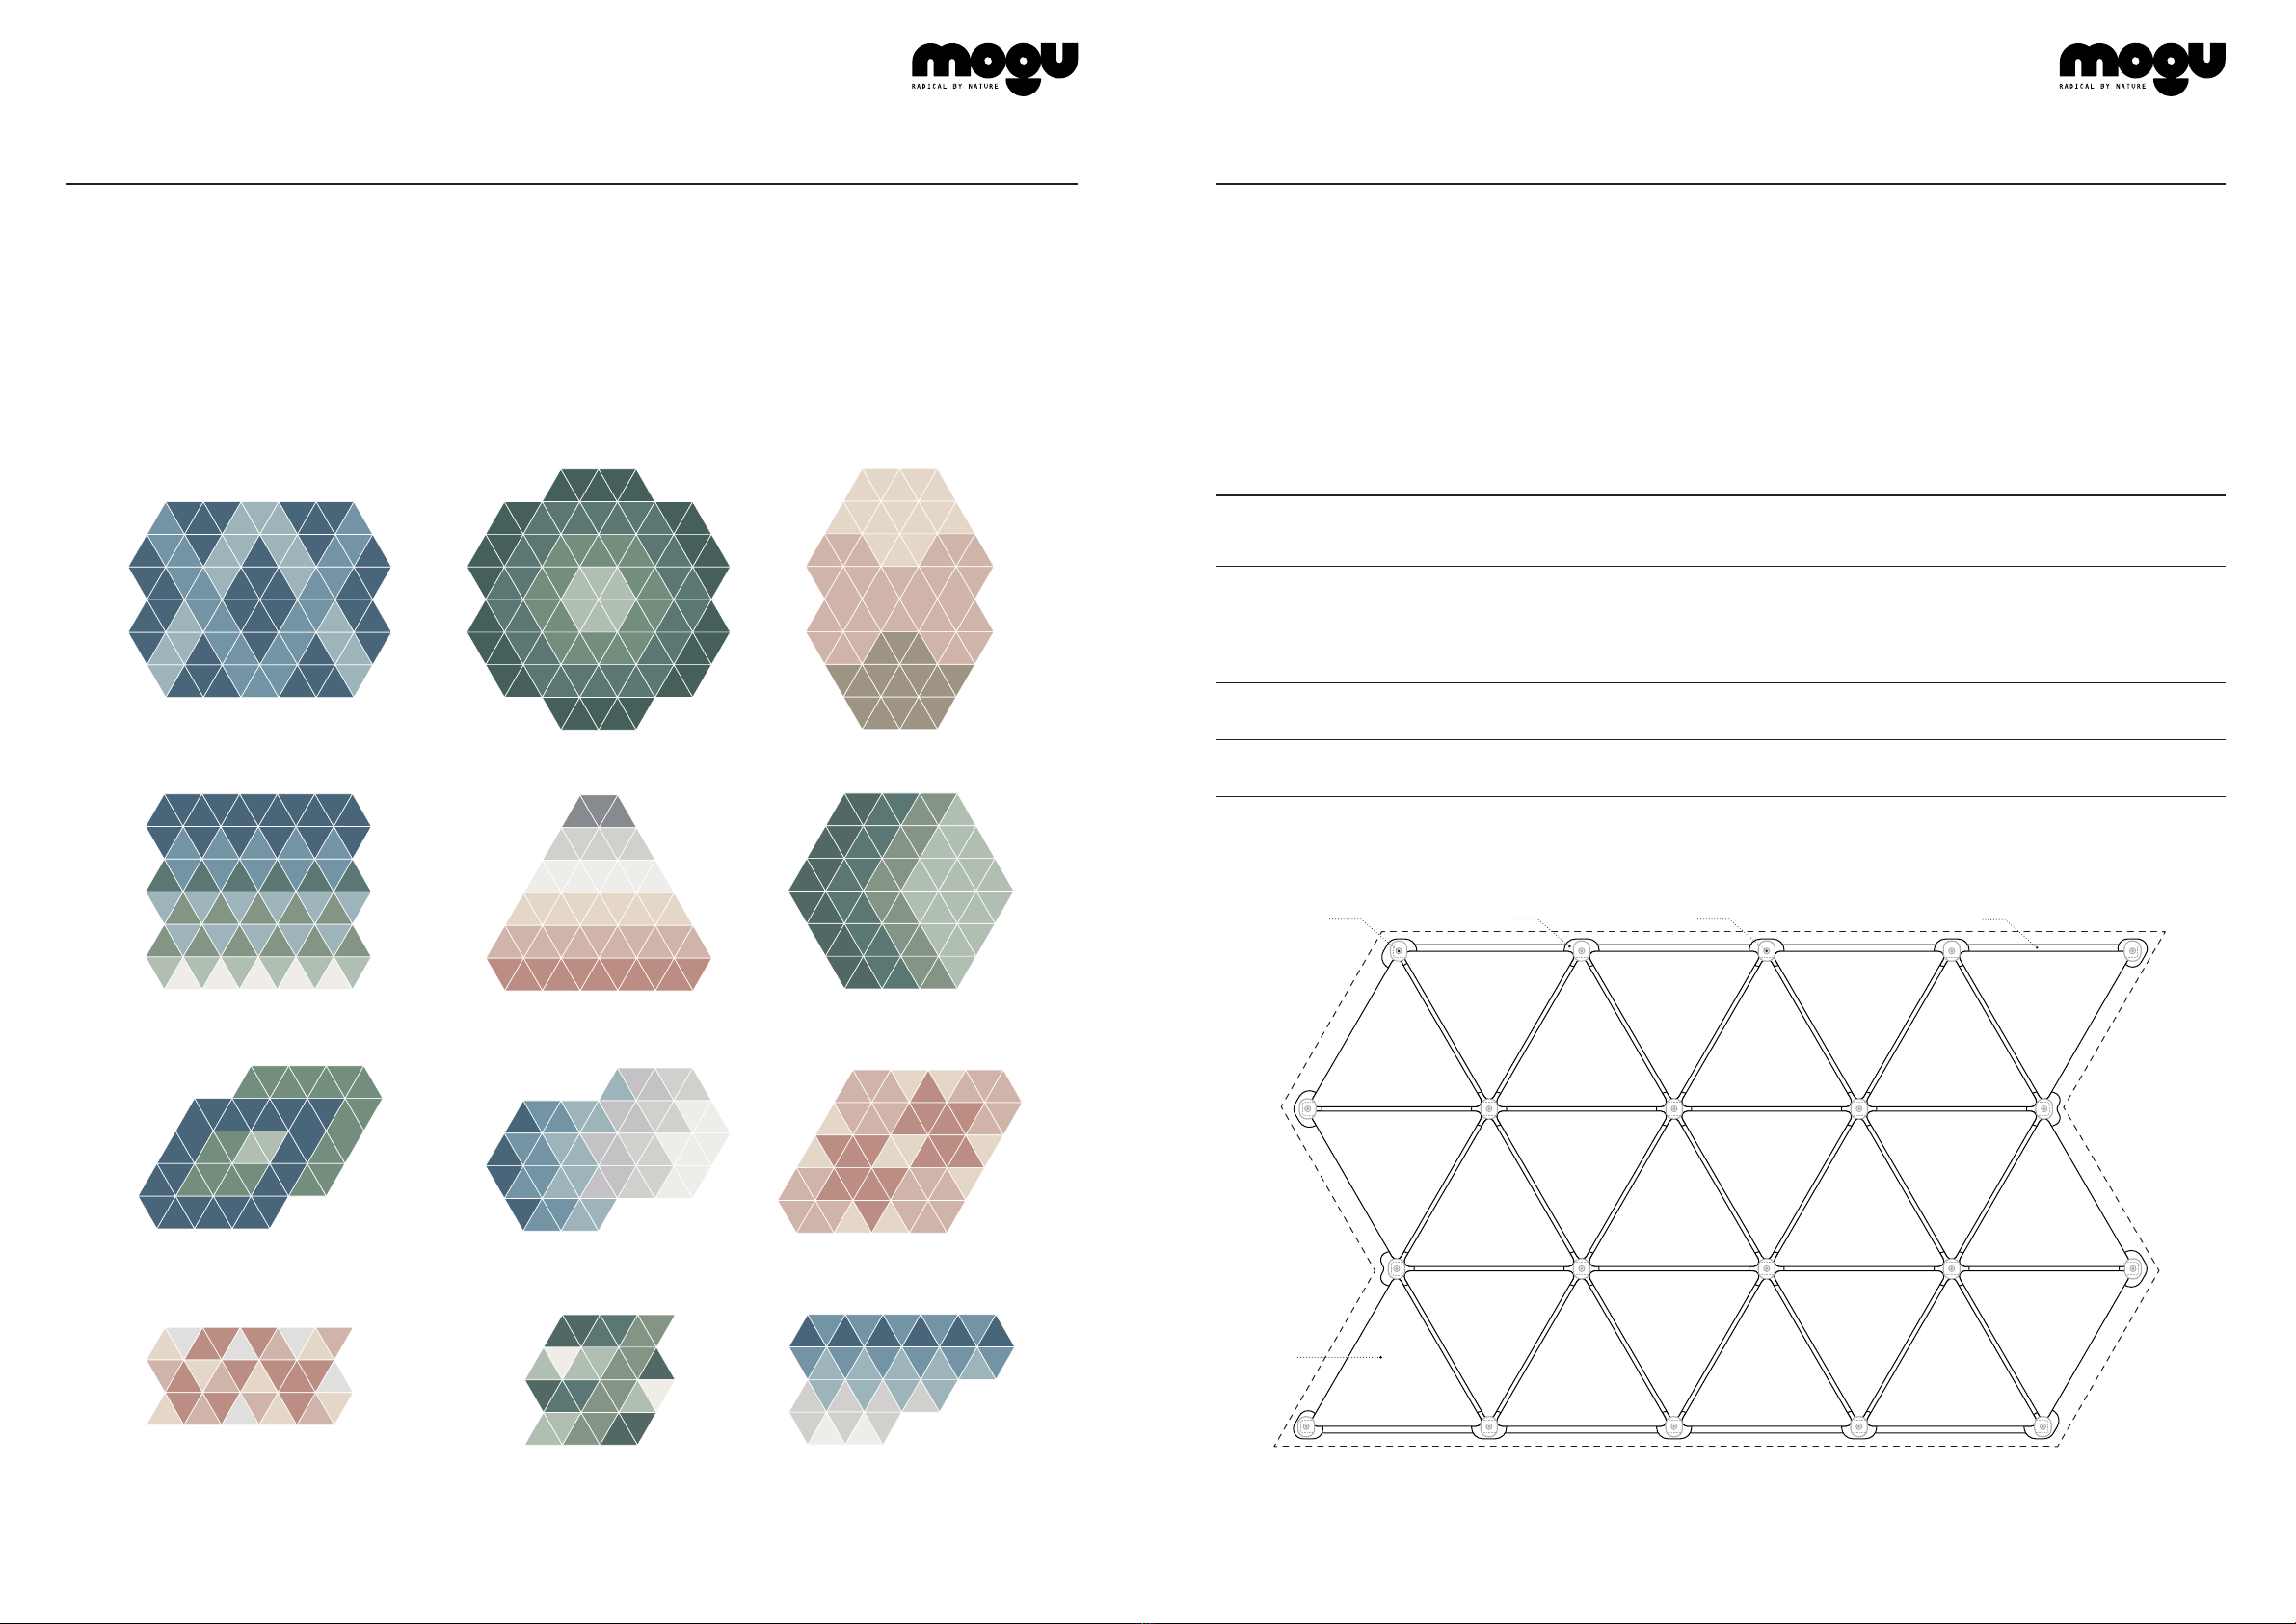
How to Design
Composition Examples
Foresta Structure
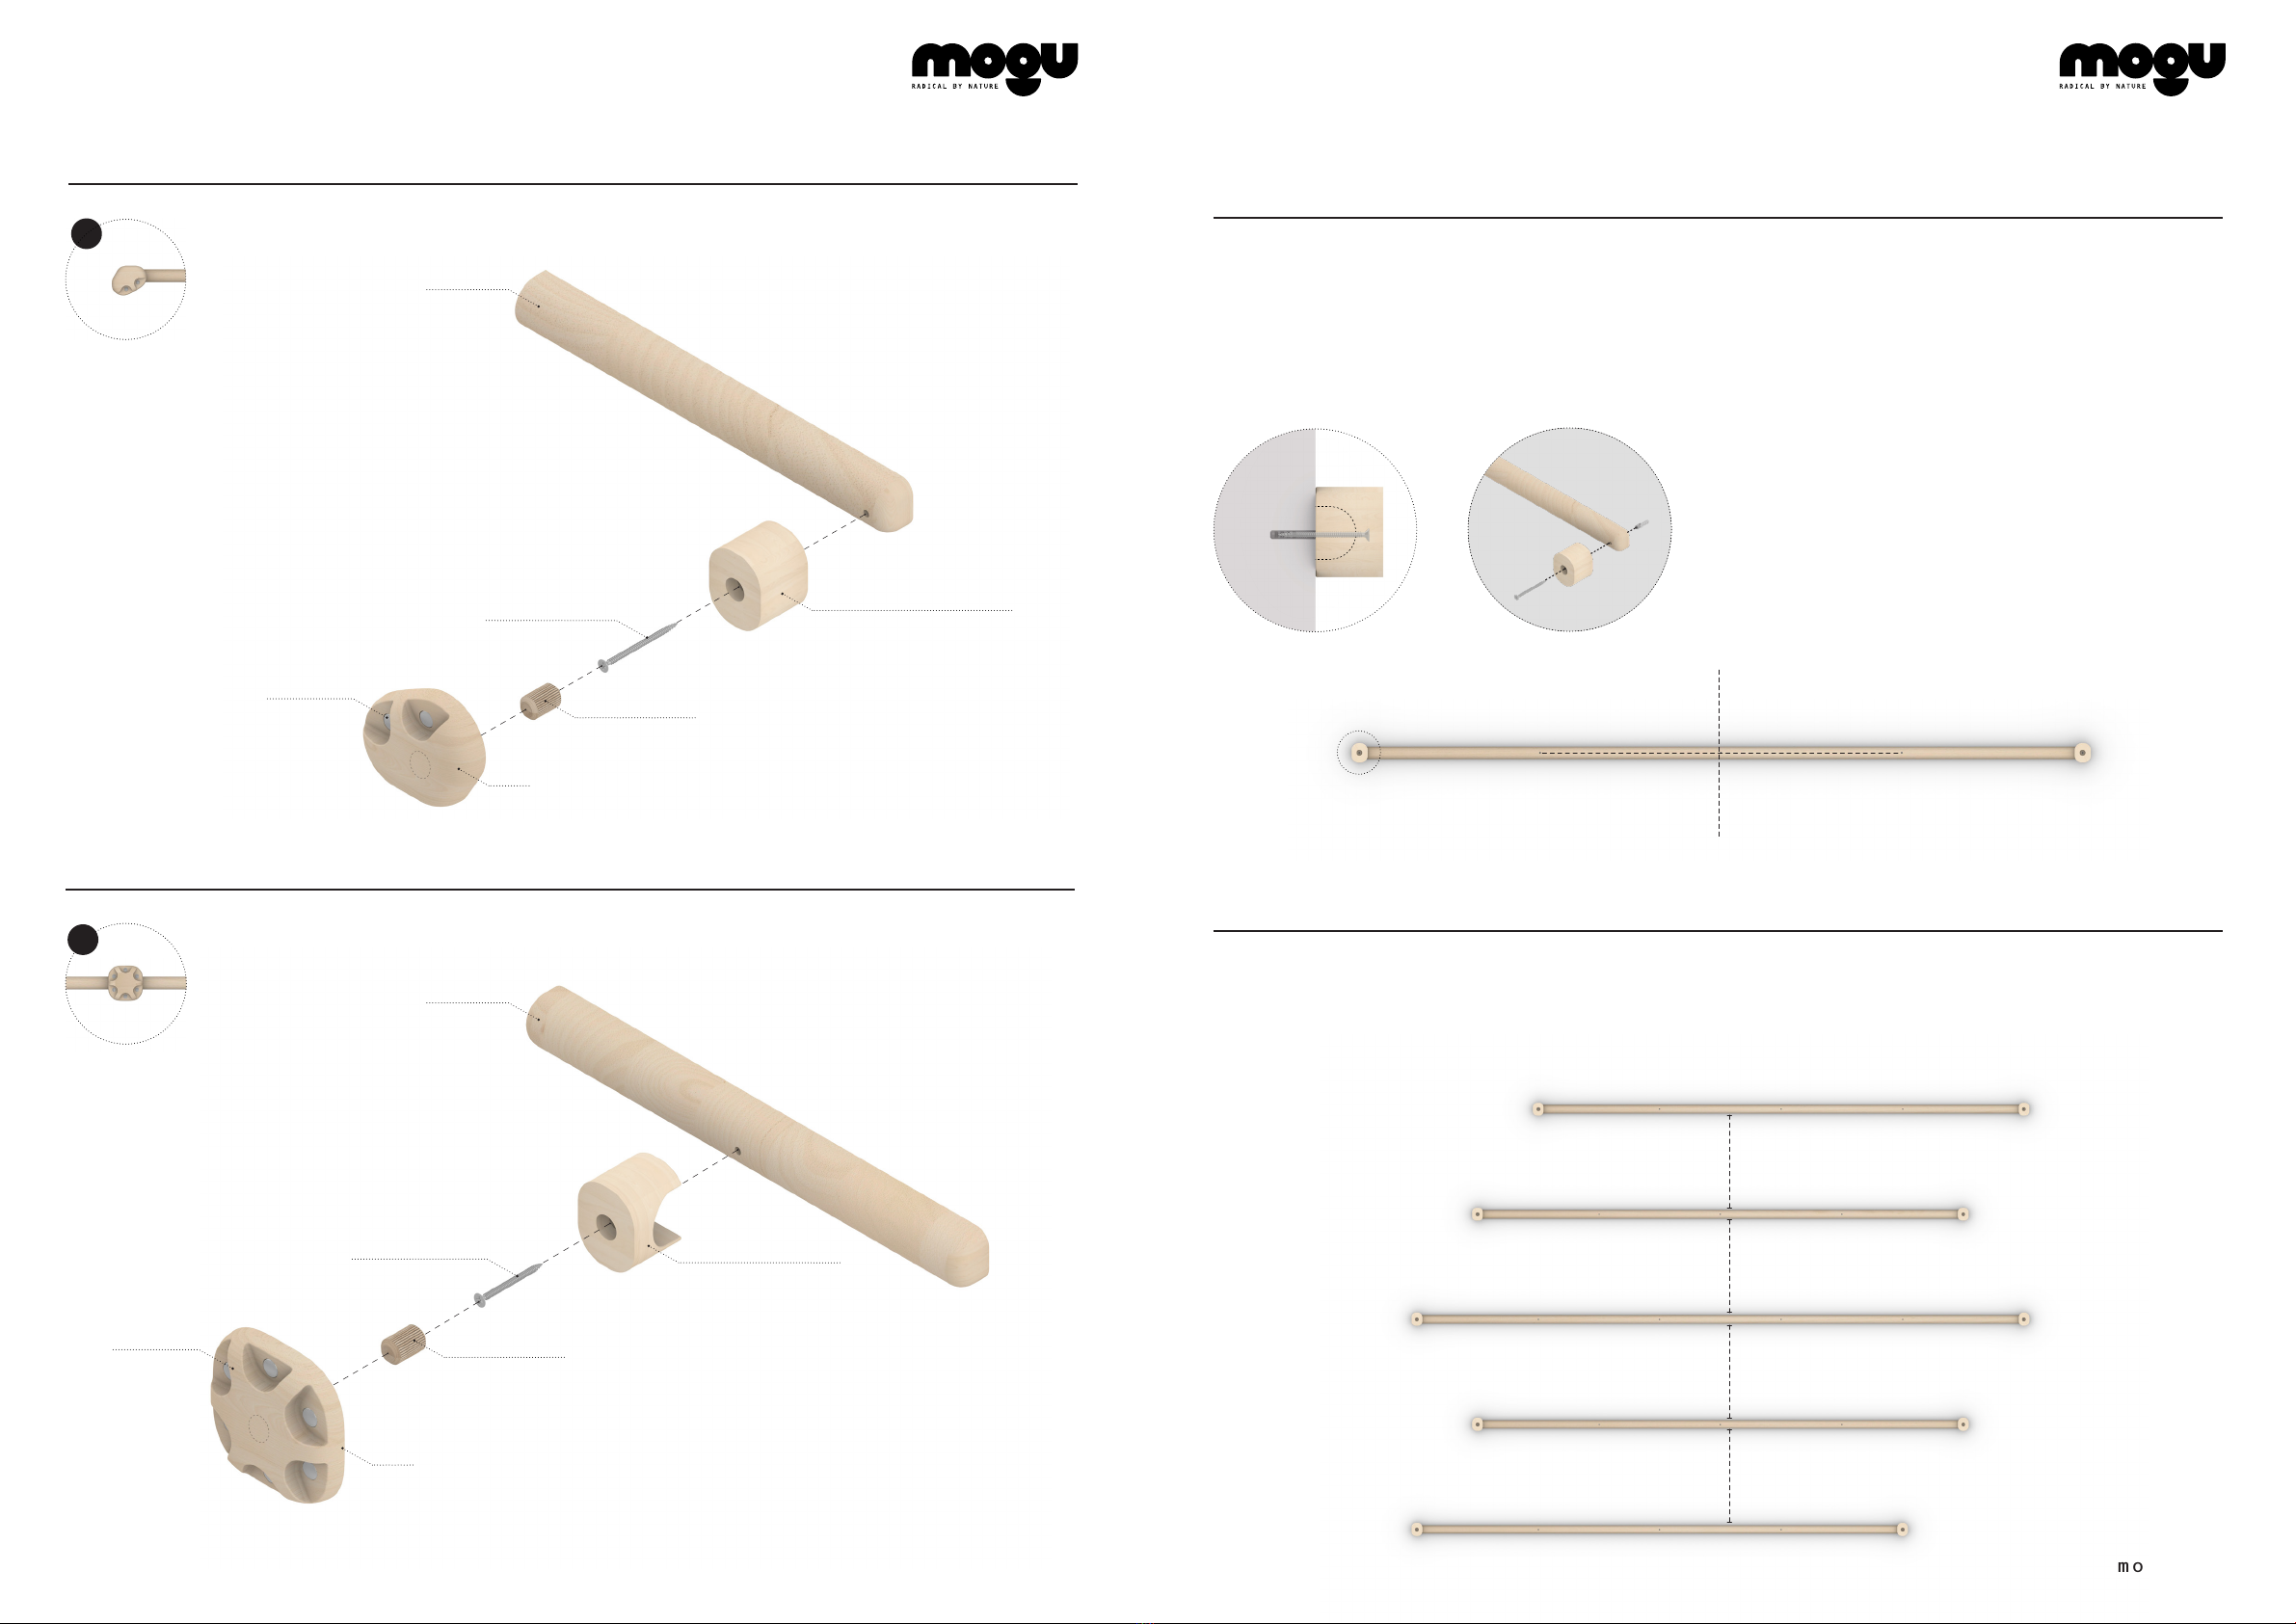
Exploded Assembly
p.15
p.19
Installation Steps
Care & Maintenance
w [mm] t [mm] side [mm] sqm n°/s q m weight [Kg]h [mm]
445
9 TRIANGLES
11 NODES + 11 BACKS
3.5 mtl RAILS
ASPEN CONCAVE / CONVEX
1 SQM OF PRODUCT FEATURES:
SYSTEM PARAMETRICS
0.1165 0.6390 9.1445