Monowalker fatmate User manual

MONOWALKER DESIGN ▪Kai Fuchs ▪Himmelreich 38 ▪D-79199 Kirchzarten
Dear customer,
thank you for chosing the Monowalker Fatmate hiking trailer –the all-terrain marvel for your adventure.
Walk`n`Roll !
The Monowalker fatmate- the easy way to carry your gear !
Hey folks, we are passionate climbers and hikers from the Black Forest mountains and have built with
love and passion your Monowalker Fatmate .

For the past three years, the Monowalker trailmate hiking trailer has been now the best "mate"
for hikers all around the world. Many expeditions and long distance hikes were done with the
Monowalker trailmate hiking trailer in the past three years. This trailer already crossed Patagonia,
Iceland, carried gear and food for weeks in the Scandinavian wilderness and was the best mate for many
pilgrims on their way to Santiago di Compestela.
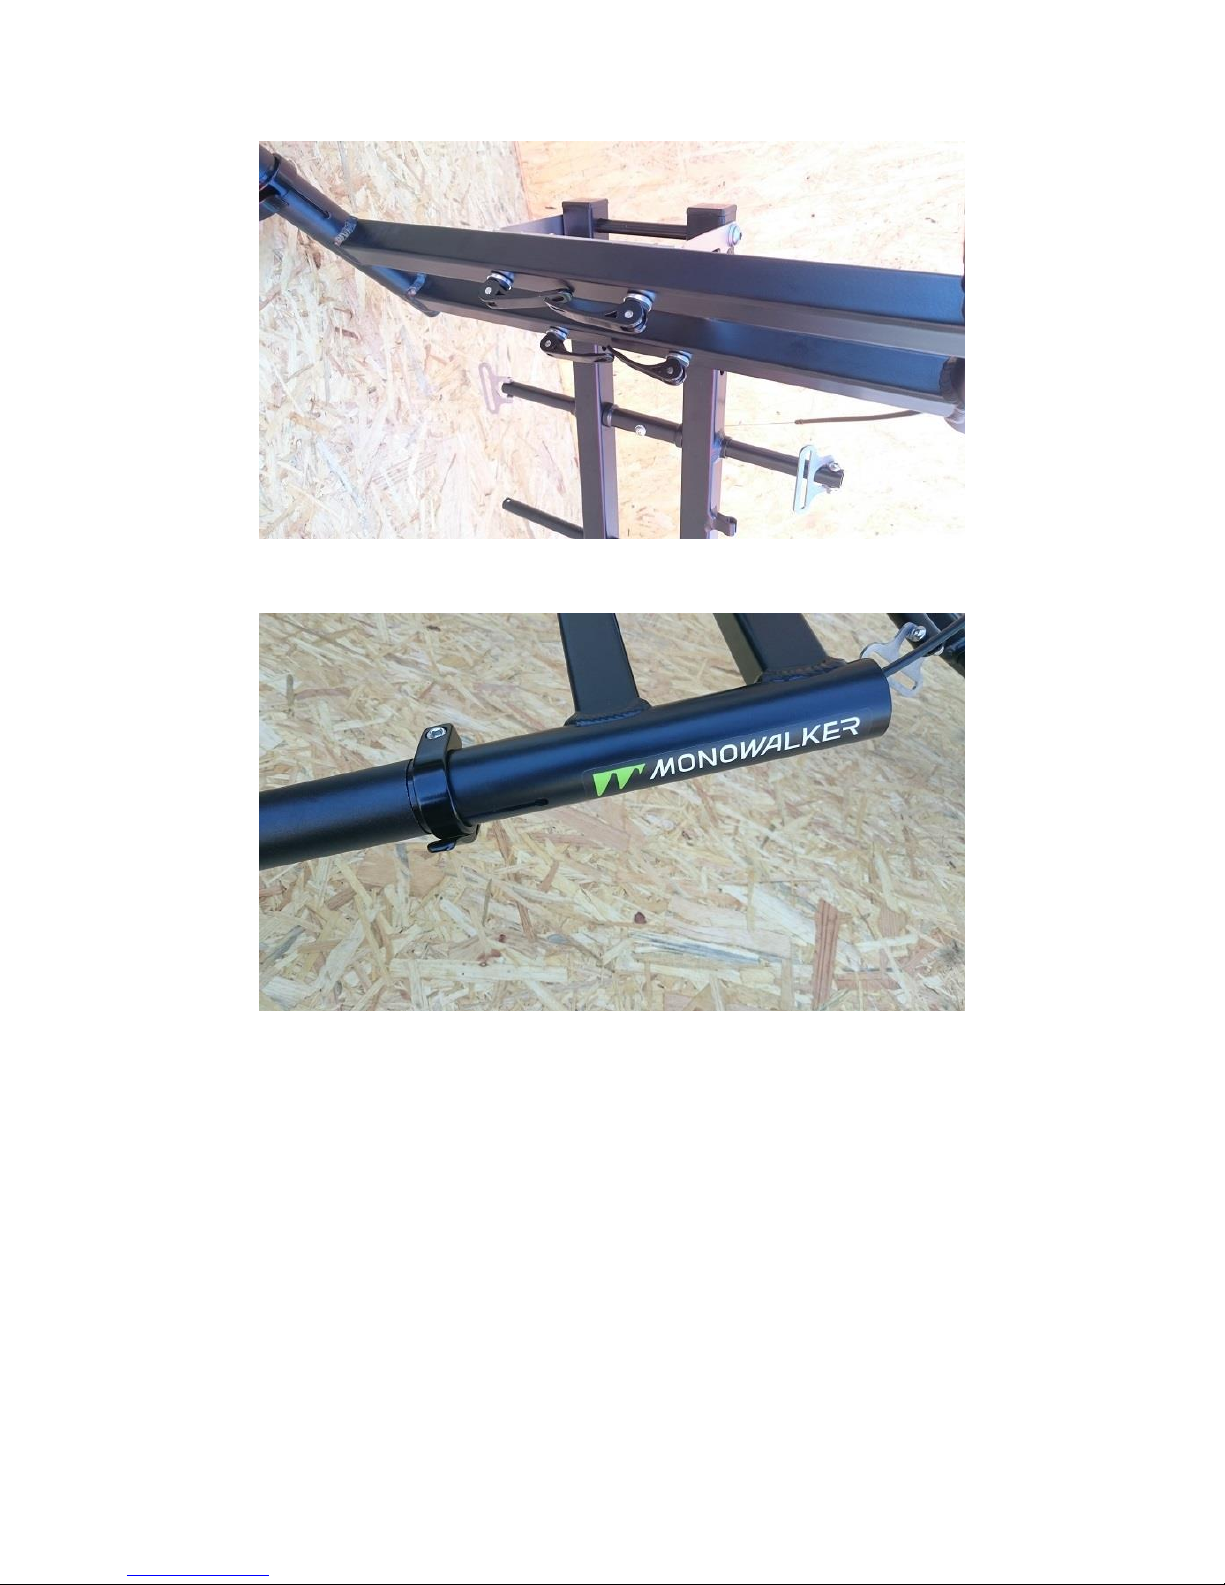
Incorporating all of the experience and expertise that we have gained in the past years we have now
upgraded our original model. The result is in your hands: the Monowalker fatmate which is made for
thru-hikers, hunters, adventurers, preppers, but as well for families with a bunch of outdoor gear. It´s
especially made for those who love the great outdoors without paths. The Monowalker fatmate is an all-
terrain marvel and follows you downhill and uphill on any trail and any terrain. In remote areas, the
fatmate shows its strengths. With the fatmate, it doesn`t matter if there is a path, if you cross snowfields
or deep muddy ground. If there is no trail, the 20x4” fat tire wheel will find its way. It runs great on sand,
muddy terrain or snow and rolls with ease over every obstacle. The tough design of the main frame with
crash protector underneath allows you to tow the trailer over rocks or fallen trees. It’s the downhill and
cross country machine for those who love nature and hiking trips, days away from civilisation. The
lightweight aluminum frame, made of 7005 aircraft aluminum allows you to carry your gear up to 110lbs.
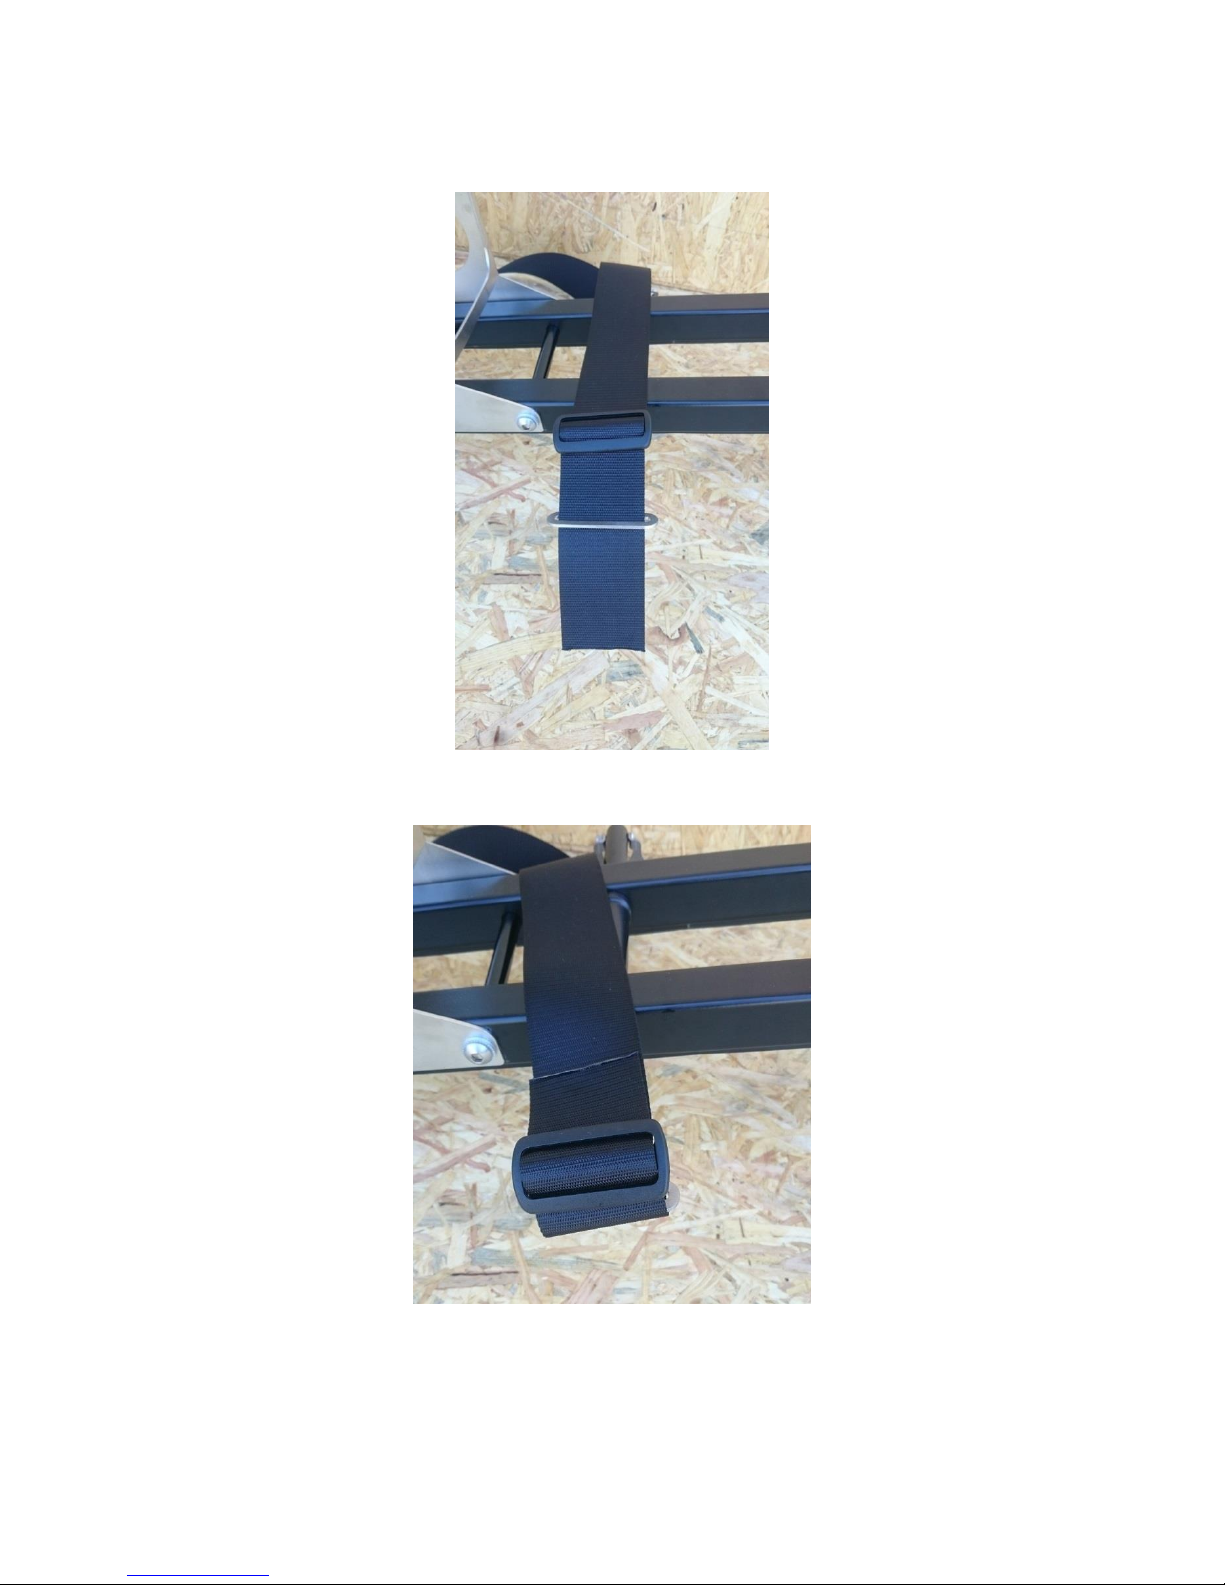
What are the benefits of a hiking trailer? The hiking trailer will be towed with the help of the specially
designed Monowalker harness. The handles are connected by snaphooks with the hipbelt. But the
biggest advantage is the weight distribution on the trailer ……due to its smart geometry only half of your
equipment's weight is on your hips. With all the remaining weight (50-60%) being on the back wheel,
your hike becomes much more relaxing and enjoyable and you can carry extra supplies with comfort. By
adding the fattire rack, you may reduce the weight on your hipbelt down to 30%.
The special hipbelt carries your gear weight. Additionally, during uphill and downhill hiking, stress on
your knees is reduced because only half of the total weight is on your hips.
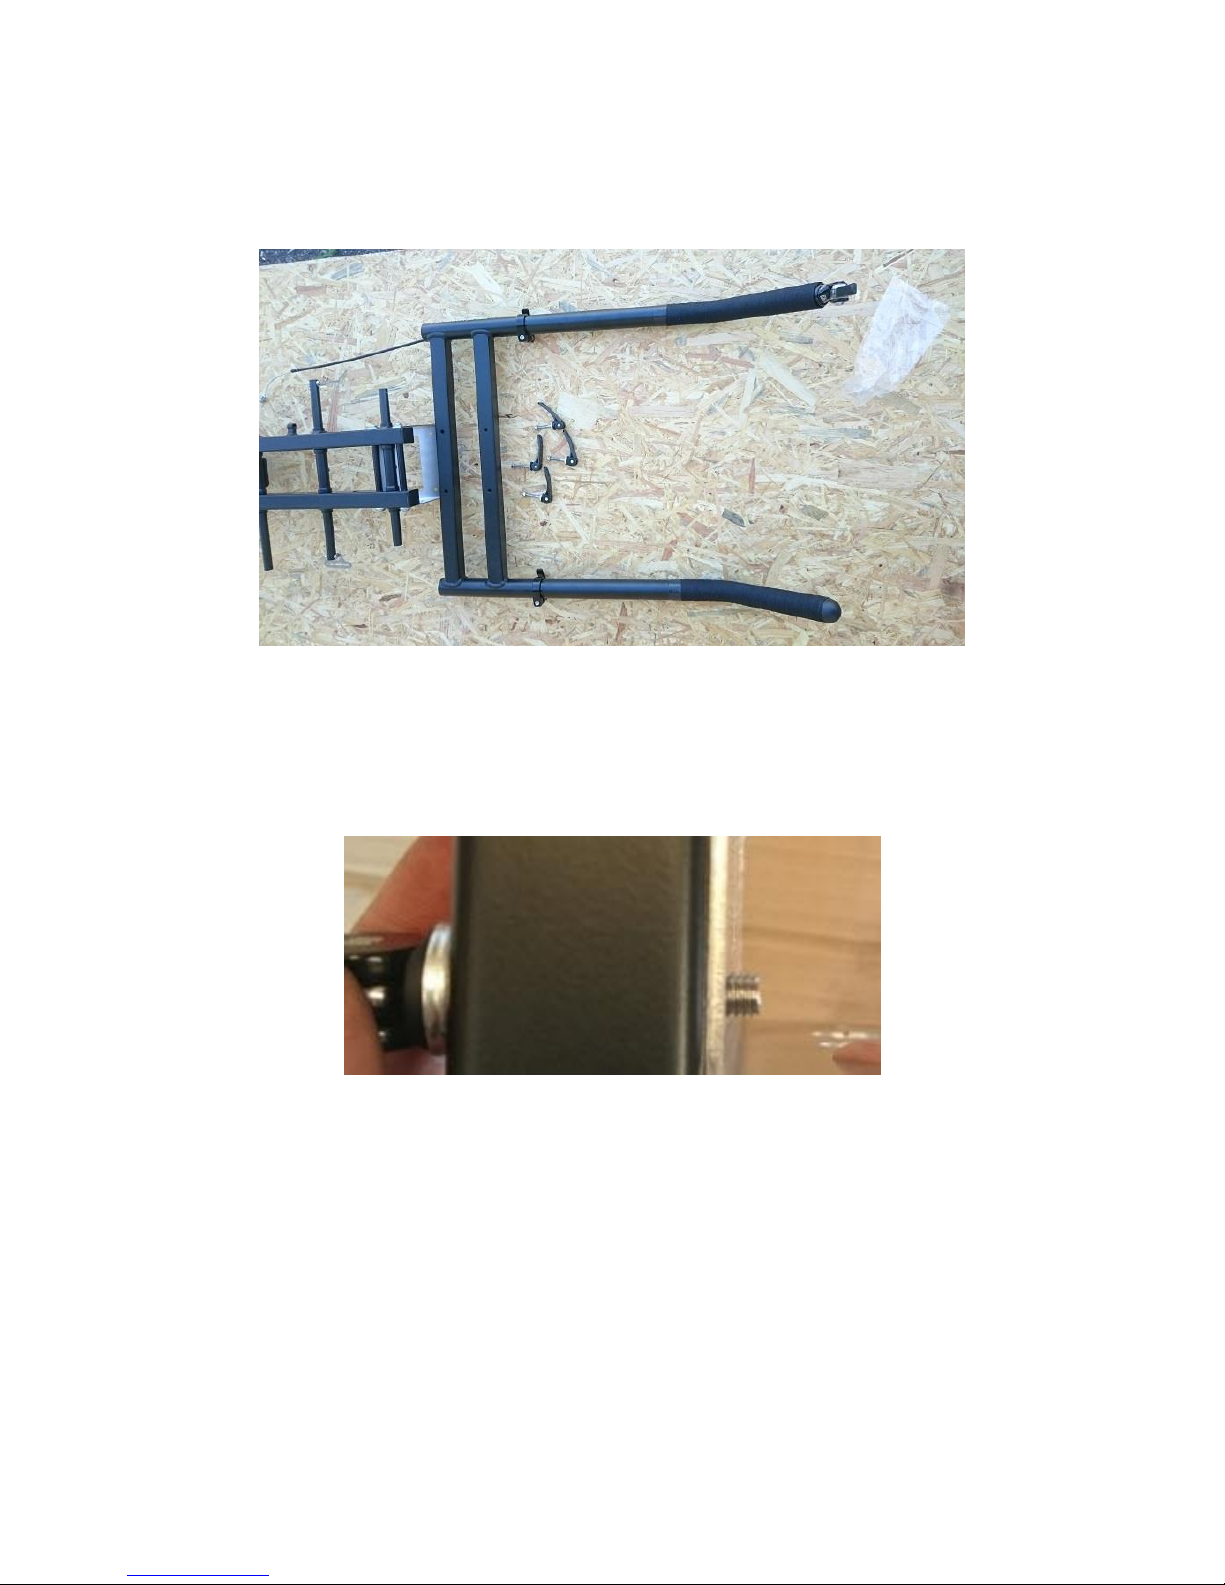
The uniquely Z-shaped configuration of the handlebar-main frame- swing arm configuration allows for a
very stable platform which won't lean or topple, even when your hands are off the handlebars. This
trailer can be towed across any terrain where you can still walk. It does not restrict your movement while
pulling because of the specialized MONOWALKER hip belt.
Downhill routes are easily traversed with help of the mechanical disc brake. Manipulated from the
handle bar, you can choose the level of brake resistance to help you travel downhill. The disc brake
allows you to easily take a break- take a deep breath or relax by leaning back, holding you and your
baggage in place.

Assembly manual:
Mainframe: We deliver the Monowalker Fatmate pre-assembled, due to packing reasons. All parts were
pre-assembled with care. You will get the frame without assembled cross tubes.
Three cross tubes ( two of the longest, one of the middle size) have no pre-assembled screws . These you
will find in a separate plastic bag ( 3x counter sink screws with torx 25 ) You`ll get with your delivery a
minitool that contains all tools with exception of an 8 mm u-mouth wrench.
Slide the 3 cross tubes into the mainframe. Fix the cross tubes with the Torx 25 counter sink screw
together with the backpack PA panel. Use your minitool with Torx 25 key.

Slide in the remaining three cross tubes ( two shortest tubes at each end of the trailer, one of the middle
size below the handlebar holder). These three tubes you will find in your delivery with pre-assembled
mushroom screws.
These screws have a NORDLOCK washer (2 washers are one washer unit ) This special washer prevents
that the screw gets loose under vibration. Don`t use other washers. Use your Minitool with 3 mm Allen
key to tighten the screws.
Packbelts: Due to packing reasons we deliver the 6 stainless steel belt holders in a separate bag with 6x
M 5 x 25 mushroom screws with nuts ( no washer required) . Please assemble these. The assembled
screw and the nut are proper connected if the screw is in connection with the blue plastic ring of the nut.
You`ll receive with your trailer 6 pack belts, pre-assembled as shown below.
Unloop the ends of each belt ( we have looped the belt to illustrate how to loop the belt )

Slide in the pack belt as shown in the picture.
Loop the belt through the ladder buckle

Rearend frame section: The main frame comes with pre-assembled luggage plate ( stainless steel) and
handlebar holder (stainless steel) Disassemble the M8x30 screw and M8 x25 screw left and right. Use
these for assembling the rearend tubes. Use the screws in same position as shown !!

Assemble the right rearend tube ( no discbrake )
Assemble the left rearendtube with pre-assembled and pre-adjusted discbrake.
All M8 scews do have the NORDLOCK washer to prevent that screws get loose by vibration. Don` t use
other washers.
Slide in the cable housing into the cable stop at the left side of the mainframe tube. Be aware that the
cable-housing endcap covers completely the cable housing end.

Handlebar unit: The main frame comes with pre-assembled handlebar holder. It can be positioned in
two heights.
The handlebar unit contains:
1x Handle left with brakelever and pre-assembled brake cable
1x Handle right
1x H-bar handlebar holder
2x Handlebar clamps ( dia: 34.9mm)
4x Quickrelease skewer

Assemble first the H-bar with 4x quick-release skewer at the stainless steel handlebar holder.
Then insert the handle right. When assembling the handle left, slide in the cable housing with brake
cable into the left H-bar handlebar tube.
Close the quick-release skewers. If the quick-release skewer is not fixing the handles, pre-tighten it with
the Allen key screw at the backside of the quick-release skewer. Be sure after closing the QR skewer that
you can`t twist anymore the aluminum handles.

The handles should be in horizontal position if the trailer is in upright position. If you are at 1.75 –1,95 m
(5,75”-6,40”) use the upper position of the bar holder. If you are at 1,65-1.75m (5,40 5,75”), please
change to the lower position of the bar holder. This recommendation depends as well on arm length,
back and leg length!

The picture shows the trailer with assembled handlebar holder in lower position for smaller people.

Discbrake: Insert the cable housing with the cable housing end cap into the cable stop at the mainframe.
Be aware that the cable-housing endcap covers completely the cable housing end.
Connect the cable splitter (one brake cable is coming from the brake lever connected with the brake
cable coming from the discbrake caliper) Do a test if the disc brake works proper. It was pre-adjusted by
us.

If the disc-brake cable is too loose ( disc-brake does not react immediately by pulling the barend-lever)
you can shorten the cable tension by turning the screw Acounterclockwise. Or you unscrew screw B and
tighten the brake cable.
If your brake pad is worn-out or you want to adjust the relation between disc rotor and discbrake pad,
you can turn the screw inside the discbrake (shows towards the spokes) clockwise or counterclockwise.
The right brakepad will move toward the discrotor or away from it.

If you think you have to re-adjust the disc brake at any time:
Turn the right brake pad toward the disc rotor until it will touch it. The left brake pad (moving brake pad)
should have a distance of 1,5 mm. Now open the upper srews that connects the discbrake caliper with
the IS 200 Adapter. Press the brakepads to the disc rotor and close the two screws again. The left brake
pad should have a distance of 1-1,5 mm to the disc rotor. Turn the right brake pad counter clockwise so
it will have a distance of 1mm to the disc rotor. Note: if you ever want to replace this discbrake, purchase
only a mechanical discbrake for roadbikes. This will work only with the barendshifter !
You can use the discbrake as drag brake or stop brake. If you have a short break on the trail, you can pull
the discbrake lever and lean with your body toward the trailer to relax as standing against a wall.

Wheel: Your wheel comes due to transportation reasons without assembled disc rotor, because it can
bend during transport in the card box. We recommend to take off the disc rotor if you carry your
Monowalker hiking trailer in the plane.
You will find the rotor in a cardboard with screws. Assemble please all 6 disc rotor screws with help of
the Torx 25 key at your minitool.
Insert the axle shims from the left side and right side of the hub.

Slide in the hub quick release skewer from the disc rotor side.

Assemble the wheel from the downside of the dropout. Be aware that the disc rotor slides proper
between the two brake pads. The quick-release skewer is no screw! It’s a lever with excentric joint. 1)
Pre-tighten the nut on the right side and leave the quick-release skewer in a line with the axle. 2) Try to
press the lever with the palm of your hand to the rearend tube. You`ll feel counter pressure.
3) The lever should be in the position as shown in picture below.

Monowalker Fattire rack:
Planning on carrying extra heavy or bulky gear like water, food, baby diapers or dog food ? In this case,
you want to choose the Monowalker fattire rack - designed by Monowalker Design- with an extra payload
of 25 kg/ 55lb; an add-on rack for the Monowalker fatmate hiking trailer.( FYI - this is an option and not
included with the trailer purchase) With gear positioned directly at the wheel axle, no extra weight is on
the handles!
In order to guarantee balanced handles, you will want to distribute your gear quite evenly. You can
attach bags (bicycle rear paniers) on the sides of the fattire rack, but as a result you will be more
restricted in the terrain or trail you use due to possible damage to the bags. If you plan to carry water,
we recommend to use 5 l flexible water bags made of waterproof fabric.
We designed this rack with the task to fit with the fat tire wheel , but as well to offer you a rack that can
be disassembled for easier transport by plane or car.
You love to hike with your little dog? You can attach a dog basket on this rack with an adaptor, that fits
direct on the rack. ATTENTION: Carrying dogs with a Monowalker is by your own risk

If you have ordered a rack: Your rack will come disassembled but can be carried in this way in your flight
luggage if you want to fly with your hiking trailer.
Content of delivery:
1 x rack platform
2 x side panels with assembled stainless steel 3-D dropouts
2 x side stays for panniers
2 x M5 x16 mushroom screw
2 x M5 x25 mushroom screw
2 x M5 x30 mushroom screw
2 x M5 x40 mushroom screw
6 x selfsecuring nuts
4x nylon washers black
2 x Nordlock washers ( 1 washer is made of two single washers)
2x silver stay holder brackets for round rack stay with pre-assembled screws and Nordlock washers
2x black stay holder brackets for round rack stay with pre-assembled screws and washers ( assembled at
the rack)
2 aluminum stays

Start assembling the side panels, using the M5 x 16 screw in the middle position and fix it on the rack
platform with an M5 self-securing screw. Continue with the M5 x 30 screw at the right side of the rack.
Use one of the black 10 mm nylon spacer between the panel and the lowrider stay. Do the same at the
frontend by using a M5x25 screw with 10 mm spacer and self-securing nut.
Assemble the black round stays at the frontside of the rack, connect them with the silver stay holder
brackets that are included in your delivery. Assemble the silver stay holder brackets at the topside of the
lugguage plate. Use for the silver stay holder brackets the pre-assembled Nordlock washers, that prevent
that the screws getting loose due to vibration.
Popular Utility Vehicle manuals by other brands

NC ENGINEERING
NC ENGINEERING MKII 600 Series Operating, maintenance and safety instructions

Toro
Toro 7287 Operator's manual

Bomag
Bomag BMP 8500 Operating and maintenance instructions

Taylor-Dunn
Taylor-Dunn B0-248-48AC Operation, t roubleshooting and replacement parts manual

Taylor-Dunn
Taylor-Dunn B0-210-36 Service and Replacement Parts Manual

Yamaha
Yamaha YTF2 Owner's/operator's manual

Etnyre
Etnyre Black-Topper manual

Cub Cadet
Cub Cadet Big Country 641 Operator's manual

Textron Specialized Vehicles
Textron Specialized Vehicles Cushman Shuttle 4 ELiTE 2020 owner's manual

Oldenbourg group
Oldenbourg group euv-400 Parts and service manual

North Star
North Star 165959 owner's manual

Husqvarna
Husqvarna HUV 4214 user manual