MONTAGUE RB36SC User manual

1
INSTRUCTION MANUAL
These instructions should be read thoroughly before attempting installation.
Set up and installation should be performed by qualified installation personnel.
PLEASE RETAIN THIS MANUAL
FOR FUTURE REFERENCE.
THE MONTAGUE COMPANY
1830 Stearman Avenue
P.O. BOX 4954
Hayward, CA 94540-4954
TEL: (510) 785-8822 FAX: (510) 785-3342
MODEL(S):
RB36SC—RB108SC
RB36R—RB108R
RB36 FREEZER—RB108 FREEZER
INSTALLATION / OPERATIONS / PARTS & SERVICE
MONTAGUE
REFRIGERATION AND FREEZER
BASES

2
WARNING:
Improper installation, adjustment,
alteration, service or maintenance
can cause property damage, injury
or death. Read the operating
and maintenance instructions
thoroughly before installing or
servicing this equipment.
FOR YOUR SAFETY:
Do not store or use gasoline or
other flammable vapors and
liquids in the vicinity of this or
any other appliance.
INSTRUCTIONS TO BE FOLLOWED IN THE EVENT THE USER SMELLS GAS MUST BE
POSTED IN A PROMINENT LOCATION. THIS INFORMATION MAY BE OBTAINED BY
CONSULTING THE LOCAL GAS SUPPLIER.
SHIPPING DAMAGE CLAIM PROCEDURE
For your protection, please note that equipment in this shipment was carefully inspected
and packed by skilled personnel before leaving the factory. The transportation company
assumes full responsibility for safe delivery upon acceptance of this shipment.
If shipment arrives damaged:
1. VISIBLE LOSS OR DAMAGE—Be certain this is noted on freight bill or express receipt,
and signed by person making delivery.
2. FILE CLAIM FOR DAMAGES IMMEDIATELY—Regardless of the extent of damage.
3. CONCEALED LOSS OR DAMAGE—If damage is unnoticed until merchandise is un-
packed, notify transportation company or carrier immediately, and file “concealed dam-
age” claim with them. This should be done within fifteen (15) days of date that delivery
was made to you. Be sure to retain container for inspection.
We cannot assume responsibility for damage incurred in transit. We will, however, be glad
to furnish you with necessary documents to support your claim.
IMPORTANT

3
The Refrigeration and Freezer bases are produced with the best possible material and workmanship.
PROPER INSTALLATION IS ESSENTIAL FOR SAFE AND EFFICIENT TROUBLE-FREE OPERATION.
THE INSTALLATION INSTRUCTIONS CONTAINED HEREIN ARE FOR THE
USE OF QUALIFIED INSTALLATION AND SERVICE PERSONNEL ONLY.
INSTALLATION OR SERVICE BY OTHER THAN QUALIFIED PERSONNEL
MAY RESULT IN DAMAGE TO THE EQUIPMENT AND/OR INJURY TO THE
OPERATOR.
Qualified installation personnel are individuals, a firm, corporation or company which either in
person, or through a representative are engaged in, and are responsible for:
A. The installation or replacement of the connection, installation, repair or servicing of equip-
ment, who is experienced in such work, familiar with all precautions required, and has
complied with all requirements of state or local authorities having jurisdiction. Reference:
National Fuel Gas Code Z223.1-latest addenda, Section 1.4.
B. The installation of electrical wiring from the electric meter, main control box or service out-
let to the electric appliance. Qualified personnel must be experienced in such work, be fa-
miliar with all precautions required and have complied with all requirements of state and
local authorities having jurisdiction. Reference: National Electric Code, N.F.P.A. No. 70–
latest addenda.
READ CAREFULY AND FOLLOW THESE INSTRUCTIONS
THIS UNIT WHEN INSTALLED MUST BE ELECTRICALLY GROUNDED
IN ACCORDANCE WITH LOCAL CODES, OR IN ABSENCE OF LOCAL
CODES, WITH THE NATIONAL ELECTRICAL CODE, ANSI/NFPA No.70–
LATEST ADDENDA.
PROVISIONS MUST BE MADE FOR ADEQUATE AIR SUPPLY TO THE UNIT.

4
NOTE: Sections of this manual are prepared for the use of Service Technicians and should not be
used by those not properly qualified. This manual is not intended to be all encompassing. You
should read, in its entirety, the repair procedure you wish to perform to determine if you have the
necessary tools, instruments, and skills required to perform the procedure.
MONTAGUE MODELS
Montague RB-SC and RB-R models are refrigerated Equipment Stand units available in different
lengths from 36 to 108 inches in width. These units are available as refrigerated or freezer storage
compartments. The condensing systems are designed to be installed with minimal clearance to walls
or other equipment.
These models are available as self-contained or remote. Standard features on these models include:
Electronic temperature control
All stainless steel construction
6” legs for (RB-R) models
Double or single wide drawers
Exterior Top Rail thermometer
Display: 3 digit display w/ sign (-199 to 999)
and decimal point.
Six status LED’s
Unique designed evaporator coil (TURBO
COIL). controlled from the outside thermom-
eter
MODELS AVAILABLE
SELF-CONTAINED
(RB-SC)
REMOTE
(RB-R)
SELF-CONTAINED
(FB-SC)
REMOTE
(FB-R)
RB-36-SC RB-36-RFB-36-SC FB-36-R
RB-48-SC RB-48-RFB-48-SC FB-48-R
RB-60-SC RB-60-RFB-60-SC FB-60-R
RB-72-SC RB-72-RFB-72-SC FB-72-R
RB-84-SC RB-84-RFB-84-SC FB-84-R
RB-96-SC RB-96-RFB-96-SC FB-96-R
RB-108-SC RB-108-RFB-108-SC FB-108-R
* Available options include: Marine edge exterior top in all different models.
INTRODUCTION

5
THE SERIAL TAG …………………………………. PAGE 6
RECEIVING & INSPECTING …………………….. PAGE 7
A. UNPACKING AND CHECKING
INSTALLATION ……………………………………. PAGE 7 & 8
A. UNPACK LOOSE COMPONENTS
B. REFRIGERATION LINES
C. ELECTRIC CONNECTION
OPERATION ……………………………………….. PAGE 8
A. TEMPERATURE SETTING
B. FREEZER SETTING
C. THERMOSTAT
D. DEFROST
E. SHUTTING OFF
DRAWER CONFIGURATION ……………………. PAGE 9 & 10
MAINTENANCE PROCEDURES ……………….. PAGE 11
A. CLEANING STORAGE CABINET
B. STORAGE CABINET
C. CONDENSING UNIT
TROUBLESHOOTING GUIDE …………………… PAGE 12
WIRING DIAGRAM (RB-SELF CONTAINED) … PAGE 13
WIRING DIAGRAM (RB-REMOTE) …………….. PAGE 14
WIRING DIAGRAM (FB-SELF CONTAINED) …. PAGE 15
WIRING DIAGRAM (FB-REMOTE)……………… PAGE 16
EXPLODED VIEWS & PARTS LISTS……………. PAGE 17-25
TABLE OF CONTENTS

6
The serial tag is a label permanently affixed to
every unit on which vital electrical and
refrigeration data about your Montague product,
is recorded as well as model and serial
number. This tag is located inside the storage
cabinet on all standard Self-contained (RB-SC)
or Remote (RB-R) model refrigerated equipment
stand units. Prior to installation, test the
electrical service to assure that it agrees with
the specifications of the equipment marked on
the serial tag.
READING THE SERIAL MODEL:
Serial = The permanent ID# of your
Montague unit
Model = The model # of your Montague unit
Volts = Voltage
Hz = Cycle
Heaters (freezers only) = Number of Heaters
Total Amps = Maximum Amp draw
Minimum Circuit = Minimum Circuit Ampacity
Maximum Amps Protection = Breaker size
Refrigerant = Refrigerant type and amount
used
Design Pressure = Maximum operating
pressures
THE MONTAGUE CO.
HAYWARD – CALIFORNIA
MOD:
SER:
VOLTS: HZ: PH:
TOTAL AMPS:
DESIGN PRESSURE
(PSIG)
HIGH SIDE: LOW SIDE:
REFRIGERANT: LBS: OZ:
A TYPE II DISPLAY REFRIGERATOR OR FREEZER
INTENDED FOR OTHER THAN HOUSEHOLD USE.
(DESTINE A UN USAGE AUTRE QUE
DOMESTIQUE.)
P/N:59935-2
EXAMPLE:
SERIAL NUMBER LOCATION
Always have the serial number of your unit
available when calling Parts & Service.
The serial number is on the nameplate that also
includes the model number. A typical
identification plate is shown in Figure 1.
Figure 1.
THE SERIAL TAG
MIN CIRCUIT AMPACITY:

7
the equipment, notify the carrier. Notification
should be made verbally as well as in written
form.
4. Request an inspection by the shipping
company of the damaged equipment. This
should be done within 10 days from receipt
of equipment.
5. Freight carriers can supply the necessary
damage form upon request.
6. Retain all shipping materials until an
inspection has been made or waived.
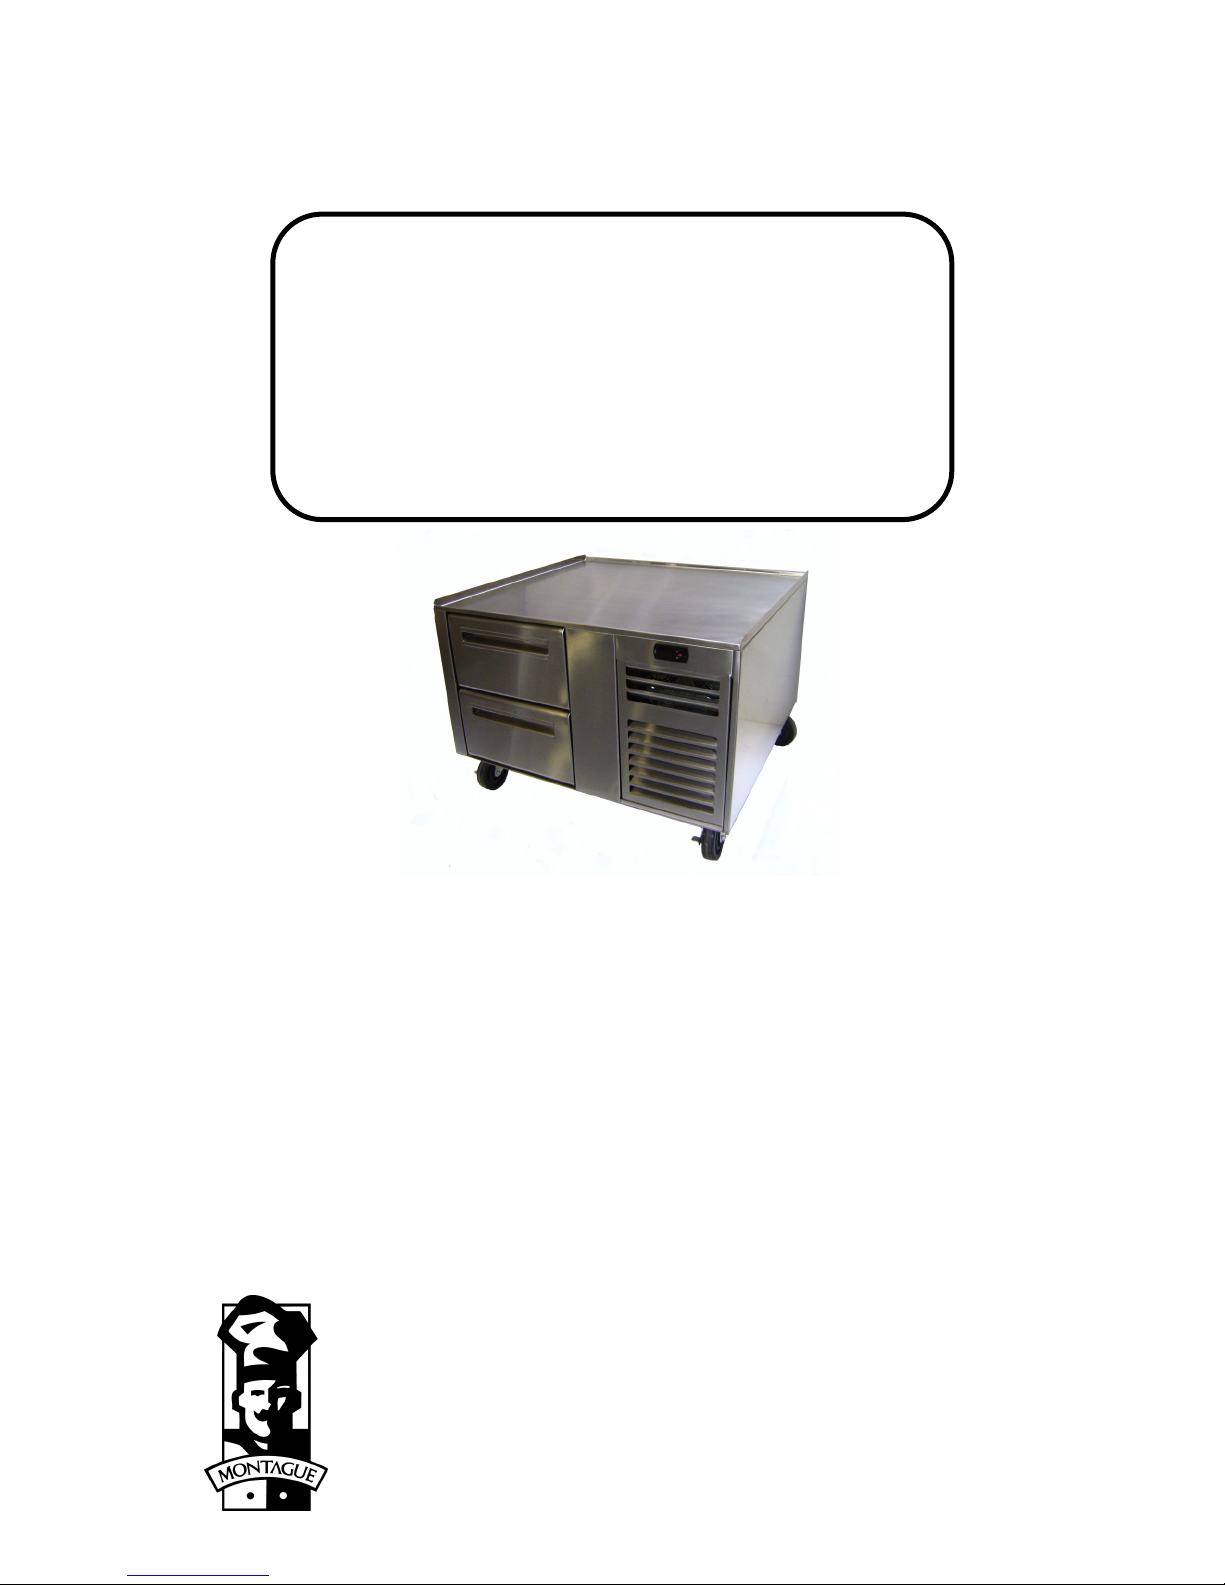
INSTALLATION
A. Uncrate unit as near to final location as
possible for easier and lighter handling of the
unit and remove all packing materials from
interior.
Some components are packed and shipped
inside the storage cabinet to avoid damage
during shipment. Remove these items from the
cabinet and remove packing materials.
(CASTERS, LEGS, ETC.)
B. FOR CORD CONNECTED UNITS
(Self-contained models): Plug the unit into a
properly sized outlet. See data plate location
inside storage cabinet for circuit sizing.
C. WARNING: THIS UNIT IS PROVIDED
WITH A THREE PRONGED GROUNDING
PLUG. THE OUTLET TO WHICH THIS
PLUG IS CONNECTED MUST BE
PROPERLY GROUNDED. IF
RECEPTACLE IS NOT THE PROPER
GROUNDING TYPE, CONSULT ELECTRI-
CIAN FOR PROPER INSTALLATION.
D. PERMANENTLY WIRED UNITS (Remote
Models): A junction box located on the back
of the unit is provided for electrical field
SHIPPING DAMAGE CLAIM PROCEDURE
NOTE: For your protection, please note that
equipment in this shipment was carefully
inspected and packed by skilled personnel
before leaving the factory. The transportation
company assumed full responsibility for safe
delivery upon acceptance of this shipment.
* We cannot assume responsibility for
damage incurred in transit. We will, however,
be glad to furnish you with the necessary
documents to support your claim.
All Montague products are factory tested for
performance and are free from defects when
shipped. The utmost care has been taken in
crating this product to protect against damage in
transit.
You should carefully inspect your Montague unit
for damage during delivery. If damage is de-
tected, you should save all the crating mate-
rials and make note on the carriers Bill of Lading
describing the damage. A freight claim should be
filed immediately. There is a fifteen (15) day limit
to file freight damage with the carrier. (to
verify)
Care should be taken during unloading so the
equipment is not damaged while being moved
into the building.
1. Visually inspect the exterior of the package
and skid or container. Any damage should be
noted and reported to the delivery carrier
immediately.
2. If damaged, open and inspect the contents
with the carrier.
3. In the event the exterior is not damaged, yet
upon opening, there is concealed damage to
RECEIVING & INSPECTING

8
connections. See wiring diagram shipped
with the unit on the compressor compartment
behind the louver panel for electrical rating.
E. REFRIGERATION LINES (Remote units
only)
WARNING: REFRIGERATION LINES ARE
SHIPPED UNDER PRESSURE. USE CAUTION
WHEN OPENING LINES.
F. ON REMOTE UNITS. Refrigeration lines for
suction and supply are located on the back
of the unit. The suction line is marked
“suction” and 3/8 copper tubing. The liquid
supply line is 1/4” copper. If upon opening
lines, no release of charge is evident, contact
your local authorized service agent immedi-
ately.
Cut refrigeration tubing with appropriate tool
and de-burr end of the tube. Clean tubing prior
brazing connection. Use Silfos 5% refrigerant
line brazing or better.
A. TEMPERATURE CONTROL SETTINGS:
On both Self-Contained and Remote
Refrigerated units, temperature Control
should be set 35°F with a 5°F dierenal. This
display should read between 35°F to 40°F . The
temperature control seng is “locked” to avoid
unauthorized adjustments. Therefore,
adjustments to the set point must be made by an
authorized service technician.
B. ON FREEZER BASE UNITS: The temperature
control should be set at 0°F with 5°F dierenal.
Temperature display should read between 0°F
and 5°F
C. The temperature control is the actual
thermometer of the unit, it does display the
actual temperature of the storage cabinet.
Allow cabinet to reach normal operang
temperature before loading (approximately) 20
minutes for refrigerator and 45 minutes for
freezer. If the storage cabinet is overloaded with
warm food products, a certain amount of me is
required to remove heat from items before
operang temperatures can be maintained.
The system is designed for storage of
refrigerated or frozen products.
D. DEFROST TIME SETTINGS: All models are
provided with an electronic temperature control
which have a built-in defrost system, which is
factory set as well as the temperature sengs.
Any change made to the seng must be made
by a qualied or authorized service technician.
E. SHUTDOWN FOR EXTENDED PERIODS: If the
units are not to be used for an extended period
of me, disconnect the electrical power supply
and remove the drawers from the storage
cabinet. As soon as cabinet has warmed to room
temperature, wipe out the base interior.
INSTALLATION(CONTINUED) OPERATION

9
DRAWER CONFIGURATION (A) DRAWER CONFIGURATION (B) DRAWER CONFIGURATION (C)
Can accommodate up to one
6” (152mm) deep, 12” x 20” (305 x
508mm)
Can accommodate up to two pans
6” (152mm) deep, 12” x 20” (305 x
508mm) *(from left to right)
Can accommodate up to two pans
6” (152mm) deep, 12” x 20” (305 x
508mm) *(from front to back)
Heavy 14-gauge stainless steel track system
Recessed drawer handles
Drawers are easily removed for cleaning
300lbs (136 kg) individual drawer weight
capacity
Tandem 2” (51mm) diameter stainless steel
wheel
Self-Contained Model Guide
Model
Number
Unit Width
Inches
(mm)
Total
Pans
Drawers: Width & Configuration
14-3/8”
(356mm)
22-3/8”
(566mm)
27-1/4”
(692mm)
RB-36-SC 36” (914) A2
RB-48-SC 48” (1219) C4
RB-60-SC 60” (1524) AB6
RB-72-SC 72” (1829) BC8
RB-84-SC 84” (2134) C8
RB-96-SC 96” (2438) B - (2) C12
RB-108-SC 108” (2743) C - (3) 12
AVAILABLE DRAWER CONFIGURATION

10
Remote Model Guide
Model
Number
Unit Width
Inches
(mm)
Total
Pans
Drawer: Width & Configuration
14-3/8”
(356mm)
22-3/8”
(566mm)
27-1/4”
(692mm)
RB-36-R36” (914) C4
RB-48-R48” (1219) AB6
RB-60-R60” (1524) BC8
RB-72-R72” (1829) C - (2) 8
RB-84-R84” (2134) B - (2) C12
RB-96-R96” (2438) C - (3) 12
RB-108-R108” (2743) B - (3) C16
AVAILABLE DRAWER CONFIGURATION

11
A. CLEANING: STORAGE CABINET
WARNING: DISCONNECT ELECTRICAL
POWER SUPPLY BEFORE CLEANING ANY
PARTS OF THE UNIT.
B. STORAGE CABINET: Remove the drawer
from the drawer frame modules, use warm
soapy water to clean storage cabinet doors.
NEVER use cleaners containing gritty, abrasive
materials, bleach or harsh chemicals. Rinse
thoroughly and dry with a clean soft cloth. Al-
ways rub in the same direction as the grain pat-
ter of the stainless steel.
WARNING: DISCONNECT ELECTRICAL
POWER SUPPLY BEFORE CLEANING ANY
PART OF THE UNIT
The condensing unit coil must be cleaned
regularly on self-contained models for optimal
performance. The operating environment will
affect the required frequency of cleaning.
However, the condenser should be cleaned at
minimum of once every 6 months. Air must be
able to freely circulate through the condenser.
Unit performance and operating efficiency are
significantly affected by the amount of the air
passing through the condenser. Condenser fins
that are clogged with dirt and grease greatly
reduce required heat transfer to air flow. Failure
to keep the condenser clean may cause
premature compressor failure, which will not be
covered by the warranty. The condensing unit is
located behind the louvered panel in the
compressor compartment. Remove panel by
lifting it up and pulling the bottom out. Carefully
clean dirt and lint from the condenser coil using
a vacuum cleaner or soft brush. Do not use a
wire brush. An approved condenser degreaser
must be used to remove grease. Replace
louvered panel by installing top of the panel into
track and pushing in the bottom so it fits inside
the opening, reconnect electrical supply.
D. EVAPORATOR COILS:
WARNING: DISCONNECT ELECTRICAL
POWER SUPPLY BEFORE CLEANING ANY
PARTS OF THE UNIT.
Evaporator coils should be cleaned as required
for optimal performance.
The evaporator coils are located in the storage
cabinet behind the coil cover. With a 1/4” driver,
remove 2 screws holding the cover and remove
cover. Clean evaporator coils with a vacuum
cleaner or soft brush. Replace coil cover . Re-
connect electrical supply.
MAINTENANCE PROCEDURES

12
PROBLEM POSSIBLE CAUSE
1. Compressor fails to operate
Power failure
Plug in loose receptacle or unplugged
Blown fuse or tripped circuit breaker
Main power switch is off
Temperature control not set properly
2. Condensing unit operates for prolonged
periods or continuously
Door gaskets not sealing properly
Condenser dirty
Evaporator coil is iced up or dirty
Prolonged and/or frequent door openings or
door(s) ajar
Excessive load of warm food placed into
lower storage cabinet
3. Lower storage cabinet not holding
temperature
Temperature control not set properly
Door gasket not sealing properly
Inadequate air circulation due to product over
loading
Evaporator coil is iced up or dirty
SERVICE: Please contact your local authorized service agent.
TROUBLSHOOTING

13
EVAPORATOR COIL
FAN MOTOR
FAN
4N
GROUND
WIRE
GROUND
WIRE
EVAPORATOR COIL
FAN MOTOR
FAN
4N
SOLENOID
VALVE
BLACK
BLACK
BLACK
BLACK = HOT WHITE = NUETRAL
WHITE
JUNCTION BOX
BLACK
WHITE
WHITE
WHITE
GROUND
T-STAT
RED
RED
115 V
AXIAL FAN
115 V
AXIAL FAN
ON SELF-CONTAINED
CABINETS ONLY
115V/60 HZ/ 1 PH
PRESSURE
SWITCH
10 AMP
COMPRESSOR
OUTLET
1/3 HP
COMPRESSOR
123
WIRING DIAGRAM(RB-SC) SELF-CONTAINED

14
EVAPORATOR COIL
EVAPORATOR COIL
GROUND
WIRE
GROUND
WIRE
FAN MOTOR
FAN MOTOR
FAN
FAN
4
4
N
N
SOLENOID
VALVE
BLACK = HOT WHITE = NUETRAL
GROUND
JUNCTION BOX
BLACK WHITE
WHITE
WHITE
BLACK
BLACK
RED
RED
T-STAT
123
WIRING DIAGRAM(RB-R) REMOTE

15
EVAPORATOR COIL
EVAPORATOR COIL
FAN MOTOR
FAN MOTOR
FAN
FAN
GROUND
WIRE
GROUND
WIRE
GROUND
BLACK = HOT WHITE = NUETRAL
BLACK WHITE
JUNCTION BOX
SOLENOID
VALVE
ON SELF-CONTAINED
CABINETS ONLY
115V/60 HZ/ 1 PH
1/3 HP
COMPRESSOR
PRESSURE
SWITCH
10 AMP
COMPRESSOR
OUTLET
4
4
4
N
N
3
3
3
12
DEFROST HEATER
DEFROST HEATER
DEFROST HEATER
(ONE DOOR)
115 V
AXIAL FAN
115 V
AXIAL FAN
AMBIENT (OUTSIDE COIL)
DEFROST (INSTERTED
INSIDE EVAPORATOR COIL)
5678910 11
WHITE
WHITE
BLACK
WHITE
WHITE
BLACK
WIRING DIAGRAM(FB-SC) FREEZER

16
EVAPORATOR COIL
EVAPORATOR COIL
FAN
FAN
FAN MOTOR
FAN MOTOR
GROUND
WIRE
GROUND
WIRE
JUNCTION BOX
GROUND
BLACK = HOT WHITE = NUETRAL
DEFROST HEATER
(ONE DOOR)
SOLENOID
VALVE
DEFROST HEATER
DEFROST HEATER
AMBIENT (OUTSIDE COIL)
DEFROST (INSTERTED
INSIDE EVAPORATOR COIL)
BLACK
BLACK
WHITE
WHITE
WHITE
4
4
3
3N
N
12345678910 11
WIRING DIAGRAM(FB-R) FREEZER

17
EXPLODED VIEW #1

18
EXPLODED VIEW #1 PARTS LIST
ITEM # PART # DESCRIPTION MODELS USED FOR
170030-4RA FAN HOUSING RB-36-SC,RB-48-SC,RB-60-SC,RB-72-SC,RB-84-SC,RB-96-SC,RB-108-SC
270031-2RA CONDENSING GUARD RB-36-SC,RB-48-SC,RB-60-SC,RB-72-SC,RB-84-SC,RB-96-SC,RB-108-SC
370032-0RA CONDENSER SHELF RB-36-SC,RB-48-SC,RB-60-SC,RB-72-SC,RB-84-SC,RB-96-SC,RB-108-SC
470044-4RA CC BOTTOM SHELF RB-36-SC,RB-48-SC,RB-60-SC,RB-72-SC,RB-84-SC,RB-96-SC,RB-108-SC
570045-2RA CC EXTERIOR TOP RB-36-SC,RB-48-SC,RB-60-SC,RB-72-SC,RB-84-SC,RB-96-SC,RB-108-SC
670046-0RA CC EXTERIOR BOTTOM RB-36-SC,RB-48-SC,RB-60-SC,RB-72-SC,RB-84-SC,RB-96-SC,RB-108-SC
770047-9RA CC BOTTOM & TOP CHANNEL SUPPORT RB-36-SC,RB-48-SC,RB-60-SC,RB-72-SC,RB-84-SC,RB-96-SC,RB-108-SC
870061-4RA CC EXTERIOR, SIDE RIGHT RB-36-SC,RB-48-SC,RB-60-SC,RB-72-SC,RB-84-SC,RB-96-SC,RB-108-SC
970084-2RA CC EXTERIOR, INNER SIDE RB-36-SC,RB-48-SC,RB-60-SC,RB-72-SC,RB-84-SC,RB-96-SC,RB-108-SC
10 70085-1RA LOUVER, TOP RAIL RB-36-SC,RB-48-SC,RB-60-SC,RB-72-SC,RB-84-SC,RB-96-SC,RB-108-SC
11 70087-8RA LOUVER, PANEL RB-36-SC,RB-48-SC,RB-60-SC,RB-72-SC,RB-84-SC,RB-96-SC,RB-108-SC
12 70148-3RA INNER LOUVER, TOP RAIL RB-36-SC,RB-48-SC,RB-60-SC,RB-72-SC,RB-84-SC,RB-96-SC,RB-108-SC
13 70190-4RA CC SLIDING SHELF RB-36-SC,RB-48-SC,RB-60-SC,RB-72-SC,RB-84-SC,RB-96-SC,RB-108-SC
14 70191-2RA SHELF, SLIDER LEFT & RIGHT RB-36-SC,RB-48-SC,RB-60-SC,RB-72-SC,RB-84-SC,RB-96-SC,RB-108-SC
15 70228-5RA CC EXTERIOR, SIDE COVER RB-36-SC,RB-48-SC,RB-60-SC,RB-72-SC,RB-84-SC,RB-96-SC,RB-108-SC
16 59682-51/3 COMPRESSOR RB-36-SC,RB-48-SC,RB-60-SC,RB-72-SC
59681-71/3+ COMPRESSOR RB-84-SC,RB-96-SC,RB-108-SC
17 59667-1AXIAL FAN, 4" RB-36-SC,RB-48-SC,RB-60-SC,RB-72-SC,RB-84-SC,RB-96-SC,RB-108-SC
18 19118-3CASTER WITH LOCK RB-36-SC,RB-48-SC,RB-60-SC,RB-72-SC,RB-84-SC,RB-96-SC,RB-108-SC
19 19119-1CASTER WITHOUT LOCK RB-36-SC,RB-48-SC,RB-60-SC,RB-72-SC,RB-84-SC,RB-96-SC,RB-108-SC
20 33604-1NUT SCREW RB-36-SC,RB-48-SC,RB-60-SC,RB-72-SC,RB-84-SC,RB-96-SC,RB-108-SC

19
17
EXPLODED VIEW #2

20
EXPLODED VIEW #2 PARTS LIST
PARTS LIST CONTINUED ON NEXT PAGE
ITEM # PART # DESCRIPTION MODEL/S USED WITH
170002-9RA LINER SIDE, LEFT & RIGHT RB-36-R,RB-48-R,RB-60-R,RB-72-R,RB-84-R,RB-96-R,RB-108-R
RB-36-SC,RB-48-SC,RB-60-SC,RB-72-SC,RB-84-SC,RB-96-SC,RB-108-SC
270023-1RA DRAWER TRACK, LEFT RB-36-R,RB-48-R,RB-60-R,RB-72-R,RB-84-R,RB-96-R,RB-108-R
RB-36-SC,RB-48-SC,RB-60-SC,RB-72-SC,RB-84-SC,RB-96-SC,RB-108-SC
370025-8RA DRAWER TRACK, RIGHT RB-36-R,RB-48-R,RB-60-R,RB-72-R,RB-84-R,RB-96-R,RB-108-R
RB-36-SC,RB-48-SC,RB-60-SC,RB-72-SC,RB-84-SC,RB-96-SC,RB-108-SC
470026-6RA TRACK MOUNT, LEFT RB-36-R,RB-48-R,RB-60-R,RB-72-R,RB-84-R,RB-96-R,RB-108-R
RB-36-SC,RB-48-SC,RB-60-SC,RB-72-SC,RB-84-SC,RB-96-SC,RB-108-SC
570027-4RA TRACK MOUNT, RIGHT RB-36-R,RB-48-R,RB-60-R,RB-72-R,RB-84-R,RB-96-R,RB-108-R
RB-36-SC,RB-48-SC,RB-60-SC,RB-72-SC,RB-84-SC,RB-96-SC,RB-108-SC
670028-2RA TRACK MOUNT, FRONT LEFT RB-36-R,RB-48-R,RB-60-R,RB-72-R,RB-84-R,RB-96-R,RB-108-R
RB-36-SC,RB-48-SC,RB-60-SC,RB-72-SC,RB-84-SC,RB-96-SC,RB-108-SC
770029-0RA TRACK MOUNT, FRONT RIGHT RB-36-R,RB-48-R,RB-60-R,RB-72-R,RB-84-R,RB-96-R,RB-108-R
RB-36-SC,RB-48-SC,RB-60-SC,RB-72-SC,RB-84-SC,RB-96-SC,RB-108-SC
870006-1RA LINER, BACK RB-36-SC
70111-4LINER, BACK RB-48-SC,RB-36-R
70165-3RA LINER, BACK RB-60-SC,RB-48-R
70268-4RA LINER, BACK RB-72-SC,RB-60-R
70269-2RA LINER, BACK RB-84-SC,RB-72-R
70270-6RA LINER, BACK RB-96-SC,RB-84-R
70271-4RA LINER, BACK RB-108-SC,RB-96-R
70483-0RA LINER, BACK RB-108-R
970009-6RA LINER, BOTTOM RB-36-SC
70112-2LINER, BOTTOM RB-48-SC,RB-36-R
70155-6RA LINER, BOTTOM RB-60-SC,RB-48-R
70272-2RA LINER, BOTTOM RB-72-SC,RB-60-R
70273-0RA LINER, BOTTOM RB-84-SC,RB-72-R
70274-9RA LINER, BOTTOM RB-96-SC,RB-84-R
70275-7RA LINER, BOTTOM RB-108-SC,RB-96-R
70481-4RA LINER, BOTTOM RB-108-R
10 70012-6RA LINER, TOP RB-36-SC
70113-0LINER, TOP RB-48-SC,RB-36-R
70156-4RA LINER, TOP RB-60-SC,RB-48-R
70276-5RA LINER, TOP RB-72-SC,RB-60-R
70277-3RA LINER, TOP RB-84-SC,RB-72-R
70278-1RA LINER, TOP RB-96-SC,RB-84-R
70280-3RA LINER, TOP RB-108-SC,RB-96-R
70482-2RA LINER, TOP RB-108-R
Other manuals for RB36SC
2
This manual suits for next models
3
Table of contents
Popular Refrigerator manuals by other brands

LG
LG LFX25975SW - 24.7 cu. ft. Refrigerator Guía para el uso e instrucciones de instalación

Crosley
Crosley CS25AFXKT04 Use & care guide

Continental Refrigerator
Continental Refrigerator DL1RE-SS Specifications

Metos
Metos Marine BCD-215V instruction manual

LG
LG LSC27935SB owner's manual

PowerPoint
PowerPoint P450TTIBMDW manual