manuals.online logo
Brands
  1. Home
  2. •
  3. Brands
  4. •
  5. montpellier
  6. •
  7. Freezer
  8. •
  9. montpellier M603DDAP User manual

montpellier M603DDAP User manual

Montpellier
Installation and Operating Instructions
MODEL: M603DDAP
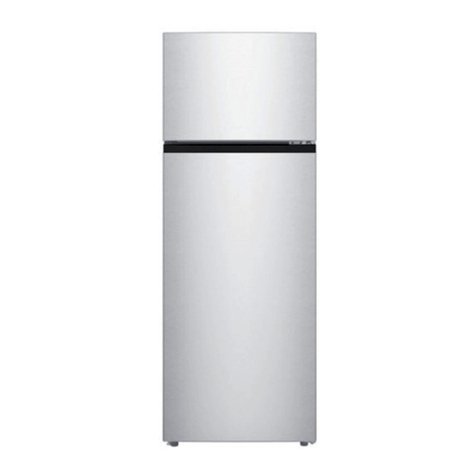
92cm A+ SIDE BY SIDE FRIDGE FREEZER
(Picture shown for indicative purposes only, model supplied may differ).
Please read these instructions carefully before attempting to install or use this appliance. It is
advisable to keep these instructions in a safe place for future reference.
1
Introduction
Thank you for choosing this Montpellier appliance. It has been
designed to give years of trouble-free use provided it is installed and
maintained correctly.
Please read these instructions carefully before installing or using your
appliance. It is advisable to keep your purchase and installation receipts
with these instructions in a safe place for future reference. Included is
some important safety information in addition to guidelines and
recommendations that will enable you to take full advantage of all the
functions available.
This quality appliance has been tested and certified to meet all applicable
UK electrical and safety standards.
This appliance must be installed and connected in accordance with
current regulations by a qualified electrician.
After unpacking the appliance ensure that there is no visible damage.
If the appliance has been damaged during transit, do not use it, contact
your retailer immediately.
2
3
Description of the Appliance
A - Freezer Compartment
B - Fridge Compartment
1. Freezer Door Rack
2. Twist Ice-Maker
3. Freezer Compartment Light
4. Freezer Shelf
5. Freezer Storage Box
6. Fridge Compartment Light
7. Fridge Shelf
8. Fridge Storage Box Cover
9. Fridge Storage Box
10. Fridge Door Rack
11. Fridge Door Rack
(Picture shown for indicative purposes only, model supplied may differ).
4
CONTENTS:
Section 1. Installation
Section 2. Safety Advice
Section 3. Operating the Appliance
Section 4. Maintenance
5
Section 1. Installation
IMPORTANT! This appliance must be left to stand in an upright position for at
least 4 hours before being switched on for the first time.
This appliance has been designed for Domestic Use Only.
Remove all packaging and securing tape from the appliance.
The exterior stainless steel surfaces may be covered with a protective film which
should be removed prior to use. Carefully peel the film from the surfaces and
then clean any marks left on the surface with a dry cloth. DO NOT USE A
BLADE OR SHARP IMPLEMENT TO CUT or REMOVE THE FILM as this will
damage the surface of the stainless steel. Damage to the stainless steel surface
is not covered under the 2 year guarantee offered with this appliance.
Wash the interior of the appliance with luke warm water containing a small
amount of bicarbonate soda (5ml to 0.5 litres of water).
Position the appliance in a dry atmosphere and out of direct sunlight.
Do not position next to a cooker or other sources of heat, i.e. radiator.
This appliance should not be sited in a cold atmosphere, i.e. garage or
shed. Doing so may cause the freezer unit to underfreeze.
If positioned next to another fridge or freezer, leave a minimum gap of 10cm
between the appliances in order to avoid condensation.
A clearance of 30mm should be left above the appliance. If this cannot be
achieved you should ensure a clearance of 20mm is maintained on each side of
the appliance.
You must ensure a clearance of at least 10mm between the appliance and the
wall.
Do not place or store heavy items on the top of this appliance.
Ensure that the appliance is positioned on a firm flat floor.
This appliance must be level. Adjust the level by using the leveling facility at the
base of the appliance.
Ensure that the appliance is upright and in firm contact with the floor so that the
cabinet is stable.
Connect the plug to an adjacent 13amp socket outlet and ensure that the
appliance is not standing on the supply cable.
Ensure the appliance has sufficient air circulation as follows:
6
Install the door handles as follows:
Please note that the illustration shows a short handle, however the same
principal applies to the long door handles. Simply line the handle up with the
pre-drilled fixing holes on the door.
Adjust the feet as follows:
To install, locate each handle
into the holes on the door (1)
and then slide the handle in a
downwards direction to lock in
place (2).
To remove the handle, reverse
the above procedure.
7
Section 2. Safety Advice
Please read this booklet thoroughly before installing and switching on the
appliance. The manufacturer accepts no responsibility for incorrect installation
and usage.
If this appliance is to replace an old refrigerator with a lock, as a safety measure
break or remove the lock and/or door before disposal.
Your old appliances contain insulation gases and refrigerant that must be
disposed of correctly. Please ensure that the refrigerant circuit is not damaged
before the appliance is taken away for correct disposal in line with current
legislation. If there is any doubt contact your Local Authority for instructions.
This appliance may contain the refrigerant isobutene (R600a). This is a natural gas
with a high level of environmental compatibility; however, caution is required as
isobutene is a flammable gas. It is essential to ensure that refrigerant tubes are not
damaged during transportation and the installation of the appliance. In the event
that the refrigerant circuit is damaged, avoid naked flames or sources of ignition and
ventilate the room in which the appliance is situated.
Do not damage the refrigerant circuit.
The appliance is not intended for use by persons (including children) with
reduced physical, sensory or mental capabilities, or lack of experience and
knowledge, unless they have been given supervision or instruction concerning
the use of the appliance by a person responsible for their safety. Children should
be supervised to ensure that they do not play with the appliance.
If using an adaptor, this must be used in accordance with the manufacturers
instructions and ensure that the electrical circuit is not overloaded as this could
cause overheating.
Do not twist or bend the cables, and keep them away from hot surfaces.
Do not plug ın or unplug this appliance with wet hands.
Following installation make sure that the power cable is not trapped underneath
the appliance.
Ensure the appliance is left in an upright position for at least 4 hours before you
switch it on.
The plug supplied with this appliance must be fitted with a 13 Amp fuse.
If the power supply cord is damaged, it must be replaced by the manufacturer,
it’s service agent or similarly qualified persons in order to avoid a hazard.
8
Section 3. Operating the Appliance
3.1. Switching on the Appliance
Allow the appliance to stand upright for a minimum of 4 hours before you switch it
on.
Plug in the appliance and switch on at the mains supply.
Set the thermostat control panel to the required setting as detailed in the
Temperature Control section (3.2.).
Leave the appliance for approximately 4 hours for the correct temperature to be
reached.
3.2. Temperature Control
The temperature control panel (LED) is located on the outer face of the freezer door.
The LED has two display modes, Standard and Energy Saving
When initially connected to the power supply the display will automatically go into
Energy Saving mode and the display will go off after approximately 30 seconds
To select Standard mode, press the Supper Freeze button for approximately 5
seconds. The LED display will now remain on.
Display Panel
Lock/Unlock Button
Super Freeze Button
Freezer Temperature Fridge Temperature
Fridge Compartment
Temperature Set Button
Freezer Compartment
Temperature Set Button
9
3.2.1. Freezer Temperature Settings
When initially connected to the power supply the temperature of the Freezer
compartment temperature will be automatically set at -18°C. This is the
normal temperature setting for a freezer, however you can change the setting
between -15°C and -23°C as follows:
3.2.2. Fridge Temperature Settings
When initially connected to the power supply the temperature of the Fridge
compartment will be automatically set at 5°C. This is the normal
temperature setting for a fridge, however you can change the setting
between 0°C and 6°C as follows:
3.2.3. Super Freeze.
In order to fast freeze fresh food items added to your freezer compartment,
press the Super Frz button. The following indicator will be shown in the
display panel . The super freeze function will remain in operation for
approximately three hours. It will switch off automatically, however you can
turn it off at any time by simply pressing the Super Frz button again.
10
3.2.4. Lock/Unlock Function
To lock the settings, simply press the Lock/Unlock button for 3 seconds or
until the symbol is displayed in the panel. To unlock, simply press the
Lock/Unlock button for 3 seconds.
3.2.5. Super Cool Setting
Your fridge compartment has a Super Cooling function that automatically
operates should the temperature inside the compartment rise rapidly, i.e.
when a large amount of fresh foods items have been added. The facility will
switch off automatically when the compartment temperature has stabilized.
3.2.6. Door Open Warning
Should you inadvertently leave either of the doors open for approximately 1
minute or longer, a warning sound will be activated. It will stop as soon as you
close the door(s).
Important!
During high ambient temperatures e.g. on hot summer days, it may be necessary to set
the thermostat to the coldest setting. This may cause the compressor to run
continuously in order to maintain a low temperature in the cabinet.
3.3. Storing Food In the Fridge Compartment
11
3.4. Storing & Freezing Food in the Freezer
This appliance has a four star freezer that is suitable for the long-term storage of frozen
food items. It can also be used for freezing and storing fresh food items.
You should always follow the storage guidelines printed on each food producers
packaging, however the following information is provided as a general guide for the
maximum storage life of frozen items:
Fresh Meat and Poultry – up to 12 months
Cooked Meats – up to 2 months
Fresh Fish – up to 6 months
Fruit and Vegetables – up to 12 months
Bread and Cakes – up to 6 months
3.5. Operating the Twist Ice-Maker
3.6. Normal Operating Sounds
You may hear faint gurgling or bubbling sounds when the refrigerant is pumped to the
cooling system and through the coils or tubing at the rear of the appliance. When the
compressor is in operation you may hear a slight whirring sound or pulsating noise. The
thermostat controls the operation of the compressor, and you may hear a slight click as
it cycles in and out.
Open the ice-maker lid and fill
the unit with fresh cold water.
Take care not to spill water into
the freezer door or the interior
of the freezer compartment.
N.B. You must only use this unit
to freeze water!
When the water is frozen
(minimum 3 hours) turn the
small control knob on the r/hand
side of the unit in a clockwise
direction. The ice will then fall
into the container, ready for
use. Slide the drawer out to
extract the ice.
12
3.7. Energy Saving Advice
Do not install the appliance close to sources of heat, such as a cooker,
dishwasher or radiator.
Locate the appliance in a cool well-ventilated room and make sure that the air
vents are clear
Try to avoid keeping the doors open for a long time, warm air will enter the
cabinet and may cause a build-up of ice as well as affecting the energy
consumption. Ensure there are no obstructions preventing the doors from closing
properly
Ensure that the door seals are clean and there are no tears or splits.
Keep the most perishable foods, (those with a short shelf-life, such as
cooked meats), in the coldest part of the fridge. The Salad Crisper Box is
the warmest part of your fridge and should be used for vegetables, salads and
fruits etc. (see Description of Appliance on Page 2)
Do not overload the fridge: the cooling air that circulates to keep the
fridge cold gets blocked and pockets of warm air form.
Do not put hot food into the fridge or freezer – let it cool down first.
3.8. In the Event of a Power Failure
If there is a power failure, keep the doors closed. When the power has been restored
the appliance will start to operate but it may take some time to achieve the pre-set
operating temperature. Check the condition of your stored food items and liquids.
13
Section 4. Maintenance
Before any maintenance or cleaning work is carried out, DISCONNECT the
appliance from the ELECTRICITY supply.
4.1. Internal Cleaning
Clean the interior and accessories with warm water and bicarbonate of soda (5ml to 0.5
litre of water). Rinse and dry thoroughly. Do not use detergents, abrasive powders,
highly perfumed cleaning products, wax polishes or cleaning products containing bleach
or alcohol.
4.2. External Cleaning
Wash the outer cabinet with warm soapy water. Do NOT use abrasive products. There
may be sharp edges on the underside of the product, so care should be taken when
cleaning. Once or twice a year dust the rear of the appliance and the compressor at the
back of the appliance, with a brush or vacuum cleaner, as an accumulation of dust will
affect the performance of the appliance and cause increased energy consumption.
4.3. Defrosting
Your new appliance is ‘Frost Free’ and will, under normal circumstances defrost
automatically. However, should ice build up in the freezer exceed 3-5mm, empty the
contents and switch off the appliance, leave the door open and allow the ice to melt.
Place the frozen foods items in a cool-bag or wrap them in thick newspaper. Do not
use sharp objects to scrape the ice away. Clean and dry the interior, close the door
and turn on the power to the appliance. When the power has been restored the
appliance will start to operate but it may take some time to achieve the pre-set operating
temperature.
4.4. When the appliance is not in use
When the appliance is not in use for long periods, remove the contents, disconnect
from the electricity supply and clean the appliance, leaving the door ajar until you wish
to use the appliance again.
4.5. Changing the Interior Lights
Switch off the power supply to the appliance
Remove the plastic light cover
Remove the LED from the light unit.
Replace the LED with a suitable replacement
Refit the cover and switch the appliance back on.
14
4.6. What to do if something goes wrong
There is no power to the appliance:
Check there is not a power cut
Check there is power to the electric socket/appliance
Check the fuse in the plug (Must be 13 amp)
Check that the Temperature Control(s) has been set correctly (see section 3.2.)
The compressor runs continuously:
Are the doors closed correctly?
Have large quantities of food recently been added to the appliance? – if yes,
allow the interior temperature to recover
Have the appliance doors been opened frequently? – if yes, allow the interior
temperature to recover
Check that the Thermostat Control(s) has not been set to maximum
There is excessive frost/ice build up:
Ensure that the doors have been closed correctly
Ensure that the door seals are clean and sealing correctly
Check that the Temperature Control(s) has not been set to maximum
The appliance is making a noise:
Refer to Normal Operating Sounds, section 3.6
Ensure that the appliance has been installed correctly (see section 1).
If after the above checks there is still a fault please contact your retailer.
SERVICE HELP-LINE
Should your appliance develop a fault, please call the
Montpellier Service Helpline on:
01527-888133
15
Appliance Dimensions:
16
Insurance
!
Any warranty provided with this product
does
not
cover
loss
of
!
fridge/
freezer content
.
Any claim for loss, damage, costs or expenses of an indirect or consequential nature
including any economic loss or damage to foodstuffs or any other goods is excluded.
We recommend that you inspect your fridge/freezer regularly to check that it is working
correctly, losses can result from deterioration following breakdown or accidental failure
of the appliance, fuses, plugs or public electricity supply, these can be covered by your
standard home insurance or might require extra cover. Check with your insurance
provider.
Important Note:
This
appliance is
marked
according
to
the
European
directive
2002/96/EC
on
Waste
Electrical and
Electronic
Equipment
(WEEE).
By
ensuring
this
product
is
disposed
of
correctly,
you
will
help prevent
potential
negative
consequences
for
the
environment
and
human
health,
which
could otherwise
be
caused
by
inappropriate
waste
handling
of
this
product.
The
symbol
on
the
product,
or
on
the
documents
accompanying
the
product,
the
Crossed
Out Wheelie
Bin,
indicates
that
this
appliance may
not
be
treated
as
household
waste. Instead
it
shall
be
handed
over
to
the
applicable
collection
point
for
the
recycling
of
electrical
and electronic
equipment.
Disposal
must
be
carried
out
in
accordance
with
local
environmental
regulations
for
waste
disposal.
For
more
detailed
information
about
treatment,
recovery
and
recycling
of
this product,
please
contact
your
local
authority,
your
household
waste
disposal
service
or
the
retailer
where
you purchased
the
product.
We
continuously
try
to
improve
our
products
for
the
benefit
of
our
customers.
For
this
reason
we
reserve
the
right
to
make
changes
to
any
product
at
any
time,
without
notice
Issue: 05/24-10-2013

Other montpellier Freezer manuals

montpellier MON-MZF48W User manual

montpellier

montpellier MON-MZF48W User manual

montpellier MAB145C/K/R User manual

montpellier

montpellier MAB145C/K/R User manual

montpellier MITL320 User manual

montpellier

montpellier MITL320 User manual

montpellier MNF167EW User manual

montpellier

montpellier MNF167EW User manual

montpellier MS183W/S User manual

montpellier

montpellier MS183W/S User manual

montpellier MFF150W User manual

montpellier

montpellier MFF150W User manual

montpellier MS145W User manual

montpellier

montpellier MS145W User manual

montpellier MFF4X User manual

montpellier

montpellier MFF4X User manual

montpellier MFF155W User manual

montpellier

montpellier MFF155W User manual

montpellier MZM201BG User manual

montpellier

montpellier MZM201BG User manual

montpellier MS175EW User manual

montpellier

montpellier MS175EW User manual

montpellier MBUF96 User manual

montpellier

montpellier MBUF96 User manual

montpellier MZF54W/BK User manual

montpellier

montpellier MZF54W/BK User manual

montpellier MIFF502 User manual

montpellier

montpellier MIFF502 User manual

montpellier MS171W User manual

montpellier

montpellier MS171W User manual

montpellier MFF148W User manual

montpellier

montpellier MFF148W User manual

montpellier MAB144C User manual

montpellier

montpellier MAB144C User manual

montpellier MS2035EW User manual

montpellier

montpellier MS2035EW User manual

montpellier MS2035W User manual

montpellier

montpellier MS2035W User manual

montpellier MFF175W User manual

montpellier

montpellier MFF175W User manual

montpellier MIFF501 User manual

montpellier

montpellier MIFF501 User manual

montpellier MCF99-E User manual

montpellier

montpellier MCF99-E User manual

montpellier MAB385 User manual

montpellier

montpellier MAB385 User manual

montpellier MITF122 User manual

montpellier

montpellier MITF122 User manual

Popular Freezer manuals by other brands

Electrolux EUN2244AOW user manual

Electrolux

Electrolux EUN2244AOW user manual

Frigidaire FFC13C4CW Factory parts catalog

Frigidaire

Frigidaire FFC13C4CW Factory parts catalog

Summit CP962 Use and care guide

Summit

Summit CP962 Use and care guide

Electrolux EUN6300 user manual

Electrolux

Electrolux EUN6300 user manual

ROWAN ELECTRIC APPLIANCE BD-50 owner's manual

ROWAN ELECTRIC APPLIANCE

ROWAN ELECTRIC APPLIANCE BD-50 owner's manual

Electrolux EUF 27291 W user manual

Electrolux

Electrolux EUF 27291 W user manual

Miele F 1801 SF Operating and installation instructions

Miele

Miele F 1801 SF Operating and installation instructions

Electrolux EU 6938 C Instruction book

Electrolux

Electrolux EU 6938 C Instruction book

Silver King SKUCF7F Technical manual and replacement parts list

Silver King

Silver King SKUCF7F Technical manual and replacement parts list

Frigidaire Freezer owner's guide

Frigidaire

Frigidaire Freezer owner's guide

Selecline DD1-05B-1 user manual

Selecline

Selecline DD1-05B-1 user manual

Sanyo MDF-U53V Service manual

Sanyo

Sanyo MDF-U53V Service manual

BioLife Stirling Ultracold ULT25NEU operating manual

BioLife

BioLife Stirling Ultracold ULT25NEU operating manual

HIGH ONE TTF 83 F W625C Instructions for use

HIGH ONE

HIGH ONE TTF 83 F W625C Instructions for use

Beko B3RFNE294W user manual

Beko

Beko B3RFNE294W user manual

Taylor Horizon 8756 Operator's manual

Taylor

Taylor Horizon 8756 Operator's manual

Electrolux EUN12510 user manual

Electrolux

Electrolux EUN12510 user manual

Indesit IN-C 3100 G.1 UK manual

Indesit

Indesit IN-C 3100 G.1 UK manual

manuals.online logo
manuals.online logoBrands
  • About & Mission
  • Contact us
  • Privacy Policy
  • Terms and Conditions

Copyright 2025 Manuals.Online. All Rights Reserved.