220i Integrated Amplifier
____________________________________________________________________________________
10
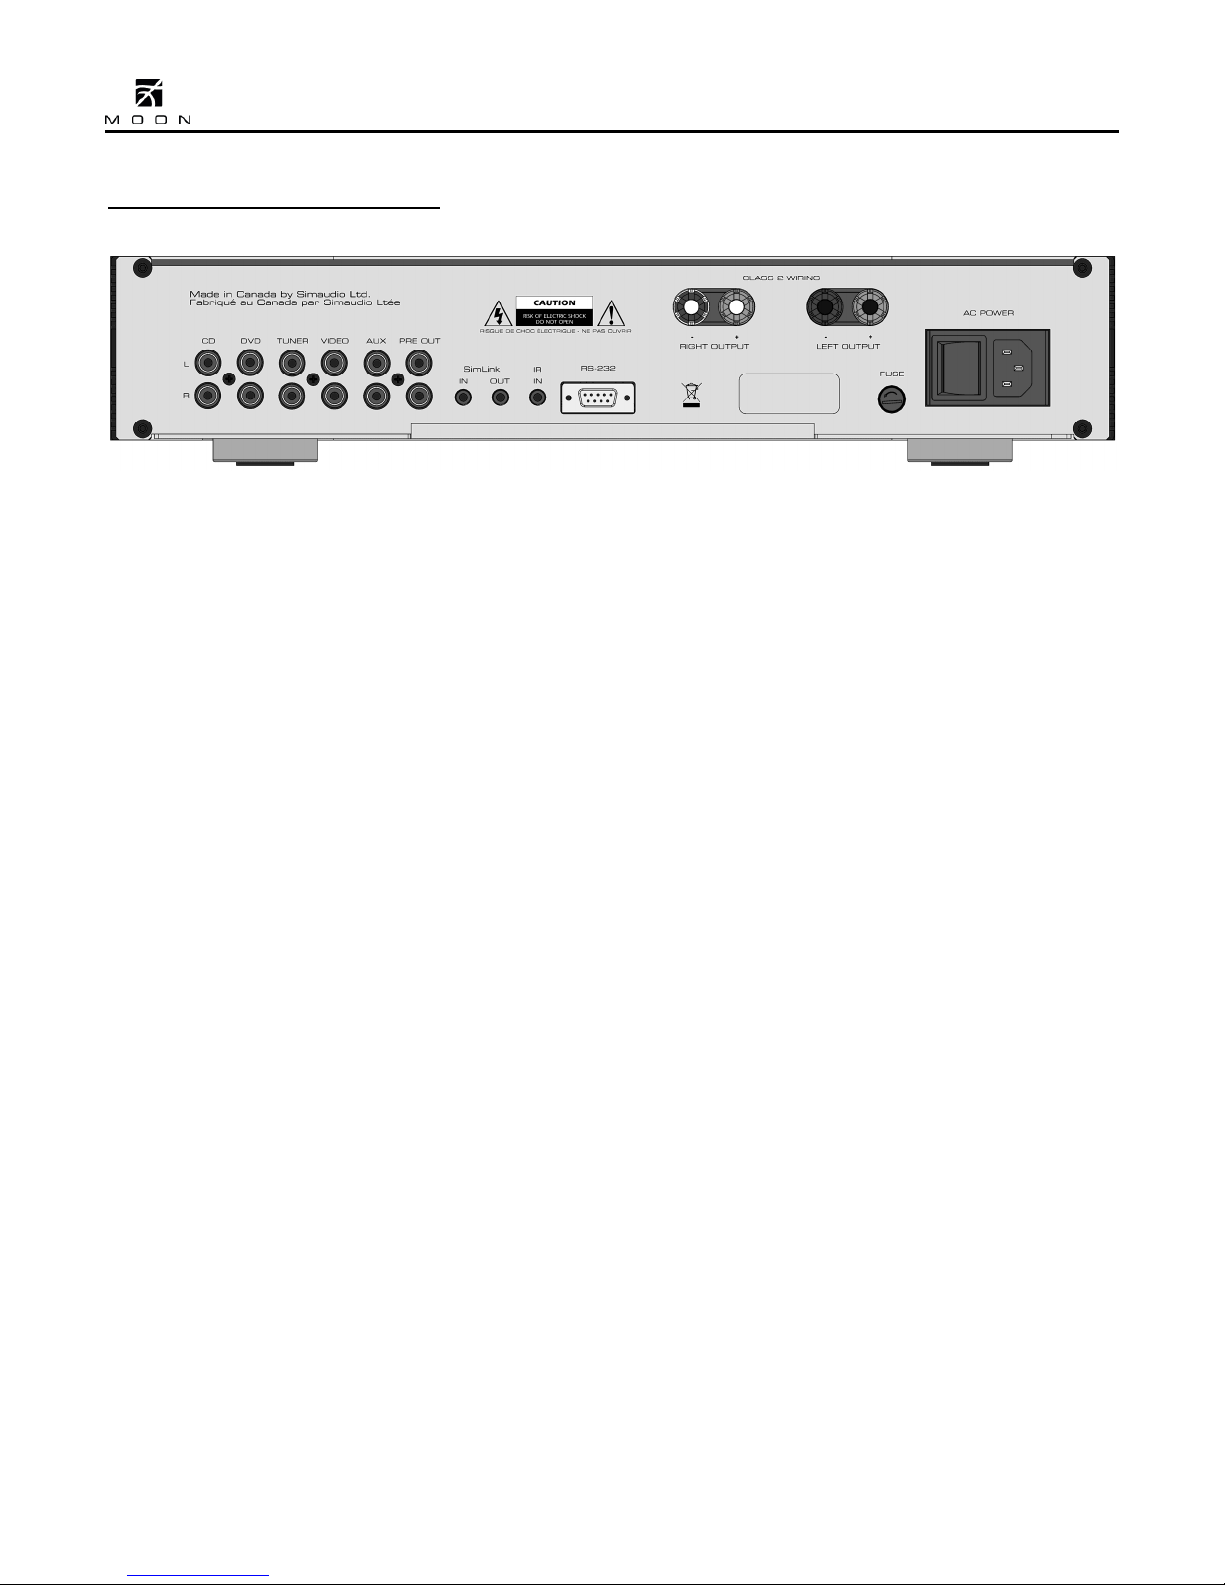
SimLink™
The SimLink™ provides communication features
between various MOON components. For example,
if you were to connect the 260D to the 220i via the
SimLink™, pressing the X(play) button on the
260D will cause the 220i to automatically switch to
the input labelled ‘CD’. A second feature of
SimLink™ involves the “Standby” function. By
pressing down and holding the “Standby” button for
2 seconds on the either the 260D or 220i, both
units will go into “Standby” mode. The same logic
applies when switching from “Standby” to active
mode.
If you are using the “MiND” Music Streamer and an
external digital-to-analog converter (DAC), you must
make a SimLink™ connection between the “MiND”s
SimLink™ out and the 220i’s SimLink™ in. The ‘Aux’
input is the default input for the “MiND” Music
Streamer; When you press the X(play) button on
the “MiND” App, the 220i will automatically switch
to the input labeled ‘Aux’. You can change these
default settings for the “MiND” as follows: Select the
input that you want as the new default for “MiND”,
then press and hold the “MP” button until the front
panel display begins to flash on and off.
The connection rules for the SimLink™ are very
basic. You must always connect the supplied cable
between one component’s SimLink™ Out jack and
another component’s SimLink™ In jack. If you
inadvertently connect the cable between either two
SimLink™ In or two SimLink™ Out jacks, the
SimLink™ communication feature may not function.
Also, there is no master component in a SimLink™
chain; no one particular component operates as the
main communications controller.
Operating the 220i
We recommend leaving your Nēo 220i powered up
at all times to maintain optimal performance. When
you plan on being away for a few days, it may not
be a bad idea to power off your amplifier. Please
keep in mind that once fully “broken-in”, your 220i
requires several hours of operation before reaching
optimal performance after powering it up again.
Turning on your Nēo 220i for the first time
Prior to turning the amplifier on for the first time,
make sure that every cable is properly connected to
avoid any problems. Flick the main rocker switch,
located on the rear panel, labeled “POWER” to the
‘1’ (on) position. The blue LED on the front panel
will blink for up to 10 seconds while it achieves
standby mode. When it stops blinking and is not
illuminated, your 220i is in standby mode. Next,
briefly press the push button labeled “Standby”
located on the front panel. You will hear a very faint
click sound confirming that everything is in order.
The blue LED on the front panel will illuminate,
indicating that the 220i is now powered up and
ready for use.
On and Off Sequence
To avoid having any annoying noises (ie. “thumps”
and “pops”) emanate from your speakers when
powering your 220i on or off, you should always
power up any source components prior to powering
up your 220i. As well, always power down your
220i prior to powering down any source
components.