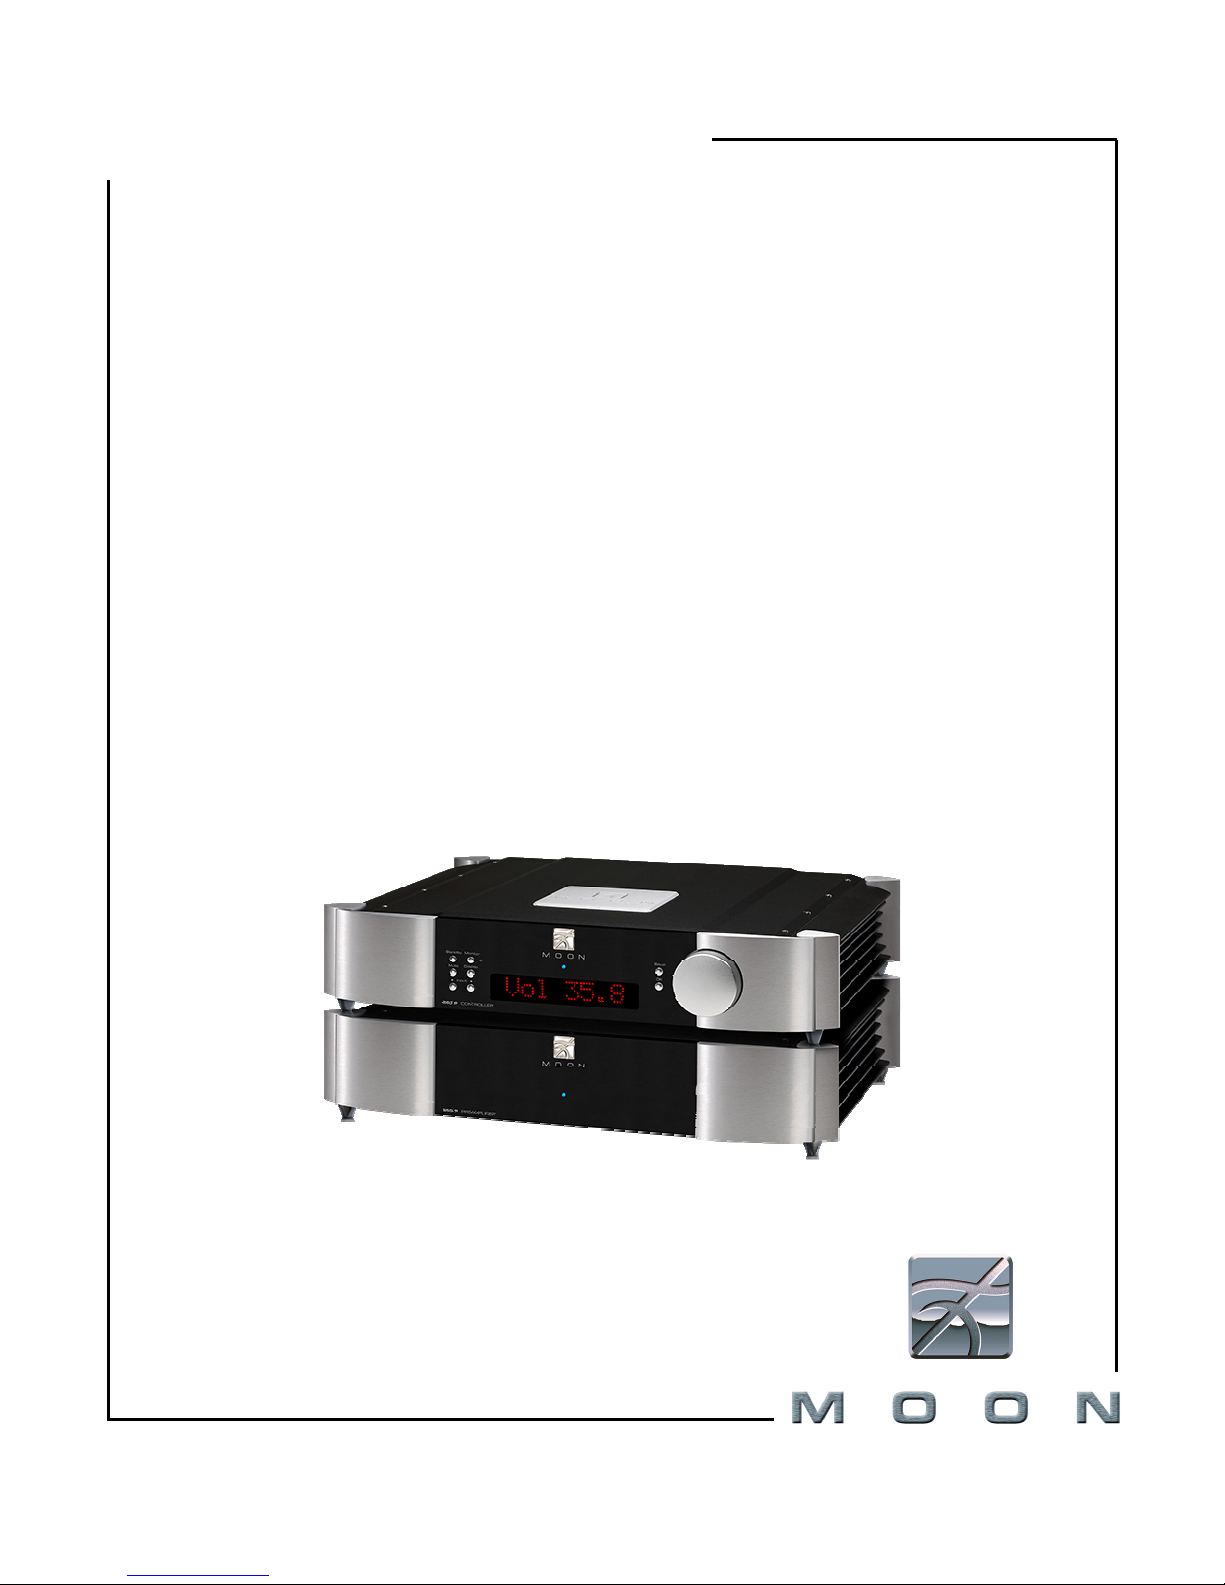
850P Reference Dual-Mono Preamplifier
____________________________________________________________________________________
6
Introduction
Thank you for selecting the MOON 850P Dual-
Mono preamplifier as a part of your music/cinema
system. This preamplifier has been designed to offer
state-of-the-art high-end performance in an elegant
package, while retaining all the sonic hallmarks on
which Simaudio has made its reputation. We have
spared no effort to ensure that it is the finest two-
channel preamplifier available. We have been
building high-performance audio equipment for over
30 years, and the know-how gained through our
cumulative experience is an important reason why
MOON preamplifiers are so musically satisfying.
Your new preamplifier is a true dual-mono design,
whereby each channel operates completely
independent of the other. The performance of
your 850P will continue to improve during the first
400 hours of listening. This is the result of a “break-
in” period required for the numerous high quality
electronic parts used throughout this preamplifier.
Before setting up your new MOON 850P, we
encourage you to please read this manual
thoroughly to properly acquaint yourself with its
features. We hope you enjoy listening to the
MOON 850P dual-mono preamplifier as much as
the pride we have taken in creating this fine audio
product. We understand the power and emotion of
music and build our products with the goal of
faithfully capturing these elusive qualities.
The information contained in this manual is subject
to change without notice. The most current version
of this manual is available on our official website at
http://www.simaudio.com
Your MOON 850P dual-mono preamplifier incorporates many significant design features to achieve its “world-
class” level of performance. This is an abbreviated list of the more important features:
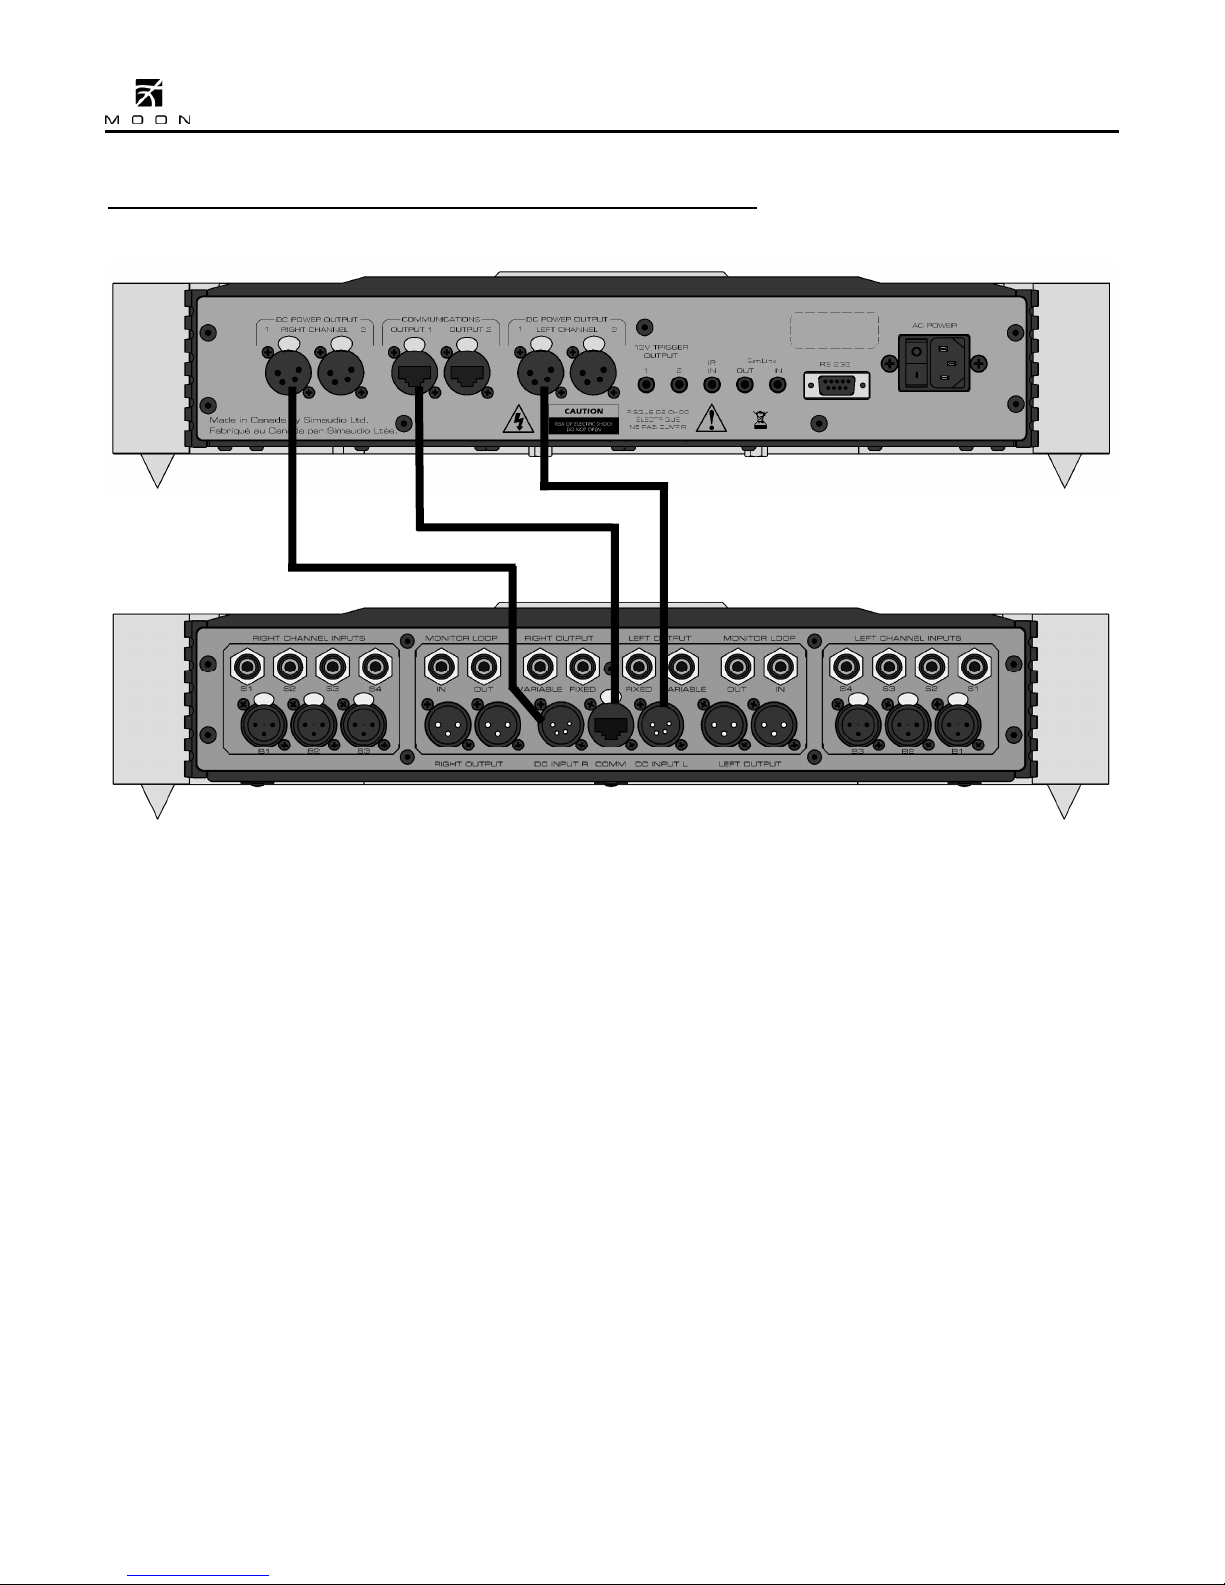
2-chassis design with one chassis (Controller) housing
the power supply, digital controller circuitry, software
processing and the LED display. The other chassis
(Preamplifier) contains ONLY audio circuitry.
Our proprietary M-Octave Damping system that virtually
eliminates the sonically degrading “microphonic effect” by
mounting the main audio circuit board on an 8-point
floating suspension.
Custom proprietary toroidal transformer design with
lower magnetic, electrical and thermal loss, yielding an
improved power transfer and lower regulation factor. The
result is increased current speed and better dynamics.
An oversized dual-mono power supply features 6
stages of DC voltage regulation and choke filtering.
SimLinkTM controller port allows for 2-way
communications between other compatible MOON
Evolution Series components.
M-Ray volume control circuit based on the R-2R resistor
array configuration that uses thin film surface mount
resistors with 0.1% tolerances, resulting in no sonic
degradation of the audio signal regardless of the selected
volume setting.
530 individual volume steps in 1dB and 0.1dB
increments.
M-Lock circuit for “user selectable” maximum volume
setting lock-out for each line input.
Power supply voltage regulation includes i2DCf
(Independent Inductive DC Filtering); 1 inductor for each
and every IC in the audio circuit’s signal path – 40 stages
in all.
Full unsolicited RS-232 bidirectional feedback.
Gain offset for each line input with a ±10dB range.
Each line input is fully configurable to be “home theater
ready”, where the volume control of the 850P is
bypassed.
Four-layer PCB tracings; The advantages include better
ground and power supply circuit layouts resulting in a
much shorter signal path and dramatically improved
signal-to-noise ratio.
Ultra rigid chassis construction to minimize the effects
of external vibrations.