Moosoo ST1800 User manual

For any questions and malfunctions
of the appliance during use, please
contact our customer service email:
INSTRUCTION MANUAL
STEAM IRON
Model: ST1800


IMPORTANT SAFETY INSTRUCTIONS
OVERVIEW
OPERATING INSTRUCTIONS
FEATURES
CLEANING AND STORAGE
TROUBLESHOOTING
WARRANTY
01
02
03
05
08
10
11
TABLE OF CONTENTS

-01-
IMPORTANT SAFETY INSTRUCTIONS
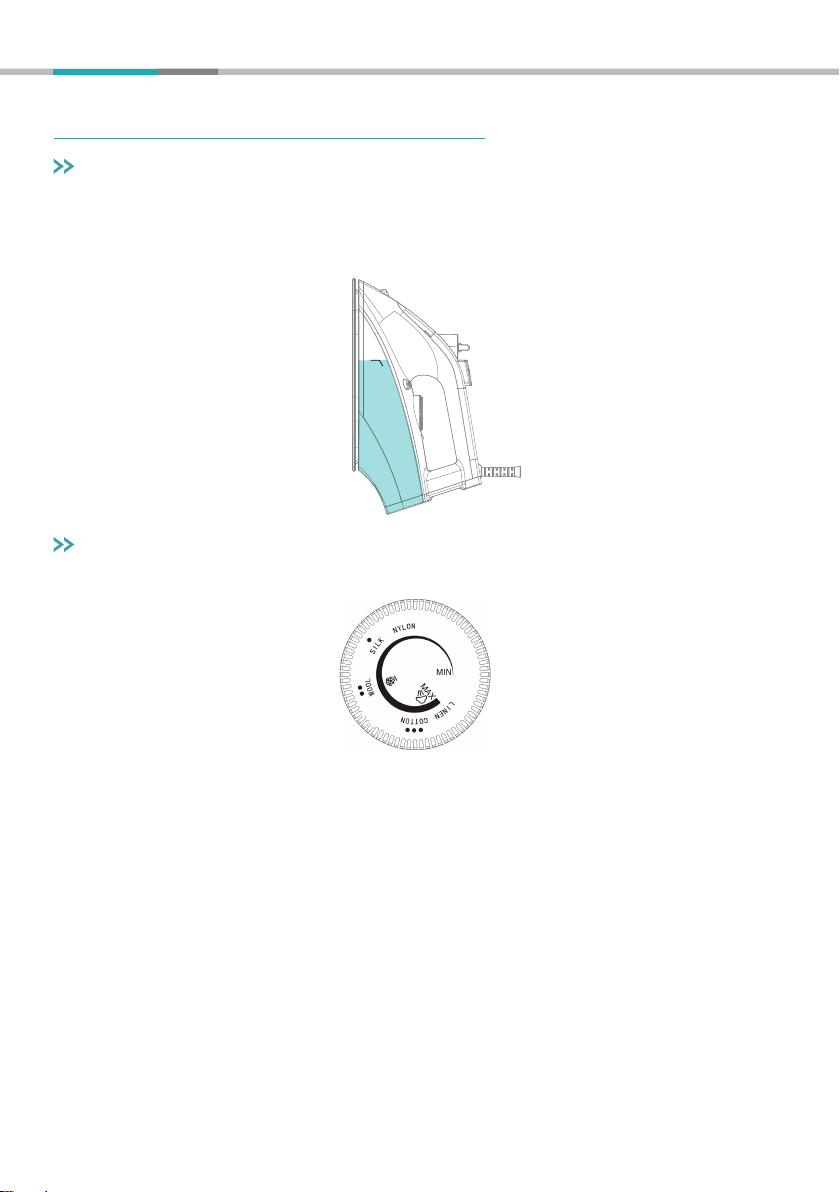
1. Please remove all packaging or protective films from the soleplate before first use.
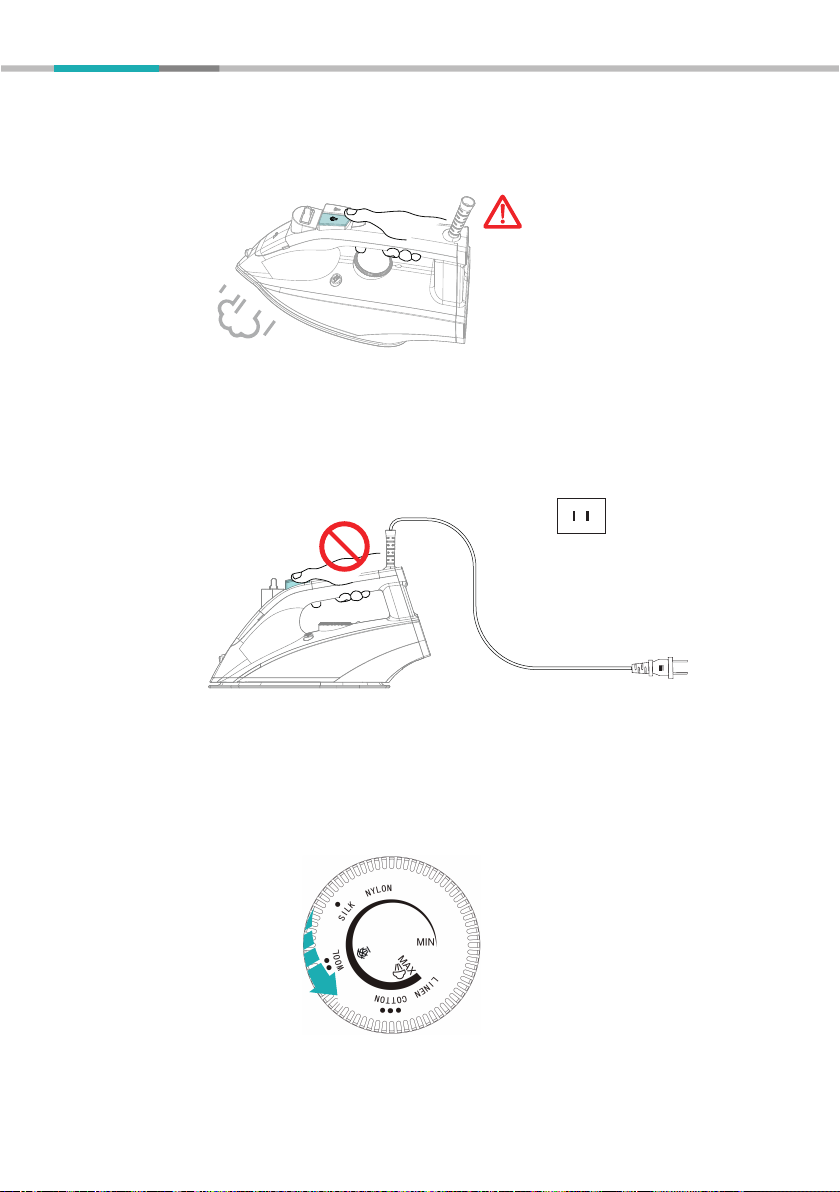
2. When plugged in for the first time, you may notice slight smoke due to production grease. Do not worry as this will
disappear shortly.
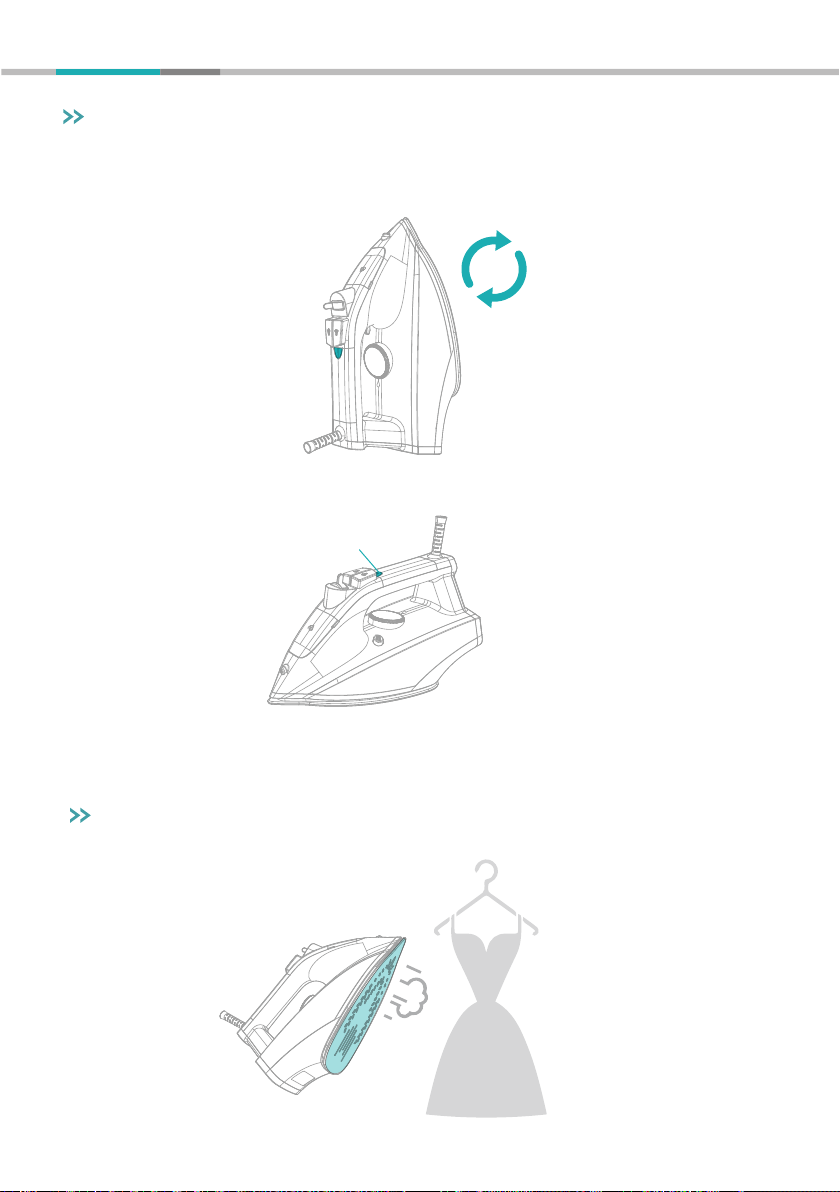
3. Whenever you need to step away from the iron, make sure that you unplug it and leave the iron in a vertical position
with soleplate facing upright,
4. Keep children away from the plugged iron.
5. Avoid contact of hot soleplate with your hands or flammable objects during use.
6. Make sure your iron is disconnected from the power supply before pouring water in the water tank.
7. DO NOT immerse any part of the iron in any liquid.
8. Do NOT use the iron if the cord is damaged.
9. Avoid directing steam towards people or animals. Steam is hazardous and can cause severe skin burns.
This equipment has been tested and found to comply with the limits for a Class B digital device, pursuant to part 15 of
the FCC Rules. These limits are designed to provide reasonable protection against harmful interference in a residential
installation. This equipment generates, uses and can radiate radio frequency energy and, if not installed and used in
accordance with the instructions may cause harmful interference to radio communications. However, there is no
guarantee that interference will not our in a particular installation. If this equipment does cause harmful interference to
radio or television reception, which can be determined by turning the equipment off and on, the user is encouraged to
try to correct the interference by one or more of the following measures:
Reorient or relocate the receiving antenna.
Increase the separation between the equipment and receiver.
Connect the equipment into an outlet on a circuit different from that to which the receiver is connected.
Consult the dealer or an experienced radio/TV technician for help.
IMPORTANT SAFETY INSTRUCTIONS
When using an electric appliances, basic precautions should always be followed,
including the following:
READ ALL INSTRUCTIONS
BEFORE USING (THIS APPLIANCE)
WARNING: TO REDUCE THE RISK OF FIRE, ELECTRIC SHOCK, DAMAGE OR INJURY:
FCC STATEMENT

OVERVIEW
-02-
SPECIFICATION
Name
Model
Rated Voltage
Rated Power
STEAM IRON
ST1800
120V
1800W
8-Foot Power Cord
with 360°Pivot
Temperature Dial
Ceramic Coating Soleplate
Water Tank
Spray Nozzle
Water Tank Lid
Steam Control Lever
Spray Mist Button
Burst of Steam Button
Auto Shut-Off Light/Power Indicator Light
Self-cleaning Button
NOTE: Pretests will be carried before each iron gets packed. Harmless water residue may be found in the water tank
due to these tests.

-03-
OPERATING INSTRUCTIONS
Filling Water
Temperature Dial
Before filling the water tank, make sure that the iron is unplugged, temperature Dial is positioned at "OFF", and
the iron is held at approximately 45° tilt. Now, fill the water tank until water reaches MAX level.
Select a proper level to iron on different fabrics. Check the label of clothing to know which kind of materials they
are made of.
Level 1:Chemical fiber, silk, wool, polyester and acrylic fiber
To iron the above fabrics, please turn the steam control level to "O" and switch the temperature dial to level 1. It's
forbidden to use steam on those fabrics. However, you can spray some water on them before ironing.
a. For better results, cover the silk fiber with a piece of cotton to iron or iron the back of the silk. Note: Do not
spray water on silk fabrics.
b. To iron the embroidered clothing, please iron the back of the clothing.
c. To iron the clothing with twill weave, please iron along the weave.
Level 2: Cotton, mixed fiber, denim
To iron on the above fabrics, it's not recommended to iron with steam. To remove wrinkles on those fabrics,
please spray some water before bursting steam on them by pressing Burst of steam button every 3~5 seconds.
Level 3 & MAX:Thick denim, linen and thick cotton
Adjust the steam level according to thickness of fabrics.
Note: Pressing the Burst of steam button while the steam level is on may cause water leakage above level 3.
NOTE: Using the included cup (2 cups) to fill the water tank. Do not exceed the MAX level otherwise it will cause
water leakage.
MAX
①
②
③

-04
Dry Ironing
Steam Ironing
1. Set the Temperature Adjustment to position "O" (=No Steam).
2. Adjust the ironing temperature as per fabric's requirements.
3. The solid on red light indicates the temperature is increasing steadily. Once the set temperature is reached, the
light will turn off automatically.
1. Fill in the water tank referring to the section "Filling with Water".
2. Plug the cord into the outlet.
3. The solid on red light indicates the temperature is increasing steadily. Once the set temperature is reached, the
light will turn off automatically.
4. Adjust the Steam Control Lever by turning right for more steam and left for less steam.
5. To achieve best steam results, make sure that the Temperature Dial is set at the MAX level.
Fabrics
Linen
Cotton
Wool
Silk
Nylon
Temperature Dial Steam Mist Spray Burst of Steam
"O"

-05-
Anti Calc
Anti Drip
Burst of Steam
Indicator Light Instruction
Over time, scales may accumulate inside the iron or on the soleplate surface. To prevent this, an anti-calc filter is
permanently installed in this appliance. It can't be removed for cleaning purposes.
This function is specially designed to remove the toughest wrinkles and creases present in heavy fabrics. By
pressing the Burst of Steam Button, a sudden shot of steam is expelled out of the soleplate, which is extremely
useful in straightening even the most stubborn creases. For optimal results, make sure the Burst of Steam is
used at higher MAX temperature and a regular 5 second delay between each burst of of steam is maintained,
otherwise it is normal that the soleplate will have water drop during continuous burst of steam.
An advanced system inside your iron prevents water leakage at even the lowest temperature setting.
1. The red light will turn ON when the soleplate is heating to the set temperature.
2. The red light will turn OFF when the set temperature is reached.
3. The red light will flash when the iron is powered off due to the auto shut-off function.
FEATURES

-06-
NOTE 1:
It takes 3 seconds for the iron to preheat before bursting steam. Please press the Burst of steam button at the
interval of 3 seconds in case water leaks.
NOTE 2:
Do not press the Burst of steam button when the iron is unplugged. The mechanical structure will push water out
when there is no electricity to preheat the soleplate.
NOTE 3:
The ST1800 will only burst steam when the soleplate reaches the temperature (Temperature adjustment > WOOL(Level 2)).
Press the Burst of steam button under level 2 will cause water leakage.
Press once every
3 seconds

Auto Shut-Off
Vertical Steam
1. If the iron is left unused in upright position for 15 minutes, the red light will flash, indicating that the iron has
automatically shut off.
2. If the iron is left flatwise unused for 30 seconds, the the red light will flash, indicating that the iron has
automatically shut off.
3. Move the iron back and forth on the fabrics to auto restart, the red light will immediately stop flashing and after
achieving the sufficient temperature for you to continue ironing.
By holding the iron in a vertical position, you can apply burst of steam to remove creases from curtains or any
type of hanging fabrics.
-07-
15min
30sec

-08-
Cleaning
1. Before clearing, unplug the iron and allow it to cool down.
2. Clean the soleplate with any moist cloth and non-abrasive cleaner.
3. If any fibers stick to the soleplate, use the damp cloth immersed in vinegar to wipe off them.
4. Never use strong acids or cleaning solutions when cleaning soleplate.
5. Remove any left over water from the water tank.
6. Make sure the steam control lever is set to O(=No Stem) and the Temperature Dial is set to "MIN" before
cleaning or storage.
①Empty the water tank completely after each use. Wipe the iron dry with clean cloth after cooling it for 30 minutes at
least. Make sure the water tank is empty and there is no water residue on the iron before storing it.
②After using the iron for 50 hours/3 months, please run the self-cleaning process once to maintain the soleplate.
CLEANING AND STORAGE

-09 -
Self-cleaning
1. Your iron should be unplugged before self-cleaning.
2. Set the steam level to "0" (=No Steam).
3. Fill the water tank to the MAX level. Do not add any detergent inside the water tank.
4. Before plugging in your iron make sure that the Temperature Dial is set to "MAX".
5. Plug in the iron once the red light turns OFF as the iron reaches its optimal working temperature.
6. Turn the Temperature Dial to "MIN" and unplug from power supply.
7. Firmly hold the iron over the sink and press/hold the self-cleaning button for several seconds.
8. Shake the iron back and froth while pressing the self-cleaning button. Steam and boiling water will expel along with
impurities and other contaminants.
9. Avoid any contact with the iron during the cleaning process and firmly hold it above the sink to prevent any burns.
10. You can repeat the self-cleaning process if there are still some leftover impurities.
11. Dry up the soleplate by plugging the iron into the outlet. It will heat up the soleplate and evaporate water droplets.
12. Disconnect the iron from the power outlet once it reaches the required temperature.
Before storing, make sure the iron cools down completely. Then carefully remove any water stains with a piece of dry
cloth.
If the water in your area is hard (contains excessive dissolved mineral), self-cleaning should be done every two weeks.

-10-
Plug in the power cord firmly. Double check temperature
adjustment for a proper setting
Adjust the temperature dial to a proper setting(Above
level 2)
Refer to the "Steam Ironing" section
There is less steam
There is steam leakage
There is little heat
There is no flow of steam or vertical steam
Water is leaking from the soleplate
No water spray
Self clean the iron. Adjust the steam control level
to the proper setting. Fill the water tank to the
MAX level
Press the spray mist button repeatedly until air
pressure reaches optimal level to push out water
Give regular pauses between each shot of steam
POSSIBLE CAUSES & SOLUTIONSPROBLEM
TROUBLESHOOTING

-11-
WARRANTY
1. According to the requirements outlined in this instruction manual, the warranty is subject to the following
conditions and exclusions.
2. This warranty provides, at no extra cost to you all labor and parts necessary to ensure your machine
is in proper operating condition during the warranty period.
3. We provide the repair or replacement of your MOOSOO appliance if your MOOSOO appliance is found
to be defective due to faulty materials, workmanship function within 1 year of purchase or delivery. ( If
any part is no longer available or out of manufacture, we will replace it with a functional replacement
part).
1. Under your MOOSOO guarantee, MOOSOO shall not be liable for costs of repair or replacement of a
product incurred as a result of: Accidental damage, faults caused by negligent use or care, misuse,
neglect, careless operation or handling of the MOOSOO appliance which is not in accordance with
this MOOSOO Instruction Manual.
2. Machines purchased from an unauthorized dealer.
3. Use of parts and accessories other than those produced or recommended by MOOSOO.
4. Repairs or alterations carried out by unauthorized parties or agents.
5. Use of the machine other than for normal domestic purpose, e.g. for commercial or rental purposes.
6. Reduction in battery run time due to battery age or use.
The 1-year Limited Warranty is valid for products purchased from our MOOSOO only, starting from the
date of the original retail purchased. We will provide customer service for any defects in quality or
materials under normal, non-commercial use.
CUSTOMER CARE
WHAT IS NOT COVERED
1. If you have a query about your MOOSOO appliance, please contact the MOOSOO customer service
email: [email protected]
2. Please inform us your model name/number, purchase date, order number, machine problem and your
requirement.
3. Your model number can be found on rating plate.
4. Please keep your purchase receipt in a safe place to ensure you have this information.
Service under this warranty will not extend the available time of warranty.
WARRANTY SERVICE


Dierent for you
Table of contents