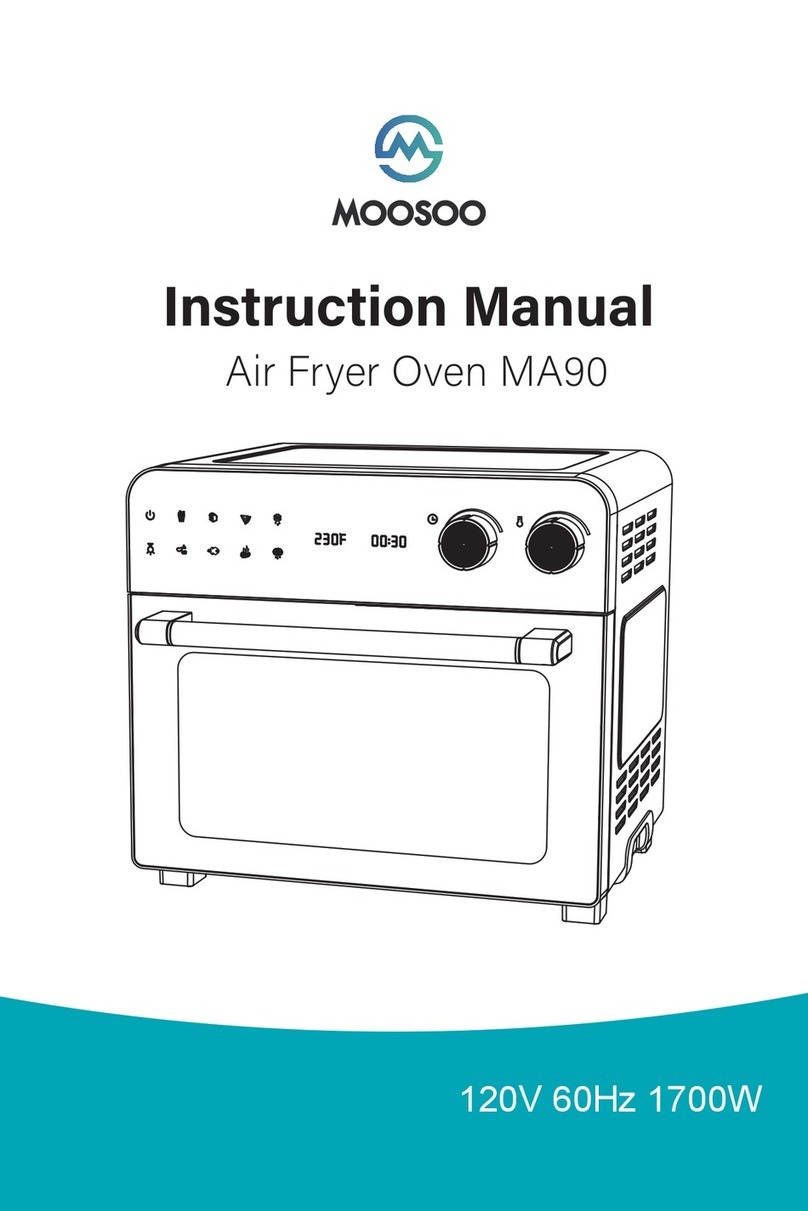
Moosoo GH28AF-RL-H User manual

USER MANUAL
Air Fryer Oven
Model: GH28AF-RL-H
For any questions and malfunctions of the appliance during use, please contact our
customer service email: usa@imoosoo.com


4
5
6
7
9
13
14
19
TABLE OF CONTENTS
IMPORTANT SAFEGUARDS
SPECIFICATIONS
GET TO KNOW YOUR OVEN
OPERATING INSTRUCTIONS
CLEANING & MAINTENANCE
RECIPE
WARRANTY
BEFORE FIRST USE
3

IMPORTANT SAFEGUARDS
• FOR HOUSEHOLD USE ONLY. DO NOT USE THIS APPLIANCE FOR OTHER THAN ITS INTEND-
ED USE.
• Remove all packaging materials and labels before first use.
• Wash all accessories before first use. See Cleaning & Maintenance.
• A short cord is provided to reduce the hazards resulting from tripping or entanglement. DO NOT
drape the cord over a counter or tabletop, where it can be pulled on or tripped over. DO NOT
wrap the cord tightly around the appliance, as this could cause the cord to fray or break.
• We DO NOT recommend using an extension cord with this appliance. However, if an extension
cord is used, the marked electrical rating should be at least as great as the rated power of this
appliance.
• CLOSE SUPERVISION IS NECESSARY WHEN USING THIS APPLIANCE NEAR CHILDREN.
• A fire may occur if this appliance is used near flammable materials, including curtains, towels,
walls, etc. DO NOT place any paper, plastic or other nonfood items in the appliance. DO NOT
place the appliance or its cord on or near a heated surface or in a heated oven.
• Always use this appliance on a stable, dry, heat-resistant surface.
• DO NOT use near water.
• DO NOT use an accessory or attachment not recommended by customer service as this may
cause injury or damage the appliance.
• Keep hands, hair and clothing away from all moving parts.
• Always use oven mitts when handling hot food or appliances. DO NOT attempt to move an
appliance when it is hot or has hot contents.
• DO NOT use outdoors.
• Turn off an unplug this appliance when not in use.
• This appliance is not intended to be operated by an external timer or remote control.
• THERE ARE NO SERVICEABLE PARTS INSIDE THIS APPLIANCE.
• DO NOT USE AN APPLIANCE WITH A DAMAGED CORD OR PLUG, OR AFTER THE APPLIANCE
MALFUNCTIONS OR HAS BEEN DAMAGED IN ANY MANNER.
• Appliances/tools contain valuable materials that can be recycled. Dispose of your old applianc-
es/tools using appropriate collection systems in accordance with federal and local regulations.
General Safety
READ CAREFULLY BEFORE USING AND SAVE THESE INSTRUCTIONS!
4

This appliance is equipped with a polarized plug in which 1 prong is wider than the other. This is
a safety feature to reduce the risk of electrical shock. The plug will fit into a polarized outlet only
1 way. If you are unable to insert the plug into the outlet, try reversing the plug. If it still does not
fit, contact customer service. DO NOT attempt to modify the plug in any way. MOOSOO cannot
accept any liability for damage or injury resulting from failure to observe these safety proce-
dures.
SPECIFICATIONS
Rated Power
Capacity
Cord Length
Dimensions
Model
120V, 60Hz, 1600W
12" pizza or 6-slices of bread
35"
21" W x 13¾" H x 15" D
GH28AF-RL-H
Caution
5

GET TO KNOW YOUR OVEN
1.Oven Door
2.Door Window
3.Door Handle
4.Housing
5.Air Fry Temperature Knob
6.Function Knob
7.Power Light
8.Oven Temperature Knob
9.Timer Knob
10.Adjustable Rack
11.Air Frying Fan (at top of oven interior, not shown)
12.Removable Crumb Tray (not shown)
13.Removable Air Fry Basket (not shown)
14.Removable Drip Pan/Tool (not shown)
15.Removable Rotisserie Rod/Forks/Tool (not shown)
1
2
3
4
5
6
7
8
9
10
Tips: Not an operate press button,just a picture of icon.
6

• When operating the oven, keep at least 4" of free space . All sides of the oven to allow fro
adequate air circulation.
• Extreme caution must be used when moving a drip pan containing hot oil or other hot
liquids.
• DO NOT cover any part of the oven with metal foil. This may cause the oven to overheat.
• DO NOT store any item on top of the oven.
• DO NOT store any materials other than the recommended accessories in this oven when
not in use.
• While cooking, be sure that nothing touches the top or bottom heating elements of the
oven.
• Use caution to avoid scratching the door surface or nicking the door edges.
• The oven is off when the timer knob is set to OFF.
BEFORE FIRST USE
Before first use, we recommend running the oven on TOAST at 450 °Ffor
30 minutes to burn off any residue that may remain after shipping. This-
could result in minimal smell and smoke, but it is normal.
Note
WARNINGS
7

[Operation Guide ( Detail Introduction )]
Air
Fry
① Air Fry Function
② Off
③ Broil ( one top heating element )
④ Rotisserie ( one heating element on the top )
⑤ Toast ( one top and one bottom heating element )
⑥ Bake ( one bottom heating element )
1.Select "Air Fry" Function.
2. Adjust the temperature of the "Air Fry " as you want.
3. Adjust the time of the "Air Fry" as you want.
1.Select "Oven" Function ( Broil / Rotisserie / Toast / Bake )
2. Adjust the temperature of "Oven " as you want.
3. Adjust the time of "Oven" as you want.
Air Fry Function
Oven Function
Air
ryF
Oven
①
②
③ ④
⑤
⑥
8

1. Set the function knob to AIR FRY.
2. Use the air fry temperature knob to set the desired temperature (0‒395 °F).
3. Turn the timer knob to the desired cooking time (0-60 minutes).
4. When finished cooking, turn the timer knob to OFF and unplug the oven.
·All air fryers are different; monitor closely when trying a recipe for the first time.
·For faster cooking, preheat your air fryer before adding food.
·For a crispy texture when air frying, some foods will require a little oil. We recommend
using a refillable oil mister (add oil when cooking time is at half way). Battered food should
not need additional oil.
·When air frying prefrozen treats (poppers, cheese sticks, egg rolls, etc.), follow package
cooking instructions for best results.
·Spray the basket or pan with oil in a mister to keep foods from sticking. Cooking sprays are
NOT recommended, as they may cause buildup on surfaces.
·DO NOT overcrowd the food. Air frying will be quicker and more even when there is space
for the hot air to move around the food.
·Food may need to be tossed or stirred halfway through air frying.
·When converting a recipe from a traditional oven to an air fry oven, use a lower tempera-
ture (10-20 °F less) and reduce cooking time. Monitor closely.
·The air frying pan is powerful; wet batters tend to drip off food while cooking.
·Always use a meat thermometer to check for result.
OPERATING INSTRUCTIONS
[AIR FRY]
Tips:
9

1. Set the function knob to BROIL (only the top elements will heat).
2. Use the oven temperature knob to set the desired temperature (150‒450 F).
3. Turn the timer knob to the desired cooking time (0-60 minutes).
4. Open the oven door halfway while broiling.
5. When finished cooking, turn the timer knob to OFF and unplug the oven.
[BROIL]
TEMPFOOD MINUTES/LB
450° F
450° F
450° F
375° F
400° F
20–30
20–30
15–20
20–30
20–25
135–160° F
135–160° F
135–160° F
until flaky
145° F
INTERNAL TEMP
Cooking results may vary. Adjust these times to your individual requirements.
Use of a meat thermometer is recommended.
Broiling Guide
Rib Steak
T-Bone Steak
Hamburger
Breaded Fish Filet
Salmon Steak (1" thick)
All outer surfaces may get hot when this appliance is operating!
WARNING!
10

1. Set the function knob to ROTISSERIE (only the top elements will heat). Use the oven
temperature knob to set the desired temperature (150‒450 F).
2. Insert the drip tray in the lowest position in the oven.
3. Attach 1 rotisserie fork onto the rod, pointing inward. Secure with thumbscrew.
4. Load the food on the rod, ensuring it is centered, and secure the second Rotisserie fork
in place. Tie the food with butcher's twine, as needed, to keep it secure while on the
rotisserie.
5. Using the rotisserie tool, insert the pointed end of the rod into the drive socket on the
right (you may have to twist the rod to align with the socket), Then rest the square end
of the rod on the support on the left.
6. Turn the timer knob to your desired cooking time (0-60 minutes).
7. If food does not rotate smoothly, stop, remove, and secure/balance the food. Restart.
8. When finished cooking, turn the timer knob to OFF and unplug the oven.
9. Lift the food out with the rotisserie tool; carefully lift the left side up from the support
first, then remove the right end from the socket.
10. Place the food on a cutting board or plate and carefully remove the hot rotisserie forks
and rod. Let food rest 5-10 minutes before serving.
[ROTISSERIE]
Cooking results may vary. Adjust these times to your individual requirements.
Use of a meat thermometer is recommended.
Rotisserie Guide
TEMPFOOD MINUTES/LB
350° F
350° F
350° F
450° F
375° F
30–35
45–50
45–50
45–50
30–40
135–160° F
160–170° F
140° F
165° F
165° F
INTERNAL TEMP
Beef Roast
Pork Roast
Ham
Chicken
Turkey Breast
11

1. Set the function knob to TOAST (the top and bottom elements will heat).
2. Use the oven temperature knob to set the desired temperature (150-450°F).
3. Turn the timer knob to the desired cooking time (0-60 minutes).
4. When finished cooking, turn the timer knob to OFF and unplug the oven.
[TOAST]
1. Set the function knob to BAKE (only the bottom elements will heat).
2. Use the oven temperature knob to set the desired temperature (150‒450°F).
3. Turn the timer knob to the desired cooking time (0-60 minutes).
4. When finished cooking, turn the timer knob to OFF and unplug the oven.
[BAKE]
12

CLEANING & MAINTENANCE
1. Turn off and unplug the oven.
2. Always allow the appliance to cool completely before cleaning.
3. Remove all racks, pans and accessories. These items may be washed in warm, soapy
water or they may be cleaned in a dishwasher.
4. Wipe the interior and exterior walls with a damp sponge or cloth with mild detergent.
DO NOT use steel wool scouring pads, abrasive cleaners or metal utensils on the interior
or exterior of this oven.
5. Use a soft cloth, sponge or rubber spatula to remove any stuck-on food or residue.
6. Wipe the door (inside and out) with a damp cloth and dry with a soft cloth.
7. DO NOT immerse any cord, plug or electrical appliance into water. Ensure all parts are
dried thoroughly before reassembling and using this appliance.
13

RECIPE
1. In a small bowl, beat the eggs. Stir in the onion, spinach and mushrooms.
2. To avoid cross contamination, wash hands, cutting boards, utensils, etc. after touching
raw eggs.
3. Spray a pie pan with olive oil and pour the egg mixture into it. Salt & pepper, to taste.
4. Place the pan on the center rack and AIR FRY at 350° F for 5‒7 minutes or until the
edges are set.
5. Add the cheese and cook another 2 minutes or until center is set.
6. Use a spatula to fold over the omelet and serve.
1. Wash hands with soap and water. DO NOT rinse raw poultry. To cross contamination,
wash hands, utensils, cutting boards, etc. after avoid touching raw poultry.
2. In a large bowl, whisk together the dry ingredients.
3. Pour the milk in another bowl.
4. Dredge the chicken pieces in the dry ingredients, shake off excess, then in the milk,
then back into the dry ingredients.
5. Put the coated chicken pieces into the basket in 1 layer with a little space each piece.
6. AIR FRY at 360 °F for 40 minutes. Chicken is done when internal temperature reaches
165° F.
1 tsp. pepper
1 cup milk
1½ tsp. salt
6 chicken thighs (skin on)
1½ cup flour
1½ tsp. cayenne pepper
Serves 1–2
Serves 2–4
Veggie Omelet
Air-Fried Chicken
4 eggs
2‒3 mushrooms, sliced
1 green onion, chopped
salt & pepper
1 small handful of spinach, chopped
½ cup cheddar cheese, shredded
14

1. Wash hands with soap and water. To avoid cross contamination, wash hands,
cutting boards, utensils, etc. After touching raw meats.
2. In a medium bowl, mix all ingredients, except the ketchup, with your hands.
3. Press the meat mixture into an 8‒9" oven-safe pan and top with the ketchup.
4. BAKE at 400 °F for 30 minutes. When done, the internal temperature at the center of the
meatloaf should be 160 °F.
1 lb. lean ground beef
1‒2 slices bread, cubed
½ medium onion, minced 2 eggs
½ stalk celery, minced
salt & pepper, to taste
1 clove garlic, minced
½ cup ketchup
Serves 4
Meatloaf
1. Wash hands with soap and water. To avoid cross contamination, wash hands, cutting
boards, utensils, etc. after touching raw seafood.
2. Spray an oven-sate pan with olive oil before placing on the salmon fillets.
3. In a large bowl, mix the tomatoes, olives, garlic, mushrooms, zucchini and squash with
the olive oil.
4. Pour the vegetables over the salmon. Salt & pepper to taste.
5. AIR FRY on the center rack at 395 °F for 20-30 minutes or until the thickest part of the
salmon reaches an internal temperature of 145 F.
6. Serve with lemon wedges.
4 frozen salmon fillets (about 1 lb.)
1 small zucchini, sliced
1 cup grape tomatoes
1 small summer squash, sliced
3 oz. Kalamata olives, sliced
2 Tbsp. olive oil
1 clove garlic, minced
salt & pepper
½ cup mushrooms, sliced
1 lemon, cut into 4 wedges
Mediterranean Salmon Dinner
Serves 4
15

Spice rubs are an excellent way to add flavor and seal in juices when cook-
ing On arotisserie. The first recipe makes about 2½ cups of rub and the
second makes about 1¾ cups of rub. Store unused rub in a sealed
container for next time.
1. Wash hands with soap and water. To avoid cross contamination, wash hands, cutting
boards, utensils, etc. after touching raw meats.
2. Mix all ingredients together and pat generously on the meat.
3. Follow the guide on page 9 for rotisserie cooking times and temperatures.
4. When done, let the meat rest 10 minutes before serving.
1. Spray or brush the outside of each potato lightly with olive oil. Cut each in half and
scoop out the inside (leave about ¼" attached to the skin).
2. Place the potato halves on a platter or cutting board (skins up) and sprinkle with salt.
Turn over each half and place in the air fry basket.
3. Spray or brush the tops of the potatoes lightly with olive oil.
4. Divide the bacon, cheese and onions evenly on top of the potatoes.
5. AIR FRY on the center racket at 395°F for 20 minutes until cheese is melted and tops
begin to crisp.
6. Sprinkle the hot potatoes with pepper flakes and top with sour cream before serving.
10 small‒med. baked potatoes
1 cup cheddar cheese, shredded
olive oil
2‒3 green onions, chopped
2 Tbsp. kosher salt 1½ tsp. dried rosemary
2 Tbsp. brown sugar 1½ tsp. dry mustard
1 Tbsp. onion powder 1½ tsp. ground cumin
1 Tbsp. garlic powder 1½ tsp. dried thyme
1 Tbsp. smoked paprika 1½ tsp. cayenne pepper
1½ tsp. black pepper
1 Tbsp. garlic powder 2 Tbsp. kosher salt
1 Tbsp. ground black pepper 1 Tbsp. ground coriander
1 Tbsp. smoked paprika 1 Tbsp. onion powder
Serves 6-10 as an appetizer
Spice Rubs
Potato Skins
Chicken or Pork:
Beef or Venison:
salt
red pepper flakes
1 cup of bacon, cooked and crumbled
½ cup sour cream
16

1. Brush or spray the corn with olive oil and place on the center rack. TOAST in preheated
oven at 450° F for 15 minutes.
2. While the corn is cooking, put the garlic and butter in a microwave-safe dish and cook
in a microwave oven just until the butter is melted.
3. When the corn is done, pour the garlic butter over it and garnish with salt, pepper,
hot sauce and cilantro.
4 ears of corn, peeled
salt & pepper
1Tbsp. olive oil
hot sauce
Serves 4
Toasted Corn on the Cob
2cloves garlic, minced
fresh cilantro, chopped
2 Tbsp. butter
1. Wash hands with soap and water. To avoid cross contamination, wash hands, cutting
boards, utensils, etc. after touching raw meats.
2. Mix the first 7 ingredients in a container with a cover. Stir in the beef. Ensure meat is
coated well.
3. Refrigerate several hours (or overnight).
4. Place the meat strips in a single layer on the air fry basket.
5. DO NOT reuse marinades used on raw foods.
6. AIR FRY at 175 °F for 60‒90 minutes. Check for result (meat should be cooked through
with no red spots remaining.
7. Store the cooked jerky in a tightly sealed container in the refrigerator.
½ cup soy sauce
½ tsp. powdered ginger
2 Tbsp. Worcestershire sauce
1 tsp. salt
Serves 4
Beef Jerky
1 tsp. garlic powder
½ tsp. pepper
1 tsp. onion powder
1‒1½ lbs. beef, cut into ¼" thick strips
17

Serves 6–8
Coconut Custard Pie
1. Preheat oven on BAKE at 350 °F.
2. Use an electric mixer on low speed to beat together the butter an sugar. Add the flour,
then the eggs, 1 at a time and mix until smooth To avoid cross contamination, wash
hands after touching raw eggs.
3. Mix in the milk, coconut, vanilla, almond and nutmeg.
4. Pour this mixture into the crust and BAKE 40-50 minutes, or until set in the center.
5. Cool, then refrigerate the pie at least 2 hours before serving.
¼ cup butter, softened
1 cup sweetened flaked coconut
¾ cup sugar
½ tsp. vanilla extract
2 Tbsp. flour
½ tsp. almond extract
3 eggs
¼ tsp. ground nutmeg
1 cup milk
9" pie crust, unbaked
18

WARRANTY
1. According to the requirements outlined in this instruction manual, the warranty is
subject to the following conditions and exclusions.
2. This warranty provides, at no extra cost to you all labor and parts necessary to ensure
your machine is in proper operating condition during the warranty period.
3. We provide the repair or replacement of your MOOSOO appliance if your MOOSOO
appliance is found to be defective due to faulty materials, workmanship function within
1 year of purchase or delivery. ( If any part is no longer available or out of manufacture,
we will replace it with a functional replacement part).
WHAT IS NOT COVERED
1. Under your MOOSOO guarantee, MOOSOO shall not be liable for costs of repair or
replacement of a product incurred as a result of: Accidental damage, faults caused by
negligent use or care, misuse, neglect, careless operation or handling of the MOOSOO
appliance which is not in accordance with this MOOSOO Instruction Manual.
2. Machines purchased from an unauthorized dealer.
3. Use of parts and accessories other than those produced or recommended by MOOSOO.
4. Repairs or alterations carried out by unauthorized parties or agents.
5. Use of the machine other than for normal domestic purpose, e.g. for commercial or
rental purposes.
6. Reduction in battery run time due to battery age or use.
WARRANTY SERVICE
1. If you have a query about your MOOSOO appliance, please contact the MOOSOO
customer service email: usa@imoosoo.com
2. Please inform us your model name/number, purchase date, order number, machine
problem and your requirement.
3. Your model number can be found on rating plate. For information on your rating plate
see the inside front cover.
4. Please keep your purchase receipt in a safe place to ensure you have this information.
5. Service under this warranty will not extend the available time of warranty.
The 1-year Limited Warranty is valid for products purchased from our
MOOSOO only, starting from the date of the original retail purchased. We
will provide customer service for any defects in quality or materials under
normal, non-commercial use.
19

We’re Here to Help
If you have any questions or need any help
please feel free to contact us.
Email: (USA)[email protected]
(EUR)[email protected]
Whatsapp: (323)992-9765
Visit [email protected] for
how-to videos, tips & more.
Table of contents
Other Moosoo Oven manuals