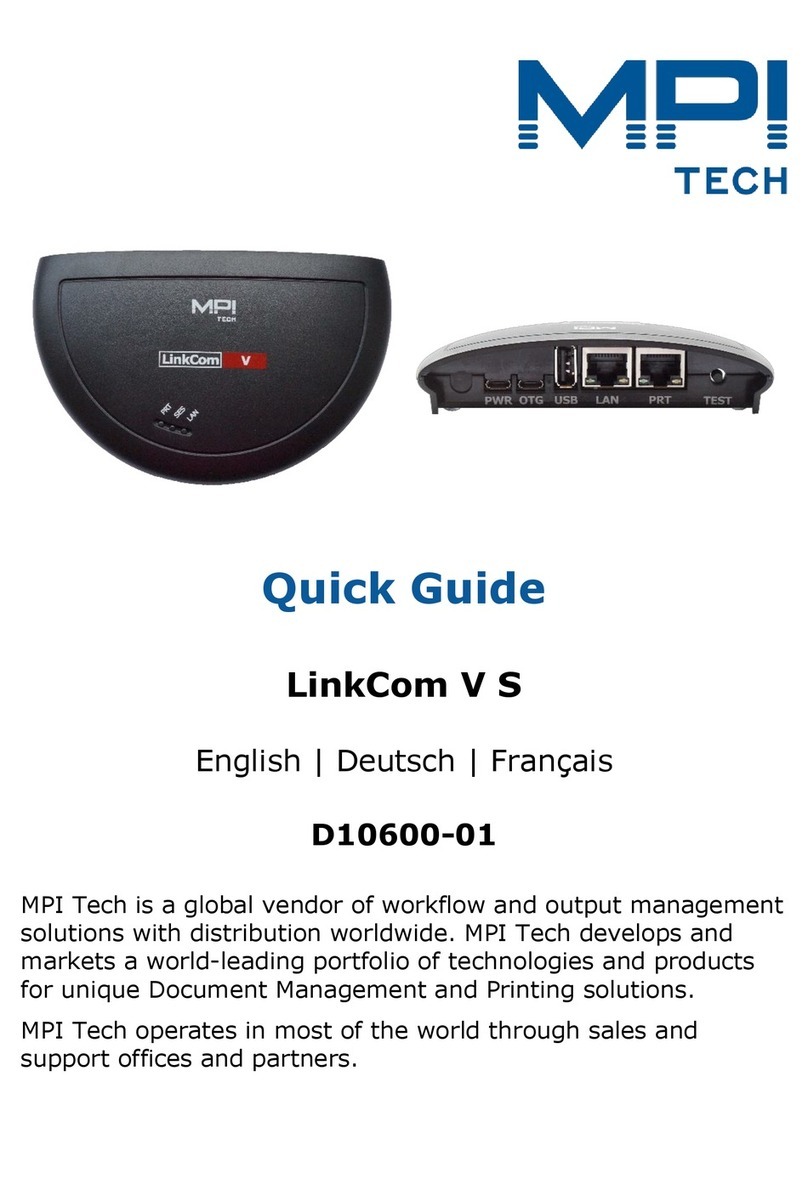
MPI linkcom 5 User manual

LinkCom 5 User Manual
LinkCom 5 User Manual
How to configure and use LinkCom 5
D13086-002
June 16

LinkCom 5 User Manual
Page 2

LinkCom 5 User Manual
Page 3
Content
1ABOUT MPI TECH ................................................................................................ 6
1.1 Trademarks ................................................................................................ 6
1.2 Contact ...................................................................................................... 6
2INTRODUCTION .................................................................................................. 7
2.1 Terms and definitions ................................................................................... 7
2.2 Related documentation................................................................................. 8
2.3 About this document .................................................................................... 9
2.4 Document history ........................................................................................ 9
3INTRODUCTION TO LINKCOM 5 ........................................................................ 10
3.1 Intention .................................................................................................. 10
3.2 Product features ........................................................................................ 10
3.3 Requirements............................................................................................ 11
3.3.1 PC system requirements ............................................................................... 11
3.3.2 Printer requirements..................................................................................... 11
3.3.3 Host system requirements............................................................................. 11
4FEATURES OF LINKCOM 5 ................................................................................. 13
4.1 Overview of LinkCom 5............................................................................... 13
4.2 End to end control ..................................................................................... 13
5INSTALLATION ................................................................................................. 14
5.1 Installation requirements. ........................................................................... 14
5.2 The LinkCom 5 PrintServer can be hardware connected in 3 different ways:...... 14
5.2.1 Connection via PRT/LAN ports........................................................................ 14
5.2.2 Connect a USB printer .................................................................................. 15
5.2.3 Host2Net connection .................................................................................... 15
5.2.4 General connection setup .............................................................................. 16
6OPERATING LINKCOM 5.................................................................................... 18
6.1 Using test button to print PrintServer configuration........................................ 18
6.2 Using test button to reset PrintServer to factory defaults ................................ 18
6.3 Understanding PrintServer LED signalling...................................................... 19
6.4 LED signalling explained ............................................................................. 19
7CONFIGURING LINKCOM 5 PRINTSERVER ........................................................ 20
7.1 Use of PrintGuide....................................................................................... 20
7.2 Getting started with PrintGuide.................................................................... 20
7.3 Configuring logical printers ......................................................................... 21
7.4 Configuring AFP/IPDS transform .................................................................. 21
7.4.1 PPD ............................................................................................................ 21
7.4.2 IPDS........................................................................................................... 22
7.4.3 Physical Printer ............................................................................................ 24
7.4.4 Strings........................................................................................................ 26

LinkCom 5 User Manual
Page 4
7.4.5 Output driver............................................................................................... 27
7.5 Configuring AFP/ICDS transform.................................................................. 28
7.5.1 PPD ............................................................................................................ 28
7.5.2 PSS ............................................................................................................ 29
7.5.3 Physical Printer ............................................................................................ 30
7.5.4 Strings........................................................................................................ 32
7.5.5 Output driver............................................................................................... 32
7.6 Configuring DCA Transform......................................................................... 33
7.6.1 Telnet Print ................................................................................................. 34
7.6.2 DCA ........................................................................................................... 34
7.6.3 Physical Printer ............................................................................................ 35
7.6.4 Strings........................................................................................................ 37
7.6.5 Output Driver .............................................................................................. 38
7.7 Configuring SCS transform.......................................................................... 39
7.7.1 Telnet Print ................................................................................................. 39
7.7.2 SCS............................................................................................................ 40
7.7.3 Physical Printer ............................................................................................ 41
7.7.4 Strings........................................................................................................ 43
7.7.5 Output Driver .............................................................................................. 44
7.8 Configuring Transparent TCP/IP Printing ....................................................... 45
7.8.1 T Port ......................................................................................................... 46
7.8.2 Physical Printer ............................................................................................ 47
7.8.3 Strings........................................................................................................ 47
7.8.4 Output Driver .............................................................................................. 47
7.9 Printer templates ....................................................................................... 49
7.10 Internal LinkCom 5 web server .................................................................... 49
7.10.1 Accessing the internal web server .................................................................. 49
7.10.2 Status page with Configuration Page. ............................................................. 50
7.10.3 Advanced Configuration ................................................................................ 50
7.10.4 General....................................................................................................... 51
7.10.5 Logical Printers ............................................................................................ 51
7.10.6 TCP/IP section ............................................................................................. 53
7.10.7 Password section ......................................................................................... 54
7.10.8 Logout of web server .................................................................................... 54
7.10.9 Restart PrintServer....................................................................................... 54
7.10.10Restore Factory Default Configuration............................................................. 54
7.10.11Remember to save changes and restart PrintServer ......................................... 55
8CONFIGURATION OF HOST SYSTEMS ................................................................ 56
8.1 Setup in mainframe TCP/IP environment ...................................................... 56
8.2 PSF/MVS AFP/IPDS printing ........................................................................ 56
8.2.1 PSF/MVS start-up procedure.......................................................................... 56
8.3 PSS/MVS AFP/ICDS printing ........................................................................ 56
8.3.1 PSS printer profile using TCP/IP attachment .................................................... 57
8.4 PSS/VM AFP printing using TCP/IP ............................................................... 58
8.4.1 Sample PSS VM printer profile definition using TCP/IP ...................................... 58
8.5 Setup in OS/400 TCP/IP environment ........................................................... 58

LinkCom 5 User Manual
Page 5
8.6 PSF/400 AFP Printing Using TCP/IP .............................................................. 58
8.7 AS/400 / iSeries Settings for Version 3.7, - 7.x ............................................. 59
8.7.1 Creating the PSF configuration....................................................................... 59
8.7.2 Creating the Printer Device Description ........................................................... 60
9SCS/DCA PRINTING USING TN3270E/TN5250E ............................................... 62
9.1 TN3270e setup using OS/390 communication server ...................................... 62
9.1.1 Mainframe TCPIP profile definitions: ............................................................... 62
9.2 TN5250e set-up......................................................................................... 62
9.2.1 Auto-configuration of devices ........................................................................ 63
9.2.2 Manual Configuration of Devices .................................................................... 63
10 LED SIGNALLING EXPLAINED IN DETAILS ........................................................ 67
11 UPDATING FIRMWARE...................................................................................... 70
11.1 How to update firmware ............................................................................. 70
11.2 Updating firmware with PrintGuide............................................................... 70
12 USING PRINTGUIDE TO ADD NEW FEATURES ................................................... 72
12.1 Prerequisites ............................................................................................. 72
12.2 Installing new features ............................................................................... 72
13 ENABLING/DISABLING HIDDEN FEATURES ...................................................... 74
13.1 How to enable/disable options ..................................................................... 74
13.2 Disabling IPv6 and DHCPv6......................................................................... 74
13.3 Test button reset feature ............................................................................ 75
14 CLONING PRINTSERVER SETTINGS .................................................................. 76
15 TROUBLESHOOTING ......................................................................................... 78
15.1 Changes to the output printer address are not applied.................................... 78
15.2 LinkCom 5 hangs during a restart ................................................................ 79
15.3 Not able to see options for Matrix printing..................................................... 79
15.4 Not able to see finishing options in PrintGuide ............................................... 80
15.5 DCA Output language keeps returning to Matrix ............................................ 81
16 INDEX............................................................................................................... 82

LinkCom 5 User Manual
Page 6
1About MPI Tech
The MPI Tech Group is a leading provider of document management and document
output solutions that put the customer in charge. With our software and hardware
solutions we enable customers to create, print, secure, transform, distribute and
archive their information.
Our services run on multiple operating systems making it possible for our
customers to manage all their paper and electronic output through a coherent
software and hardware platform.
The MPI Tech products range from Mainframe and Midrange printing solutions
through Server, Embedded and Stand-alone Hardware based transforms to pure
LAN connectivity. The product range also includes document creation tools and
document management and routing solutions that enables customers to manage
their entire document life cycle from document creation to the documents final
destination whether it is digital or paper.
More information is available at www.mpitech.com
1.1 Trademarks
Company and product names mentioned in this manual are trademarks or
registered trademarks of their respective owners. MPI Tech cannot be held
responsible for any technical or typographical errors and reserves the right to make
changes to products and documentation without prior notification.
1.2 Contact
France
40, rue du Général Malleret Joinville
BP 88 - 94402 Vitry sur Seine Cedex
Phone: +33 (0)1 4573 0940
Fax: +33 (0)1 4680 7071
Denmark
United Kingdom
Anchor House, 50 High Stret
Bagshot GU19 5AW
Phone: +44 (0)844 800 9803
Fax: +44 (0)1276 452 379
Germany
Bavariastrasse 7a
D-80336 Muenchen
Phone: +49 (0)89 35 4762 20
Fax: +49 (0)89 35 4762 11
North America - West Coast
4952 Warner Avenue, Suite 301
Huntington Beach, CA 92649-5506
Phone: +1 (714) 840 8077
Fax: +1 (714) 840 2176
North America - East Coast
2001 Jefferson Davis Highway, Suite 306
Arlington, VA 22202
Phone: +1 (703) 418 0680
Fax: +1 (703) 418 0684

LinkCom 5 User Manual
Page 7
2Introduction
2.1 Terms and definitions
Transform
A conversion from one protocol into another. E.g. the transform from AFP document
type over IPDS data stream into PostScript.
PrintGuide
The Windows application that is used to discover, monitor and configure MPI Tech
PrintServers including LinkCom 5. PrintGuide is also used to backup, modify, and
restore the PrintServer configuration. Feature enablement and software updates are
also applied using PrintGuide.
PrintServer
A device that connects printers to client computers over a network. LinkCom 5 is a
PrintServer, and besides the above description, it can also connect printers with
host systems (AS400, IBM Mainframe, Unix) as well as offer direct TCP/IP port
9100 print from office computers.
Printer definition files
PrintGuide comes preinstalled with predefined printer definition files (*.itc) for
multiple printer models. The files are normally installed in the
“..\MPI Tech\PrintGuide\Printer Descriptions\” subfolder on a computer with
PrintGuide installed. They contain information about trays, duplex-, colour-
capabilities, finishing options, paper sizes and printable area.
In order to use a predefined printer definition file with a LinkCom 5 PrintServer, use
PrintGuide to import the desired printer definition file. This is done from the menu
“PrintServer”, “Upload Configuration”. Change “Files of type” to “Printer
Configuration Template” and browse to the location of the ITC files.
Find and select a suitable printer model definition file. It will be applied to the
selected LinkCom 5 PrintServer.

LinkCom 5 User Manual
Page 8
Please note that in order for Matrix options to appear as available options in
PrintGuide it is necessary to first load a matrix printer definition file via PrintGuide.
Firmware
Firmware is the operating system of LinkCom 5. Firmware can be updated using
PrintGuide.
MPI Tech will make firmware updates available to customers with valid
maintenance. Firmware updates can include new features, improvements, error
corrections and other updates.
Host2Net
Host2Net printing is when the PrintServer and the printer are not directly
connected. Instead the PrintServer receives the print data from the host on the LAN
port and targets the output printer using the LAN port sending the output data back
over the network to the destination printer. In this situation, the PrintServer’s PRT
or USB ports are not used.
Maintenance
Maintenance is a yearly fee paid to MPI Tech that allows for the customer to receive
support for their software and hardware solutions purchased from MPI Tech.
The support can be in the form of written help, remote sessions or the like. Error
corrections can also be in the form of new firmware.
2.2 Related documentation
LinkCom 5 Quick Guide, doc. no.D10600
Getting Started with PrintGuide, doc. no. D60364
Host Print Setup Guide, doc. no. D60425
FSL reference, doc. no. D60313
PSS MVS, Product Installation Guide, doc. no. D13052
PSS VM, Installation Guide, doc. no. D13055
EPM Product Guide, doc. no. D13070

LinkCom 5 User Manual
Page 9
2.3 About this document
The purpose of this manual is to introduce the LinkCom 5 PrintServer, and help the
user setting up the PrintServer to receive host print data from different host
systems and deliver PCL or PostScript or matrix data (Epson or IBM Proprinter) to a
network or USB printer.
The user is expected to be knowledgeable in how to setup host systems to deliver
data to printers and how to initiate print jobs from the specific host system.
This user guide also contains tips and best practices on the host system side for
various host systems.
2.4 Document history
Major changes in this and previous versions of this manual.
Revision D13086-002
Support for automatic discovering of printer connected via USB or PRT port
Web server added
More detailed configuration page
Support for Matrix printing (Epson and IBM Proprinter emulation)
Revision D13086-001
This is the initial document version.

LinkCom 5 User Manual
Page 10
3Introduction to LinkCom 5
Printing host data on an inexpensive LAN- or USB-based printer used to require
expensive hardware and complicated programming in order to eliminate the
incompatibilities between the two environments. Thanks to the LinkCom 5
PrintServer from MPI Tech, your LAN- or USB-connected printer can receive host
print data using any existing standard TCP/IP host attachments.
LinkCom 5 is capable of receiving host print to support either a USB printer or LAN
connected Printer. Using the built-in transparent network switch, the receiving LAN
based printer can be network connected via the LinkCom 5 PrintServer. This can be
a great benefit eliminating the need for an extra network outlet.
The PrintServer comes with a predefined set of print protocols, print transform and
output device according to the hardware license(s).
High speed print options, full colour support and extra transforms require separate
license.
A new feature for LinkCom 5, is support for Gigabit on the LAN side and that both
IPv6 and IPv4 is now supported.
LinkCom 5 converts host print data to a format that is compatible with standard
office printers. Printers can be connected via LAN or USB. LinkCom 5 delivers real-
time conversion that is passed to the printer via the existing LAN or USB
connection.
LinkCom 5 provides conversion of IPDS, ICDS, SCS and DCA host data streams into
PCL5/5c and PostScript languages. Printing to matrix printers using IBM Proprinter
and Epson emulation is also possible with IPDS, SCS and DCA tranforms.
In the basic configuration LinkCom 5 supports one printer session and one ICDS
transform (ICDS to PCL5 or PS). Either one USB printer or one LAN printer. The
LAN printer can either be connected via the LinkCom 5 PRT connector, or reside
elsewhere on the network.
3.1 Intention
This manual describes how to install LinkCom 5, and how to configure the different
features. Please note that some of the features requires additional hardware
licenses.
3.2 Product features
The LinkCom 5 features the following:
TCP/IP session
SCS/DCA with FSL support
IPDS printer emulation (IP40, 4028, 3812, 3816, 4247(matrix))
PCL, PostScript output

LinkCom 5 User Manual
Page 11
Provides bi-directional communication between host and selected printer.
(TCP/IP printing. Not USB)
TCP/IP. ver.6 and ver.4 supported.
(Provided that the host/printer also supports IPv6)
Link speed
Gigabit support on the LAN port. 10/100MB support on both LAN and PRT
ports.
3.3 Requirements
This section describes the hardware and host requirements needed for operating
LinkCom 5.
For specification on MPI Tech host-operating system requirements and installation,
please see:
PSS MVS, Product Installation Guide, doc. no. D13052
PSS VM, Installation Guide, doc. no. D13055
EPM MVS Product Guide, document no. D13070
3.3.1 PC system requirements
Hardware:
PC/Server with LAN adapter able to run Windows with the software mentioned
below.
Software:
PrintGuide version S42 065.490 or newer. This version of PrintGuide supports the
LinkCom 5 product, and is used for configuring the product.
3.3.2 Printer requirements
A printer that is connected to LinkCom 5 via a USB cable must be self-powered. It
may not require power via the USB plug exceeding 100mA.
3.3.3 Host system requirements
Mainframe MVS
IBM PSF version 2.1 or higher
PSS/MVS
Either PSS version 6.01 or higher or EPM
ACF/VTAM version 3.1 or higher is required
IBM TCP/IP version 2.1 or higher or Interlink TCP/Access ver.3.1 or higher
Mainframe VM
IBM PSF version 2.1 or higher (only VTAM connection)

LinkCom 5 User Manual
Page 12
PSS VM version 6.01 or higher
ACF/VTAM version 3.1 or higher
IBM TCP/IP version 2.1 or higher
Mainframe VSE
PSF/VSE
ACT VTAM
AS/400
OS/400 V3 R1 (incl. PTFs) or higher
PSF/400

LinkCom 5 User Manual
Page 13
4Features of LinkCom 5
LinkCom 5 is delivered preinstalled with features and options according to the
purchased product license. Additional functions, e.g. transforms, full colour, high
speed printing, etc. can be purchased and activated later.
4.1 Overview of LinkCom 5.
LinkCom 5 is a standalone hardware PrintServer.
LinkCom 5 can connect to various types of host and midrange systems and process
host print input to address the needs of heterogeneous print environments. It
provides a method to receive host print data via TCP/IP host attachments, convert
host print data to a format that can be printed on LAN (or USB printers), and
redistribute output to existing LAN print devices. LinkCom 5 provides conversion of
IPDS, ICDS and SCS/DCA host data streams into PCL5/5c or PostScript languages.
Conversion for matrix printing is also possible with IPDS, SCS and DCA host
printing.
LinkCom 5 is licensed to meet the requirements of the actual installation. The
license resides inside the LinkCom 5 PrintServer and enables usage of the
purchased features. Licenses for additional features can be applied and enabled
using PrintGuide.
IPv6 and IPv4 protocols are supported on both incoming and outgoing
communication.
Gigabit speed to and from the PrintServer is supported on the LAN port. 10/100
Mbit is supported on both the LAN and PRT ports.
PrintGuide is used to discover, monitor and configure MPI Tech PrintServers
including the hardware PrintServer LinkCom 5. PrintGuide is used to configure,
backup, alter, and restore configuration settings for PrintServers. LinkCom 5
software updates are installed via PrintGuide.
LinkCom 5 is also equipped with an internal web server for displaying basic
settings. Some configurations possible with PrintGuide, can also be made via the
web server.
4.2 End to end control
Using a direct TCP/IP connection with the printer will allow enhanced end to end
control with LinkCom 5. The LinkCom 5 PrintServer receives status feedback from
the printer and sends the true page count to the AS/400 or mainframe S/390 host
systems. The number of printed pages reported back to the mainframe will always
be the number of printed pages in the printer’s output bin.

LinkCom 5 User Manual
Page 14
5Installation
5.1 Installation requirements.
The LinkCom 5 PrintServer requires that the destination printer either has a fixed IP
address or a fixed pingable host name. There are no such requirements when
printing to printer via a USB port.
A LAN network printer must have one of the following: a fixed IP address, a DHCP
reservation or can be reached using its DNS name. (Example:
printer2.company.org).
5.2 The LinkCom 5 PrintServer can be hardware
connected in 3 different ways:
A network printer connected to the LinkCom 5 PrintServer via the PRT/LAN
ports
A USB printer connected to the LinkCom 5 printer via the USB port
A network printer connected via its own network connection. (Host2Net)
5.2.1 Connection via PRT/LAN ports
Normally the recommended setup for a LAN connected printer is to use the built-in
network switch in the LinkCom 5. This removes the need for an extra network
outlet in the print room.
Connect the network printer via the PRT port on the LinkCom 5. The PrintServer is
connected to the network outlet via the LAN port. The setup is illustrated below.

LinkCom 5 User Manual
Page 15
5.2.2 Connect a USB printer
A USB printer can be LAN connected via the LinkCom 5 PrintServer.
Connect the LinkCom 5 PrintServer to the network via the LAN port, and connect a
USB cable (USB-A USB-B cable) between the PrintServer and the printer. Plug
the normal USB-A connector into the PrintServer’s USB port, and the USB-B
connector into the USB port on the printer.
5.2.3 Host2Net connection
Host2Net connection is the recommended setup when:
The network printer and the LinkCom PrintServer are located too far from each
other to be directly connected, or

LinkCom 5 User Manual
Page 16
local network policies do not allow two network devices to share the same
network connection.
The solution is to connect the LinkCom 5 PrintServer to the network using the LAN
port, and connect the network printer directly to the network. The LinkCom 5 can
be configured to transmit print jobs from the PrintServer to the network printer
over the network.
5.2.4 General connection setup
Use the delivered 5V 1A power adapter, regional power plug, and USB-A Micro
USB cable in order to power up the LinkCom 5 PrintServer.
Slide in the regional power plug into the 5V 1A power adapter
Insert the USB-A part of the power USB cable into the 5V 1A power adapter.
Insert the micro USB part of the power USB cable into the PWR socket on the
LinkCom 5 PrintServer. Make sure it is oriented correctly.
Power on the printer
Power up the LinkCom 5.

LinkCom 5 User Manual
Page 17
The green LED’s on the LinkCom 5 PrintServer front will blink during the power up
and self-test cycle. A successful power up sequence will end with the LAN led being
constantly lit (indicating that network configuration was successful).
When the LinkCom 5 has successfully completed the power up process it is ready to
be configured using PrintGuide. Refer to section 7 Configuring LinkCom 5
PrintServer for more information about setting up the PrintServer with PrintGuide.
Consult sections 6.4 LED signalling explained, 10 LED signalling explained in details
and 15.2 LinkCom 5 hangs during a restart for help if the PrintServer fail during the
start-up process.

LinkCom 5 User Manual
Page 18
6Operating LinkCom 5
Most setup and management of LinkCom 5 PrintServers is handled through
PrintGuide. Some actions are performed directly on the PrintServer. A built-in web
server offers some configuration options.
6.1 Using test button to print PrintServer
configuration
The test button is located on the rear side of the PrintServer. Pressing the test
button shortly once, will cause the PrintServer to print a basic PrintServer
configuration page on the connected printer. The “PRT” LED will blink one time.
The configuration page contains information about the PrintServer; LinkCom
product name, firmware version, HW/MAC address, IPv6 and IPv4 address
assignment (if relevant), features installed (including transforms, colour support
and resident fonts).
Please note that the printer must be defined in PrintGuide before a configuration
page can be printed. The destination printer must support ASCII text format. If,
however, a USB printer is connected directly to the LinkCom 5 PrintServer via the
USB port the configuration page will be printed on the USB printer thereby
overruling any PrintGuide configuration.
In the situation where the LinkCom 5 PrintServer has not been configured or has
been reset to factory defaults:
If a USB Printer is connected via the LinkCom USB port the configuration page
is printed here.
If a network printer is connected directly to the LinkCom PRT port the
configuration page is printed here.
A detected USB printer will take precedence over a detected network printer when
printing the configuration page. (Please note that directly network or USB printers
are only detected by LinkCom 5 during power up, so a LinkCom 5 power recycle
might be needed)
This makes it easier for a technician not having access to the customers DHCP
server, verifying the setup.
6.2 Using test button to reset PrintServer to
factory defaults
By pressing the test button and holding it pressed between 8 to 60 seconds will
initiate a PrintServer reset to factory defaults routine. After an automatic restart,
the PrintServer will be restored to default settings this includes TCP/IP settings will
default to DHCP assigned IP address. An eventual set device password will not be
cleared.

LinkCom 5 User Manual
Page 19
6.3 Understanding PrintServer LED signalling
The PrintServer is equipped with 3 LEDs labelled "PRT", "SES", LAN" for status
signalling.
PRT LED signals print data being sent to or from the designated printer
SES LED signals incoming data from host
LAN LED signals network activity
Each LED can have 4 types of status:
LED is off
LED is constantly lit
LED flashes slowly (approx. 50 times per minute)
LED flashes fast (approx. 100 times per minute)
6.4 LED signalling explained
Right after power up all three front LED’s are off, but shortly after the LAN LED will
start to flash. When the start-up procedure has been completed, the LAN LED
should be lit constantly. The PRT and SES LED may flash shortly from time to time.
For a full list of LED signalling, please see section 10 LED signalling explained in
details“.

LinkCom 5 User Manual
Page 20
7Configuring LinkCom 5 PrintServer
7.1 Use of PrintGuide
All configuration of the PrintServer involves the use of PrintGuide. Please ensure
that you have downloaded the latest version of PrintGuide from
https://www.mpitech.com/ under “Support”, “Software downloads”. The version of
PrintGuide must be PrintGuide version S42 065.490 or newer.
Some configurations can also be made by making changes via the built-in web
server. More about this in section 7.10
Please contact support@mpitech.com if you are not able to get a copy of the
PrintGuide Software version. Make sure to include the LinkCom 5 PrintServer’s MAC
address and Serial number in the e-mail.
For a full introduction to the PrintGuide application, please consult the document
“Getting started with PrintGuide” that is bundled with the software download.
7.2 Getting started with PrintGuide
Install PrintGuide and start the application.
On start-up PrintGuide will scan the network and search for any MPI Tech device
(default setting).
To request a forced network scan, press the icon.
In the default view, PrintGuide displays the PrintServer name, currently assigned IP
address, firmware version (if the PrintServer has been configured), and the general
status.
The list of logical printers displays the available number logical printers/transforms
according to the purchased license.
Table of contents
Other MPI Print Server manuals
