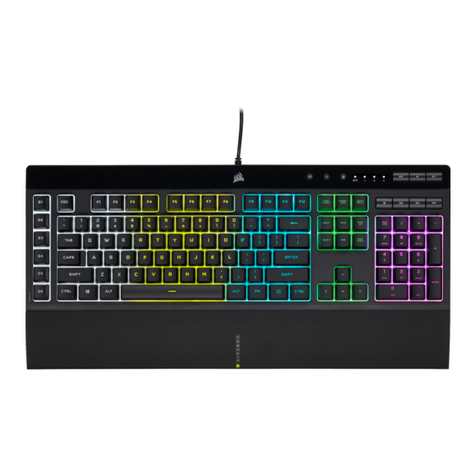
MRHANDSFREE MKA-100 User manual

GB
PARTS, KEYS & BUTTONS
see Illustraon 1 and 2
A. LED Indicator Lights
Indicates when your keyboard has low
baery and whether your Caps Lock and
Num Lock are ON or OFF.
Funcons the same as the right mouse buon.
Located on the far right of the keyboard. The
Num Lock key needs to be ON for it to funcon.
QUICK START GUIDE
1. USB Receiver Installaon
THE USB RECEIVER IS LOCATED IN THE BOTTOM OF THE MOUSE, UNDER THE COVER
OF THE BATTERY COMPARTMENT. (see Illustraon 3)
Remove the USB Receiver from the boom of the mouse and plug it into an empty USB port in your PC or
laptop. The connecon will be made automacally without downoading addional drivers or soware.
2. Mouse & Keyboard Setup
1. Insert the correct baeries into the baery compartments located on the back of your keyboard and
mouse. Keyboard: 2x AAA baeries. Mouse: 1x AA baery.
2. Make sure the polarity of the baeries corresponds to the symbols in the baery compartment.
3. Turn the mouse on by sliding the ON/OFF switch on the boom of the mouse in the ‘ON’ posion.
4. Place the keyboard and mouse where you intend to use them within 30 feet (10m) of the receiver.
5. The mouse will immediately connect to the USB receiver, and automacally turn ON when the le, right,
or scroll buon is pressed.
6. Press any key on the keyboard to connect with the USB receiver.
7. If your cursor on screen is not moving or keyboard is unresponsive, unplug and re-plug the USB receiver.
NOTE: The keyboard will go in sleep mode aer not being used for 4 seconds. The mouse will go into a slumber
mode aer not being used for 4s and the red light will blink twice. It will go in full sleep mode aer not being
used for 10 minutes and the red LED light will then turn o. The mouse will wake up when the le, right, or
scroll buon is pressed. The keyboard will wake up when pressing any key on the keyboard.
SUPPORT
For more informaon, technical quesons and return requests concerning this product, you should contact
WARRANTY
Mr Handsfree is a registered trademark of TE-Group NV. The mr Handsfree brand stands for superior product
quality and outstanding customer service. That is why mr Handsfree warrants this product against all defects
in material and workmanship for a period of two (2) years from the date of original purchase of the product.
The condions of this guarantee and the extent of responsibility of mr Handsfree under this guarantee can be
downloaded from our website: www.mrhandsfree.com.
WIRELESS KEYBOARD AND MOUSE
GB NL FR D
ILLUSTRATIONS
Hereby, Par la présente,
Company / Entreprise
Address / Adresse
declare that the following equipment / déclare que le disposif suivant
Product name
Nom du produit
Product type
Type de produit
conforms with the following safety requirements of the direcves 2015/863/EU, 2011/65/EU, 1907/2006/EU,
1272/2013/EU and 2014/53/EU. Conformity is guaranteed by the CE-symbol. This product has been tested
against following standards and specicaons.
est conforme aux exigences de sécurité suivantes des direcves 2015/863/EU, 2011/65/EU, 1907/2006/EU,
1272/2013/EU et 2014/53/EU. La conformité est garane par le symbole CE. Ce produit a été testé par rapport
aux normes et spécicaons suivantes.
EN 300328 V2.2.2 (2016-11)
EN 301489-1 V2.1.1 (2017-02)
EN 301489-17 V3.1.1 (2017-02)
EN 62479:2010
EN 62368-1:2017/A11:2017
J. Van Os, Product & Research Manager
Authorized Signature, Kapellen - July 2021
DECLARATION OF CONFORMITY
TE-Group NV
Kapelsestraat 61, 2950 Kapellen, Belgium
mr Handsfree MKA-100
Wireless Keyboard and Mouse
A
C
B
DE
F
G
DPI
ILLUSTRATION 1
ILLUSTRATION 2
Press to adjust the moving speed of your mouse
ILLUSTRATION 3
H

NL FR D
ONDERDELEN, TOETSEN & KNOPPEN
zie Illustrae 1 en2
Gee aan wanneer de baerij van uw
toetsenbord bijna leeg is en/of uw Caps Lock
en Num Lock AAN of UIT zijn.
Hee dezelfde funce als de rechtermuisknop
van de muis.
C. Numpad
Bevindt zich rechts op het toetsenbord. De
Num Lock-toets moet AAN staan om dit te
kunnen gebruiken.
SNELLE OPSTART GIDS
1. Installae van de USB-ontvanger
KLEPJE VAN HET BATTERIJCOMPARTIMENT. (zie Illustrae 3)
Haal de USB-ontvanger uit de onderkant van de muis en steek deze in een lege USB-poort van je pc of laptop.
De verbinding wordt automasch gemaakt. U hoe geen extra stuurprogramma’s of soware te downloaden.
2. Muis en toetsenbord instellen
1. Plaats de juiste baerijen in de baerijvakken aan de achterkant van uw toetsenbord en muis. Toetsenbord:
2x AAA-baerijen. Muis: 1x AA-baerij.
2. Zorg ervoor dat de polariteit van de baerijen overeenkomt met de symbolen in het baerijvak.
3. Schakel de muis AAN door de ON/OFF schakelaar onderaan de muis in de ‘ON’ posie te schuiven.
4. Plaats het toetsenbord en de muis waar u ze wilt gebruiken (max. 10 meter verwijderd van de ontvanger.)
5. De muis maakt onmiddellijk verbinding met de USB-ontvanger en gaat automasch AAN wanneer op de
linker-, rechter- of scrollknop wordt gedrukt.
6. Druk op een willekeurige toets op het toetsenbord om verbinding te maken met de USB-ontvanger.
7. Als uw cursor op het scherm niet beweegt of het toetsenbord niet reageert, koppelt u de USB-ontvanger
los en sluit u deze opnieuw aan.
OPMERKING: Het toetsenbord gaat in slaapstand nadat het 4 seconden niet werd gebruikt. De muis gaat in
een sluimermodus nadat hij 4 seconden niet werd gebruikt en het rode lampje knippert twee keer. Het gaat
in de volledige slaapmodus nadat het 10 minuten niet werd gebruikt en het rode LED-lampje gaat dan uit.
De muis wordt weer acef wanneer de linker-, rechter- of scrollknop wordt ingedrukt. Het toetsenbord wordt
acef wanneer u op een willekeurige toets op het toetsenbord drukt.
KLANTENONDERSTEUNING
Voor meer informae, technische vragen of retouraanvragen met betrekking tot dit product dient u
rechtstreeks contact op te nemen met [email protected]om.
GARANTIE
Mr Handsfree is een gedeponeerd handelsmerk van TE-Group NV. Het merk mr Handsfree staat voor
producten van superieure kwaliteit en een uitstekende klantenservice. Daarom garandeert mr Handsfree
dat dit product vrij is van materiaal- en fabricagefouten gedurende een periode van twee (2) jaar na de
oorspronkelijke aankoopdatum van het product. De voorwaarden van deze garane en de omvang van
de verantwoordelijkheid van mr Handsfree onder deze garane kunt u downloaden vanaf de website:
www.mrhandsfree.com.
Druk hierop om de bewegingssnelheid van uw
muis aan te passen.
PIÈCES, CLÉS ET BOUTONS
voir illustraons 1 et 2
A.
Indique lorsque la baerie de votre clavier
est faible et/ou que votre verrouillage des
majuscules et le verrouillage numérique
sont acvés ou désacvés.
A la même foncon que le bouton droit de la
souris.
Situé sur le côté droit du clavier. La touche
Num Lock doit être acvée pour l’uliser.
GUIDE DE DÉMARRAGE RAPIDE
1. Installaon du récepteur USB
LE RÉCEPTEUR USB EST SITUÉ AU BAS DE LA SOURIS SOUS LE COUVERCLE DU
COMPARTIMENT DES PILES. (voir illustraon 3)
Rerez le récepteur USB du bas de la souris et branchez-le sur un port USB vide de votre PC ou ordinateur portable.
La connexion sera établie automaquement sans téléchargement de pilotes ou de logiciels supplémentaires.
2. Conguraon de la souris et du clavier
1. Insérez les bonnes piles dans les comparments à piles situés à l’arrière de votre clavier et de votre souris.
Clavier : 2x piles AAA. Souris : 1x pile AA.
2. Assurez-vous que la polarité des piles correspond aux symboles dans le comparment des piles.
3. Allumez la souris en glissant le bouton ON/OFF situé au dessous de la souris dans la posion « ON ».
4. Placez le clavier et la souris là où vous avez l’intenon de les uliser à moins de 30 pieds (10 m) du récepteur.
5. La souris se connecte immédiatement au récepteur USB et s’allume automaquement lorsque le bouton
gauche, droit ou de délement est appuyé.
6. Appuyez sur n’importe quelle touche du clavier pour vous connecter au récepteur USB.
7. Si le curseur sur votre écran ne bouge pas ou que le clavier ne répond pas, débranchez et rebranchez le
récepteur USB.
REMARQUE : le clavier passe en mode veille après 4 secondes d’inacvité. La souris passe en mode veille légère
après 4 secondes d’inacvité et le voyant rouge clignotera deux fois. Il passera en mode veille complet après 10
minutes d’inacvité, et le voyant LED rouge s’éteindra. La souris redevient acve lorsque le bouton gauche, droit
ou de délement est enfoncé. Le clavier redevient acf lorsque vous appuyez sur n’importe quelle touche.
SUPPORT
Pour plus d’informaons, des quesons techniques ou des demandes de retour concernant ce produit, il faut
contacter [email protected]om.
GARANTIE
Mr Handsfree est une marque déposée de TE-Group NV. La marque mr Handsfree conçoit des produits de
qualité supérieure et dispose d’un service après-vente exceponnel. C’est pourquoi mr Handsfree garant
ce produit contre tout défaut de matériel ou de fabricaon pendant une période de deux (2) ans, à compter
de la date d’achat du produit. Pour connaître les condions générales de cee garane et l’étendue des
responsabilités de mr Handsfree au tre de cee garane, consultez notre site web: www.mrhandsfree.com.
G. Bouton DPI
Appuyez pour régler la vitesse de votre souris
TEILE, TASTEN & KNÖPFE
siehe Abbildung 1 und 2
A.
Zeigt an wenn die Baerie Ihrer Tastatur
schwach ist und ob Ihre Feststelltaste und
Num-Taste EIN oder AUS sind.
B.
Funkoniert wie die rechte Maustaste.
C.
Bendet sich ganz rechts auf der Tastatur.
Die Num Lock-Taste muss eingeschaltet sein,
damit sie funkoniert.
SCHNELLSTARTANLEITUNG
1. Installaon des USB-Empfängers
ABDECKUNG DES BATTERIEFACHES. (siehe Abbildung 3)
Enernen Sie den USB-Empfänger von der Unterseite der Maus und stecken Sie ihn in einen freien USB-Port
Ihres PCs oder Laptops. Die Verbindung wird automasch hergestellt, ohne dass zusätzliche Treiber oder
Soware heruntergeladen werden müssen.
2. Einrichtung von Maus und Tastatur
1. Legen Sie die richgen Baerien in die Baeriefächer auf der Rückseite Ihrer Tastatur und Maus ein.
Tastatur: 2x AAA-Baerien. Maus: 1x AA-Baerie.
2. Stellen Sie sicher, dass die Polarität der Baerien mit den Symbolen im Baeriefach übereinsmmt.
3. Schalten Sie die Maus ein. Schieben Sie den ON/OFF Schalter in die Posion „On“.
4. Platzieren Sie Tastatur und Maus an der Stelle, an der Sie sie verwenden möchten, innerhalb von 10 m vom
Empfänger.
5. Die Maus verbindet sich sofort mit dem USB-Empfänger und schaltet sich automasch ein, wenn die linke,
rechte oder Scrolltaste gedrückt wird.
6. Drücken Sie eine beliebige Taste auf der Tastatur, um eine Verbindung mit dem USB-Empfänger herzustellen.
7. Wenn sich Ihr Cursor auf dem Bildschirm nicht bewegt oder die Tastatur nicht reagiert, ziehen Sie den USB-
Empfänger ab und schließen Sie ihn wieder an.
HINWEIS: Die Tastatur wechselt nach 4 Sekunden Inakvität in den Ruhemodus. Die Maus wechselt nach 4
Sekunden Inakvität in den leichten Ruhemodus und das rote Licht blinkt zweimal. Es wechselt in den vollen
Ruhemodus, nachdem es 10 Minuten lang nicht verwendet wurde, und dann erlischt das rote LED-Licht. Die
Maus wird wieder akv, wenn die linke, rechte oder Scroll-Taste gedrückt wird. Die Tastatur wird akv, wenn
Sie eine beliebige Taste auf der Tastatur drücken.
KUNDENDIENST
Für weitere Informaonen, technische Fragen oder Rücksendungen zu diesem Produkt wenden Sie sich bie
an: [email protected]om.
GARANTIE
Mr Handsfree is a registered trademark of TE-Group NV. The mr Handsfree brand stands for superior product
Mr Handsfree ist ein eingetragenes Markenzeichen der TE-Group NV. Die mr Handsfree-Marke steht für
überragende Qualität und hervorragenden Kundenservice. Aus diesem Grund gibt mr Handsfree auf dieses
Produkt eine Garane von zwei (2) Jahren auf alle Material- und Verarbeitungsfehler ab Originalkaufdatum
des Produktes. Die Bedingungen dieser Garane und der Verantwortlichkeitsumfang von mr Handsfree in
dieser Garane können Sie nden auf: www.mrhandsfree.com.
F. Scrollrad
Drücken Sie diese Taste, um die geschwindigkeit
Ihrer Maus anzupassen.
H.
Other MRHANDSFREE Keyboard manuals
