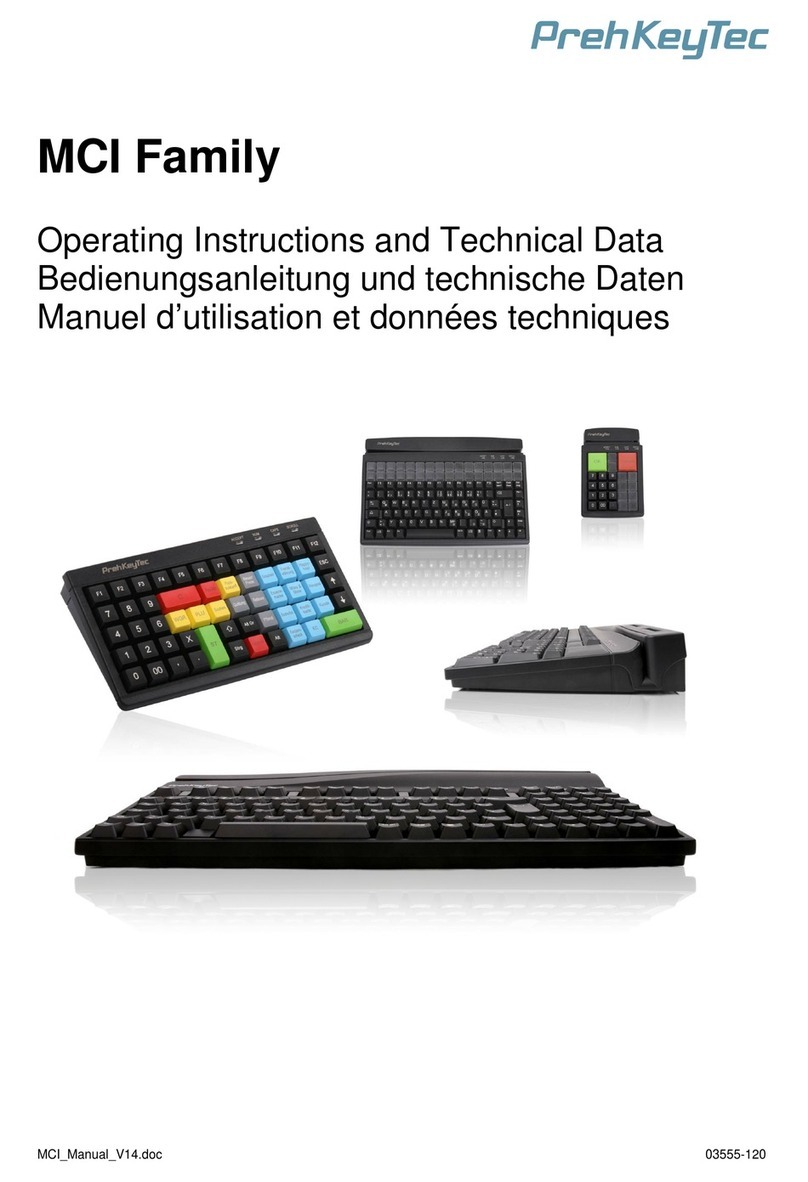
PrehKeyTec MCI TouchKey Guide

PrehKeyTec GmbH TK-TechDoc_RevB_en.doc - 2008-07-31 Page 1/40
MCI TouchKey
Technical
Documentation
Figure shows a specific keyboard layout
Document Rev. B

PrehKeyTec GmbH TK-TechDoc_RevB_en.doc - 2008-07-31 Page 2/40
Introduction............................................................................................................... 3
System requirements............................................................................................... 3
Structure of the MCI TouchKey............................................................................... 4
Keyboard and module........................................................................................................4
Touch-LCD................................................................................................................ 4
LCD......................................................................................................................................4
TouchKey Server................................................................................................................4
Loading graphics ...............................................................................................................5
TouchKey Programmer............................................................................................ 6
General information ...........................................................................................................6
Requirements .....................................................................................................................6
Adding graphics into the TouchKey Programmer ..........................................................7
XML Files................................................................................................................... 8
General information ...........................................................................................................8
Why XML?...........................................................................................................................8
XSD Schema-Files..............................................................................................................8
Types of XML files..............................................................................................................9
TouchKey.xml................................................................................................................................. 9
<Layername>.xml......................................................................................................................... 13
<Text>.xml.................................................................................................................................... 20
<Graphic>.xml............................................................................................................................... 24
Startlayout.xml.............................................................................................................................. 26
Sample project for the TouchKey Programmer.............................................................27
OPOS Service Object LineDisplay..................................................................................31
Configuring the flash memory using iLCD Setup .........................................................32
ASCII Character Table......................................................................................................33
Scan Codes.......................................................................................................................35
Virtual Key Codes.............................................................................................................36
Technical Data..................................................................................................................39
Additional help .................................................................................................................40

PrehKeyTec GmbH TK-TechDoc_RevB_en.doc - 2008-07-31 Page 3/40
MCI TouchKey
Introduction
The TouchKey is a combination of a Touch LCD and a keyboard. The right section of
the device and included modules behave like standard PrehKeyTec keyboards and
as such are programmed using the WinProgrammer. On the left section of the device
is a LCD Touch Panel which communicates with an application running on the PC.
This application evaluates data XML Data stored on the PC and displays them on the
LCD. This data could be in the form of a text, graphic or buttons. The application also
receives data from the Touch LCD and passes it on to the operating system
depending on the configuration.
System requirements
- Windows XP
- USB
- .Net Framework 2.0 or later
Customer Software
XML-Files TouchKey
Server
PC MCI TouchKey
• Customer software updates
XML Data
• After layout changes, the
new layout is automatically
displayed on the LCD
• TouchKey buttons can
either provoke a change of
layouts (drill down/up) or
simulate key codes

PrehKeyTec GmbH TK-TechDoc_RevB_en.doc - 2008-07-31 Page 4/40
Structure of the MCI TouchKey
Keyboard and module
The keyboard section and other modules (MSR, Keylock) if available are
programmed using the WinProgrammer software. This software can be downloaded
from the support section of our Website at: http://support.PrehKeyTec.com. For more
information on how to use the WinProgrammer, please refer to our Quick Start
manual of the WinProgrammer.
Touch-LCD
LCD
The left section of the TouchKey device is made of a LCD Touch Panel. These LCD
has the following characteristics:
- Tactile Feedback (Similar to pressing a keyboard key)
- Monochrome display
- Resolution of 320 x 240 Pixel
- LED Background lighting
- Layouts are controlled using XML data
- Displays text, Graphics and buttons
TouchKey Server
In order to be able to display information on the TouchKey LCD the TouchKey Server
and an interface DLL need to be on the system and running
The TouchKey Server is a little application, which after a start is displayed in the
Windows task bar.
The TouchKey server communicates with the XML Data stored in the PC and sends
this data through the TKInterface.dll to the MCI TouchKey. Changes in the XML Data
are recognized by the TouchKey Server after the data is stored and the new data is
displayed on the screen.

PrehKeyTec GmbH TK-TechDoc_RevB_en.doc - 2008-07-31 Page 5/40
The XML files can be created using the TouchKey Programmer. The XML data
structure created using the TouchKey Programmer can then be used by an
application to change content of the XML files. These changes will then be
transmitted over the TouchKey Server to the screen of the TouchKey.
In order to transmit the TouchKey configuration to the system, one simply has to
copy the XML folder, and the TouchKey Server executables (TouchKeySvr.exe /
TKInterface.dll) into a folder on the target PC.
Info-Dialog: A mouse click on the TouchKey Server icon found in
the task bar opens up the image on the left. This
image shows the version of the TouchKey
Programmer and also contains two buttons:
"Hide Window" -> This hides the window and only
shows the icon in the task bar.
"Shut Down Server" -> This shuts down the
application and all communications with the
TouchKey.
Loading graphics
Graphics can be displayed on the LCD panel of the MCI TouchKey. The maximum
size of a graphic that can be displayed is 320x240. Acceptable formats are *.bmp,
*.jpg or *.gif. The graphics are stored in the internal memory of the LCD controller.
This can be accessed using the index-number which was assigned to them during
download into the flash memory. This index is necessary in the XML files in order for
a graphic to be uploaded on the LCD.
The configuration of the flash memory is done using the tool "iLCD Setup". A detail
description on how this works is documented at the end of this manual.

PrehKeyTec GmbH TK-TechDoc_RevB_en.doc - 2008-07-31 Page 6/40
TouchKey Programmer
General information
The TouchKey Programmer is a software used to create the XML files for the MCI
TouchKey. This software primarily creates and test layouts using simple drag and
drop methods.
The most recent version of the TouchKey Programmer can be downloaded from our
website at: http://support.PrehKeyTec.com. For getting started a flash animation
shows the first steps and explains the basic usage of the MCI TouchKey.
Requirements
The TouchKey Programmer requires .NET Framework 2.0 or later to be installed on
the system. The start window of the application is shown in the image below:
The language of the Programmer window is displayed on the drop down box situated
at the top right corner of the window. A click on "help" in the menu bar displays a
complete online reference on how to use the TouchKey Programmer.

PrehKeyTec GmbH TK-TechDoc_RevB_en.doc - 2008-07-31 Page 7/40
After creating a project and its layouts, this can be exported to the LCD using "Test
Projects".
However before the layouts can be viewed on the screen, the TouchKey Server has
to be started. This TouchKey Server has to be installed one level above the XML
folder which contains the XML files.
Clicking on the menu "Test Project" creates all the necessary XML files. The
structure of these files is as follows:
- A XML file is created for every layout using the Layout data. If the name of the
layout is for example "L1", then a file named "L1.xml" will be created and
automatically stored in the folder \xml, situated in the export path of the
project’s configuration.
- Additional, if this layout "L1" contains text fields, an extra file called
"L1_txt.xml" will be created.
- Also if this layout contains graphics, a corresponding file called "L1_gfx.xml"
will also be created and stored.
Adding graphics into the TouchKey Programmer
In order to be able to work with user created images in the TouchKey Programmer,
they must first of all be copied into a folder of the Programmer. This is done using the
tool "GraphicsLoader" which is part of the TouchKey Programmer package.
New graphics is loaded into the TouchKey Programmer using the "Add" button. The
"Del" button deletes a graphics from the TouchKey Programmer.
It is important to note that the index of the graphic has to exactly match that in the
flash memory of the TouchKey. The index of the graphic in the flash memory is
written using another tool called "iLCD Setup". We will be taking a look at this tool
later in this document. In case the indexes don’t match, that can be corrected using
the "arrow" buttons of the GraphicsLoader.

PrehKeyTec GmbH TK-TechDoc_RevB_en.doc - 2008-07-31 Page 8/40
The menu "Save & Exit" saves the configuration and exits the tool.
Simply click the "Exit" button to end the program without saving the configuration.
XML Files
General information
The simplest way to create XML files is using the TouchKey Programmer. The
program has the ability to check the created files for any mistakes. Wrongly
configured XML files cannot be displayed on the LCD.
The XML files can also be manually created and configured using simple text editor
programs like notepad or any other XML editor programs.
A third method of configuration is letting the application do it. The application opens
up the appropriate XML file and configures the content, after which the file is saved.
The TouchKey Server will recognize this saving of the file and sends the updated file
to the display of the MCI TouchKey.
Why XML?
XML offers the following advantages:
- Programming language independence
- Simple structuring of data
- No software API necessary
- Remote configuration and updating of XML files
- XML files can be easily updated manually or by an application
- XML is a standardized protocol
XSD Schema-Files
The TouchKey Server uses XSD-Schema-Files to validate the syntax and value
range of the created XML files.
As such the following files must always be present in the XML-Folder:
- Graphic.xsd
- Layer.xsd
- Text.xsd
- TouchKey.xsd

PrehKeyTec GmbH TK-TechDoc_RevB_en.doc - 2008-07-31 Page 9/40
Types of XML files
TouchKey.xml
Every MCI TouchKey has a basic configuration. This configuration is stored in
"Touchkey.xml".
This file can also contain information and configurations for more than one TouchKey.
Differentiating the layouts for the different TouchKeys is done using the TouchKey’s
serial number.
Description of the elements
<Device>
Start element for a TouchKey device.
<Serialnumber>
This is the TouchKey’s serial number usually found on the sticker at the back of the
device. An example of how the number is written is : 8047-8000012). This number
can be ignored if only one TouchKey is connected to the host PC.
Example: <Serialnumber>8071-8000012</Serialnumber>
<Contrast>
The contrast values range from 0-255. This value can be separately configured for
each MCI TouchKey device on the system.
Example: <Contrast>160</Contrast>
<Backlight>
The brightness of the back ground lighting ranges from 0-15. Reducing the
brightness increases the life cycle of the back ground lighting. This can also be
configured for each separate MCI TouchKey.
Example: <Backlight>15</Backlight>
<NumberOfLayers>
This is the number of layouts programmed for the TouchKey.
Example: <NumberOfLayers>3</NumberOfLayers>

PrehKeyTec GmbH TK-TechDoc_RevB_en.doc - 2008-07-31 Page 10/40
<NumberOfGraphics>
The number of graphics available for the TouchKey. A graphic file can contain many
different graphics.
Example: <NumberOfGraphics>1</NumberOfGraphics>
<NumberOfText>
The number of text files which are available for this TouchKey. A text file can contain
multiple text fields
Example: <NumberOfText>2</NumberOfText>
<Layer>
This is the name of the layout. This name must be the same as the name of the XML
file. For example if the of the layer is "Main", then the corresponding XML file is called
"Main.xml".
Example: <NumberOfLayers>3</NumberOfLayers>
<Layers>
<Layer>tables</Layer>
<Layer>drinks</Layer>
<Layer>food</Layer>
</Layers>
<graphic>.
Name of the graphic. Same principle applies here as in layers above.
Example: < NumberOfGraphics >1</ NumberOfGraphics >
<graphics>
<graphic>tables_gfx</graphic>
</graphics>
<txt>
Name of text. Same principle as in layer but for text.
Example: <NumberOfText>2</NumberOfText>
<text>
<txt>drinks_txt</txt>
<txt>food_txt</txt>
</text>

PrehKeyTec GmbH TK-TechDoc_RevB_en.doc - 2008-07-31 Page 11/40
MCI TouchKey example for a single device
<?xml version="1.0" encoding="utf-8" ?>
<TouchKey xmlns="http://tempuri.org/TouchKey.xsd">
<Device>
<Serialnumber>0000-0000000</Serialnumber>
<Contrast>160</Contrast>
<Backlight>15</Backlight>
<NumberOfLayers>3</NumberOfLayers>
<NumberOfGraphics>1</NumberOfGraphics>
<NumberOfText>2</NumberOfText>
<Layers>
<Layer>tables</Layer>
<Layer>drinks</Layer>
<Layer>food</Layer>
</Layers>
<graphics>
<graphic>tables_gfx</graphic>
</graphics>
<text>
<txt>drinks_txt</txt>
<txt>food_txt</txt>
</text>
</Device>
</TouchKey>
The above example describes an MCI TouchKey. The above example shows no
serial number since there is just one device involved. The device displays 3 layouts.
Additional, the layout "tables" contains one or more graphics and text fields. The
layout "food" contains one or more text fields.

PrehKeyTec GmbH TK-TechDoc_RevB_en.doc - 2008-07-31 Page 12/40
MCI TouchKey example for two devices
<?xml version="1.0" encoding="utf-8" ?>
<TouchKey xmlns="http://tempuri.org/TouchKey.xsd">
<Device>
<Serialnumber>1234-1234567</Serialnumber>
<Contrast>160</Contrast>
<Backlight>15</Backlight>
<NumberOfLayers>3</NumberOfLayers>
<NumberOfGraphics>1</NumberOfGraphics>
<NumberOfText>2</NumberOfText>
<Layers>
<Layer>tables</Layer>
<Layer>drinks</Layer>
<Layer>food</Layer>
</Layers>
<graphics>
<graphic>tables_gfx</graphic>
</graphics>
<text>
<txt>drinks_txt</txt>
<txt>food_txt</txt>
</text>
</Device>
<Device>
<Serialnumber>1234-1234568</Serialnumber>
<Contrast>160</Contrast>
<Backlight>13</Backlight>
<NumberOfLayers>2</NumberOfLayers>
<NumberOfGraphics>0</NumberOfGraphics>
<NumberOfText>1</NumberOfText>
<Layers>
<Layer>payment</Layer>
<Layer>drinks</Layer>
</Layers>
<graphics>
</graphics>
<text>
<txt>drinks_txt</txt>
</text>
</Device>
</TouchKey>
The serial numbers can be found on the sticker situated at the back of the TouchKey.
This number is always specific for each device. The contrast and background lighting
for each device can be configured differently. Multiple devices can use the same
layouts as in the example above (Layout "drinks"). The second device has an extra
layout "payment", which is not shown in the first TouchKey.

PrehKeyTec GmbH TK-TechDoc_RevB_en.doc - 2008-07-31 Page 13/40
<Layername>.xml
These files contains the configuration for the layouts. Keys can be programmed in
layouts but graphics and text will always be configured in a separate file for each.
Description of the Element
<Layer>
This element contains as an attribute the name of the XML-Schema. The schema
checks the validity of <Layername>.xml. If there is an error, the TouchKey Server
automatically stops and out puts an error message.
Example: <Layer xmlns="http://tempuri.org/layer.xsd">
<name>
Sets the name of the layout. The name is same as the file name without the ".xml"
ending.
Example: <name>tables</name>
<index>
Is not used.
Example: <index>0</index>
<keytostart>
This is a POS-Key, which can directly bring up a layer on the screen. These keys can
be programmed using the WinProgrammer software on the keyboard section of the
MCI TouchKey. If this is not needed, please enter the value 0. The value range is 0-
128
Example: <keytostart>1</keytostart>
<buttondata>
This describes all the parameters for a key on a layout.
<beep>
This configuration sets a click for the button in a layout. This can be turned on or off.
The possible values are: true, false.
Example: <beep>true</beep>

PrehKeyTec GmbH TK-TechDoc_RevB_en.doc - 2008-07-31 Page 14/40
<beepfreq>
Frequency of the key click.
Range 0-255.
0 - 15 = ca 4800Hz
16 - 31 = ca 2400Hz
32 - 63 = ca 1200Hz
from 64 = ca 600Hz
Example: <beepfreq>16</beepfreq>
<beepduration>
Length of key click.
Rane 0-255.
Length = Value * 8,3ms
Example: <beepduration>10</beepduration>
<inverse>
Inverts the key when it is pressed.
Possible values: true, false
Example: <inverse>true</inverse>
<keyboardoutput>
Out puts a key when the button (key) is pressed.
Example: <keyboardoutput>true</keyboardoutput>
<xpixel>
Position Horizontal. Range 0-320.
Example: <xpixel>1</xpixel>
<ypixel>
Position Vertical. Range 0-240.
Example: <ypixel>6</ypixel>
<wpixel>
Width in pixels. Value 0-320.
Example: <wpixel>89</wpixel>
<hpixel>
Height in pixels. Range 0-240.
Example: <hpixel>61</hpixel>

PrehKeyTec GmbH TK-TechDoc_RevB_en.doc - 2008-07-31 Page 15/40
<text>
The text written on the key. Special characters have to be written using character
references as follows: "&#character;" An example for creating a new line will be
" ". A list of the ASCI characters is found at the end of this document. Numbers
are to be written in decimal form.
Example: <text>drinks
table 1</text>
<textmode>
This describes the characteristics of the fonts used in labeling buttons.
The following table lists the HEX values for the font properties:
Bit 0 Center text horizontally
Bit 1 Center text vertically
Bit 2 Right justify text
Bit 3 Bottom justify text
Bit 4 Do not word wrap text
Bit 5 Add horizontal space for border
Bit 6 Add vertical space for border
Bit 7 Turn alignment on
Example: <textmode>0</textmode>
<framemode>
Describes the properties of the frame around a button.
Value ranges from 0-255(dezimal).
The table below list the HEX values:
Bit 0 The rectangle is drawn with rounded corner
Bit 1 A shadow is drawn at the right and the bottom
Bit 2 Blank pixels are drawn outside the rectangle
Bit 3 The inner part of the rectangle will be erased
Bit 4 Erasing of the inner part is done with the inverse setting
Bit 7 Display no frame
Example: <framemode>128</framemode>

PrehKeyTec GmbH TK-TechDoc_RevB_en.doc - 2008-07-31 Page 16/40
<font>
Describes index of the font being used. The fonts have to be loaded on the flash
memory of the TouchKey before they can be used. The a user defined. The list below
shows the default font found in each MCI TouchKey:
0 Verdana 8 pt fat
1 Verdana 8 pt
2 Verdana 20 pt fat
3 Verdana 12 pt fat
4 MS Sans Serif 18 pt fat
5 MS Sans Serif 12 pt
6 Verdana 10 pt fat
7 Verdana 14 pt fat
8 Verdana 16 pt fat
Example: <font>0</font>
<touchindex>
This defines the of the touch field. Multiple buttons (keys) with different text
descriptions have to have specific indexes in order to be used.
The value range is: 0-63
A value of 255 automatically takes the next free index.
Example: <touchindex>1</touchindex>
<press>
Sends key codes when pressed (True) or released (false).
Example: <press>true</press>
<startlayer>
The name of the layout that is started when the button is pressed.
Example: <startlayer>drinks</startlayer>
<buttonvalue>
This section defines virtual key codes and scan codes. A 0 is always required at the
end of each block. Please see the description of "Scan codes" and "virtual keys" at
the end of this document.
<vk_code>
Virtual key code of the key. The decimal number is used for entering the value.
Example: <vk_code>49</vk_code>
<make>
Indicates if a make- (true) or break- (false) gets sent.
Example: <make>true</make>

PrehKeyTec GmbH TK-TechDoc_RevB_en.doc - 2008-07-31 Page 17/40
<scan_code>
The scan code for the key. The decimal number for the value is used. This block also
ends with a 0 scan code.
Example: <buttonvalue>
<vk_code>49</vk_code>
<make>true</make>
<scan_code>2</scan_code>
<scan_code>0</scan_code>
</buttonvalue>
<buttonvalue>
<vk_code>49</vk_code>
<make>false</make>
<scan_code>2</scan_code>
<scan_code>0</scan_code>
</buttonvalue>
<buttonvalue>
<vk_code>0</vk_code>
<make>false</make>
<scan_code>0</scan_code>
</buttonvalue>
Layout example
The example layout on the left
shows a key (button) with the
label "TEST" and has the
following characteristics:
- Sends key code when
pressed
- Frame with a shadow
- Round corners of frame
- Invert button when
pressed
- Generate a click when
button is pressed
A press of the button outputs a
key code sequence "Test".

PrehKeyTec GmbH TK-TechDoc_RevB_en.doc - 2008-07-31 Page 18/40
The XML file for the above example has the following structure
<?xml version="1.0" encoding="utf-8" ?>
<Layer xmlns="http://tempuri.org/layer.xsd">
<name>L1</name>
<index>0</index>
<keytostart>0</keytostart>
<buttons>
<buttondata>
<beep>true</beep>
<beepfreq>16</beepfreq>
<beepduration>10</beepduration>
<inverse>true</inverse>
<keyboardoutput>true</keyboardoutput>
<xpixel>45</xpixel>
<ypixel>40</ypixel>
<wpixel>92</wpixel>
<hpixel>40</hpixel>
<text>TEST</text>
<textmode>131</textmode>
<framemode>3</framemode>
<font>6</font>
<touchindex>1</touchindex>
<press>true</press>
<startlayer/>
<buttonvalue>
<vk_code>16</vk_code>
<make>true</make>
<scan_code>42</scan_code>
<scan_code>0</scan_code>
</buttonvalue>
<buttonvalue>
<vk_code>84</vk_code>
<make>true</make>
<scan_code>20</scan_code>
<scan_code>0</scan_code>
</buttonvalue>
<buttonvalue>
<vk_code>84</vk_code>
<make>false</make>
<scan_code>20</scan_code>
<scan_code>0</scan_code>
</buttonvalue>
<buttonvalue>
<vk_code>16</vk_code>
<make>false</make>
<scan_code>42</scan_code>
<scan_code>0</scan_code>
</buttonvalue>
<buttonvalue>
<vk_code>69</vk_code>
<make>true</make>
<scan_code>18</scan_code>
<scan_code>0</scan_code>
</buttonvalue>
<buttonvalue>
<vk_code>69</vk_code>
<make>false</make>
<scan_code>18</scan_code>
<scan_code>0</scan_code>
</buttonvalue>
<buttonvalue>

PrehKeyTec GmbH TK-TechDoc_RevB_en.doc - 2008-07-31 Page 19/40
<vk_code>83</vk_code>
<make>true</make>
<scan_code>31</scan_code>
<scan_code>0</scan_code>
</buttonvalue>
<buttonvalue>
<vk_code>83</vk_code>
<make>false</make>
<scan_code>31</scan_code>
<scan_code>0</scan_code>
</buttonvalue>
<buttonvalue>
<vk_code>84</vk_code>
<make>true</make>
<scan_code>20</scan_code>
<scan_code>0</scan_code>
</buttonvalue>
<buttonvalue>
<vk_code>84</vk_code>
<make>false</make>
<scan_code>20</scan_code>
<scan_code>0</scan_code>
</buttonvalue>
<buttonvalue>
<vk_code>0</vk_code>
<make>false</make>
<scan_code>0</scan_code>
</buttonvalue>
</buttondata>
</buttons>
</Layer>
The key code sequence for this example "Test" is as follows:
make SHIFT ->make ‘t’ ->break ‘t’ ->break SHIFT -> make ‘e’ -> break ‘e’ ->make ‘s’
-> break ‘s’ -> make ‘t’ -> break ‘t’

PrehKeyTec GmbH TK-TechDoc_RevB_en.doc - 2008-07-31 Page 20/40
<Text>.xml
The configuration of the text fields is made in this section. One or multiple text fields
can be defined here.
Description of the elements
<name>
Name of the text file without the additional ".xml".
Example: <name>food_txt</name>
<showinlayer>
The created text is shown in the layout defined in <showinlayer>. When the layout is
displayed on the LCD, it automatically out puts all text files <Text>.xml defined within
this layout.
Example: <showinlayer>food</showinlayer>
<keytostart>
This is a POS Key that starts the Text automatically. POS keys can be programmed
using the WinProgrammer on the keyboard section of the device. If this is not
required, the default value 0 is used.
Value range: 0-128.
Example: <keytostart>1</keytostart>
<erasedisplay>
This function erases the complete LCD display before displaying a text or text field.
Possible values are: true, false.
Example: <erasedisplay>false</erasedisplay>
<textfield>
Contains all the entries and characteristics of the text field.
Example: <textfield>
<xpixel>0</xpixel>
<ypixel>0</ypixel>
<wpixel>138</wpixel>
<hpixel>200</hpixel>
<font>0</font>
<inverse>false</inverse>
<setunderline>false</setunderline>
<textstring>label1</textstring>
<textmode>0</textmode>
</textfield>
Other manuals for MCI TouchKey
1
Table of contents
Other PrehKeyTec Keyboard manuals
