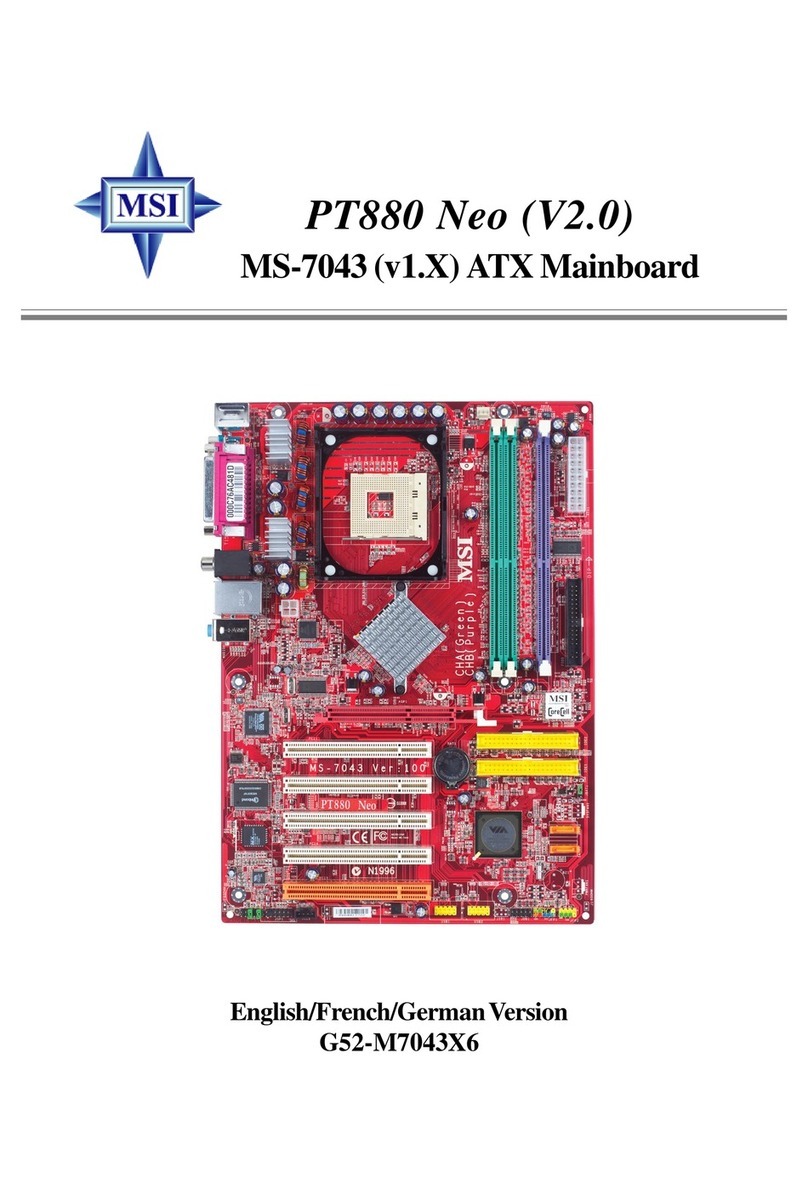
MSI MS-6791 User manual

1-1
Getting Started
Thank you for purchasing the MS-6791 v1.x M-ATX
mainboards. The MS-6791 is a superior computer motherboard
based on SiS648FX/661FX and SiS963/963L chipsets for
optimal system efficiency. Designed to fit the advanced Intel®
Pentium®4 Northwood/Prescott processors in the 478 pin
package, the MS-6791 delivers a high performance and
professional desktop platform solution.
Getting Started

1-2
MS-6791 M-ATX Mainboard
Mainboard Specifications
CPU
hSupports Socket 478 for P4 processor with 400/533/800 MHz (100/133/200
MHzQDIR)
hCore frequency up to 3.2GHz or above
Chipset
hSiS®648FX/661FX chipsets
- Supports Intel Pentium 4 processors with data transfer rate up to 800MHz
- Supports 64-bit high performance DDR400/DDR333/DDR266 memory
controller
- Supports AGP 8X/4X interface at 0.8v or 4x at 1.5v with fast write transaction
- Supports on-board graphics core (SiS 661FX only)
hSiS®963/963L chipsets
- Dual-IDE ATA 66/100/133
- ACPI & PC2001 compliant enhanced power management
- Integrated audio controller with AC97 interface
- Integrated high speed USB 2.0 controller, 480Mb/s
MainMemory
hSupports two 184-pin DDR 200/266/333/400 DIMMs
hSupports up to 2GB memory size without ECC
Slots
hOne AGP (Accelerated Graphics Port) slot
- AGP specification compliant
- Supports AGP 3.0 4x/8x
hThree 32-bit PCI bus slots
On-Board IDE
hAn IDE controller on the SiS®963/963L chipset provides IDE HDD/CD-
ROM with PIO, Bus Master and Ultra DMA66/100/133 operation modes
hCan connect up to 4 IDE devices
On-Board Peripherals
hOn-Board Peripherals include:
- 1 floppy port supports 2 FDDs with 360K, 720K, 1.2M, 1.44M and
2.88Mbytes

1-3
Getting Started
- 2 serial ports (COM A + COM B)
- 1 parallel port supports SPP/EPP/ECP mode
- 1 audio port (Line-in, Line-out, Mic-in)
- 6 high speed USB 2.0 ports (Rear * 4/ Front * 2)
- 1 IrDA connector for SIR
- 1 RJ-45 LAN jack (Optional)
Audio
h6-channel audio codec RealTek ALC650/655 (Optional)
h2-channel audio codec RealTek ALC202A (Optional)
LAN (Optional)
hRealtek 8100C
BIOS
hThe mainboard BIOS provides “Plug & Play” BIOS which detects the
peripheral devices and expansion cards of the board automatically.
hThe mainboard provides a Desktop Management Interface (DMI) function
which records your mainboard specifications.
Dimension
hM-ATX Form Factor: 24.4cm (L) x 24.4cm (W)
Mounting
h6 mounting holes
Others
hACPI support, including STR/STD (S3/S4)
hSupport WOM/WOL
hPC2001 compliant

1-4
MS-6791 M-ATX Mainboard
JUSB1 JUSB2
Mainboard Layout
MS-6791 v1.X M-ATX Mainboard
BATT
+
DDR1
DDR2
J1394_1 J1394_2
JFP1
JMR1
JCI1
JSMI1
JUSB1
JUSB3
JUSB4
JUSB2
ATX
PowerSupply
NBFAN1
CPUFAN1
PWRFAN1
PWRSW1
CHSFAN1
JBAT1
JGLED1
BIOS_WP1
BIOS
IDE1
IDE2
To p : P a ra l l e l P o r t
Bottom:
COM A
COM B (SiS648FX)
VGA (SiS661FX)
Top : mouse
Bottom: keyboard
Top: LAN Jack
Bottom: USB
ports
USB ports
MDM_IN1
JLAN1
JCPU_TEMP
CD_IN1
CD_IN2
JAUD1 JAUDIO1
Codec
Realtek
8801B
RealTek
8100C
Winbond
W83697HF
JPW1
FDD1
AGP Slot
PCI Slot3
PCI Slot2
PCI Slot1
T:
Line-Out
B:Mic
Line-In
M:
SiS
648FX/661FX
SiS
963/963L
IR1
JWOL1
JSP1
JUSB3 JUSB4

2-1
Hardware Setup
Chapter 2. Hardware
Setup
This chapter tells you how to install the CPU, memory
modules, and expansion cards, as well as how to setup the
jumpers on the mainboard. Also, it provides the instructions on
connecting the peripheral devices, such as the mouse, keyboard,
etc.
While doing the installation, be careful in holding the
components and follow the installation procedures.
Hardware Setup

2-2
MS-6791 M-ATX Mainboard
Quick Components Guide
JSP1, p.2-23
MDM_IN1, p.2-22
DDR DIMMs, p.2-7
CPU, p.2-3
Back Panel I/O,
p.2-10
CPUFAN, p.2-17
CHSFAN, p.2-17
JBAT1, p.2-29
JCI1, p.2-27
IDE1, IDE2,
p.2-19
PWRFAN1, p.2-17
IR1,p.2-28
CONN1, p.2-9
JLEG1, p.2-18
FDD1, p.2-16
JFP1, p.2-18
JMR1, p.2-26
JWOL1, p.2-26
JGLED1, p.2-27
JAUDIO1, p.2-20
NBFAN, p.2-17
JPW1, p.2-9
PWRSW1, p.2-28
USB Ports, p.2-24
JSMI1, p.2-27
J1394_1/2, p.2-25
JAUD1, p.2-20
BIOS_WP1,p.2-30
JLAN1, p.2-30
CD_IN1, p.2-22
CD_IN2, p.2-22
JCPU_TEMP, p.2-28

2-3
Hardware Setup
Central Processing Unit: CPU
CPU Core Speed Derivation Procedure
If CPUClock = 100MHz
Core/Bus ratio = 16
then CPU core speed = Host Clock x Core/Bus ratio
= 100MHz x 16
= 1.6GHz
The mainboard supports Intel®Pentium®4 Northwood/Prescott processor
in the 478 pin package. The mainboard uses a CPU socket called PGA478 for
easy CPU installation. When you are installing the CPU, make sure the CPU
hasaheatsinkandacoolingfanattachedonthetoptopreventoverheating. If
you do not find the heat sink and cooling fan, contact your dealer to purchase
and install them before turning on the computer.
MSIRemindsYou...
Overheating
Overheating will seriously damage the CPU and system, always
make sure the cooling fan can work properly to protect the CPU
from overheating.
Overclocking
This motherboard is designed to support overclocking. However,
please make sure your components are able to tolerate such
abnormal setting, while doing overclocking. Any attempt to
operate beyond product specifications is not recommended. We
do not guarantee the damages or risks caused by inadequate
operation or beyond product specifications.
Memory Speed/CPU FSB Support Matrix
FSB Memory DDR266
400MHz
DDR333 DDR400
533MHz
800MHz
N/A
OK OK
N/A
N/A
OK OK
OK OK

2-4
MS-6791 M-ATX Mainboard
CPU Installation Procedures for Socket 478
1. Please turn off the power and
unplug the power cord before
installing the CPU.
2. Pull the lever sideways away
from the socket. Make sure
to raise the lever up to a 90-
degree angle.
3. Look for the gold arrow. The
gold arrow should point to-
wards the lever pivot. The
CPU can only fit in the correct
orientation.
4. If the CPU is correctly
installed, the pins should be
completely embedded into the
socket and can not be seen.
Please note that any violation
of the correct installation pro-
cedures may cause permanent
damages to your mainboard.
5. Pressthe CPUdownfirmlyinto
the socket and close the lever.
As the CPU is likely to move
whiletheleverisbeingclosed,
always close the lever with
your fingers pressing tightly
ontopof the CPUtomakesure
the CPU is properly and com-
pletely embedded into the
socket.
Open Lever
90 degree
Sliding
Plate
Close
Lever
Press down
the CPU
Gold arrow
Gold arrow
Gold arrow
Correct CPU placement
Incorrect CPU placement
X
O

2-5
Hardware Setup
InstallingtheCPUFan
As processor technology pushes to faster speeds and higher
performance,thermalmanagement becomes increasinglyimportant.To dissipate
heat, you need to attach the CPU cooling fan and heatsink on top of the CPU.
Follow the instructions below to install the Heatsink/Fan:
2. Position the heatsink onto the reten-
tion mechanism.
1. Locate the CPU and its retention
mechanism on the motherboard.
3. Mount the fan on top of the heatsink.
Press down the fan until its four clips
get wedged in the holes of the reten-
tion mechanism.
4. Press the two levers down to fasten
the fan. Each lever can be pressed
down in only ONE direction.
retention mechanism
levers

2-6
MS-6791 M-ATX Mainboard
5. Connect the fan power cable from the mounted fan to the 3-pin fan power connector
on the board.
fan power cable
NOTES

2-7
Hardware Setup
Themainboardprovides 2 slotsfor184-pin DDR SDRAMDIMM(Double
In-Line Memory Module) modules and supports the memory size up to 2GB.
Youcan installPC3200/DDR400,PC2700/DDR333, PC2100/DDR266modules
on the DDR DIMM slots (DIMM 1~2).
Memory
DDR Slots
Introduction to DDR SDRAM
DDR (Double Data Rate) SDRAM is similar to conventional SDRAM,
but doubles the rate by transferring data twice per cycle. It uses 2.5 volts as
opposedto3.3volts used inSDRSDRAM,and requires 184-pinDIMMmodules
rather than 168-pin DIMM modules used by SDR SDRAM. High memory
bandwidth makes DDR an ideal solution for high performance PC, workstations
and servers.

2-8
MS-6791 M-ATX Mainboard
Installing DDR Modules
1. The DDR DIMM has only one notch on the center of module. The module
will only fit in the right orientation.
2. Insert the DIMM memory module vertically into the DIMM slot. Then
push it in until the golden finger on the memory module is deeply inserted
in the socket.
3. The plastic clip at each side of the DIMM slot will automatically close.
MSIRemindsYou...
You can barely see the golden finger if the module is properly
inserted in the socket.
Volt Notch
Install at least one DIMM module on the slots. Memory modules can be
installed on the slots in any order. You can install either single- or double-
sided modules to meet your own needs.
Memory modules can be installed in any combination as follows:
DDR DIMM Module Combination
S: Single Side D: Double Side
Slot Memory Module Total Memory
DIMM 1
(Bank 0 & 1) S/D 64MB~1GB
DIMM 2
(Bank 2 & 3) S/D 64MB~1GB
Maximum System Memory Supported 64MB~2GB

2-9
Hardware Setup
Power Supply
The mainboard supports ATX power supply for the power system. Before
inserting the power supply connector, always make sure that all components
are installed properly to ensure that no damage will be caused.
ATX 20-Pin Power Connector: CONN1
This connector allows you to connect to an ATX power supply. To
connect to the ATX power supply, make sure the plug of the power supply is
inserted in the proper orientation and the pins are aligned. Then push down
the power supply firmly into the connector.
ATX12VPowerConnector:JPW1
This 12V power connector is used to provide power to the CPU.
JPW1
PIN SIGNAL
1 GND
2 GND
3 12V
4 12V
JPW1 Pin Definition PIN SIGNAL
11 3.3V
12 -12V
13 GND
14 PS_ON
15 GND
16 GND
17 GND
18 -5V
19 5V
20 5V
PIN SIGNAL
1 3.3V
2 3.3V
3 GND
45V
5 GND
65V
7 GND
8 PW_OK
9 5V_SB
10 12V
CONN1 Pin Definition
13
42
11
CONN1
10
1
20
MSI Reminds You...
Power supply of 300 (and up) watt is highly recommended for
system stability.

2-10
MS-6791 M-ATX Mainboard
The back panel provides the following connectors:
Back Panel
Mouse Parallel
USB
COM USB
Keyboard
L-in
MIC
L-out
LAN
(Optional)
VGA
For SiS 661FX
Mouse Parallel
USB
COM USB
Keyboard
L-in
MIC
L-out
LAN
(Optional)
COM
For SiS 648FX

2-11
Hardware Setup
Keyboard Connector
The mainboard provides a standard PS/2®keyboard mini DIN connector
for attaching a PS/2®keyboard. You can plug a PS/2®keyboard directly into
this connector.
PIN SIGNAL DESCRIPTION
1 Keyboard DATA Keyboard DATA
2 NC No connection
3 GND Ground
4 VCC +5V
5 Keyboard Clock Keyboard clock
6 NC No connection
Pin Definition
PS/2 Keyboard (6-pin Female)
21
3
4
5
6
Mouse Connector
The mainboard provides a standard PS/2®mouse mini DIN connector
for attaching a PS/2®mouse. You can plug a PS/2®mouse directly into this
connector. The connector location and pin assignments are as follows:
PIN SIGNAL DESCRIPTION
1 MouseDATA MouseDATA
2 NC No connection
3 GND Ground
4 VCC +5V
5 Mouse Clock Mouse clock
6 NC No connection
Pin Definition
PS/2 Mouse (6-pin Female)
21
3
4
5
6

2-12
MS-6791 M-ATX Mainboard
RJ-45 LAN Jack (Optional)
The mainboard provides one standard RJ-45 jack for connection to Local
Area Network (LAN). You can connect a network cable to the LAN jack.
Pin Definition
PIN SIGNAL DESCRIPTION
1 TDP Transmit Differential Pair
2 TDN Transmit Differential Pair
3 RDP Receive Differential Pair
4 NC Not Used
5 NC Not Used
6 RDN Receive Differential Pair
7 NC Not Used
8 NC Not Used
RJ-45 LAN Jack
USB 2.0 Connectors
The mainboard provides an OHCI (Open Host Controller Interface) Uni-
versal Serial Bus root for attaching USB devices such as keyboard, mouse or
other USB-compatible devices. You can plug the USB device directly into the
connector.
PIN SIGNAL DESCRIPTION
1 VCC +5V
2 -Data 0 Negative Data Channel 0
3 +Data0 Positive Data Channel 0
4 GND Ground
5 VCC +5V
6 -Data 1 Negative Data Channel 1
7 +Data 1 Positive Data Channel 1
8 GND Ground
USB Port Description
USB Ports
1 2 3 4
5 6 7 8

2-13
Hardware Setup
Serial Port Connectors: COM A & COM B
The mainboard offers two 9-pin male DIN connectors as serial port COM
A & COM B. The ports are 16550A high speed communication ports that
send/receive 16 bytes FIFOs. You can attach a serial mouse or other serial
devices directly to the connectors.
PIN SIGNAL DESCRIPTION
1 DCD Data Carry Detect
2 SIN Serial In or Receive Data
3 SOUT Serial Out or Transmit Data
4 DTR Data Terminal Ready)
5 GND Ground
6 DSR Data Set Ready
7 RTS Request To Send
8 CTS Clear To Send
9 RI Ring Indicate
Pin Definition
9-Pin Male DIN Connector
1 2 3 4 5
6 7 8 9
VGAConnector
The mainboard provides a DB 15-pin female connector to connect a VGA
monitor.
51
15 11
VGA Connector
(DB 15-pin)
Pin Signal Description
1 RED
2 GREEN
3 BLUE
4 N/C
5 GND
6 GND
7 GND
8 GND
9 +5V
10 GND
11 N/C
12 SDA
13 Horizontal Sync
14 Vertical Sync
15 SCL

2-14
MS-6791 M-ATX Mainboard
Parallel Port Connector: LPT1
The mainboard provides a 25-pin female centronic connector as LPT.
A parallel port is a standard printer port that supports Enhanced Parallel Port
(EPP) and Extended Capabilities Parallel Port (ECP) mode.
13 1
14
25
PIN SIGNAL DESCRIPTION
1 STROBE Strobe
2 DATA0 Data0
3 DATA1 Data1
4 DATA2 Data2
5 DATA3 Data3
6 DATA4 Data4
7 DATA5 Data5
8 DATA6 Data6
9 DATA7 Data7
10 ACK# Acknowledge
11 BUSY Busy
12 PE Paper End
13 SELECT Select
14 AUTO FEED# Automatic Feed
15 ERR# Error
16 INIT# Initialize Printer
17 SLIN# Select In
18 GND Ground
19 GND Ground
20 GND Ground
21 GND Ground
22 GND Ground
23 GND Ground
24 GND Ground
25 GND Ground
Pin Definition

2-15
Hardware Setup
Audio Port Connectors
Line Out is a connector for Speakers or Headphones. Line In is used for
external CD player, Tape player, or other audio devices. Mic is a connector for
microphones.
1/8” Stereo Audio Connectors
MSI Reminds You...
The mainboard offers 6-channel audio operation and can turn
rear audio connectors from 2-channel to 4-/6-channel audio.
For more information on 6-channel audio operation, please
refer to Appendix A: Using 4- or 6-Channel Audio Function.
Line Out
Line In
MIC

2-16
MS-6791 M-ATX Mainboard
The mainboard provides connectors to connect to FDD, IDE HDD, case,
LAN, USB Ports, IR module and CPU/System/Power Supply FAN.
Floppy Disk Drive Connector: FDD1
The mainboard provides a standard floppy disk drive connector that
supports 360K, 720K, 1.2M, 1.44M and 2.88M floppy disk types.
Connectors
FDD1
Table of contents
Other MSI Motherboard manuals

MSI
MSI K7N2GM-V User manual

MSI
MSI H6M-P30 (B3) User manual

MSI
MSI H410M PRO-C User manual

MSI
MSI MS-6532 User manual

MSI
MSI B250 GAMING PRO CARBON User manual

MSI
MSI MS-7512 User manual

MSI
MSI MS-6395 ATX User manual

MSI
MSI PRO B760M-G DDR4 User manual

MSI
MSI H270M MORTAR ARCTIC User manual

MSI
MSI A68H PC Mate User manual

MSI
MSI X299 XPOWER GAMING AC User manual

MSI
MSI PRO H610M-C EX User manual

MSI
MSI MPG Z390 GAMING PLUS User manual

MSI
MSI B560-A PRO User manual

MSI
MSI NF720DT-C43 Series User manual
MSI
MSI 955X Platinum User manual

MSI
MSI X299M GAMING PRO CARBON AC User manual

MSI
MSI MICRO ATX ZX14 User manual

MSI
MSI X299M GAMING PRO CARBON AC User manual

MSI
MSI Z370 GAMING PRO CARBON User manual