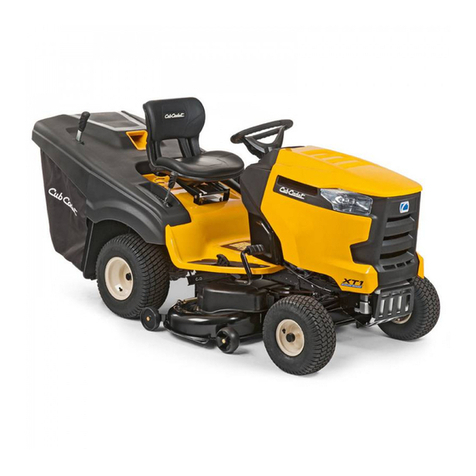
MTD DOMESTIC ROTARY LAWNMOWER User manual

DOMESTICROTARYLAWNMOWER
OWNER’SMANUAL

SAFETYINSTRUCTIONS
•Never mowwhilebarefootor wearing open sandalsor thongs. Wearlong trousersand heavy
shoes
•Knowyour controls.Read the owner’smanualcarefully. Learnhowtostop the enginequickly
inanyemergency
•Make surethe lawnisclear of sticks, stones, bones,wireand debris. Theycouldbe thrown
bythe blade
•Stop theengine anddisconnectthe sparkplug wirebeforeclearing blockages, checking, or
working onthe mower.
•Beforeusing, alwaysvisuallyinspecttosee thatblades, blade boltsandcutter assemblyare
notwornor damaged. Replacewornor damaged blades insetstopreservebalance.
DAMAGED BLADES AND WORN BOLTS ARE MAJOR HAZARDS.
•Checkall nuts, boltsand screwsoften; alwaysbe surethemower isinasafeoperating
condition. Use onlygenuine replacementparts.
•Refueloutdoorsonly. Donotsmokewhilefuellingengine. Add fuelbeforestarting theen-
gine. Never removethe cap off the fueltank or add fuelwhilethe engine isrunning or the
engine ishot. If fuelisspilled, do notattempttostartthe engine butmovethe machine away
fromthe area of the spilland avoidcreating anysourceof ignition untilfuelvapourshave
dissipated.
•Donotmowwhilstpeople, especiallychildren or petsareinthe mowingarea.
•Replacewornor faultysilencers(muffler)
•Mowonlyingood daylight.
•Never use the mower unlessthegrass catcher or guards (rearflap) provided bythe
manufacturer areinposition.
•Startthe engine carefullywithfeetwellawayfromthe blade.
•Donotoperatetheengine inaconfined spacewhereexhaustfumes(carbon monoxide) can
collect.
•Stop theengine whenever you leavethe mower, even for amoment.
•Donotallowchildren or peopleunfamiliar withthese instructions touse the mower.
•Storethe mower inawell-ventilatedroomawayfromnakedflamessuchas maybe found in
hotwater heaters.
•Donotover-speedthe engine or alter governor settings. Excessivespeedisdangerousand
shortens the mower life.
•Itisadvisabletowear suitableeyeprotection whenoperating amower.
•Turnthefueloff attheconclusion of mowingand reducethe throttlesetting during engine
run-out.
•Storefuelinacoolplaceinacontainer specificallydesigned for the purpose. Ingeneral,
plasticcontainersareunsuitable.
•Stop theengine, disconnectthe sparkplugwireand inspectthemower if :
a) the mower begins tovibrateabnormally; or
b) after striking aforeign object.
•Never cutgrass whilewalking backwards.
•Stop theengine beforepushing the mower across graveldrives, walksor roads.
•Walk, never run.
•Mowacross the faceof slopes, never up and down. Exercise extremecaution whenchanging
direction on slopes. Donotmowexcessivelysteepslopes.
•Never pickup or carryamower whenitisoperating.
CAUTION
Toavoidenginedamagedrainthe oiland fuelfromthe engine beforeturning
the lawnmower over inanydirection.
1
MANUAL CONTENTS Page
• Safetyinstructions 1
• Introduction 2
• Setting up 3
• Operation - All Models 3&4
- Mulch Models(only) 4&5
• Maintenance - AllModels 6&7
- Mulch Models(only) 8&9
• Mulch Mowing Information 8&9
• Warrantyconditions 11
CARTONCONTENTS: Quantity
• Domesticrotarylawnmower 1
• Plastickitbag (containing Owner’smanualsand handlebar fasteners) 1
• Plasticgrass catcher upper half 1
• Plasticgrass catcher lower half 1
NB. MowerswhichhavetheMulchoption willhavethe mulchplug fitted intotherear chuteof the
mower.
If when unpacking yournewlawnmowerit isfound that thereareitemsmissing contact
yournearest authorized RoverMowersservicedealeroragent.
INTRODUCTION
Congratulations on yourpurchase ofthisdomesticrotarylawnmower.
Thismanualcoversthe setting up, operation andmaintenanceof the domestic
rotarylawnmower. Please read and understand thisowner’smanualbeforeusingthe mower. If
anypointisunclear, contact RoverMowers orany RoverMowers authorized servicedealer or
agent.
Thesafetyof the user and
othersinvolved. Personal
injurymayresult shouldthis
information be
disregarded.
WARNING
Followtheseinstructions
toavoidmower damage
and possibleloss of
warranty.
CAUTION
To emphasise specialinformationthe following WARNING and CAUTION highlightsare
used.
2

3
SETTINGUP
Plasticgrasscatcherassembly
• Refer tothe “SetUpInstructions” attached tothegrass catcher lower half.
Engineoil
Oil mustbe addedbeforeattemptingtostarttheengine otherwisedamagetothe engine
willoccur.
Refer tothe engine owner’smanual.
The4strokeengine fitted tothe lawnmower isshippedwithno oil inthe sump.
Enginefuel
Refer tothe engine owner’smanual.
Useonlyfresh unleaded fuelinthelawnmower engine.
OPERATION- All mowers
Adjusting thecutheight– referfigure2.
Thelawnmower 13 heightsettings arecontrolledbythe
heightadjustmentlever locatedatthe rear righthand wheel.
• Grasp the heightadjustmentlever (1) and pull the lever
awayfromthe base todisengagethe lever fromthe
heightadjustmentrack(2).
• Move thelever either forwards or backwards tothe
desired position and releasethe lever so as toengage
inthe heightadjustmentrack.
When selecting the cutheightstand tothe rear of the machine withyour feet
wellclear of the cuttingblades.
WARNING
Figure1. Grass Catcher—Assembled
Grass Catcher
Upper Half
Grass Catcher
Lower Half
Figure2. Height adjustment
(2) (1)

Installing thegrass catcher– referfigures 3and 4.
• Raisethe rear flap of themower.
• Grasp the grasscatcher bythe top handleand position the grass catcher againsttherear of
the mower. Refer toFigure3.
• Lower the rear flap so thatthe backedge of the rear flap hooks over the matching lipon the
grass catcher. Refer toFigure4.
Removing thegrasscatcher
• Raisethe rear flap of themower torelease the grass catcher.
• Liftthe grass catcher clear of the mower and lower the rear flap.
Emptying thegrasscatcher - referfigure5.
• Remove the grass catcher (as per the instructions above).
• Tilt the grass catcher withthe opening downwards.
• Gripthe catcher handleof thegrass catcher and shake the
clippings out. Refer tofigure5.
OPERATION- Mulch Mowers(only)
Installing theMulch Plug
4
Thegrass catcher shouldonlybe fitted or removed when theengine is
stopped.Never raise the rear flap when theengine isrunning.
WARNING
Figure3. Grass catcherfitment Figure4. Grass catcherfitted
Rear Flap
Figure5. Emptying grass catcher
Themulchplug shouldonlybe fitted or removed when the engine isstopped.
Never raise the rear flap when the engine isrunning.
WARNING

OPERATION- Mulch Mowers(only)
Installing theMulch Plug (Continued)
• Withthe engine stopped, raise the rear flap of the mower and removethe grasscatcher (iffitted)
• Insertthelongrighthand sideof the mulchplug firstintothe rear chuteof the mower. Refer to
figure6.
• Rotatethe lefthandside intothe rear chuteof the mower and push itas far forwardas possible.
• Align the lugs (1) (on the underside of the mulchplug) either side of therear chute(2) then lower
the mulchplug untilitsitsdownflatontothetop of therear chuteinthe mower base.Refer to
figure7.
• Lower the rear flap.
Removing theMulchPlug
• Withthe engine stopped, raise the rear flap of the mower.
• Grasp the rear of the mulchplug andliftup and awayfromthe mower. Refer tofigure7.
• Guide the mulchplugoutbyrotating theshorter lefthandside tothe rightand then guiding the
longer righthand sectionuntilclear of the mower. Refer tofigure6.
OPERATION- All mowers
OperatorPresenceControl
• Handlemovedtowardsthe handlebars, engine and bladesarefree to
rotate. Handlereleased, engineand blades stop rotating.
To Starttheengine
Refer tothe engine owner’smanualfor detailed starting
procedure.
Ensurethatthe engine oilisatthe correctleveland that
the fueltankisfull of fresh unleaded fuel.
• Move thethrottlecontrollever tothe :- “START”
position (wherefitted) - or the “RUN” position and
primethe engine. Refer totheengine manual.
• Grasp rope handleandpullslowlyuntilresistanceisfelt.
Then pullthe cordrapidlytoovercomecompression,
preventkickbackand startengine. Repeatif necessary.
• If a“START” isfitted move thethrottlecontrol
lever tothe “RUN” position after theengine starts.
Figure6. Mulch plug installation (A) Figure7. Mulch plug installation (B)
(1)
(2)
5
Figure8. ThrottleControl -
(“START” Position)
Figure9. ThrottleControl -
(“STOP” Position)
Tostop

6
MAINTENANCE - Allmowers
To Stoptheengine
Move thethrottlecontrollever tothe “STOP” position.Refer figure9.
Waittill theengine comes toacompletestop beforeremoving or fitting thegrass catcher or mulch
plugtothe mower, or attempting anymaintenanceworkon themower.
Engineaircleaner
Refer tothe engine owner’smanualfor detailed maintenanceinstructions.
Theengine air cleaner elementsmustbe serviced after every25 hoursof normalmowing. The
elementsmustbeserviced moreregularlyif the mower isused industyconditions. Replace
immediatelyif the elementisdamaged.
Sparkplug
Refer tothe engine owner’smanualfor detailed maintenanceinstructions.
For bestresults, remove thesparkplug every50 hoursfor gap checking and replaceevery100
hoursof use. Replacethe sparkplugatanytimeif itisfound thatthe electrodes arepittedor
burned or the porcelaincracked. For replacementrefer toengine owner’smanualfor correctspark
plug.
Muffler
Checkthe condition of the muffler periodicallyfor rustand cracks. Replaceif found tobe damaged
as thiscan lead toincreased exhaustnoise. Replaceonlywithagenuineoriginalequipmentpart.
Blades - referfigure10.
Checkthe condition of the bladesand centralfastenersatregular intervals, or after striking asolid
object, or ifthe mower beginstovibrateabnormally. The bladeswithuse,willlose their sharp
edge andthe qualityof the grass finish will deteriorate. When thishappens, allthe blades should
be removed and replaced withanewsetof blades. Alwaysuse genuine Rover replacement
blades andonlyreplaceblades insetstomaintainbalance.
Cutting Assembly
• Withthe engine stopped, removethe sparkpluglead and grasscatcher or mulchplug.
• Setthe heightof cutlever tothe highcutposition, and foldthe handlebars.
• Tilt the mower so thesparkplug isup.
• Inspectthecutting assemblyfor damage and wear.
• Checkthe discretaining bolts. Tightenthe centreboltto57-62Nm.
• Returnthe mower toitsnormalposition and re-attachthesparkplug lead.
Beforecarrying outanymaintenanceon the mower removethe sparkpluglead
fromthe sparkplugtopreventaccidentalstarting.
WARNING
Alwaysensurethe engine isstoppedand the sparkplug leadisremovedbefore
attempting anymaintenanceon the mower.
Securethe mower safelywhen tilted upwards toaccess the underside.
WARNING

7
MAINTENANCE - Allmowers
BladeChange- referfigures 10 and 11.
• Withthe engine stopped, sparkplug lead andgrass
catcher or mulchplug removed, open the discharge
flap and prop intheopen position. Refer tofigure10.
• Setthe mower tothe high cutposition and foldthe
handlebar down.
• Rotatethe cuttingassemblycarefullytoaccess the
blade retaining bolts.Refer tofigure10.
• Usinggloves and asuitablespanner, remove the
blade assembly.
• Retainthe “D” plates and discardtheblades and
fasteners.
NB. Mowersfittedwithacircular cutting discmustbe
fitted witha“D” Plate(as showninfigure11). These
partsareavailablefromany RoverMowers authorized
servicedealer or agent.
• Fitnewblades and fasten inthe correctorder. Refer to
figure11.
• Tightenthe blade retaining nutsfirmlyto16Nm.
• Remove the flap prop, closethe discharge flap and re-
attachthe sparkplug lead.
Cleaning
Toensuresafeoperation and long lifeitisrecommendedtocleanthemower after everyuse. This
willpreventcorrosion, overheating and firerisk whileensuring ultimateperformance.
Washport (wherefitted)
• Placethemower outdoorson aflatsurface.
• Setthe heighttomaximum.
• Withthe engine stopped connectagarden hose withasnap on
connection, tothewashportfittedtothe inside faceof the
cutting chamber. Refer figure12.
• Turnthe gardenhose on.
• Returntothe mower and startthe engine and run atfullspeed
for 1minute.
• Stop the engine and turnoff the garden hose.
• Remove the garden hose fromthe washport.
• Inspecttheunderside of themower, if notcompletelyclean
use garden hose toflushoutremaining debris.
Alwaysensurethe engine isstoppedand the sparkplug leadisremovedbefore
attempting anymaintenanceon the mower.
Alwaysreplaceblades and bladefixingsincompletesetstomaintainbalance.
WARNING
Figure11. Blade Attachments
“D”plate
Figure12. Washport Connection
Figure10. Blade change
Prop
Flap

8
Cleaningthe Undersideof the Mower
• Placethemower outdoorson aflatsurface.
• Setthe cutheighttomaximum.
• Withthe engine stopped, remove the grass catcher or mulchplug and liftopen the discharge
flap.
• Useagarden hose towash outallthe grass clippings.
• Inspecttheunderside and repeatthecycleif still notclean.
Cleaningthe Upperside of the Mower
• Useadryclothor softbrush toremoveallloose clippings.
• Useadampclothwithmilddetergenttoclean awayoilor other grime.
• Wash the grass catcher and/or mulchplug separatelyfromthe mower withahose. Wash all
clippings outof the inside, outside andfromthe grass catcher mesh.
• Letthe mower drybeforestoring.
MAINTENANCE - Mulch mowers(only)
Mulching Equipment
For optimummulching performance
• Themulchbladesaretobe keptsharp.
• Maintainthe blade sharpening anglewhen sharpening.
• Keep thecutting edge feather free whensharpening.
• Keep theundersideof the mower deckand themulchplug free of build-up.
• Refer tothe “Cleaning” section on page 7and 8.
MULCHMOWINGINFORMATION
Somemowersarefitted withanoptionfor mulchmowing.
Amulchplug issupplied withthese mowersand itisinstalled inthe rear discharge chute(as
notedinthe “OPERATION” sectionof thismanual) toperformmulchmowing.
Thefollowing information provides adviceon mulchmowing.
MULCHMOWING
Themulchmowing setup reduces the grass clippings intoveryfine particles.
Thedesign allowsfor the even distribution of thegrass particles atthe base of the lawn.
Themulched clippings can then:
• Break downquickly, releasingnutrientsintothe soil, savingon fertilizer costs.
• Reduceevaporation of moisturefromthe soilwhichreduces watering costsandeffort.
• Helptocontroltemperatureextremes protecting the rootsof the grass.
• Assistincontrollingsoilerosion.
Alwaysensurethe engine isstoppedand the sparkplug leadisremovedbefore
attempting anymaintenanceon the mower.
CAUTION
Donothose theengine aswater can damage the air cleaner and ignitionsystem.
CAUTION

9
MULCHMOWINGINFORMATION(continued)
BENEFITS TOYOUR LAWN
Researchhas shownthatlawns areusuallycut too short,
Grass, likeanyother plantlife, relies on photosynthesistoregenerateand survive.
Reduced leaf size (fromcutting toolow) can seriouslyeffectalawnby:
• Makingiteasypreyfordisease.
• Encouraging weeds totake hold.
• Exposingthe soilto:
- greater evaporation
- temperatureextremes; and
- erosion
Raisingthe cutheightand using mulchmowing followsthe best practice for nurturing ahealthier
moreattractivelawnwithlesswater usage.
BENEFITS FORYOU
Because you mulchas you mowthe timeand costsavingsarealso significant:
• Eliminatingraking of leaves beforemowing (Mulchmowingpicks up and convertsfallen
leaves intomulch).
• Eliminatingraking of cutgrass
• Saves timespentemptying the catcher.
• Automaticallydisposing of grass clippings.
• Eliminatingthe need todisposeof clippings atthe refuse tip.
USEFULMULCHMOWINGTIPS
Mulchmowingisan artformand toproducethe bestresultsconsistently, followthese usefulhints:
• Donot attempt tomulch ifthe grass istoo wet.
Wetgrass tends toclumptogether and does notevenlyspread out.
Italso clogs up the underside of the base.
• Donot mulchmowon too lowacutting height.
Remember the maximumcutshouldbe 25mmoff the topof the grass, or 1/3rdthe grass
(blade) height, whichever isthe lesser amount. Refer tofigure13.
• Donot push the mowertoo fast.
Toobtainthe bestfinish itmaybe necessary
toregulatetheground speed.
• Run the engine at full throttle.
Running the engineatlowspeed doesnot
allowthe bladestomulchthe grass efficiently.
• Keep the mulch bladessharp.
Themulchbladesaredesignedtocutand re-
cutthe bladesof grass.
If the mulchblades arenotkeptsharp,
mulching performancewillbe reduced.
• Keep the undersideofthe mowerand
mulch plug clean.
Build-up of grass under the mower baseblocks the airflowcreated bythe mulchblade and
reduces the mulching performance.
If the conditionsformulch mowing arenot idealand someclipping trailsarevisibleafter
cutting it may be necessaryto:
1. Fitthe grass catcher and catchmow.
2. Re-mowover the visibleclippings
3. Raise the cutheight.
4. Rake the clippingsup after mowing.
Figure13. Grass height

10

WarrantyConditions
AustraliaOnly
MTDProductsAustraliaPty. Ltd. warrantthatthismachine isfree fromdefectsinmaterialand
workmanship.Thiswarrantyislimited tomaking goodor replacing anypartwhichappearsupon
inspection bythe manufacturer or hisagenttobe defectiveinmaterialor workmanship.
Thewarrantyfor the engine usedtopower thismachine maydiffer fromthe warrantyfor the other
components. Refer tothe engine warrantystatementintheEngine Owner’sManualwhichhas
been included withthismachine. Asthe warrantymaydiffer, you areadvised toread theengine
warrantycarefully.
For other itemsthiswarrantyshallapplyfor aperiod of 12 monthsfromdateof purchase for
domesticuse only. However these itemsare not warranted for commercialor industrialuse.
Thiswarrantydoes notobligatethe manufacturer, hisagentsor dealerstobear thetransportcosts
incurred inthe repair or replacementof anydefectivepart. Thiswarrantyexcludes fair wear and
tear, or anydamage causedbymisuse or abuse. Partssuchas blades, blade bolts, V-belts, and
sparkplugs,whichcan be subjected touse beyond their normalintended workingcapacityare
alsoexcluded.
Thiswarrantyisvoidif partsother than genuine have been usedor if repairsor alterationshave
been made withoutthemanufacturer’swritten authority. The above warrantydoes notexclude any
condition or warrantyimplied bythe Trade Practices Act1974 or anyother relevant
legislation whichimplies anycondition whichcannotbe excluded.
REMEMBER:
PROOFOFPURCHASE ISTHE RESPONSIBILITYOFTHE OWNER AND ISRECOMMENDED
PRIOR TOWARRANTYWORK BEING UNDERTAKEN. REPAIRS MUSTBE CARRIED OUT
BYANAUTHORISED DEALEROR AGENT AND GENUINESPAREPARTS MUSTBE USED
OR YOUR WARRANTYWILL BE VOID.
MTDProductsAustralia Pty. Ltd. reservesthe right tomakechangesand add improvementstoitsproduct at
anytimewithout noticeorobligation. The Companyalsoreservesthe right todiscontinue manufactureof any
product at itsdiscretion at anytime.
Onlinewarrantyregistration:
www.rovermowers.com.au
ForyourRecord:
RetailersName: .............................................Address: ...................................................................
Phone No: ......................................................ModelNo: ................................................................
SerialNo: .......................................................Dateof Purchase: ....................................................
A.B.N. 96 004 873 572
MTDProductsAustraliaPty. Ltd. P.O. Box376 Dandenong Vic. Australia3175
Customer ServicePhone Number: 07 3213 0233
04016593 ©Copyright
9-2010
11
Revision B
Table of contents
Other MTD Lawn Mower manuals
Popular Lawn Mower manuals by other brands

Craftsman
Craftsman 3One 917.380542 owner's manual

Husqvarna
Husqvarna RC 318T AWD Operator's manual

STABILO
STABILO Eco Wheeler ST 401 Translation of the original instructions

Husqvarna
Husqvarna CTH 182T instruction manual

Simplicity
Simplicity 2500 Series parts manual

GreenWorks
GreenWorks GD40LM45 user manual