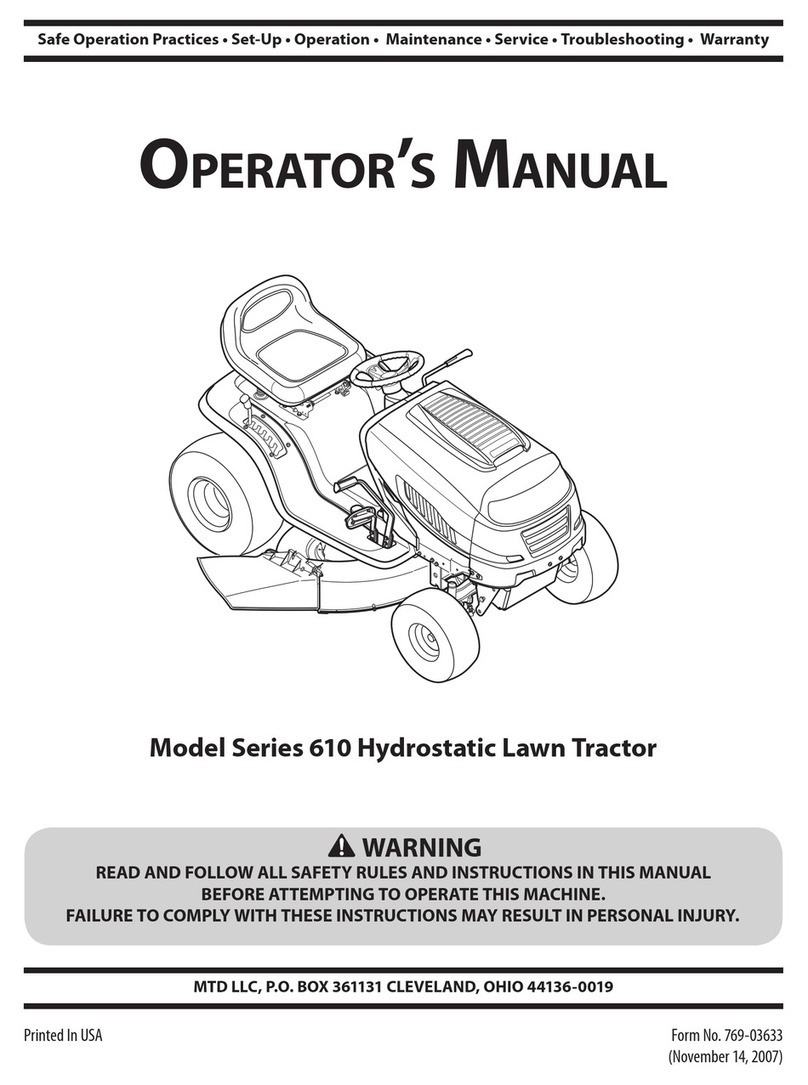
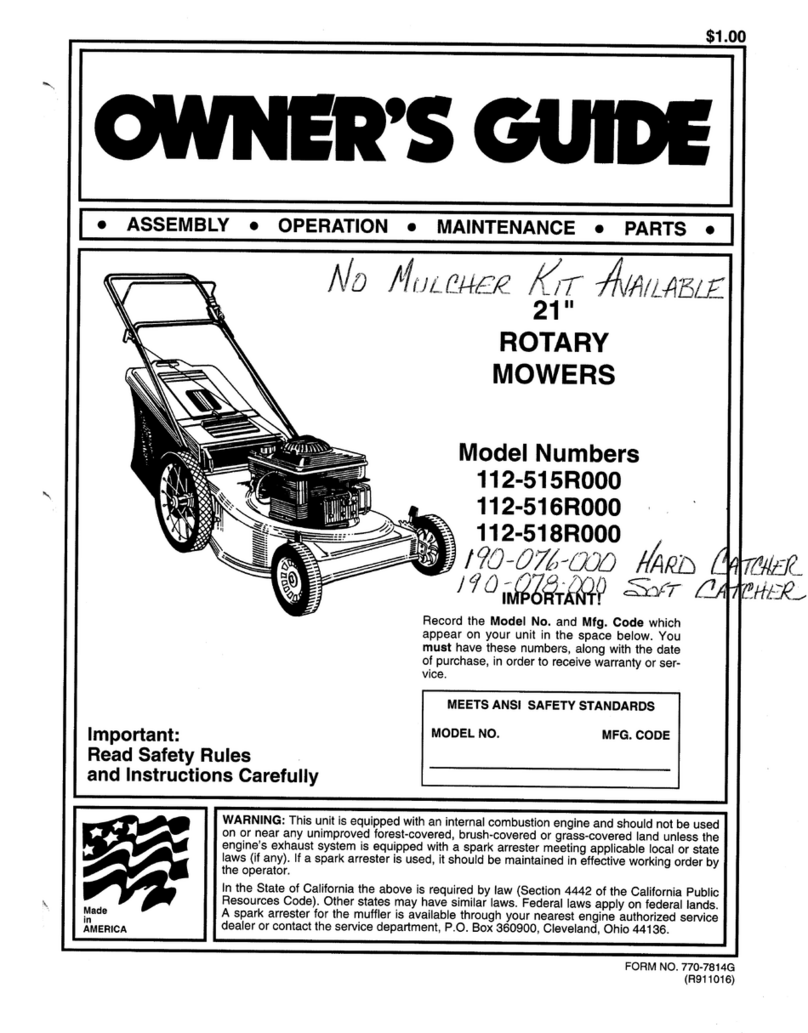
MTD Series 830 User manual

Safety • Assembly • Operation • Tips &Techniques • Maintenance • Troubleshooting • Parts Lists • Warranty
OF AOAL
\
21=inch Rotary Mower- Model Series 830
iMPORTANT
READ SAFETY RULES AND iNSTRUCTiONS CAREFULLY BEFORE OPERATION
Warning: Thisunitisequippedwithan internalcombustionengineandshouldnotbeusedon or nearanyunimprovedforest-covered,brush-
coveredor grass-coveredlandunlesstheengine'sexhaustsystemisequippedwitha sparkarrestermeetingapplicablelocalor statelaws(if any).
If a sparkarresterisused,it shouldbemaintainedineffectiveworkingorderbytheoperator.IntheStateofCaliforniatheaboveisrequiredbylaw
(Section4442oftheCaliforniaPublicResourcesCode).Otherstatesmayhavesimilarlaws.Federallawsapplyonfederallands.A sparkarrester
forthemufflerisavailablethroughyournearestengineauthorizedservicedealeror contacttheservicedepartment,RO.Box361131Cleveland,
Ohio44136-0019.
PRINTEDIN U.S.A MTD LLC, P.O. BOX 361131 CLEVELAND, OHIO 44136-0019 FORMNO.769-03031
12/22/2006

This Operator's Manual is an important part of your new lawn mower, it will help you assemble,
prepare, and maintain the unit for best performance. Please read and understand what it says.
Table of Contents
Slope Gauge ........................................................ 3
Safe Operation Practices ................................... 4
Setup and Adjustment ....................................... 6
Operating Your Lawn Mower .............................. 8
Maintaining Your Lawn Mower ......................... 10
Troubleshooting ................................................ 14
Off-Season Storage and Safety Labels .......... 15
Parts List ........................................................... 16
MTDLLCreservestherighttochangeproductspecifications,designs,andequipmentwithoutnoticeandwithoutincurringobligation.
Finding and Recording Model Number
BEFOREASSEMBLINGYOURNEWEQUIPMENT,
pleaselocatethe modelplateon theequipmentand
copythe informationto thesamplemodelplatepro-
videdto the right.Youcan locatethe modelplateby
standingat theoperatingpositionand lookingdown
atthe rearofthe deck.Thisinformationwillbe neces-
saryto usethe manufacturer'swebsite,toobtain
assistancefromtheCustomerSupportDepartment,
orwhencontactingan authorizedservicedealer.
Model Number
www.mtdproducts.com
Serial Number
MTD LLC
PoO= BOX 361131
CLEVELAND, OH 44136
330-220-4683
800-800-7310
Customer Support
Please do NOT return the unit to the retailer from which it was purchased, without first
contacting Customer Support.
Ifyou have difficultyassemblingthis productor have anyquestionsregardingthe controls, operation,or maintenanceof this
unit,youcanseek helpfromthe experts.Choosefrom the options below:
• Visitwww.mtdproducts.com
• Call a CustomerSupport Representativeat 1-800-800-7310.
• The engine manufacturer is responsiblefor all engine-relatedissueswith regardsto performance,power-rating,specifica-
tions,warranty and service. Pleasereferto the engine manufacturer'sOwner's/Operator's Manual,packedseparatelywith
your unit,for moreinformation.
2

>:.
G.)
o9
(13
(13
O
O
C
::>.,
E
c_
O
G.) c5
_- (13
o9 .oo
G.) o9
o -_
O9 C:_
G.) O9
C C
_ o
(13
-_ o_
OC
(13
c_
0
o3 _,_
0
C
o9 0
_ a
Sightandh01dthis levelwith a verticaltree...
m_ or a cornerof a building...
|
I__ or a fence post
|
| |
do;
-- fine (repros
I _ _ erlts a 75o
15°
cO

WARNING
Thissymbolpoints
out importantsafety
instructionswhich,if
notfollowed,could
endangerthe personal
i safetyand/or property
I ofyourselfand others.
Readandfollowall
instructionsinthis
manualbeforeat-
temptingto operate
i this machine.Failure
I to complywith these
instructionsmay result
i in personalinjury.When
youseethis symbol.
i HEED ITS WARNING!
i Your Responsibility
Restrictthe use
ofthis powermachine
to personswho read.
i understand
andfollow thewarnings
and instructions
I. =nthis manual
and onthe machine.
WARNING: EngineExhaust,some of itsconstituents,and certainvehiclecompo-
nentscontain or emitchemicals knownto Stateof Californiato cause cancer and
birth defectsor other reproductiveharm.
DANGER: This machine was builtto be operatedaccordingto the rulesfor safeoperation in this
manual.As with anytypeof powerequipment,carelessnessor erroronthe part ofthe operator
can resultin serious injury.This machineis capableof amputatinghandsand feet and throwing
objects. Failureto observethe following safety instructionscouldresult in serious injury or death.
Children
Tragicaccidentscanoccurifoperatorisnotalertto presence
ofchildren.Childrenareoftenattractedtomowerand mowing
activity.Theydonot understandthe dangers.Neverassume
thatchildrenwill remainwhereyoulastsawthem.
1. Keepchildrenoutofthe mowingareaand underwatchful
careofa responsibleadultotherthanthe operator.
2. Bealertandturnmoweroffif achildentersthearea.
3. Beforeand whilemovingbackwards,lookbehindanddown
forsmallchildren.
4. Useextremecarewhenapproachingblindcorners,
doorways,shrubs,trees,or otherobjectsthatmayobscure
yourvisionofachildwhomayrunintothe mower.
5. Keepchildrenawayfromhotor runningengines.Theycan
sufferburnsfroma hotmuffler.
6. Neverallowchildrenunder14yearsoldto operateapower
mower.Children14yearsoldandovershouldreadand
understandoperationinstructionsandsafetyrulesinthis
manualandshouldbetrainedandsupervisedbyaparent.
General Operation
1. Readthis operator'smanualcarefullyin its entiretybefore
attemptingtoassemblethismachine.Read,understand,
andfollowall instructionsonthe machineandin the
manual(s)beforeoperation.Becompletelyfamiliarwith
thecontrolsandthe properuseofthis machinebefore
operatingit. Keepthis manualin a safeplaceforfuture
andregularreferenceandfor orderingreplacementparts.
2. Thismachineisaprecisionpieceof powerequipment,
nota plaything.Therefore,exerciseextremecautionat all
times.Yourunithas beendesignedto performonejob: to
mowgrass.Do notuseit for anyotherpurpose.
3. Neverallow childrenunder 14yearsoldto operatethis
machine.Children14yearsoldand overshouldreadand
understandthe instructionsinthis manualandshould
betrainedand supervisedby a parent.Onlyresponsible
individualswhoarefamiliarwiththeserulesofsafe
operationshouldbeallowedto usethismachine.
4. Thoroughlyinspectthe areawherethe equipmentisto
beused.Removeall stones,sticks,wire,bones,toys
andotherforeignobjects,whichcouldbetrippedoveror
pickedupandthrownbythe blade.Thrownobjects can
causeseriouspersonalinjury.Planyourmowingpattern
toavoiddischargeofmaterialtowardroads,sidewalks,
bystandersandthe like.Also,avoiddischargingmaterial
againsta wallor obstruction,whichmaycausedischarged
materialto ricochetbacktowardthe operator.
5. Tohelpavoidbladecontactorathrownobjectinjury,
stayinoperatorzonebehindhandlesandkeepchildren,
bystanders,helpersandpetsatleast75feetfrom mower
whileit is inoperation.Stop machineifanyoneenters
area.
6. Alwayswearsafetyglassesor safetygogglesduringopera-
tionandwhile performinganadjustmentor repairtoprotect
youreyes.Thrownobjectswhich ricochetcancauseserious
injurytothe eyes.
7. Wearsturdy,rough-soledworkshoesand close-fitting
slacksandshirts. Shirtsandpantsthatcoverthe armsand
legsandsteel-toedshoesarerecommended.Neveroperate
this machinein barefeet,sandals,slipperyor light-weight
(e.g.canvas)shoes.
8. Do notputhandsorfeet nearrotatingpartsor undercutting
deck.Contactwithbladecanamputatehandsandfeet.
9. Amissingor damageddischargecovercancauseblade
contactor thrownobject injuries.
10.Manyinjuriesoccurasa resultofthe mowerbeingpulled
overthefoot duringa fall causedby slippingor tripping.
Do notholdontothe mowerifyouare falling;releasethe
handleimmediately.
11.Neverpullthe mowerbacktowardyouwhileyouare
walking.If youmust backthe mowerawayfroma wallor
obstructionfirstlookdownand behindtoavoidtrippingand
thenfollowthesesteps:
a. Stepbackfrommowertofully extendyourarms.
b. Besureyouarewellbalancedwithsurefooting.
c. Pullthe mowerbackslowly,no morethanhalfway
towardyou.
d. Repeatthesestepsas needed.
12.Do notoperatethe mowerwhileunderthe influenceof
alcoholordrugs.
13.Do notengagetheself-propelledmechanismon unitsso
equippedwhilestartingengine.
14.Thebladecontrolhandleisasafetydevice.Neverattempt
tobypassitsoperation.Doingso makesthe safetydevice
inoperativeandmayresult in personalinjurythrough
contactwiththe rotatingblade.Thebladecontrolhandle
mustoperateeasily in bothdirectionsandautomatically
returntothe disengagedpositionwhenreleased.
15.Neveroperatethe mowerinwetgrass.Alwaysbesureof
yourfooting. A slipand fall cancauseseriouspersonal
injury.If youfeelyouarelosingyourfooting,releasethe
bladecontrolhandleimmediatelyand the bladewillstop
rotatingwithinthreeseconds.
16.Mowonlyin daylightor goodartificiallight.Walk,neverrun.
17.Stopthe bladewhencrossinggraveldrives,walksor roads.
18.If the equipmentshouldstartto vibrateabnormally,stopthe
engineand checkimmediatelyfor the cause.Vibrationis
generallya warningoftrouble.
4

19.Shutthe engineoffandwaituntilthe bladecomestoa
completestopbeforeremovingthe grasscatcherorunclog-
gingthe chute.
Thecuttingbladecontinuesto rotatefora few secondsafter
the engineisshutoff. Neverplaceany partofthe body in
the bladeareauntilyouaresurethe bladehasstopped
rotating.
20.Neveroperatemowerwithoutpropertrailshield,discharge
cover,grasscatcher,bladecontrolhandleorothersafety
protectivedevicesin placeand working.Neveroperate
mowerwith damagedsafetydevices.Failureto dosocan
resultin personalinjury.
21.Mufflerandenginebecomehotandcancausea burn.Do
nottouch.
22.Only usepartsandaccessoriesmadeforthis machineby
manufacturer.Failuretodoso can resultin personalinjury.
23. Ifsituationsoccurwhicharenotcoveredinthis manual,
usecareand goodjudgment.Contactyourdealerfor
assistance.
Slope Operation
Slopesare amajorfactorrelatedtoslip andfall accidents,which
canresultinsevereinjury.Operationonslopesrequiresextra
caution.If youfeeluneasyona slope,do notmowit. Foryour
safety,usetheslopegaugeincludedaspartofthis manualto
measureslopesbeforeoperatingthis uniton aslopedorhilly
area.Ifthe slopeisgreaterthan15degrees,donotmowit.
Do:
1. Mowacrossthefaceofslopes;neverupand down.Exercise
extremecautionwhenchangingdirectiononslopes.
2. Watchfor holes,ruts,rocks,hiddenobjects,or bumps
whichcancauseyouto slipor trip. Tallgrasscan hide
obstacles.
3. Alwaysbesureofyourfooting.A slipand fallcan cause
seriouspersonalinjury.Ifyoufeel youarelosingyour
balance,releasethe bladecontrolhandleimmediately,and
the bladewill stoprotatingwithin3 seconds.
Do Not:
1. Do notmowneardrop-offs,ditchesor embankments,you
could loseyourfootingor balance.
2. Do notmowslopesgreaterthan 15degreesas shownon
the slopegauge.
3. Do notmowonwet grass.Unstablefootingcouldcause
slipping. Service
Safe Handling Of Gasoline:
1. Toavoidpersonalinjuryor propertydamageuseextreme
carein handlinggasoline.Gasolineisextremelyflammable
and thevaporsareexplosive.Seriouspersonalinjury can
occurwhengasolineisspilledonyourselfor your clothes,
which canignite.Washyourskin andchangeclothes
immediately.
2. Use onlyan approvedgasolinecontainer.
3. Neverfillcontainersinsideavehicleor ona truckortrailer
bedwitha plasticliner.Alwaysplacecontainersonthe
groundawayfromyourvehiclebeforefilling.
4. Removegas-poweredequipmentfromthe truckor trailer
and refueliton theground.If thisisnot possible,thenrefuel
suchequipmenton atrailer withaportablecontainer,rather
thanfroma gasolinedispensernozzle.
5. Keepthe nozzlein contactwiththe rimofthe fueltankor
containeropeningatall timesuntilfuelingiscomplete.Do
not usea nozzlelock-opendevice.
6. Extinguishallcigarettes,cigars,pipesandothersources
ofignition.
7. Neverfuel machineindoorbecauseflammablevaporswill
accumulatein thearea.
8. Neverremovegascap oradd fuelwhileengineishot or
running. Allowengineto coolatleasttwo minutesbefore
refueling.
9. Neveroverfillfueltank. Filltankto nomorethanY2inch
belowbottomoffiller neckto provideforfuelexpansion.
10.Replacegasolinecapandtightensecurely.
11.If gasolineis spilled,wipe itoff theengineand equipment.
Moveunittoanotherarea.Wait5minutesbeforestarting
engine.
12.Neverstorethe machineorfuel containernearanopen
flame,sparkor pilotlightas ona waterheater,space
heater,furnace,clothesdryeror othergasappliances.
13.Toreducefire hazard,keepmowerfreeofgrass,leaves,
orother debrisbuild-up.Cleanupoil orfuelspillageand
removeanyfuel soakeddebris.
14.Allowamowertocoolat least5 minutesbeforestoring.
GeneralService:
1. Neverrun anengineindoorsorin a poorlyventilatedarea.
Engineexhaustcontainscarbonmonoxide,anodorless
anddeadlygas.
2. Beforecleaning,repairing,or inspecting,makecertainthe
bladeandall movingpartshavestopped.Disconnectthe
sparkplugwireandgroundagainstthe engineto prevent
unintendedstarting.
3. Checkthe bladeandenginemountingboltsatfrequent
intervalsfor propertightness.Also,visuallyinspectblade
fordamage(e.g.,bent,cracked,worn)Replacebladewith
theoriginalequipmentmanufacture's(O.E.M.)bladeonly,
listedin thismanual."Useof partswhichdo notmeetthe
originalequipmentspecificationsmayleadto improper
performanceand compromisesafety!"
4. Mowerbladesaresharpandcancut.Wrapthebladeor
weargloves,anduseextracautionwhenservicingthem.
5. Keepallnuts,bolts,andscrewstightto besurethe equip-
mentis insafeworkingcondition.
6. Nevertamperwithsafetydevices.Checktheirproper
operationregularly.
7. Afterstrikingaforeignobject,stopthe engine,discon-
nectthesparkplugwireandgroundagainsttheengine.
Thoroughlyinspectthe mowerfor anydamage.Repairthe
damagebeforestartingandoperatingthe mower.
8. Neverattemptto makea wheelor cuttingheightadjust-
mentwhilethe engineisrunning.
9. Grasscatchercomponents,dischargecover,andtrail
shieldaresubjecttowear anddamagewhichcould
exposemovingpartsor allowobjectstobethrown.For
safetyprotection,frequentlycheckcomponentsand re-
placeimmediatelywithoriginalequipmentmanufacturer's
(O.E.M.)partsonly,listedin thismanual."Useofparts
whichdo notmeetthe originalequipmentspecifications
mayleadtoimproperperformanceand compromise
safety!"
10.Do notchangetheenginegovernorsettingor over-revthe
engine.Thegovernorcontrolsthe maximumsafeoperating
speedoftheengine.
11.Maintainor replacesafetylabels,asnecessary.
12.Observeproperdisposallawsandregulations.Improper
disposaloffluidsandmaterialscanharmtheenvironment.
Practices
WARNING
This symbol points
out importantsafety
instructions,which if
notfollowed,could
endangerthe personal
safety and/or property
of yourselfand others.
Readand followall
instructions inthis man-
ual beforeattemptingto
operatethis machine.
Failureto comply with
these instructionsmay
result in personalinjury.
Whenyousee this
symbol.
HEED iT'S WARNING!
Your Responsibility
Restrictthe use
of this powermachine
to personswho read.
understand
and followthe warnings
and instructions
in this manua
and onthe machine.
5
NOTE:ThisOperator's
Manualcoversseveral
models.LawnMower
featuresvaryby
model.Notallfeatures
discussed(orengines
pictured)inthismanual
areapplicabletoall
LawnMowermodels.
NOTE:Standbehind
themowerasifyou
weregoingtooperate
it.Yourrighthandcor-
respondstotheright
sideofthemower;your
lefthandcorresponds
totheleftsideofthe
mower.
NOTE:Forshipping
purposesyourmower
issetwiththewheels
I inalowcuttingheight
position.Forbest
resultsraisethecutting
I positionuntilitisdeter-
minedwhichheightis
bestforyourlawn,refer
toAdjustmentsection
forinstructions.
IMPORTANT
i DONOTcrimpthe
cableswhenliftingthe
i handleup.
Figure3-1:Unfoldhandleandtightenhardware.
1. Removegrasscatcherandanypackingmaterial
whichmaybe betweenupperand lowerhandles.
a. Removehandknobsfromhandlemounting
bracketsand pullupandbackonupperhandle
asshownin Figure3-1.Makecertainthelower
handleisseatedsecurelyintothehandlemounting
brackets.
.
3.
b. Tightenhandknobssecuringupperhandleto
lowerhandle.Makesurethateachcarriageboltis
seatedproperlyin thehandle.
Replaceandtightenhandknobsremovedearlier
securinglowerhandleto handlebrackets,Figure3-2.
Theropeguideisattachedtotherightsideofthe
upperhandle.Loosenthewingnutwhichsecuresthe
ropeguide.SeeFigure3-3.
a. Holdthebladecontrolagainstupperhandle.
b. Pullstarterropeoutoftheengine.Releasethe
bladecontrol.
Figure3-2:Securehandletohandlemountingbrackets.
c. Slipstarterropeintoropeguide.
d. Tightenwingnut.
4. Securecablestothelowerhandleusingthecabletie.
Pullcabletietightandcutoff excess.
5. Toassemblethegrasscatcher(ifneeded),placebag
overframewiththeblackplasticsideatthebottom.
Slipplasticchanneloverhookson frame.Allchannels
exceptforcentertopofbagattachfromtheoutside.
Thecenterof bagattachesfromtheinside.
6. Beforeattachingthegrasscatcher,themulching
bafflemustbe removed.RefertoFigure3-5.
a. Lift reardischargedoor.
b. Removemulchingbaffle.
7. Toattachgrasscatcher,refertoFigure3-4.
a. Lift reardischargedoor.
b. Placegrasscatcheron thepivotrod.Letgo
ofdischargedoorsothatit restsonthegrass
catcher.
Figure3-3:Pullrecoilstarterthroughropeguideandtighten. Figure3-4:Liftdischargedoorandplacegrasscatcheronrod.
6

,_il WARNING:Neveroperatemowerunless
the hookson thegrasscatcherarefirmly
seatedon the pivot rod and the rear
discharge door restsfirmly against top ofthe grass
catcher.
8. ThebatterypackwithintheElectricStartermustbe
charged8to 10hoursbeforeuse.Referto"Charging
Battery"in theMaintenancesectionforinstructions.
9. Followthestepsbelowtoinstallthemulchingbaffle:
a. Liftthereardischargedoorandlift thegrass
catcherupandoff ofthepivotrod,if installed.
b. Insertthemulchingbaffleasshownin Figure3-5
and releasethereardischargedoor.
f
10.Toconvertto sidedischarge,makesuregrass
catcherisoff oftheunitandreardischargedooris
closed.
a.
b. Onthesideofthe mower,lift themulchingplug.
SNdetwohookson sidedischargechuteunder
hingepinonmulchingplugassembly.SeeFigure
3-6.Lowerthemulchingplug.Donotremove Q||U
sidemulchingplugatanytimeevenwhenyou
arenotmu ch ng ustment
J
Figure3-5:Themulchingbaffle Figure3-6:Installingthe sidedischargechute.
Adjustments
Cutting Height
Thecuttingheightadjustmentleveris locatedabovethe
rearleft wheel.SeeFigure317.
a. Pulltheleveroutandawayfromthemower.
b. Movethe leverforwardor backfordesired cutting
height.
c. Releaselevertowardsmowerdeck.
f/
Drive Control
Theadjustmentwheelislocatedin thedrivecontrol
handlehousingandis usedtotightenor loosenthe
drivebelt.Youwillneedtoadjustthedrivecontrolif
themowerdoesnotpropelitselfwiththedrivecontrol
engagedor ifthemower'swheelshesitatewiththedrive
controlengaged.If eitheroftheseconditionsoccur,
rotatetheadjustmentwheelclockwisetotightenthe
cableorcounterclockwiseto loosenthecable.See
Figure3-8.
// i
........ i /
i i 'i..../
/j //
\
Figure3-7:Thecuttingheightadjustmentlever. Figure3-8:Theadjustmentwheelonthe drivecontrol.
un!essthe hooks on
the grass catcher are
firmly seated onthe
pivot rod and therear
discharge door rests
topof
the grasscatcher.
CUTTINGHEIGHT
ForroughOiuneven
lawns, movethe height
adjustment leverto a
higherposition.This will
help preventscalpingof
egrass.
OR VECONrROL
Forsome peoplethe
drive controlmay not
bein acomfortable
posit!on:You can adjust
the handle bytightening
theadjustmentwheeN
7

WARNING
The blade control
mechanism isa
safety device. Never
attemptto bypassits
operations.
Useextreme care
when handling
gasoline. Gasolineis
extremelyflammable
andthe vapors are
explosive. Neverfuel
i the machine indoors
or while the engine
is hot or running.
Extinguish cigarettes,
Icigars, pipesand
other sources of
ignition.
IMPORTANT
Thisunit isshipped
i without gasolineor
olin the engine. Fill
up gasolineand oil
as instructedin the
accompanyingengine
i manual BEFORE
i operatingyour mower.
Know Your Lawn Mower
DriveControJ
BladeControJ
HeightAdjustmentLever
RecoiJStarter--_
Figure4-1:Themajorcomponentsonthe mower.
Nowthatyouhavesetupyourlawnmowerforoperation,
it'simportanttobecomeaquaintedwithitscontrolsand
features.
Blade Control
Thebladecontrolisattachedtothe upperhandleof
themower.Depressand squeezeitagainsttheupper
handletooperateunit.Releaseit tostopengineand
blade.
_ARNING:Thebladecontrolisasafety
device. Donot bypass itsoperation.
Drive Control
Thedrivecontrolislocatedontheupperhandle.
Squeezethedrivecontrollevertoengagethedrive
system.Releaseittodisengagethedrivesystem.To
slowdownwhenapproachingan obstacle,makinga
turn,orstopping,releasethelever.
Cutting Height Adjustment Lever
Thecuttingheightadjustmentleverislocatedabovethe
left rearwheel.Toadjustthecuttingheight,refertothe
AdjustmentSection.
Recoil Starter
Therecoilstarteris attachedtotherightupperhandle.
Standbehindtheunitand pullthe recoilstarterropeto
startthe unit.
Mulching Plug
Themulchingplugisusedformulchingpurpose.Instead
ofcollectingthegrassclippingsinthegrasscatcher,your
mowerhastheoptionofrecirculatingtheclippingsback
tothelawn.Makesurethatthereardischargedooris
closedandthegrasscatcherisremovedfromunitwhile
mulching.
Electric Starter (if Equipped)
Theignitionswitchis locatedon theleftsideofthe
electricstarterhandlepanel.Itis necessarytochargethe
batteryfor8 to 10hoursbeforeinitialuse.Refertothe
Maintenancesectionformoreinformation.
Gas and Oil Fill-Up
1. Checkoillevelandaddoil if necessary.Followengine
manualforthis.
2. Servicetheenginewithgasolineasinstructedinthe
enginemanual.SeeEnginemanualforlocationofgas
andoilfill.
_ WARNING:Useextremecarewhen
handlinggasoline. Gasolineisextremely
flammable and thevapors are explosive.
Neverfuel the machine indoorsor while the engine is
hot or running.Extinguish cigarettes, cigars, pipes
and other sources of ignition.
8

_1= WARNING:The operationof any lawn
mowercanresult in foreign objectsbeing "_
thrownintothe eyes,whichcandamage
youreyesseverely.Alwayswearsafetyglasses
whileoperatingthemowerorwhileperformingany
adjustmentsorrepairson it.
Starting Engine
_WARNING:Besureno one otherthan the
operatorisstandingnear the lawnmower
whilestartingengineoroperatingmower.
Neverrunengineindoorsorin enclosed,poorly
ventilatedareas.Engineexhaustcontains carbon
monoxide, an odorlessand deadlygas. Keephands,
feet, hairand looseclothingawayfrom anymoving
partsonengineand lawnmower.
1. Pushprimer(ifequipped)threetimes.Waitabout
two secondsbetweeneachpush.SeeFigure4-2. In
temperaturearound55°Forbelow,primefivetimes.
Donotprimetorestarta warmengine.
2. Standingbehindthe mower,squeezethebladecontrol
againstupperhandle.SeeFigure4-2.
3. Recoil Start: Grasprecoilstarterhandleandpull
ropeoutwitha rapid,continuous,fullarmstroke.See
Figure4-2.Keepinga firmgriponthestarterhandle,
lettheroperewindslowly.Repeatuntilenginecranks.
Lettheroperewindeachtime slowly.
Electric Start (If Equipped}: Turnignitionkeytothe
righttostarttheengine.SeeFigure4-2.Releasethe
keyaftertheenginestarts.
Honda Engine (if Equipped):
1. Placethefuelvalveleverfoundontheleft sideofthe
engineintotheON(OPEN)position.
2. Movethechokelever(ifequipped)alltheway
backwardintothechokeposition.SeeFigure4-2
inset.
3. Standingbehindthe mower,squeezethebladecontrol
againstupperhandleasshowninFigure4-2.The
chokewill nowbeginto slowlyreturntotheoffchoke
positionafteractivatingthebladecontrol.Therefore,
quicklymoveontostepfourbelow.
4. Holdingthesetwo handlestogetherfirmly,grasprecoil
starterhandleand pullropeoutwitha rapid,continu-
ous,fullarmstroke.Keepingafirm griponthestarter
handleletthe roperewindslowly.Repeatuntilengine
cranks.Lettheroperewindeachtimeslowly.
_IL ARNING:Waitfor the bladeto stop
completely beforeperforminganywork
on the mower or to removethe grass
catcher.
Stopping Engine
1. Releasebladecontroltostoptheengineand blade.
2. Disconnectsparkplugwirefromsparkplugand
groundagainsttheengine.
Figure4-2:Startingthemower.
Using Your Lawn Mower
lJ
_ARNING:Neveroperate yourmower
without eitherthe rear door or the entire
grass catcher assembly firmly secured.
Besurelawnisclearofstones,sticks,wire,orother
objectswhichcoulddamagelawnmoweror engine.
Suchobjectscouldbeaccidentlythrownbythemower
inanydirectionandcauseseriouspersonalinjurytothe
operatorandothers.
_b ARNING:If you strikea foreign object,
stop the engine. Removewire from the
sparkplug,thoroughly inspectmower
for any damage,and repair damagebefore restart-
ingand operating. Extensive vibration of mower
during operation isan indicationof damage.The
unit should be promptlyinspectedand repaired.
Using as Mulcher
Formulchinggrass,removethegrasscatcherandside
dischargechutefromthemower.Foreffectivemulching,
do notcutwetgrass.If thegrasshasbeenallowedto
growin excessof fourinches,mulchingisnotrecom-
mended.Usethegrasscatchertobagclippingsinstead.
Using Grass Catcher
Youcanusethegrasscatchertocollectclippingswhile
youareoperatingthemower.Refertosetupsectionfor
instructionson attachingthegrasscatcher.
WARNING
The operation of any
lawn mower can result
in foreign objects
being thrown into
the eyes, whichcan
damage your eyes
severely. Alwayswear
safety glasseswhile
operatingthe mower,
or while performing
any adjustments or
repairs on it.
Be sure no one other
than the operator is
standing near the
lawn mower while
starting engine or
operating mower.
Never run engine in-
doors or inenclosed,
poorly ventilated
areas. Engine exhaust
contains carbon
monoxide, an odor-
less and deadly gas.
Keep hands, feet, hair
and loose clothing
away from any moving
parts on engine and
lawnmower.
9

Your Lawn
ower
i
Always stop engine,
andgroundagainst
enginebeforeclean,
lubricating,or
performing anykind of
maintenanceOnyour
machine:
iMPORTANT: The use
of a pressurewasher
or gardenhose to
cleany0ur unitis not
recommended These
mayCausedamageto
electricCOmponents;
spindles;pulleys; ear_
ingsl orthe engine:The
useofwater will result
in shortenedlife and
reduce serViceabilityl
Lubrication
1. Lubricatepivotpointson thebladecontrolatleast
oncea seasonwithlightoil.Thebladecontrolmust
operatefreelyinbothdirections.SeeFigure5-1.
2. Lubricatethewheelsatleastoncea seasonwith
lightoil (ormotoroil). If wheelsareremovedforany
reason,lubricatesurfaceoftheaxleand innersurface
ofthewheelwith lightoil.
3. Lubricatethetorsionspringandpivotpointontherear
dischargedoorandsidemulchplugperiodicallywith
lightoil topreventrust.SeeFigure5-1.
4. Thetransmissionispre-lubricatedand sealedat the
factoryanddoesnotrequirelubrication.
5. Followtheaccompanyingenginemanualforlubrica-
tionscheduleandinstructionforenginelubrication.
Figure5-1:Lubricationareasonthe mower. Deck Care
1. Disconnectsparkplugwire.Draingasolinefromlawn
mowerorplacea pieceof plasticunderthegascap.
2. Tipmowersothat itrestsonthe housing.Keepthe
sidewiththeair cleanerfacingup.Holdmowerfirmly.
_i= ARNING:Nevertip the mower more
than 90degrees inany directions and do
not leavethe mowertipped for any length
of time. Oil candrain intothe upper partof theengine
causing a starting problem.
3. Scrapeand cleantheundersideofthedeckwitha
suitabletool.Donotspraywithwater.
4. Putthemowerbackonits wheelsontheground.If
youhad putplasticunderthegascapearlier,make
sureto removeitnow.
Figure5-2:Replacingtherearflap.
General Recommendations
• Alwaysobservesafetyruleswhenperforming
anymaintenance.
• Thewarrantyon thislawnmowerdoesnotcover
itemsthathavebeensubjectedtooperatorabuse
ornegligence.Toreceivefullvaluefromwarranty,
operatormustmaintainthelawnmoweras
instructedhere.
• Changingofengine-governedspeedwillvoid
enginewarranty.
• Alladjustmentsshouldbecheckedat leastonce
eachseason.
Periodicallycheckallfastenersand makesurethese
aretight.
_ARNING:Alwaysstop engine, discon-
nect spark plug, and groundagainst
enginebefore cleaning,lubricatingor
doing anykind of maintenanceon your machine.
Engine Care
• Maintainoil levelasinstructedin enginemanual.
• Serviceaircleanerevery25 hoursundernormal
conditions.Cleaneveryfewhoursunderextremely
dustyconditions.Refertoenginemanual.
• Cleansparkplugand resetthegaponcea season.
Checkenginemanualfor correctplugtype andgap
specifications.
• Cleanengineregularlywitha clothorbrush.Keepthe
coolingsystem(blowerhousingarea)cleantopermit
properaircirculation.Removeall grass,dirtand
combustibledebrisfrommufflerarea.
Replacing Rear Flap
1. Lift upreardoor.
2. Bend(bow)therearflapinwardon eachsideto
releasetabsfromtheholesin thehandlemounting
brackets.SeeFigure5-2.
3. Replacewithnewflapbybendingtherearflapand
slidingintoplace.
10

Blade Care
_ARNING:Whenremovingcuttingblade
for sharpeningor replacement, protect
yourhandswithapairof heavygloves or
use a heavyrag to holdblade.
1. Disconnectsparkplugwirefromsparkplug.Turn
moweron itssidemakingsurethattheairfilterand
thecarburetorareup.
2. Removebolt,bladebellsupport,blade,andadapter
fromtheenginecrankshaft.SeeFigure5-3.
NOTE:Whenremovingtheblade,adapter,etc.,becare-
fulnotto removeormisplacepartsaboveitassociated
withtheenginepulley.
3. Thebladecanbe sharpenedwitha fileor on a grind-
ingwheel.Donotattempttosharpenthebladewhile
itisstillon themower.Whensharpeningblade,follow
originalangleofgrind.Grindcuttingedgesequallyto
keepbladebalanced.
4. Removebladefromtheadapterfortestingbalance.
Balancethebladeona roundshaftscrewdriverto
check.Removemetalfromtheheavysideuntilit
balancesevenly.
_L ARNING:An unbalancedblade will
causeexcessivevibration when rotating
athigh speeds,it maycause damageto
mower,and could breakcausing personalinjury.
5. Lubricatetheenginecrankshaftandtheinnersurface
ofthebladeadapterwithlightoil.Slidetheblade
adapterontotheenginecrankshaft.Placetheblade
on theadaptersuchthatthesideoftheblademarked
"Bottom"(orwithpartnumber)facesthegroundwhen
themowerisintheoperatingposition.Makesurethat
bladeisalignedandseatedon bladeadapterflanges.
6. Placebladebellsupportonthe blade.Alignnotches
on thebladebell supportwith smallholesinblade.
Replacehexboltandtightenhexboltto torque:450
in.Ibs.rain.,600 in.Ibs.max.
Toensuresafeoperationofyourmower,periodically
checkthebladeboltforcorrecttorque.
Belt Care
1. Disconnectthesparkplugwireandgrounditagainst
theengine.
2. Drainthefueltankorplacea pieceof plasticbeneath
thecaptopreventgasolineleakage.
3. Tipmoweron itsside(aircleanersideofengineup).
4. Removeblade,adapter,andrelatedhardwareas
instructedunder"BladeCare"above.SeeFigure5-3.
5. a. Removetheself-tappingscrewsthatsecuresthe
enginebaffletothedeck. SeeFigure5-4.Remove
enginebaffle.
b. Loosenself-tappingscrewthat securesdeckbaffle
tothedeck.SeeFigure5-4.
f
Figure5-3:Removethebolt,support,blade,andadapterto
accessthebladeandundersidecomponents.
Figure5-4:A.Removethe screwsthatholdthe enginebaffle
ontothe deck.B.Loosenthescrewthatholdsdeckbaffleonto
deck.
f
Figure5-5:Removebeltfromtransmissionandenginepulley.
6. a. Workingfromtherearofthemower,carefully
removebeltfromtransmissionpulley.
b. Oncebeltisofftransmissionpulley,pushdownon
deckbaffletoaccessenginepulleyand slidebelt
offthis pulleyandoutfromunderthedeck.See
Figure5-5.
ntainin!
When removing
the cutting blade
for sharpening or
replacement or
when sliding the belt
around it, protect
your hands with a
pairof heavy gloves
or use a heavy rag to
hold the blade.
An unbalanced
blade will cause
excessive vibration
when rotating at high
speeds, it maycause
damage to mower and
could break causing
personal injury.
11

7. Replacewithnewbelt workingitbetweenthedeck f _
!
i
=Batteries contain
sulfuric acid which
maycause
Do not short circuit
or mutlate batteries
in anyway: Do not
put batteries m fire
may
or release toxic
materials:
I
I
Donot remove the
battery packfrom
the electric starter
ho = =gfor==y
Ireason other than
replacement,
I
I
NOTE:Make certain
that belt isseated
correctlyandthat itis
riding smoothlyon the
enginepulleyand iSnot
andbaffle,firstaroundthetransmissionpulleyand
thentheenginepulley.
NOTE: Makecertainthatbeltis seatedcorrectlyand
thatitisridingsmoothlyon theenginepulleyandisnot
pinchedbetweenthelowerand upperpulleyhalves.
.
9.
10.
11.
Tightenself-tappingscrewsecuringdeckbaffle
loosenedearlier.
Replaceenginebaffleand securewith selftapping
screws.
Replaceblade,bladeadapter,andassociated
hardware.Followinstructionsin BladeCaresection
forproperassembly.
Tipmowerbackontoitswheelsand removepieceof
plasticfromundergascap(if applicable).
Replacing Battery (If Equipped)
Figure5-6:Folddownupperhandleand removetwo screws
frombackof housing.
_IL ARNING:Batteriescontainsulfuric
acid which may causeburns. Do not
short circuit or mutilate batteries in any
way.Donot put batteries in fire asthese mayburst
or releasetoxic materials.
1. Loosenroundhandleknobssecuringupperand
lowerhandlesandcarefullyfoldthe upperhandle
downtowardthelowerhandleas showninFigure
5-6.
.
.
Removethetwo screwssecuringbatterycoverto
batteryhousingandplacethemtotheside.See
Figure5-6.
Openbatterycover,removepositiveandnegative
leadsfrombattery,removeandreplacewith new
battery.SeeFigure5-7.Connectthepositiveleadto
thepositivesideofthe batterypack,thenconnect
thenegativeside.
NOTE:Thebatteryyouhavemaydifferslightlyfromthe
oneshownin Figure5-7.RefertothePartsList.
+
Positive
Terminal
.e tiv0J
Terminal
Figure5-7:Opencovertoviewbatteryandwires.
IMPORTANT:Whenreplacingbattery pack in handle
panel,battery pack must be positioned with the
positive terminal to the left sideand the negative
terminal to the right side of panel (Positive terminal
isclosest to the key switch), Figure5-7.Replacing
battery pack incorrectly will causeserious damage.
4. Reattachbatterycoverto batteryhousingbysecur-
ingwiththetwoscrewsremovedearlier,makingsure
tosnapthewireconduiton theleftintoplaceonthe
housing.
5. Foldhandlesbackup andtightenhandleknobs.
_ WARNING:Donot removethe battery
packfrom the electricstarter housing
for anyreasonother than replacement.
12

,_hllL WARNING:The batterycontainscor-
rosivefluid andtoxicmaterial; handle
with careand keepaway from children.
Donot puncture,disassemble, mutilateor incinerate
the battery. Explosivegasescould bevented during
charging or discharging. Usein awell ventilated
area,awayfrom sources ofignition.
NOTE:Thespecialdesignedplugonthechargerwillonly
fit intothe plugon thebatterybox.
,_ WARNING:Useonly the battery chargersupplied with this mower.
.
2.
Plugthebatterychargerintotheport on theunderside
ofthebatteryhousing,Figure5-8.
Insertthebatterychargerplugintoa standard120
volt householdoutlet.SeeFigure5-8.Chargebattery
for8 to 10hoursbeforeinitialuse.Donot charge
longer than 12hours. Thebatteryshouldonlyneed
to bechargeduponinitialsetupandafteranyother
extendedperiodsof non-use.
IMPORTANT:Alwaysplugchargerleadintobatterypack
leadfirst,andtheninsertbatterychargerpluginto120
volt standardhouseholdoutlet.Followthisorderofaction
everytimeyouchargethebattery.
3. Aftercharging,disconnectchargerplugfromoutlet
first,thendisconnectchargerleadfrombattery.
Replacing Fuse (If Equipped)
Theelectricstartercircuitand batteryare protectedbya
40 amperefuse.Ifthefuseburnsout,theelectricstarter
willnotoperate.Iftheunitfailsto startwiththeelectric
starter,performthefollowingstepstocheckthefuse
insidethebatteryhousing:
1. OpenthebatterycoverasdescribedinReplacing
Battery. Referto Figure5-6.
2. Removefusefromsocketandinspectas shownin
Figure5-9.If itisburnedout, replacewithstandard
automotive40amperefuse.
3. Carefullyplacewiringbackintohousing,closebattery
cover,andfoldupperhandlebackintoplace.
NOTE:Theenginecan bestarted manually ifthe fuse
burns out.
Off-Season Storage
Thefollowingstepsshouldbetakentoprepareyourlawn
mowerforstorage.
• Cleanandlubricatemowerthoroughlyasdescribedin
thelubricationinstructions.
Figure5-8:Plugchargerintobatterylead(1)andthenplug
chargerpackinto120voltstandardhouseholdoutlet(2).
f
Figure5-9:Whenreplacingfuse,useastandardautomotive40
Ampfuse.
• Refertoenginemanualforcorrectenginestorage
instructions.
Coatmower'scuttingbladewithchassisgreaseto
preventrusting.
• Storemowerina dry,cleanarea.Donotstorenext
tocorrosivematerials,suchas fertilizer.
Whenstoringanytypeof powerequipmentin a poorly
ventilatedor metalstorageshed,careshouldbetaken
torust-prooftheequipment.Usinga lightoil or silicone,
coattheequipment,especiallycablesandall moving
partsofyourlawnmowerbeforestorage.
Battery (If Equipped)
Thebatterymustbestoredwitha fullcharge.Extended
storageofa dischargedbatterywill reducelifeand
capacityofthebattery.
Wedonotrecommendtheuseofa pressurewasher
or gardenhosetocleanyourunit.
13
ntainin
Lr Lawn
Mower
WARNING
The battery contains
corrosive fluid and
toxic material; handle
care
Donot puncture,
disassemble; mutilate
or incinerate the
battery, Explosive
couldbe
vented during chargi
discharging,
Use in a well venti,
ated area; away from
sourcesofg" t on;
Use only the battery
charger supplied
with this mower.
NOTE:The enginecan
be startedmanually if
the fuse burnsoutl

ProblemCause Remedy
Enaone fa sto start 1....Bade contro d sengaged 1 Engagebade contro
2. Sparkplugwiredisconnected. 2. Connectwiretosparkplug.
3. Fueltankemptyorstalefuel. 3. Filltankwth clean freshgasoline.
4. Enginenotprimed(if equipped). 4. Prmeengineas instructedin
"OperatingYou!LawnMower.
5. Faultysparkplug. 5. Clean,adjustgap,or replace.
6. Blockedfuel line. I 6. Cleanfuel ine.
7. Enginefcoded. 7 Waita fewminutesto restart,but
I I do notprme.
8. Burntfuse,(ElectricStartOnly) 8. Replacefuse(seeMaintenance
"section)
Engineruns erratic 1, Sparkplugwireloose, 1, Connectandtightenspark
plugwire,
2, Blockedfuellineor stalefuel, 2, Cleanfuelline;filltankwithclean,
freshgasoline,
3, Ventingascapplugged, 3, Clearvent,
For repairs beyond 4, Waterordirt infuelsystem, 4, Drainfueltank,Refillwith
freshfuel,
merits listed here, 5, Dirtyair cleaner, 5, Refertoenginemanual,
contactan authorized 6, Carburetoroutofadjustment, 6, Refertoenginemanual,
service dealer. g eoe eats I " " I " "
En in v rh 1 Engne o eve ow 1 F crankcasewthpropero
H B
2. Air flowrestricted. 2. Removeblowerhousing
_ andclean.
3. Carburetornotadjustedproperly. 3. Referto enginemanual.
Occasionalskips 1, Sparkpluggaptooclose, 1, Adjustgapto ,030",
(hesitates)at 2, Carburetoridlemixtureadjustment 2, Refertoenginemanual,
highspeed improperlyset.
Idlespoory 1. Sparkplugfouled,faultyorgap 1. Resetgapto ,030"or replace
toowide. sparkplug.
I 2 Carburetormproperyadjusted 2 Referto engnemanua.
3. Dirtyair cleaner. 3. Referto enginemanual.
Excessive 1. Cuttingbladelooseor unbalanced. 1. Tightenbladeandadapter.
Vibration Balanceblade.
2. Bentcuttingblade. 2. Seean authorizedservicedealer.
MowerwIInot 1 Wetgrass. 1. Donotmowwhengrassiswet;wait
mhr unt atertocut
UC g ass 2. Excessivelyhighgrass 2. Mowonceat a highcuttngheight
I thenmowagainatdesire(Jheightor
3. Dullblade, makea narrowercuttingpath.
. 3. Sharpenor replaceblade.
Unevencut 1. Dullblade. 1. Sharpenor replaceblade.
Mower will not 1. Beltnotinstalledproperly I 1. Checkbeltforproperpulleyinstal-
self ro el ' aton and movement
p p 2. Debriscloggingdriveoperation, i .
3. Damagedorwornbelt. 2. Stopengine,disconnectsparkplug
I I w re andceanoutdebrs.
. 3. Inspectandreplacebelt.
14

Safety Labels Found On Your Lawn Mower
Label
WARNING
DONOTremove safety
(or any) labels from
mower for any reason.
15

Model Series 830 ;_q_
[]
,
[]
16

Ref. PartNo. Description
No.
1 746-04265A DriveCable
2 735-04059 RubberGrommet
3 753-05096A DriveControlAssembly
4 731-04859" BailCover
5 747-1161A BladeControl
6 746-04213 ControlCable
7 749-04037 LowerHandle
8 725-0157 CableTie
9 732-04265 TorsionSpring,LH
10 710-0599 TTScrew,1/4-20x.500
11 787-01341A 21-inchDeck
12 710-0654A TTScrew,3/8-16x 1.00
13 787-01346 FrontDeckBaffle
14 756-04157Btt UpperEnginePulley
756-042735 UpperEnginePulley
15 756-04156Btt LowerEnginePulley
756-04272_1 LowerEnginePulley
16 736-0514tt FiatWash.,.885x 1.850x.060
17 748-0376Ctt BladeAdapter
748-04096_: BladeAdapter
18 710-1044 Screw,3/8-24x 1.50
19 736-0524B BladeBell Support
20 742-0741 21"MulchingBlade
21 736-0513tt SprgWasher,.890x 1.70x .048
22 750-1071tt SleeveSpacer,.88x 1.13x .12
750-04818_1 SIv.Spcr.,25ramx 1.375x .375
23 731-05903 EngineBaffle
24 731-05463A DeckBaffle
25 710-0260A CarriageBolt,5/16-18x.62
26 712-04063 FlangeLockNut,5/16-18
27 731-05462A Trailshield
Ref. PartNo. Description
No.
28 731-05157 MulchPlug
29 731-05017A RearDoor
30 710-1241 Screw,1/4-15x 1.00
31 720-04072 StarKnob
32 732-04264 TorsionSpring,RH
33 711-04374 DoorPivotRod
34 647-04051 GrassCatcherFrame
35 664-04052A GrassCatcher-Gray
664-04046A GrassCatcher-Black
36 710-1174 CarriageBolt,5/16-18x2.00
37 720-0279 WingNut
38 710-1205 EyeBolt
39 749-04209t UpperHandle
749-04206 UpperHandle
40 736-0270 BellWasher,.265x.75x.062
41 732-1014 TorsionSpring
42 17032A ChuteDeflectorAdapter
43 747-0710 HingePin
44 687-02055 MulchPlugAssembly
45 731-04177 SideDischargeChute
Parts List
PARTS
i ii i i ii
TOorder replacement
i,8oo:8oo: 31o
orvisit
www.mtdproducts,com
46 725-04323t 12VoltBattery
47 725-04329t BatteryCharger
48 726-0240t CableTie
49 728-0199t Rivet
50 725-04347t KeySwitch
51 725-0201t Key
52 625-04029t ElectricStarterHarnessAss'y.
53 710-1667At Screw,#10-16x.750
54 750-04825_1 SleeveSpacer
55 736-0447_ Washer,Wave,1.5x 1.0x .029
t EquippedwithElectricStart Units
tt Equippedon UnitswithBriggs& StrattonEngine
_1Equippedon Unitswith HondaEngine
* IfEquipped
17

iVlodel Series 830
reference
shown for
reference
18

Ref. PartNo. Description
No.
1 754-04093 V-Belt
2 732-04338 SpringLever
3 720-0230 FoamGrip
4 717-04184A SpurGear,14T- LH
5 710-0599 TT Screw,1/4-20x0.50
6 750-04305A Spacer
7 749-04267A CrossBracket
8 687-02204 FrontBracketAssembly
9 731-05470 ClipSpacer
10 741-04136B SplitHexFlangeBearing
11 734-04033 FrontWheel
12 712-04065 FlangeLockNut,3/8-16
13 634-04207D RearWheel
14 710-04531 Screw,1/4-20x.39
15 717o04192A SpurGear,14ToRH
16 736-3084 FlatWasher
17 782-7551A WheelDustCover
18 748-04159 TransmissionBearingSupport
19 750-04317 ClipSpacer
20 716-0198 RetainingRing.875
21 687-02314 RearBracketAssembly
22 732-0320 ExtensionSpring
23 756-04151A Pulley,3.360D
24 736-0105 BellWasher,.375x.870x.063
25 712-0411 HexLockNut,5/16-24
26 687-02205 HandleBracketAssemblyLH
27 715-0221 DowelPin
28 618-04378 TransmissionAssembly
29 687-02206 HandleBracketAssemblyRH
30 748-0390 BearingSupportSpacer
31 736-0504 Washer,Wave,.510x.750x.017
PARTS
To order replacement
i,8oo:8oo:731o
orvisit
www.mtdproducts,com
ii i _iI_ ii
iMPORTANT
Fora properworking
machine,use Factory
Approved Parts.
V-BELTS are specially
designedto engage
and disengagesafely.
A substitute (non OEM)
V-Belt canbe danger-
ous by not disengaging
completely.
19

MANUFACTURER'S LiMiTED WARRANTY FOR
ThelimitedwarrantysetforthbelowisgivenbyMTDLLCwithrespect
tonewmerchandisepurchasedandusedin theUnitedStates,its
possessionsandterritories.
"MTD"warrantsthisproductagainstdefectsinmaterialandworkman-
shipfora periodoftwo (2)yearscommencingonthedateoforiginal
purchaseandwill,at itsoption,repairor replace,freeofcharge,any
partfoundto bedefectiveinmaterialsorworkmanship.Thislimitedwar-
rantyshallonlyapplyifthisproducthasbeenoperatedand maintained
inaccordancewiththeOperator'sManualfurnishedwiththeproduct,
andhasnotbeensubjectto misuse,abuse,commercialuse,neglect,
accident,impropermaintenance,alteration,vandalism,theft,fire,water,
ordamagebecauseofotherperilor naturaldisaster.Damageresulting
fromthe installationor useofanypart,accessoryor attachmentnot
approvedby MTDforusewiththeproduct(s)coveredbythis manual
willvoidyourwarrantyastoanyresultingdamage.
Normalwearpartsarewarrantedto befreefromdefectsinmaterialand
workmanshipfora periodofthirty(30)daysfromthedateof purchase.
Normalwearpartsinclude,butare notlimitedto itemssuchas: batter-
ies,belts,blades,bladeadapters,grassbags,riderdeckwheels,seats,
snowthrowerskidshoes,shaveplates,augerspiralrubberandtires.
HOW TO OBTAINSERVICE: Warrantyservice isavailable,WITH
PROOFOF PURCHASE, throughyour localauthorized service
dealer.Tolocate the dealer in yourarea, check yourYellowPages,
or contact MTDLLCat RO. Box361131,Cleveland,Ohio 44136-
0019,or call 1-800-800-7310or 1-330-220-4683 or log on to our
Website at www.mtdproducts.com.
Thislimitedwarrantydoesnot providecoverageinthefollowingcases:
a. Theengineor componentpartsthereof.Theseitemsmaycarrya
separatemanufacturer'swarranty.Refertoapplicablemanufacturer's
warrantyfortermsandconditions.
b. Logsplitterpumps,valves,andcylindershavea separateoneyear
warranty.
c. Routinemaintenanceitemssuchaslubricants,filters,blade
sharpening,tune-ups,brakeadjustments,clutchadjustments,deck
adjustments,andnormaldeteriorationoftheexteriorfinishdueto
useor exposure.
d. Servicecompletedbysomeoneotherthananauthorizedservice
dealer.
e. MTDdoesnotextendanywarrantyforproductssoldor exported
outsideoftheUnitedStates,its possessionsandterritories,except
thosesoldthroughMTD'sauthorizedchannelsofexportdistribution.
f. ReplacementpartsthatarenotgenuineMTDparts.
g. Transportationchargesandservicecalls.
Noimpliedwarranty,includingany impliedwarranty of mer-
chantabilityof fitness for a particular purpose,applies after the
applicable periodof expresswritten warranty aboveasto the
partsasidentified.Nootherexpresswarranty, whetherwrittenor
oral, exceptas mentioned above,givenby anypersonor entity,
includingadealeror retailer, withrespect to any product,shall
bindMTD.Duringthe periodof the warranty,the exclusiveremedy
isrepairor replacementof the productas setforth above.
Theprovisionsasset forth inthis warrantyprovidethesoleand
exclusiveremedy arising from the sale.MTDshallnot be liable
for incidentalor consequentiallossor damageincluding,without
limitation, expensesincurredfor substituteor replacementlawn
careservicesor for rentalexpensesto temporarily replacea
warranted product.
Somestatesdo notallowtheexclusionor limitationofincidentalor
consequentialdamages,or limitationsonhowlongan impliedwarranty
lasts,sotheaboveexclusionsor limitationsmaynotapplytoyou.
Innoeventshallrecoveryofanykindbegreaterthantheamountofthe
purchasepriceof theproductsold.Alterationof safetyfeaturesof
the productshallvoid this warranty. Youassumetheriskandliability
forloss,damage,or injurytoyouandyourpropertyand/ortoothersand
theirpropertyarisingoutofthemisuseor inabilitytousethe product.
Thislimitedwarrantyshallnotextendtoanyoneotherthantheoriginal
purchaserorto thepersonforwhomitwas purchasedasa gift.
HOWSTATELAWRELATESTOTHISWARRANTY:This limited
warrantygivesyouspecificlegalrights,and youmayalsohaveother
rightswhichvaryfromstatetostate.
IMPORTANT:OwnermustpresentOriginalProofof Purchasetoobtain
warrantycoverage.
IViTDLLC, P.O. BOX 361131 CLEVELAND, OHiO 44136-0019; Phone: 1=800=800-7310, 1-330=220-4683
Other manuals for Series 830
3
Table of contents
Other MTD Lawn Mower manuals