English Operating instructions – Lawn mower with combustion engine
8
Contents
For your safety . . . . . . . . . . . . . . 8
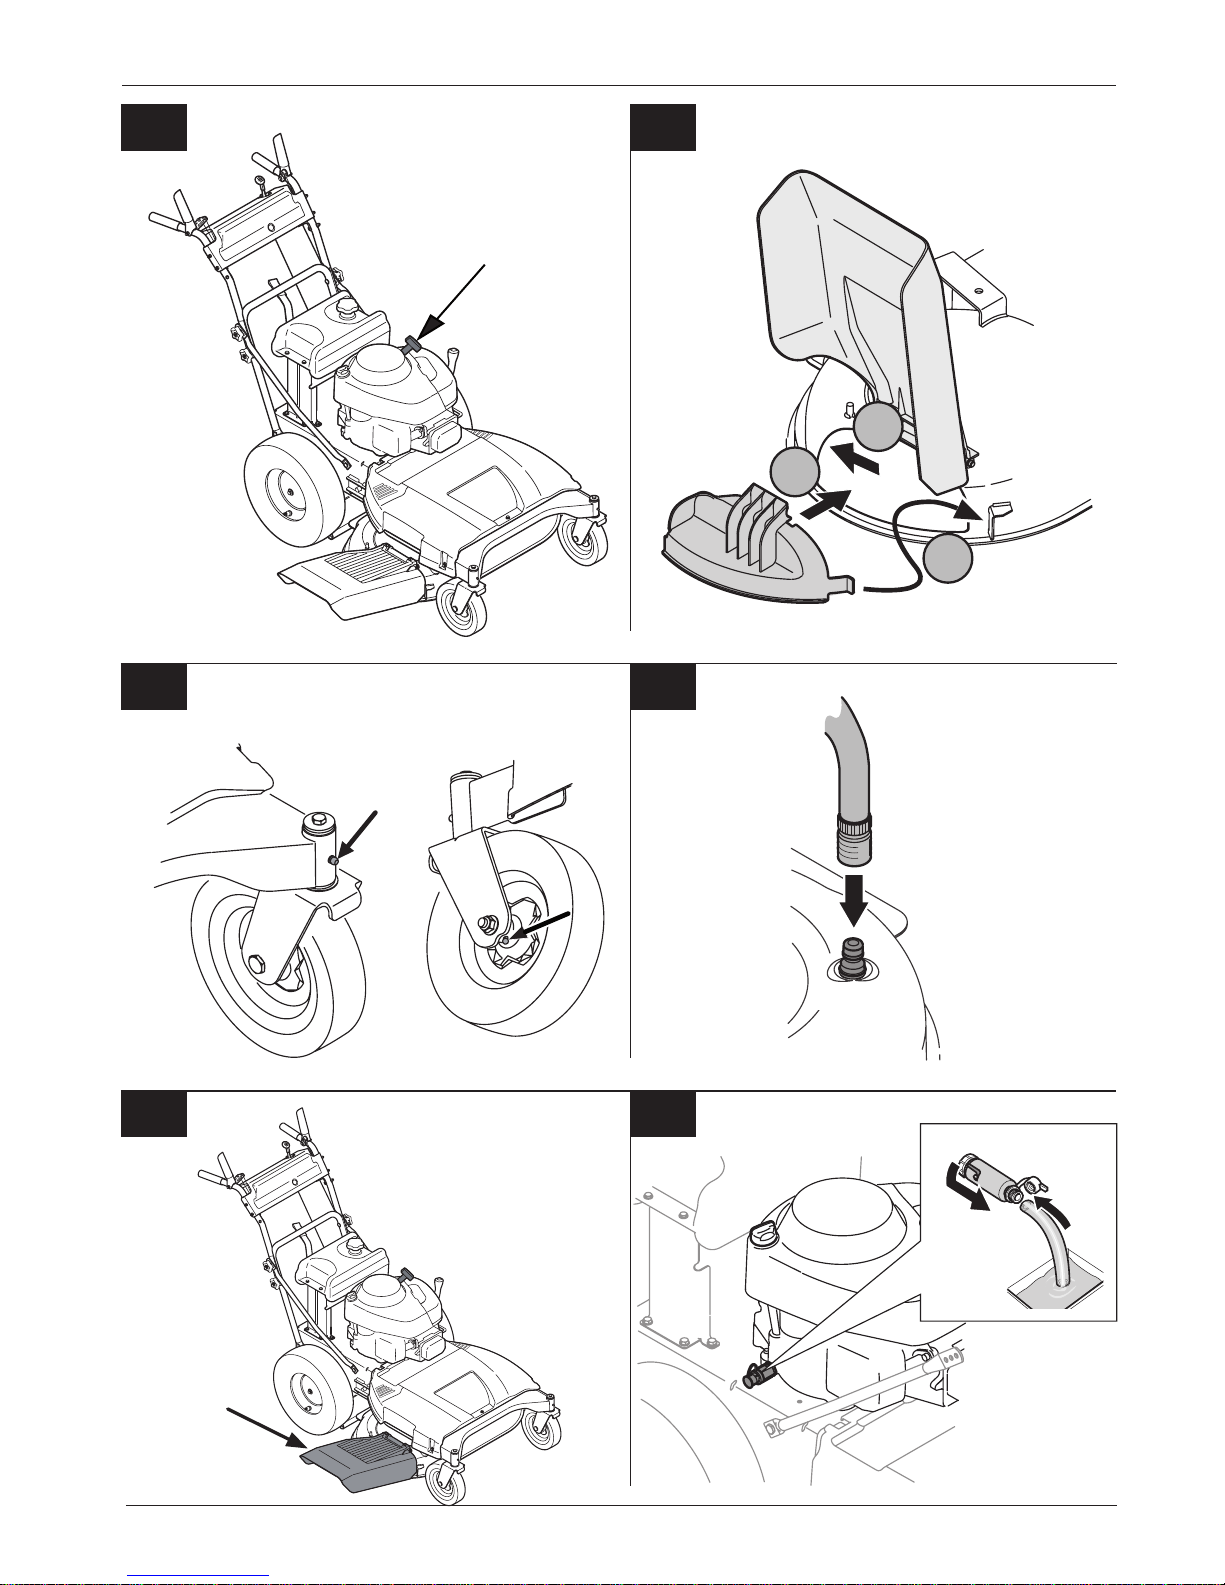
Assembling the appliance . . . . 10
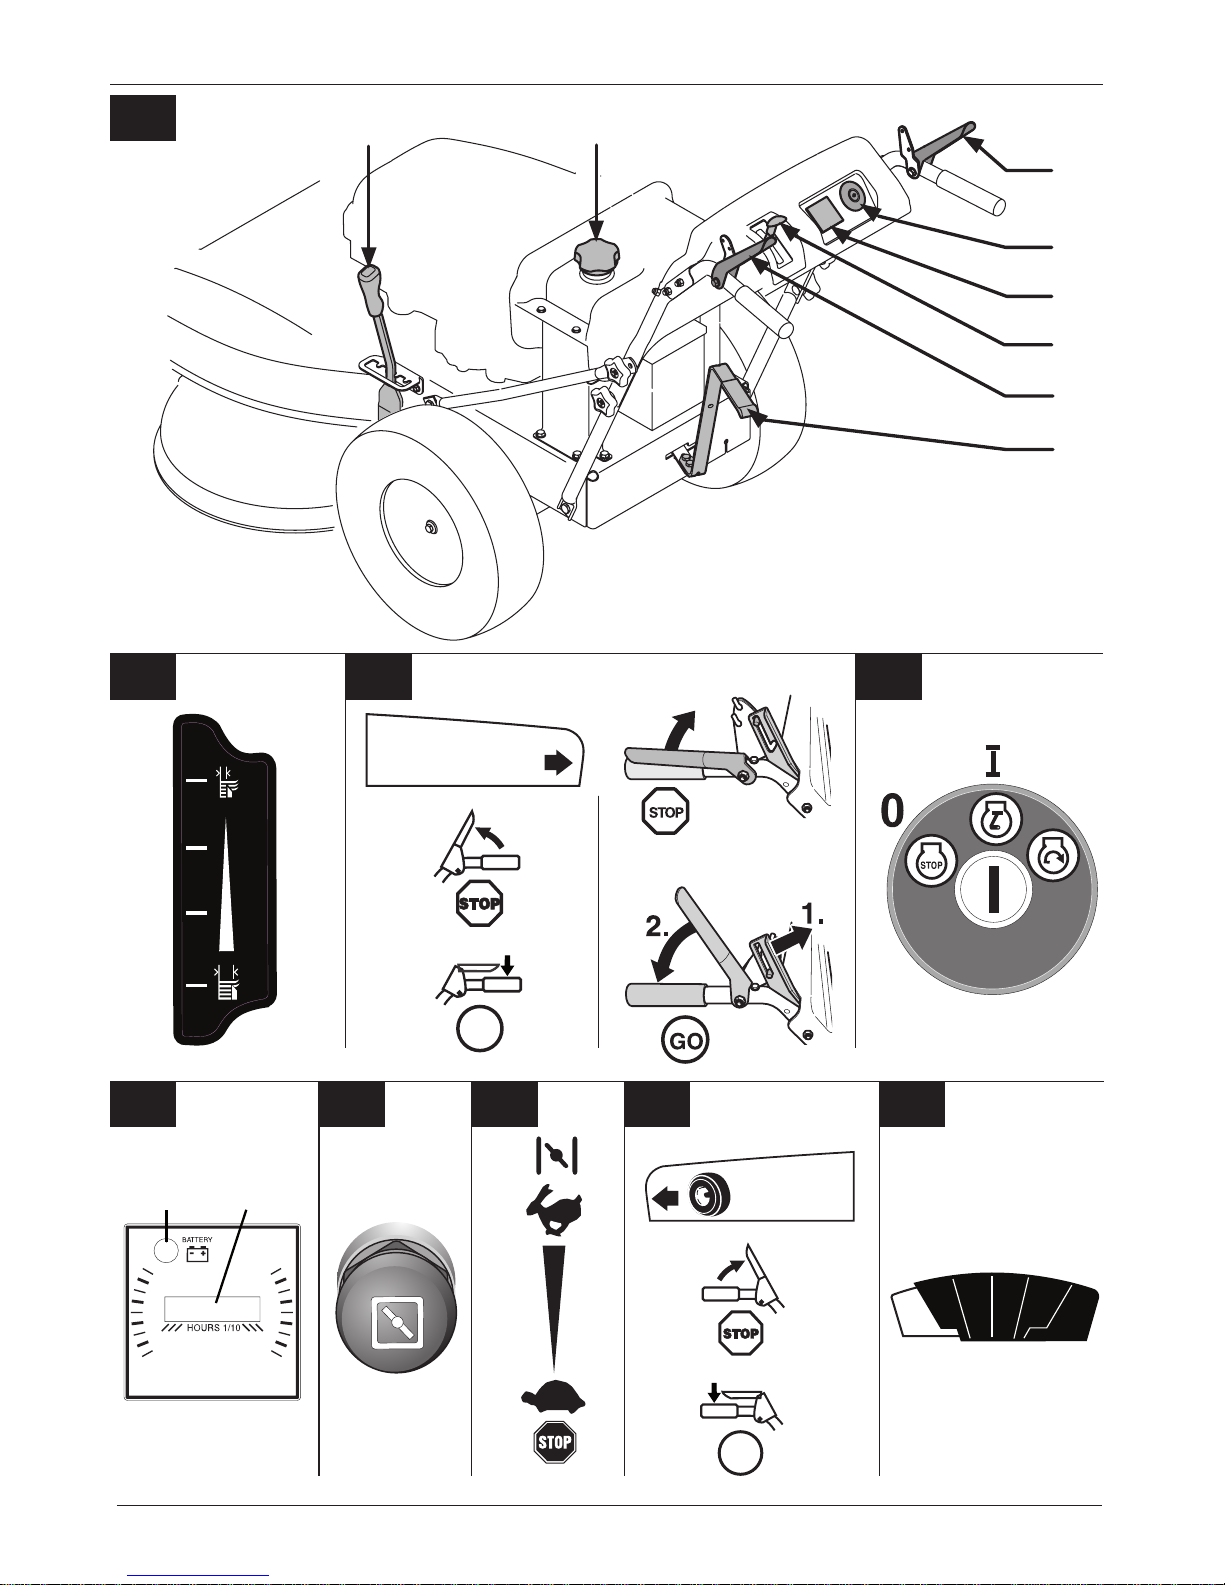
Operating and display
elements . . . . . . . . . . . . . . . . . . 11
Operation . . . . . . . . . . . . . . . . . 12
Tips on lawn care . . . . . . . . . . . 14
Transporting . . . . . . . . . . . . . . . 15
Cleaning/servicing . . . . . . . . . . 15
Shutting down the unit . . . . . . . 16
Warranty . . . . . . . . . . . . . . . . . . 16
Engine . . . . . . . . . . . . . . . . . . . 16
Troubleshooting . . . . . . . . . . . . 17
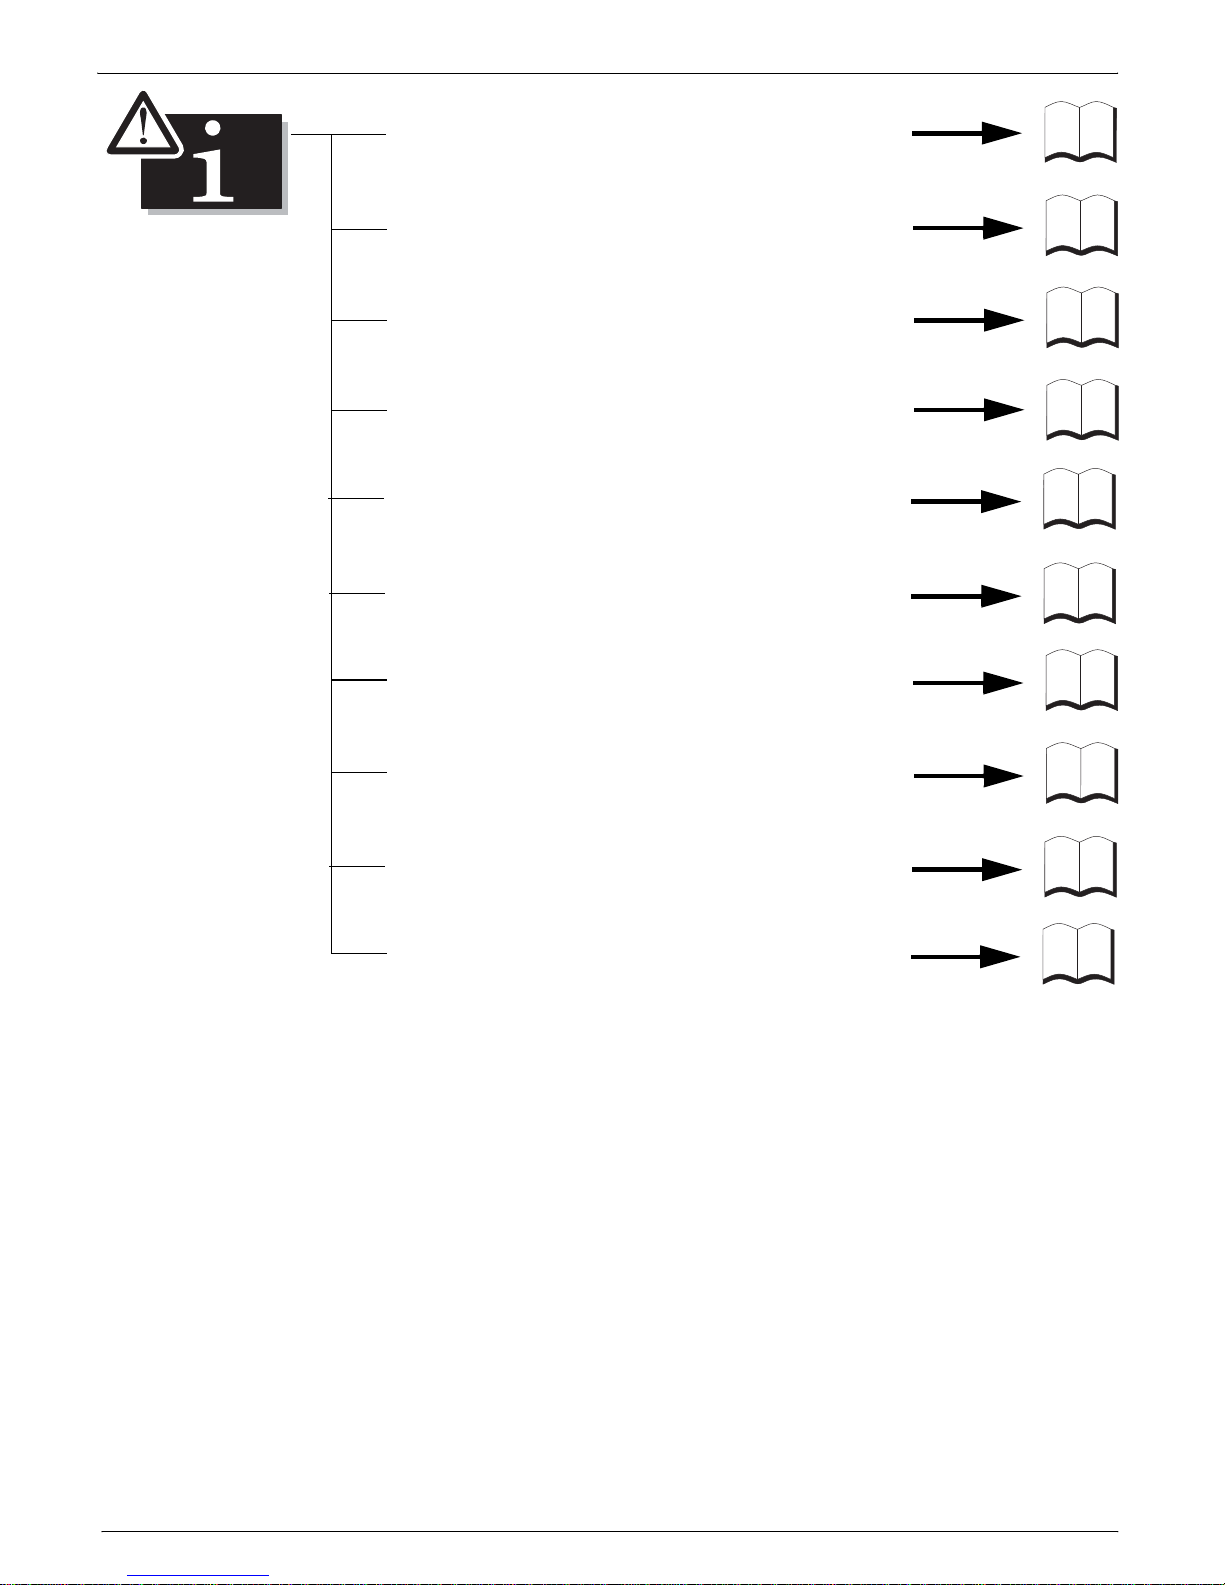
Information on the
identification plate
These details are very important as
they will not only be needed for
identifying your mower when
ordering replacement parts but
they will also be required by Cus-
tomer Service. You will find the
identification plate in the vicinity of
the engine. Enter all the details on
your mower’s rating plate in the
following fields.
This and other information on the
appliance can be found on the
separate CE Declaration of
Conformity which is a component
of these operating instructions.
Illustrations
Fold out the illustrated pages at the
start of the operating manual.
For your safety
Use the appliance properly
This appliance is approved solely
for use
– in accordance with the
descriptions and safety
instructions specified in this
user's guide
– to mow the lawns of domestic
and leisure gardens.
Any other use is not as intended.
The user is liable for all injuries to
third parties and damage to their
property.
Unauthorised changes to the
mower exclude liability of the
manufacturer for any resulting
damage and/or injury.
Observe the safety and
operating information
As the user of this appliance,
carefully read these operating
instructions before using the
appliance for the first time. Comply
with the operating manual and
keep it for subsequent use. Never
allow children or other people who
do not know this operating manual
to use the mower.
If the mower changes ownership,
hand over the operating manual.
General notes on safety
In this section you will find general
information about safety. Warnings
that apply specifically to individual
parts of the mower, functions or
activities are shown at the corres-
ponding point in this user's guide.
Before working with the mower
Persons who use the mower must
not be under the influence of intoxi-
cants, e.g. alcohol, drugs or
medication.
Do not permit children under the
age of 16 to handle this mower or
perform other tasks such as main-
tenance, cleaning, adjustment
(local regulations may specify the
minimum age of the user).
Before starting work, familiarise
yourself with all the equipment and
controls as well as their functions.
All persons involved in bringing into
service, operation or maintenance
of the mower must be appropriately
qualified. Do not use the mower if
you have not received appropriate
training or are tired or ill.
Store fuel in permitted containers
only and never near heat sources
(e.g. cooker or hot water tank).
Refuel the mower outdoors only.
Never refuel the mower while the
engine is running or hot.
Replace a damaged exhaust, tank
or tank cap.
Before using the appliance,
– check that the grass catcher
attachment (optional) functions
and the discharge flap closes
properly. Replace damaged,
worn out or missing parts
immediately.
– check for any wearing or damage
to the cutters, fastening pins, and
the whole cutter unit. Have worn
or damaged parts replaced by a
specialist company and only in
sets to exclude imbalances.
Spare parts must fulfil the requi-
rements laid down by the manu-
facturer. You should therefore only
use original spare parts or those
which have been approved by the
manufacturer. The use of spare
parts or accessories not approved
by the manufacturer can represent
a significant safety risk. Ensure
repair, maintenance and the
replacement of safety element is
performed by a technician or
appoint a specialist workshop to
perform the work. Ensure main-
tenance work is always performed
to schedule so that the mower
remains in a safe condition.