EN-23
Translation of the Original Instructions of Use (EN)
Dear customer,
Thank you for placing your trust in our product!
IMPORTANT! BEFORE USING THE
PRODUCT FOR THE FIRST TIME, PLEASE
MAKE SURE YOU READ THESE
OPERATING INSTRUCTIONS!
Here you will find information about how to use the
product safely and ensure its long service life. You
should pay attention to all of the safety instructions
in this document!
SAVE THIS MANUAL FOR FUTURE
REFERENCE!
Table of contents
How to use these instructions .................23
Safety Regulations ...................................23
Before you begin.......................................26
Machine desctiption .................................27
Assembling ...............................................27
Operation ..................................................28
Cleaning and maintenance ......................30
Storing and transport ...............................31
Service and spare parts ...........................31
Troubleshooting .......................................32
Disposal ....................................................32
Warranty conditions..................................33
Technical data ..........................................33
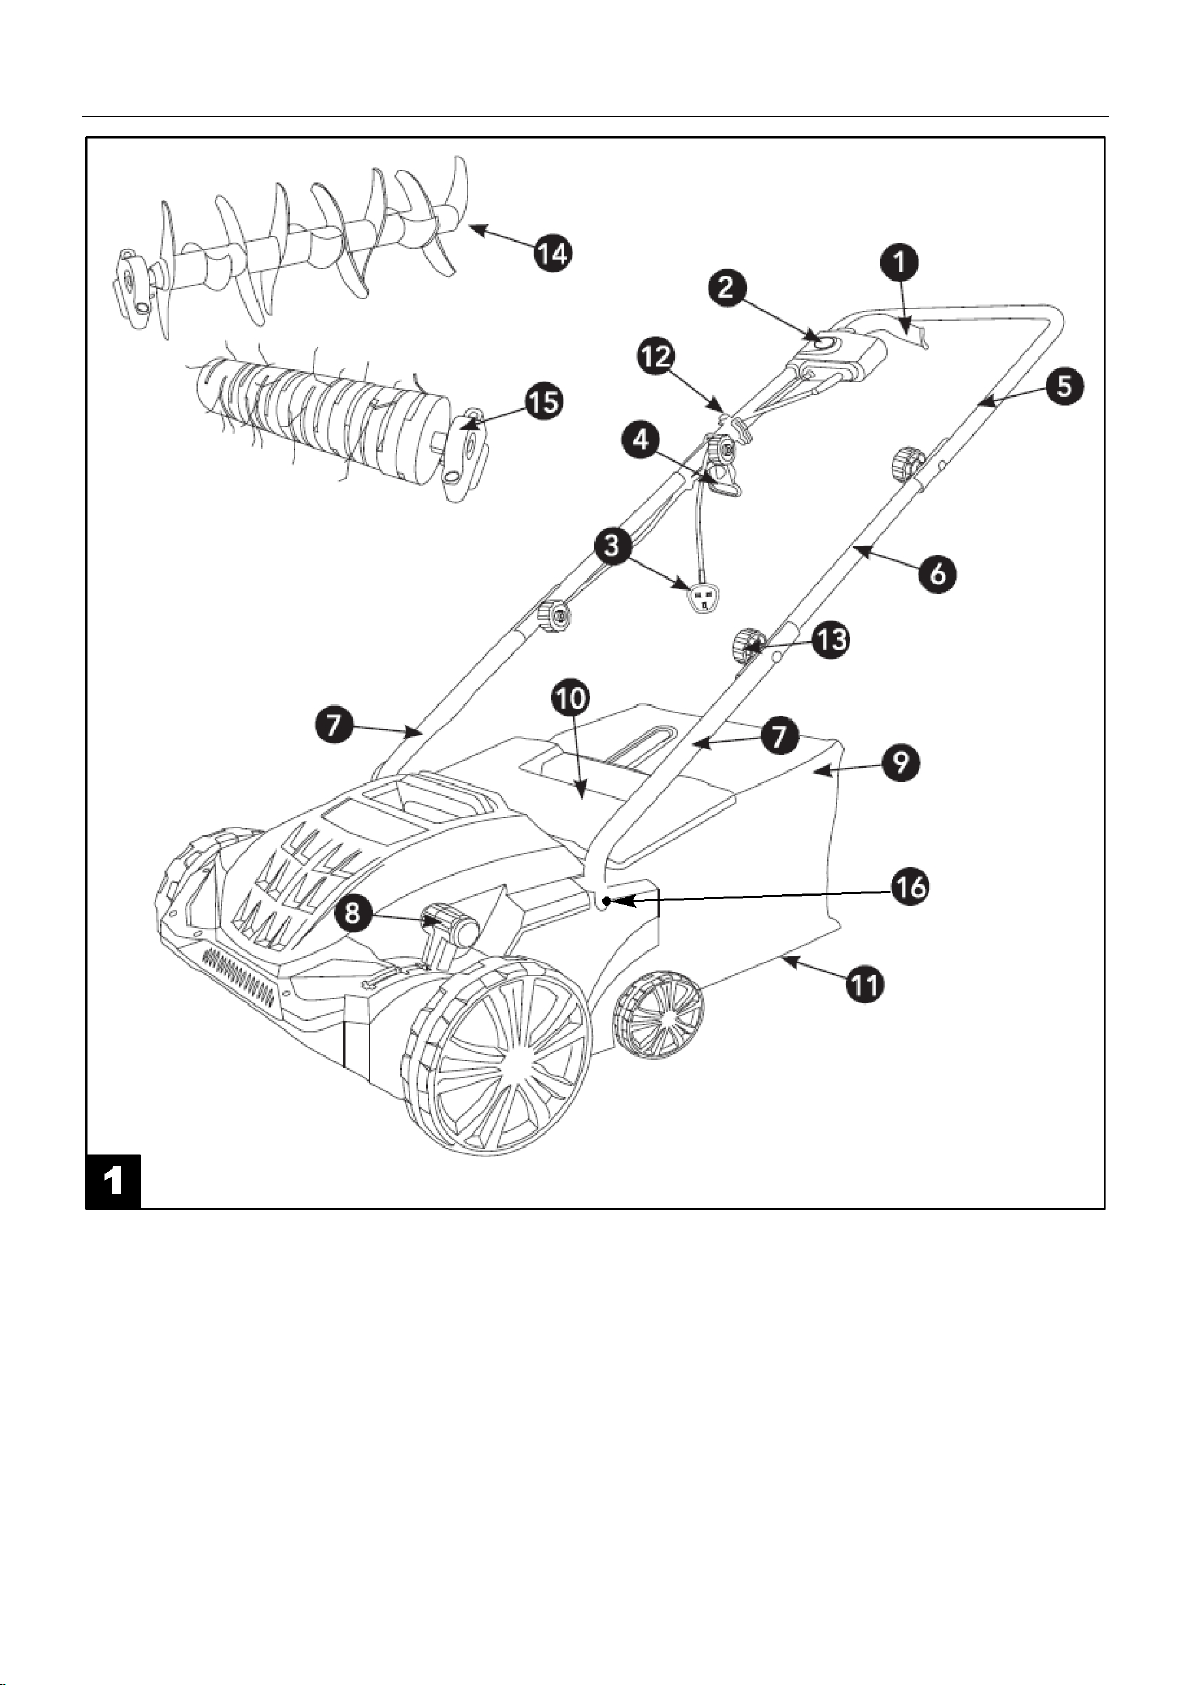
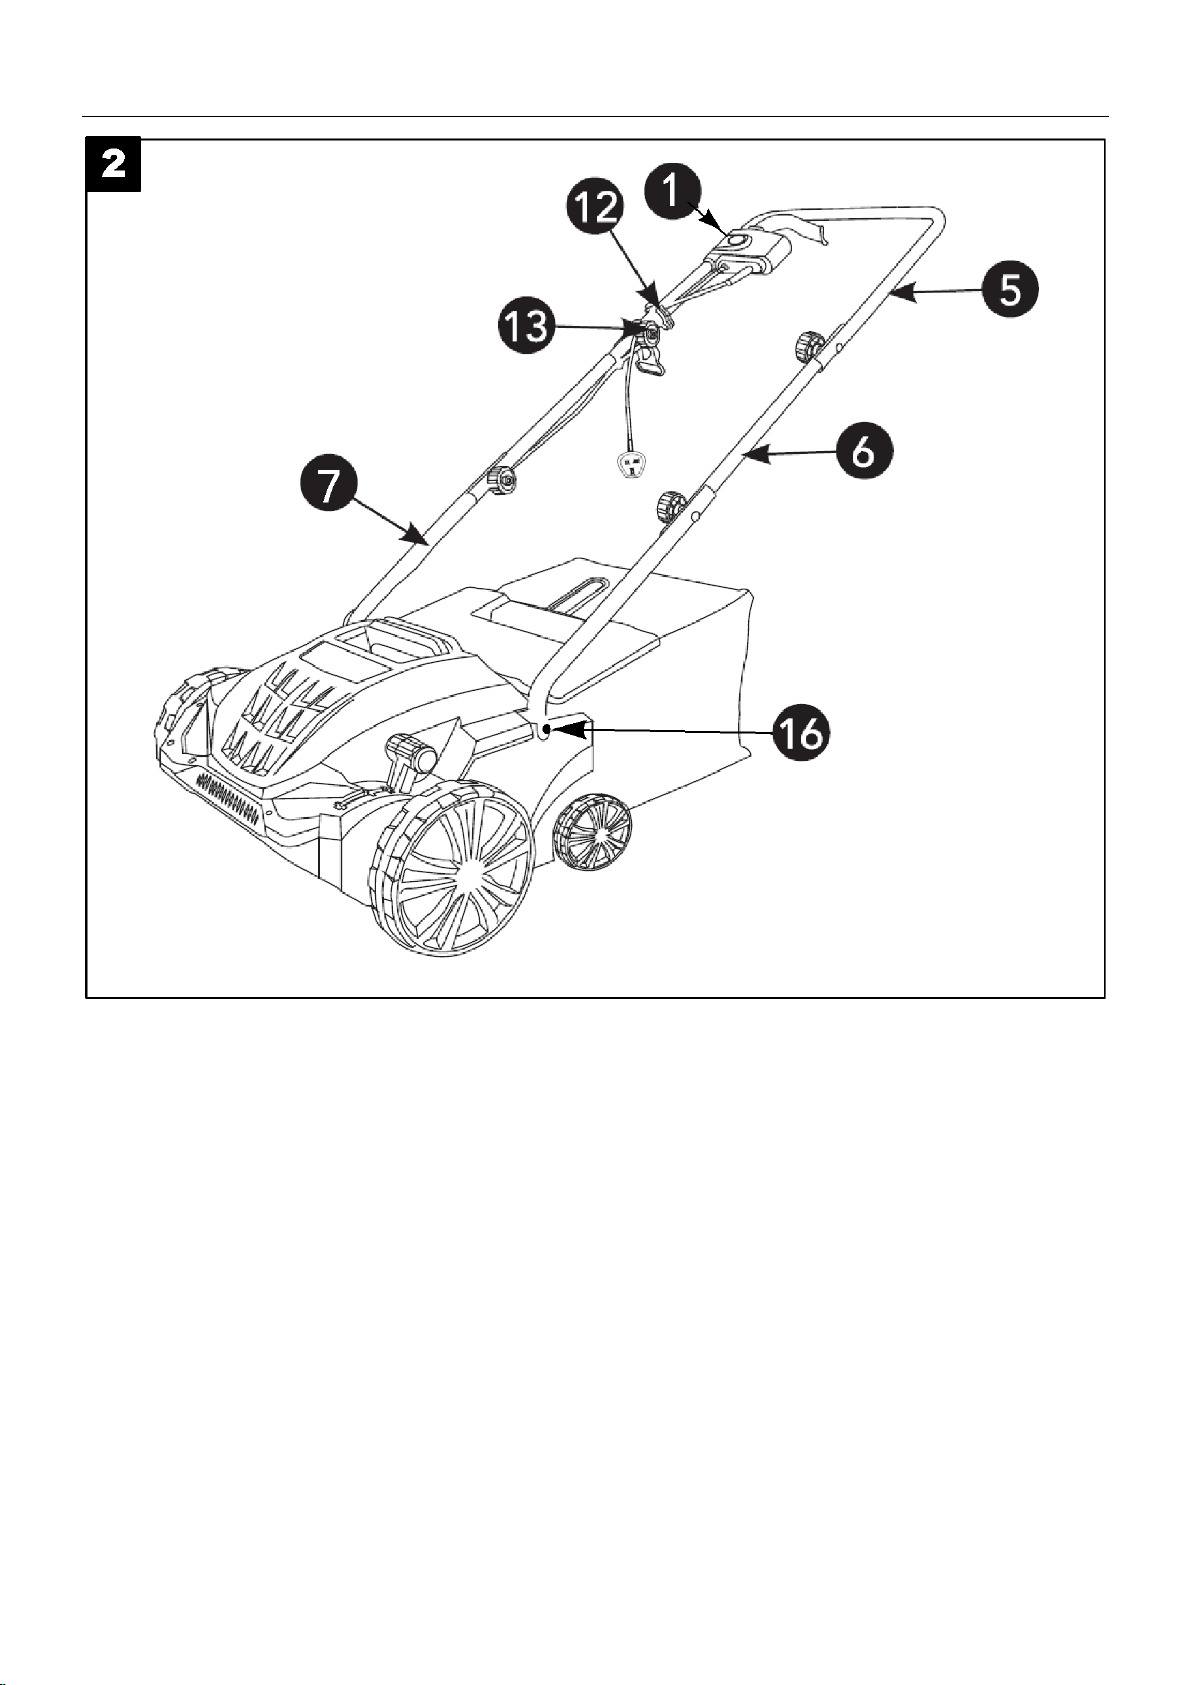
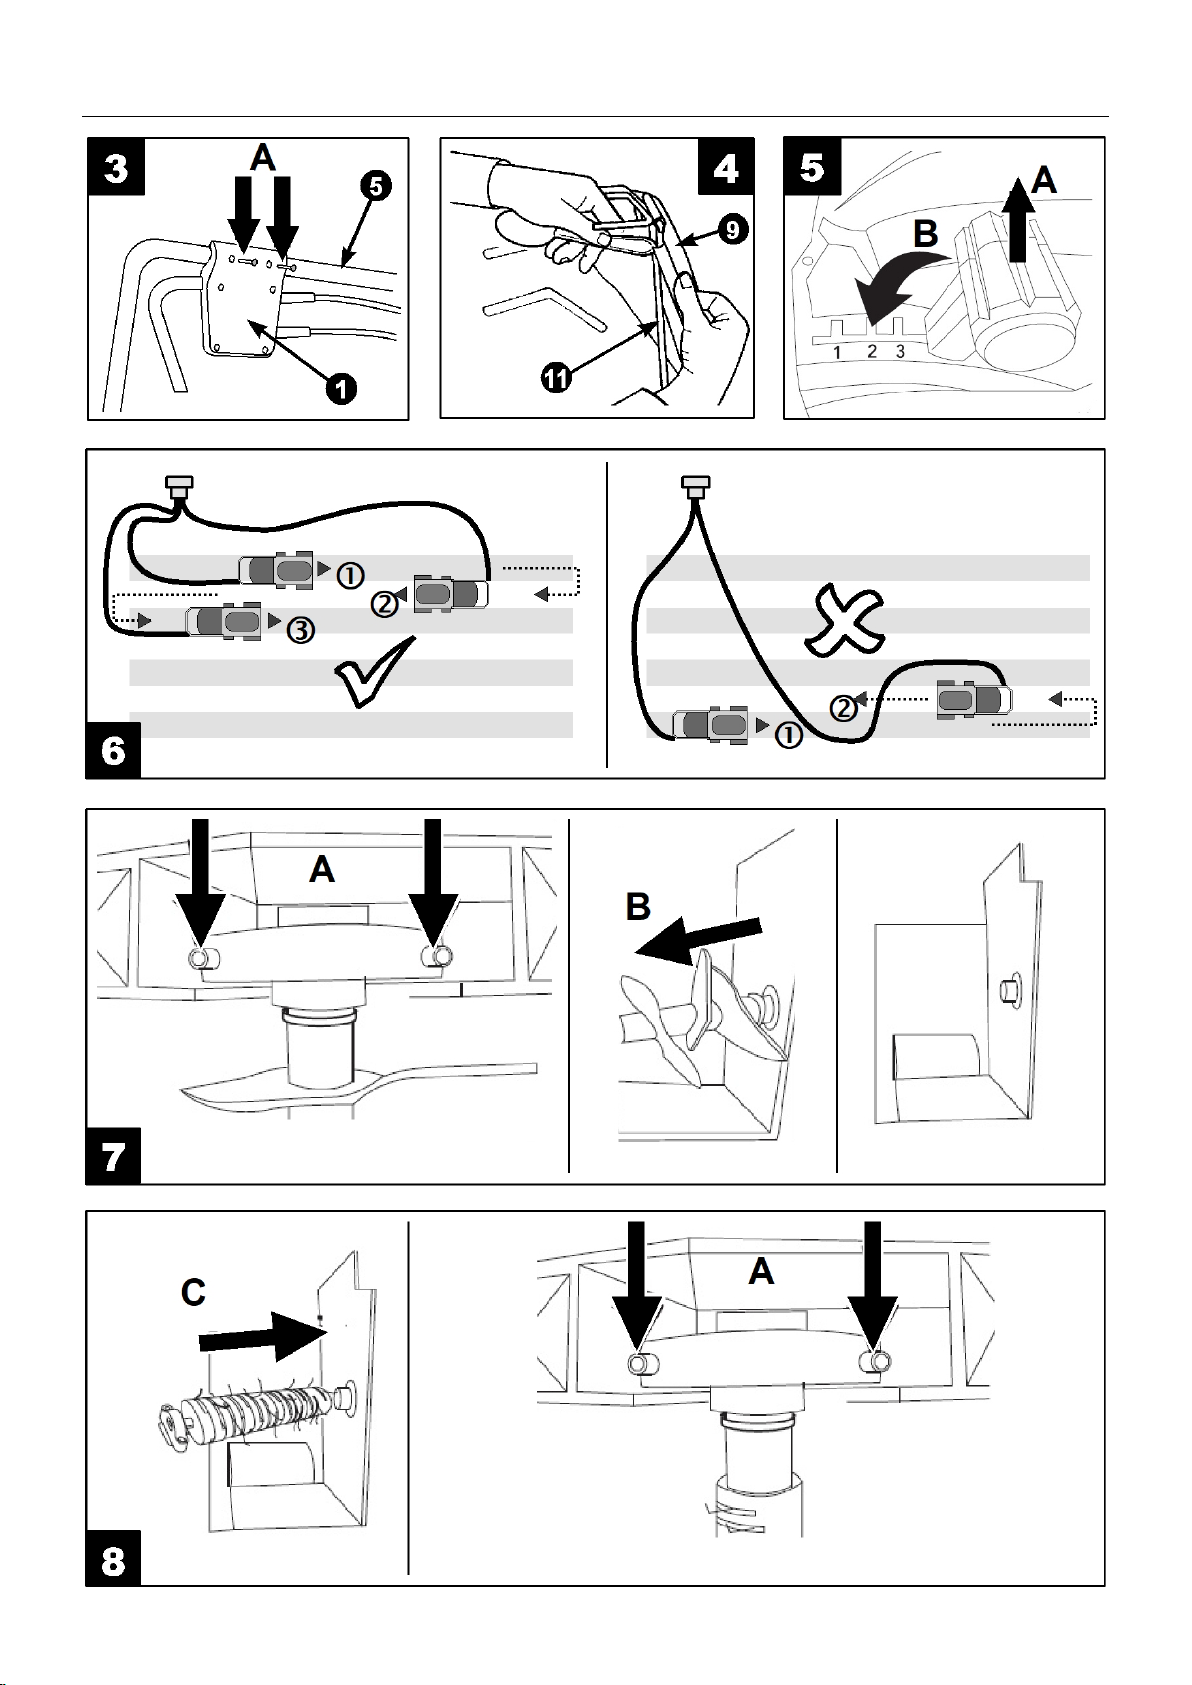
How to use these instructions
All of the necessary diagrams can be found on the
first pages of this set of instructions. Within the
descriptions, you will be directed by cross-
references to the appropriate diagrams.
SAFETY REGULATIONS
A) TRAINING
1) Read the instructions carefully. Become
familiar with the controls and the proper
use of the machine. Learn how to stop the
motor quickly.
2) Never allow children,persons with reduced
mobility, sensory perception or mental
disabilities, or persons with a lack of
experience and knowledge, or persons
unfamiliar with these instructions, to use
this machine; local regulations can restrict
the minimum age of the user.
3) Never use the machine:
– when people, especially children or
pets are nearby;
– if the operator has taken medicine or
substances that may impair his ability to
react and be attentive.
4) Bear in mind that the operator or user is
responsible for accidents or unexpected
events occurring to other people or their
property.
5) Symbols appearing on your product may
not be removed or covered. The symbols
on the product that are no longer legible
must be replaced immediately.
B) PRELIMINARY OPERATIONS
1) While working, always wear sturdy
footwear and long trousers. Do not operate
the machine when barefoot or wearing
open sandals. Avoid wearing clothing that
is loose fitting or has hanging cords or ties.
2) Thoroughly inspect the entire work area
and remove anything that could be thrown
by the machine or damage the working
roller or motor (stones, branches, iron wire,
bones, etc.).
3) Before using the machine, always perform
an overall check of its condition, especially
the condition of the rotating parts and the
cutting unit to make sure that they are not
worn or damaged. Replace damaged or
worn parts to preserve balance.
4) Before use check the power and extension
cable for signs of damage or aging.
5) Before switching on the machine, always
check that all screws, nuts, bolts and other
attachments are well secured, and that the
guards and protective guards are in place.
6) Always wear ear protection and safety
goggles during operation.
7) Use the machine only in the recommended
position and only on a firm and level
surface.
8) Do not use the machine on paved or gravel
surfaces that could be injured by the
material being ejected.
C) DURING USE
1) Work only in daylight or good artificial
light.
2) Avoid working in wet grass or when it is
raining. Do not use the machine in poor
weather conditions, especially if there is a
risk of lightning.
3) Avoid unnatural posture and always