Mueller Compact Chiller Models CP2-10 and CP2-20 Effective May 15, 2009
Installation and Operation Manual, Part No. 8826238 Revised January 31, 2019
3.1 INSPEC ION
Due to the possibility of equipment damage during shipment, it is recommended that you make a thorough
inspection of all equipment before it is unloaded from the freight carrier. Carefully inspect equipment for hidden
damage. It may be difficult to collect for damage if it is not found prior to unloading. If any damage is found, it is
very important to note the damage on the bill of lading and have the driver sign the bill of lading.
3.2 LOCA ION
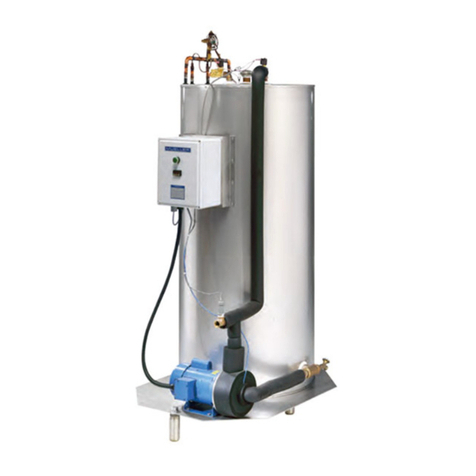
When choosing a location for the Mueller compact chiller, consider these items:
•E viro me t: An indoor location will be necessary where the chiller is protected from freezing temperatures.
•Serviceability: The chiller should be located with the circulating pump and the electronic temperature
control accessible for service. Keep in mind the chiller will require field connections to the main electrical
supply and the liquid solution reservoir may require a drain for maintenance.
•Co de si g U its: The condensing units must be located where they are protected from the environment
and have adequate air flow for the condensers. Be especially cautious for conditions that would allow dust or
oil to enter the condenser.
•Efficie cy: Locate the chiller as close to the Mueller Accu-Therm plate cooler as possible. This will improve
efficiency by reducing heat gain and flow restrictions in the chilled liquid solution piping.
3.3 CHILLED SOLU ION PIPING
The piping between the Mueller compact chiller and the Mueller Accu-Therm plate cooler should be a minimum of
3" Schedule-40 or -80 PVC, stainless steel, or copper pipe. Make any reducer connections at the Accu-Therm and
install a union and shut-off valve in each line for service.
If PVC plastic pipe is used with solutions containing propylene glycol, the manufacturers’ of PVC or CPVC pipe
recommend that Schedule-80 purple primer and Schedule-80 gray adhesive be used. The following procedure
should be used to assemble PVC or CPVC:
1. Scour primer with a hard bristle brush. It should be alternately applied to the surface of the pipe once and to
the fitting socket twice.
2. Solvent cement should be applied with a stiff bristle brush while the primer is wet. It should be alternately
applied to the surface of the pipe twice and to the fitting socket once.
IMPORTANT: Galva ized pipe should ot be used for applicatio s with propyle e glycol, as propyle e
glycol ca strip the zi c coati g from galva ized pipe.
To provide efficient, chilled liquid solution flow to the Accu-Therm plate cooler, utilize long-radius fittings and 45-
degree elbows where possible. A non-absorbent pipe insulation should be installed on both pipes to reduce
sweating and heat gain of the chilled liquid solution piping.
5
Sectio 3.0 – I stallatio


