manuals.online logo
Brands
  1. Home
  2. •
  3. Brands
  4. •
  5. Multimo
  6. •
  7. Indoor Furnishing
  8. •
  9. Multimo A 205-PENSIERO User manual

Multimo A 205-PENSIERO User manual

Assembly Instructions
+-
VIDEO
link
45 min.
120 min.
Technical Service
End User
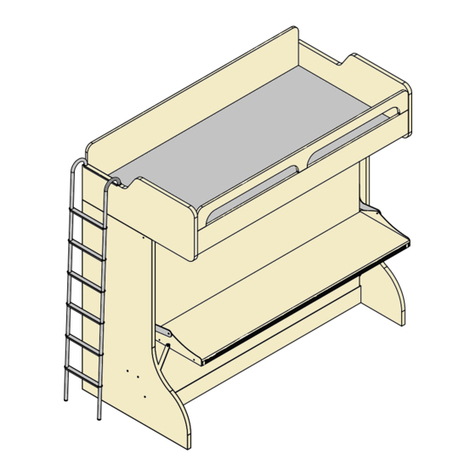
A 205-PENSIERO
Page 1 Page 2
MNG - 01
32 / piece
CT - 01 ( 6x40 ) mm
4/ piece
IM - 01 (6x30) mm
8 / piece
CT - 02 ( 6x30 ) mm
2/ piece
DD - 01 ( R10 )
3 / piece
DSE - 01 (40x90x32) mm
3 / piece
VTB - 01 (4,8x16) mm
12 / piece
KP - 01 ( 224 ) mm
2 / piece
VKP - 01 (22) mm
4 / piece
Accessories List
MNX 02
32 / piece
KVL 01
36 / piece
TTC 01
8 / piece
AKR 01
2 / piece
SC-61
2 / piece
OT-054
4 / piece
MKZ - 02
4 / piece 350N
Rx2 Lx2
P ie c e T h ic k n e s s L e n g t h W id t h P ie c e T h ic k H e ig h t M o s t
A11 ,1 8 7 7 ,0 1 1 2 ,9 9 13 0 1 9 5 6 3 3 0
B10 ,7 1 7 7 ,0 1 1 2 ,9 9 1 1 8 1 9 5 6 3 3 0
C10 ,7 1 7 7 ,0 1 5 ,3 1 1 1 8 1 9 5 6 1 3 5
D21 ,1 8 8 9 ,7 6 1 3 ,7 8 2 3 0 2 2 8 0 3 5 0
E10 ,7 1 7 7 ,0 1 1 0 ,2 4 1 1 8 1 9 5 6 2 6 0
F40 ,3 1 8 9 ,4 1 1 9 ,3 7 4 8 2 2 7 1 4 9 2
H20 ,7 1 7 7 ,0 1 7 ,8 7 2 1 8 1 9 5 6 2 0 0
I10 ,7 1 7 7 ,0 1 1 0 ,2 4 1 1 8 1 9 5 6 2 6 0
G T 10 ,7 1 4 0 ,9 4 7 5 ,9 8 1 1 8 1 0 4 0 1 9 3 0
G B 1 0 ,7 1 4 0 ,9 4 7 5 ,9 8 1 1 8 1 0 4 0 1 9 3 0
T ra c k T it le
(in c h ) (m m )
VD - 02 (3,5x25) mm
16 / piece
PL - 02 (8x22x1) mm
3 / piece
TFC - 01(8x70) mm
3 / piece
OT-006
2 / piece
MRD 01
1 / piece
H 01
3 / piece
TAP - 01
32 / piece
GT
GB
A
B
C
F
D-L
F
F
F
H
H
E
I
AVT - 01
8 / piece
VTB - 02 (4,2x16) mm
16 / piece 2 / piece
KMT-01
AL - 01 (4MM)
1 / piece
AL - 02 (5MM)
1 / piece
KKS - 01
4 / piece
D-R
KBP - 01
10 / piece
KLF 02 (fabric cover)
5 / piece
KOR 02
5 / piece
YSB - 02 ( 4x20 ) mm
20 / piece
Page 3 Page 4
I
KVL-01 x 8
STEP 1 STEP 2
VIDEO
link
VIDEO
link
MNX - 02
KVL 01
C
KVL-01 x 4
MNX-02 x 4
A
MNX-02 x 4
KVL-01 x 4
B
KVL-01 x 8
E
KVL-01 x 8
H
KVL-01 x 4
D-L/D-R
MNX-02 x 12
MNX - 02
STEP 3
MNG - 01
MNG - 01 x4
210°
C
B
Page 3 Page 4
I
KVL-01 x 8
STEP 1 STEP 2
VIDEO
link
VIDEO
link
MNX - 02
KVL 01
C
KVL-01 x 4
MNX-02 x 4
A
MNX-02 x 4
KVL-01 x 4
B
KVL-01 x 8
E
KVL-01 x 8
H
KVL-01 x 4
D-L/D-R
MNX-02 x 12
MNX - 02
STEP 3
MNG - 01
MNG - 01 x4
210°
C
B
Page 5 Page 6
STEP 4 STEP 6
VIDEO
link
VIDEO
link
E
B C
I
H
D-R
A
H
MNG - 01
MNG - 01
MNG - 01 x 12
STEP 5
MNG - 01
F
H 01
F
F
F
210°
STEP 7
MNG - 01 D-L
MNG - 01 x12
210°
I
A
MNG - 01 x4
210°
Page 5 Page 6
STEP 4 STEP 6
VIDEO
link
VIDEO
link
E
B C
I
H
D-R
A
H
MNG - 01
MNG - 01
MNG - 01 x 12
STEP 5
MNG - 01
F
H 01
F
F
F
210°
STEP 7
MNG - 01 D-L
MNG - 01 x12
210°
I
A
MNG - 01 x4
210°
Page 7 Page 8
STEP 8 STEP 9
VIDEO
link
VIDEO
link
CAUTION
DO NOT UNLOCK
MKZ - 02 (2xL/2xR)
BEFORE INSTALL
ATTENTION!
Please be sure that ‘’part A’’ s
fully straght whle fixng back
panels.
VD - 02 x 8
VD - 02 x 8
AVT - 01x 8
OT - 054
CT - 01
AL - 01
IM - 01
AL - 02
Page 7 Page 8
STEP 8 STEP 9
VIDEO
link
VIDEO
link
CAUTION
DO NOT UNLOCK
MKZ - 02 (2xL/2xR)
BEFORE INSTALL
ATTENTION!
Please be sure that ‘’part A’’ s
fully straght whle fixng back
panels.
VD - 02 x 8
VD - 02 x 8
AVT - 01x 8
OT - 054
CT - 01
AL - 01
IM - 01
AL - 02
Page 9 Page 10
STEP 10 STEP 10-1
VIDEO
link
Ø 10 mm / 0,254 nch
DD - 01
TFC - 01
DSE - 01
VTB - 01
PL - 02
ATTENTION!!!
Must be secured to the wall made of brick, concrete or similarly strong material.
Mounting to wooden or metal studs is also acceptable.
Do not mount directly to sheetrock or paper-mache type walls not supported by studs.
WALLS MADE OF DRYWALL WITH WOODEN OR METAL STUDS
FİRST LOCATE THE STUDS BY USİNG ''STUD
FİNDER'' İN THE WALL AND DRİLL İT
ACCORDİNG TO THE HEİGHT MEASURMENTS
GİVEN ON THE SİDE.
UPPER HOLES SHOULD BE DRİLLED
FOR ATTACHİNG BED AT NEXT STEP.
SUPPLY DRYWALL FASTENERS APPROPPRIATE
TO YOUR WALL TYPE. WE RECOMMEND
USING STEEL TOGGLE BOLT ANCHOR THAT
SHOWN BELOW
NOT INCLUDED
Ø 10 mm / 0,254 inc
Ø 10 mm / 0,254 inch
DD - 01
TFC - 01
DSE - 01
VTB - 01
PL - 02
TAP - 01
TAP - 01
Page 11 Page 12
STEP 11 STEP 12
VIDEO
link
VIDEO
link
CUITION !
Please make sure
that leg ledder supports
the center of the top
bed and use all tme
when the bed s opened
MRD 01
STEP 15
SC-61
45-50°
45-50°
LET THE STOPPER LOCK MOVE DOWN !!!
Page 11 Page 12
STEP 11 STEP 12
VIDEO
link
VIDEO
link
MRD 01
STEP 15
SC-61
45-50°
45-50°
LET THE STOPPER LOCK MOVE DOWN !!!
CAUTION !
LADDER MUST BE ATTACHED TO THE
UPPER BUNK WHILE IT IS IN USE FOR
ADDITIONAL SUPPORT AND SAFETY.
Page 13 Page 14
STEP 13 STEP 14
VIDEO
link
VIDEO
link
AKR 01 X 2
VTB - 02 X 4
KMT - 01
KMT - 01
AL - 01
CT - 02
OT - 06
AL - 01
VKP - 01 X 2
KP - 01
Page 13 Page 14
STEP 13 STEP 14
VIDEO
link
VIDEO
link
AKR 01 X 2
VTB - 02 X 4
KMT - 01
KMT - 01
AL - 01
CT - 02
OT - 06
AL - 01
VKP - 01 X 2
KP - 01
Page 15 Page 16
STEP 15 STEP 16
VIDEO
link
VIDEO
link
TTC 01 X 4
TTC 01 X 4
KKS - 01 X 4
KBP - 01
KOR 02
KBP - 01
KBP - 01
YSB - 02 X 2
KOR 02
KLF 02
(fabric cover)
CAUTION !
MAKE SURE THAT HEADBOARDS
AND GUARDRAILS ARE FOLDED
BEFORE CLOSING THE BED
Page 15 Page 16
STEP 15 STEP 16
VIDEO
link
VIDEO
link
TTC 01 X 4
TTC 01 X 4
KKS - 01 X 4
KBP - 01
KOR 02
KBP - 01
KBP - 01
YSB - 02 X 2
KOR 02
KLF 02
(fabric cover)
CAUTION !
MAKE SURE THAT HEADBOARDS
AND GUARDRAILS ARE FOLDED
BEFORE CLOSING THE BED
Page 17 Page 18
ATTENTION / HOW TO / READ ME / OWNER'S GUIDE
1. Most bunk beds must be securely attached to the wall, unless the bed is free
standing. Please check the product description for this information. Hardware
for mounting to concrete, brick or similar strong material is included.
2. When mounting to drywall, wall bunk beds must be attached to wooden or
metal studs in 2 or 3 points. Do not mount wall bunk beds directly to drywall
or paper-mache type wall without properly attaching it to studs. Please
choose appropriate fasteners for the type of wall the bed will be mounted
on. Drywall mounting hardware is not included.
3. For safety and product longevity you must periodically inspect the integrity
and tightness of the mounting and mechanical connections. Confirm
hardware remains properly affixed and connections are snug.
4. Do not lean or rest heavy objects on sides or top of furniture. This may cause
balance issues and compromise the integrity of your mounting connections.
5. Please use wall bunk beds and integrated shelves, desks and sofas as
intended. Do not jump and/or exceed supported weight limits. Do not sit or
lean on integrated shelves and desks. Improper use may cause personal
injury and damage to property.
· Always use the provided ladder when accessing the top bunk.
· Always use a ladder for additional support for the upper bunk when it is
open.
· Be slow, careful and aware of surroundings when opening the top bunk.
· Do not horseplay. Beds are to be slept on only.
· Make sure that support legs are fully extended and are flat on the floor.
Always be aware of where the leg is and will be.
6. With seasonal humidity change please inspect the interior and exterior of the
furniture for deformation and/or discoloration.
7. Before any un-mounting or disassembly please contact Multimo Beds for
technical support and instructions Failure to properly detach may result in
personal injury and damage to property.
www.multmobeds.com

Other Multimo Indoor Furnishing manuals
Multimo A 513-ROYAL KING WALL BED User manual

Multimo

Multimo A 513-ROYAL KING WALL BED User manual

Multimo 221 User manual

Multimo

Multimo 221 User manual

Multimo PRIMER HAPPY 721 User manual

Multimo

Multimo PRIMER HAPPY 721 User manual

Multimo ACADEMY 114 User manual

Multimo

Multimo ACADEMY 114 User manual

Multimo 750-SIMPLE BUNK User manual

Multimo

Multimo 750-SIMPLE BUNK User manual

Multimo SIMPLE 120 User manual

Multimo

Multimo SIMPLE 120 User manual

Multimo A 500 ROYAL QUEEN BED User manual

Multimo

Multimo A 500 ROYAL QUEEN BED User manual

Multimo 630 - COMPACT User manual

Multimo

Multimo 630 - COMPACT User manual

Multimo 1107 User manual

Multimo

Multimo 1107 User manual

Multimo A 505-1 User manual

Multimo

Multimo A 505-1 User manual

Multimo 225-ROYAL PLUS 160 User manual

Multimo

Multimo 225-ROYAL PLUS 160 User manual

Multimo A 502 User manual

Multimo

Multimo A 502 User manual

Multimo A 207 User manual

Multimo

Multimo A 207 User manual

Multimo 221-ROYAL DUOBLE BED User manual
Multimo

Multimo 221-ROYAL DUOBLE BED User manual

Multimo A 751 SIMPLE TWIN 100 CM User manual

Multimo

Multimo A 751 SIMPLE TWIN 100 CM User manual

Multimo ROYAL A 227 User manual

Multimo

Multimo ROYAL A 227 User manual

Multimo A 240 User manual

Multimo

Multimo A 240 User manual

Multimo A 212 CASTELLO User manual

Multimo

Multimo A 212 CASTELLO User manual

Multimo ROYAL QUEEN BED A 500 User manual
Multimo

Multimo ROYAL QUEEN BED A 500 User manual

Multimo 310-NOVA PLUS User manual

Multimo

Multimo 310-NOVA PLUS User manual

Multimo 1111 User manual

Multimo

Multimo 1111 User manual

Multimo A 750 SIMPLE BUNK User manual

Multimo

Multimo A 750 SIMPLE BUNK User manual

Multimo A 513 User manual

Multimo

Multimo A 513 User manual

Multimo A 753 SIMPLE FULL SIZE 140 CM User manual

Multimo

Multimo A 753 SIMPLE FULL SIZE 140 CM User manual

Popular Indoor Furnishing manuals by other brands

Learniture LEARNING WALL Assembly instructions

Learniture

Learniture LEARNING WALL Assembly instructions

The Container Store TEAK BOOKCASE Assembly

The Container Store

The Container Store TEAK BOOKCASE Assembly

Furinno Go Green Home Laptop Notedbook 11193 Assembly instruction

Furinno

Furinno Go Green Home Laptop Notedbook 11193 Assembly instruction

Habitat Alexis manual

Habitat

Habitat Alexis manual

Geuther 2700 manual

Geuther

Geuther 2700 manual

Jofran 2125-370KD Assembly Instructions/Parts Manual

Jofran

Jofran 2125-370KD Assembly Instructions/Parts Manual

Möbel AS CLPV83 Assembling Instruction

Möbel AS

Möbel AS CLPV83 Assembling Instruction

Kvik U892-060 Assembly instructions

Kvik

Kvik U892-060 Assembly instructions

Pacific Casual 221-8J1-3SS-BCL Use and care instructions

Pacific Casual

Pacific Casual 221-8J1-3SS-BCL Use and care instructions

Next 613299 Assembly instructions

Next

Next 613299 Assembly instructions

aspenhome I240-400-RIV Assembly instructions

aspenhome

aspenhome I240-400-RIV Assembly instructions

Wen 73016 instruction manual

Wen

Wen 73016 instruction manual

CARRARO 1052 manual

CARRARO

CARRARO 1052 manual

DEVAISE AHDG028 Assembly instructions

DEVAISE

DEVAISE AHDG028 Assembly instructions

Monarch Specialties I 7023 Assembly instructions

Monarch Specialties

Monarch Specialties I 7023 Assembly instructions

Mocka Jolt Four Drawer Assembly instructions

Mocka

Mocka Jolt Four Drawer Assembly instructions

SAFAVIEH COUTURE SFV5704A quick start guide

SAFAVIEH COUTURE

SAFAVIEH COUTURE SFV5704A quick start guide

Monarch I 2466 Assembly instructions

Monarch

Monarch I 2466 Assembly instructions

manuals.online logo
manuals.online logoBrands
  • About & Mission
  • Contact us
  • Privacy Policy
  • Terms and Conditions

Copyright 2025 Manuals.Online. All Rights Reserved.